Note
Access to this page requires authorization. You can try signing in or changing directories.
Access to this page requires authorization. You can try changing directories.
If you want to connect your own application with an eventstream, you can add a custom endpoint or a custom app as a source. Then you can send real-time events to the eventstream from your own application with the connection endpoint exposed on the custom endpoint or custom app. Also, with the Apache Kafka protocol available as an option for custom endpoints or custom apps, you can send real-time events by using the Apache Kafka protocol.
This article shows you how to add a custom endpoint source or a custom app source to an eventstream in Microsoft Fabric.
Prerequisites
Access to the workspace where your eventstream is located. The workspace must be in Fabric capacity or trial mode.
Contributor or higher permissions to edit the eventstream and add a custom endpoint as a source.
Permissions for Microsoft Entra authentication
If you want to use Microsoft Entra authentication to connect your application, you need Member or higher permissions.
You also need to make sure that the managed identity of the custom endpoint has the required permissions. Configure the settings in the admin portal:
In the upper-right corner, select Settings (gear icon).
Under Governance and insights, select Admin portal.

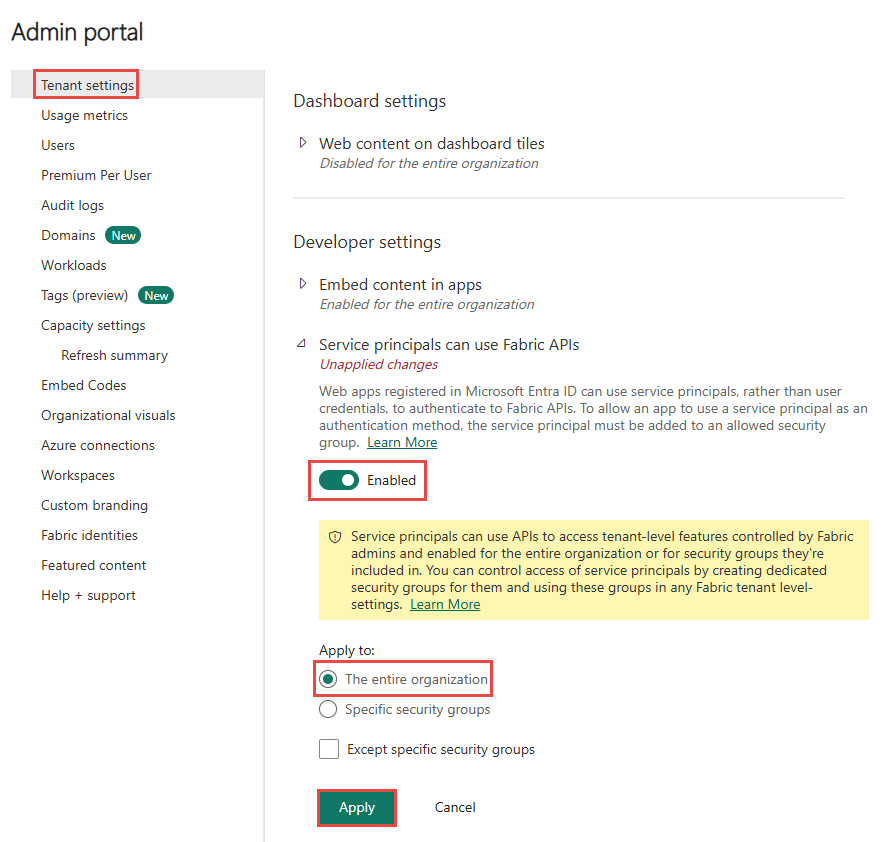
Activate the following tenant setting to grant the service principal access to Fabric APIs for creating workspaces, connections, or deployment pipelines:
- On the Tenant settings page, in the Developer settings section, expand the Service principals can use Fabric APIs option.
- Set the toggle to Enabled.
- For Apply to, select The entire organization.
- Select Apply.
Enable this option to access all other APIs (enabled by default for new tenants):
- Still on the Tenant settings page, expand the Allow Service principals to create and use profiles option.
- Set the toggle to Enabled.
- For Apply to, select The entire organization.
- Select Apply.


Add custom endpoint data as a source
To add a custom endpoint source, on the get-started page, select Use custom endpoint. Or, if you already have a published eventstream and you want to add custom endpoint data as a source, switch to edit mode. On the ribbon, select Add source > Custom endpoint.

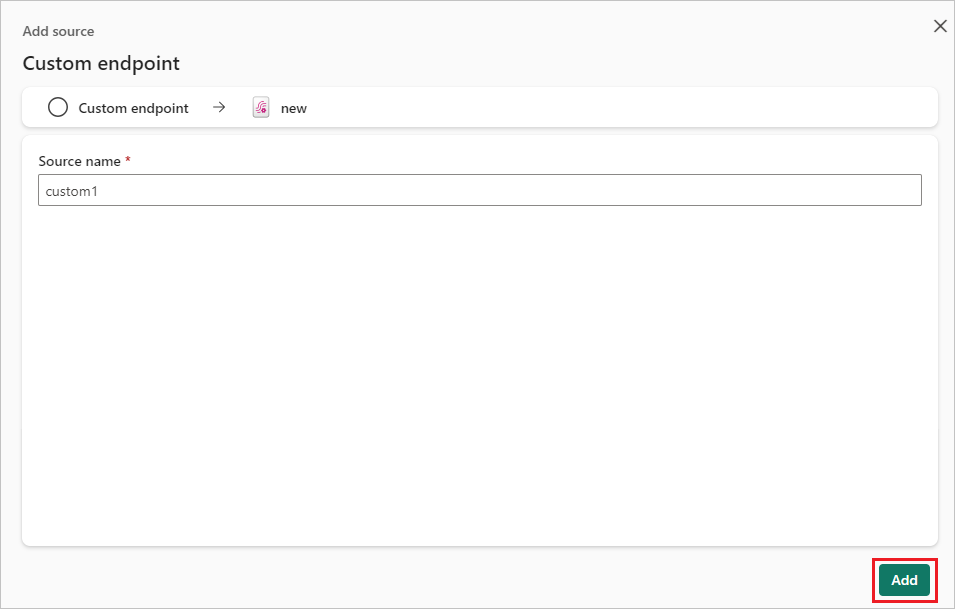
In the Custom endpoint dialog, enter a name for the custom source under Source name, and then select Add.
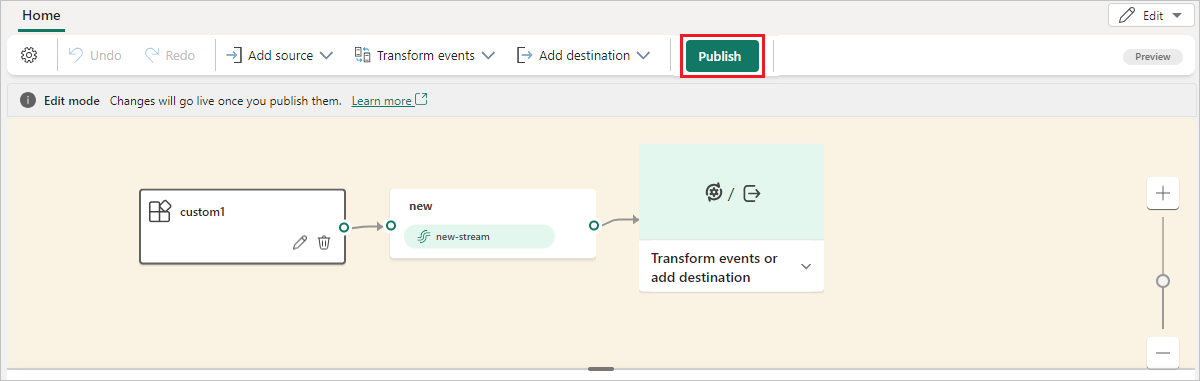
After you create the custom endpoint source, it's added to your eventstream on the canvas in edit mode. To implement the newly added data from the custom app source, select Publish.
Note
An eventstream can support up to 11 combined sources and destinations only when you're using the following types:
- Source: Custom endpoint.
- Destinations: Custom endpoint and eventhouse with direct ingestion.
Any sources or destinations not included in the preceding list, and destinations not appended to the default stream, don't count toward this limit.
Add custom endpoint data as a source
To add a custom endpoint source, on the get-started page, select Use custom endpoint. Or, if you already have a published eventstream and you want to add custom endpoint data as a source, switch to edit mode. On the ribbon, select Add source > Custom endpoint.
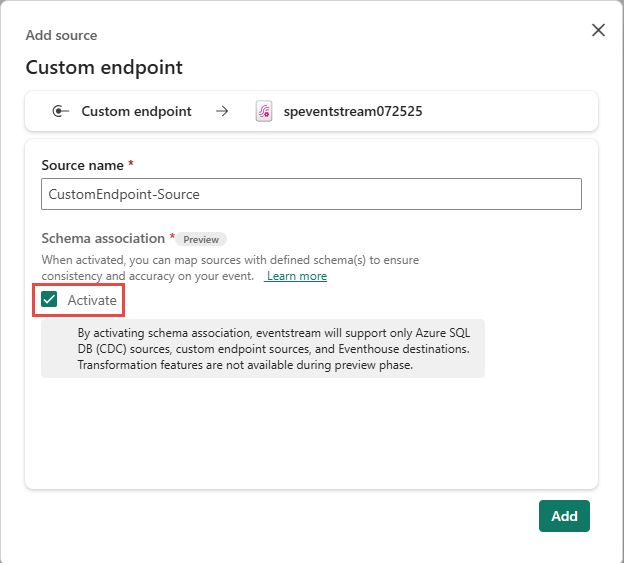
On the Add source page, select Activate for Schema association, and then select Add.
In the editor, to associate with a new schema or an existing schema from a schema registry, select Associate event schema on the ribbon.

To use an existing schema, select Choose from event schema registry, and then follow these steps:
In the Associate an event schema dialog, select a schema from the schema registry. The event data schema appears on the right pane.
Select Choose to associate the event schema with the custom endpoint.

In the eventstream editor, select the eventstream tile. On the bottom pane, switch to the Associated schema tab. Confirm that the schema is associated with the eventstream.

Use one of the following options to create a schema:
If you have a schema JSON file, select Upload to upload the file. For a sample file, see Download an event schema.

Start building a schema manually by selecting Add row. For each row, select the field type, select the field name, and optionally enter a description.

To build a schema by entering JSON code, select the Code editor option. If the message If you choose to use the code editor to create your schema, note that you won't be able to switch back to the UI builder appears, select Edit.

Enter the JSON code into the editor.


Note
An eventstream can support up to 11 combined sources and destinations only when you're using the following types:
- Source: Custom endpoint.
- Destinations: Custom endpoint and eventhouse with direct ingestion.
Any sources or destinations not included in the preceding list, and destinations not appended to the default stream, don't count toward this limit.
Get endpoint details on the Details pane
After you create a custom endpoint source, its data is available for visualization in the live view.
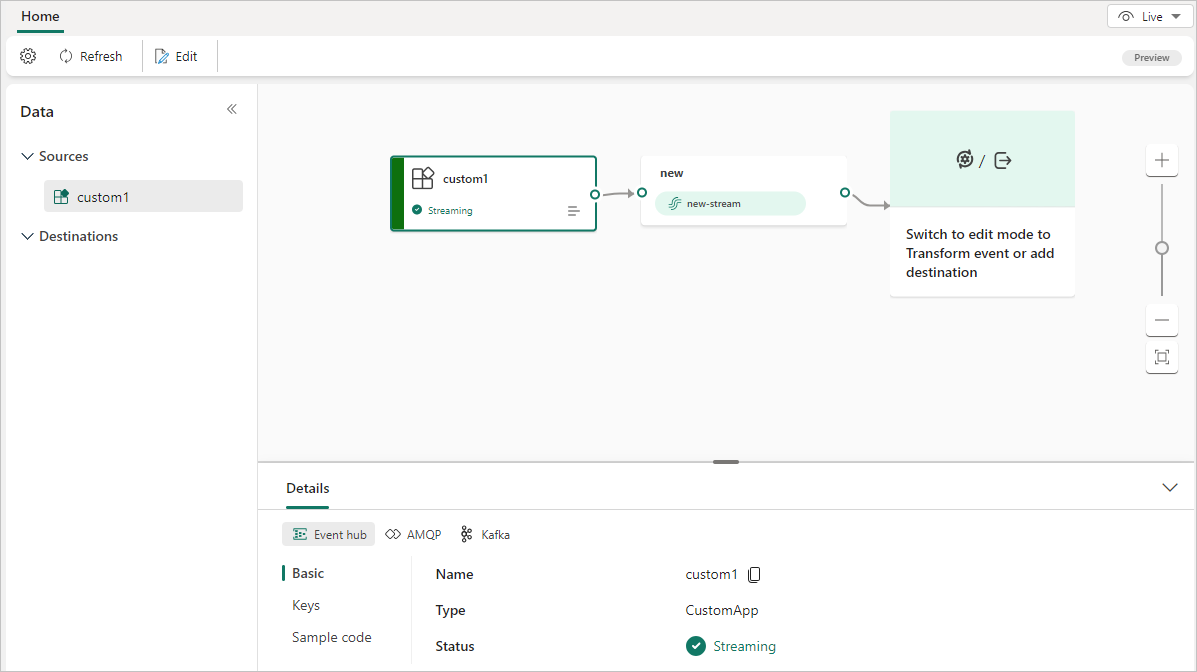
The Details pane has three protocol tabs: Event Hub, AMQP, and Kafka. Each protocol tab has two pages that offer the endpoint details with the corresponding protocol for connecting:
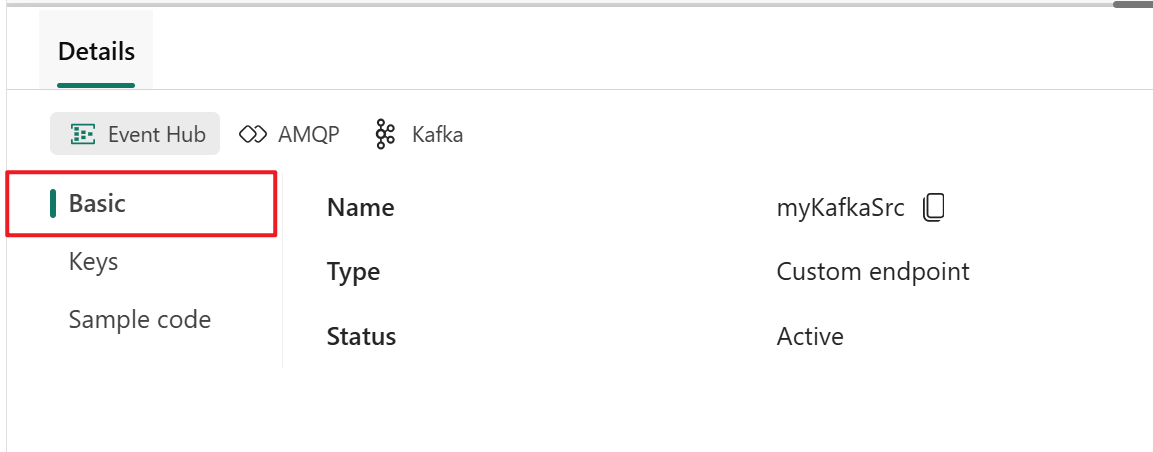
Basic shows the name, type, and status of your custom endpoint.
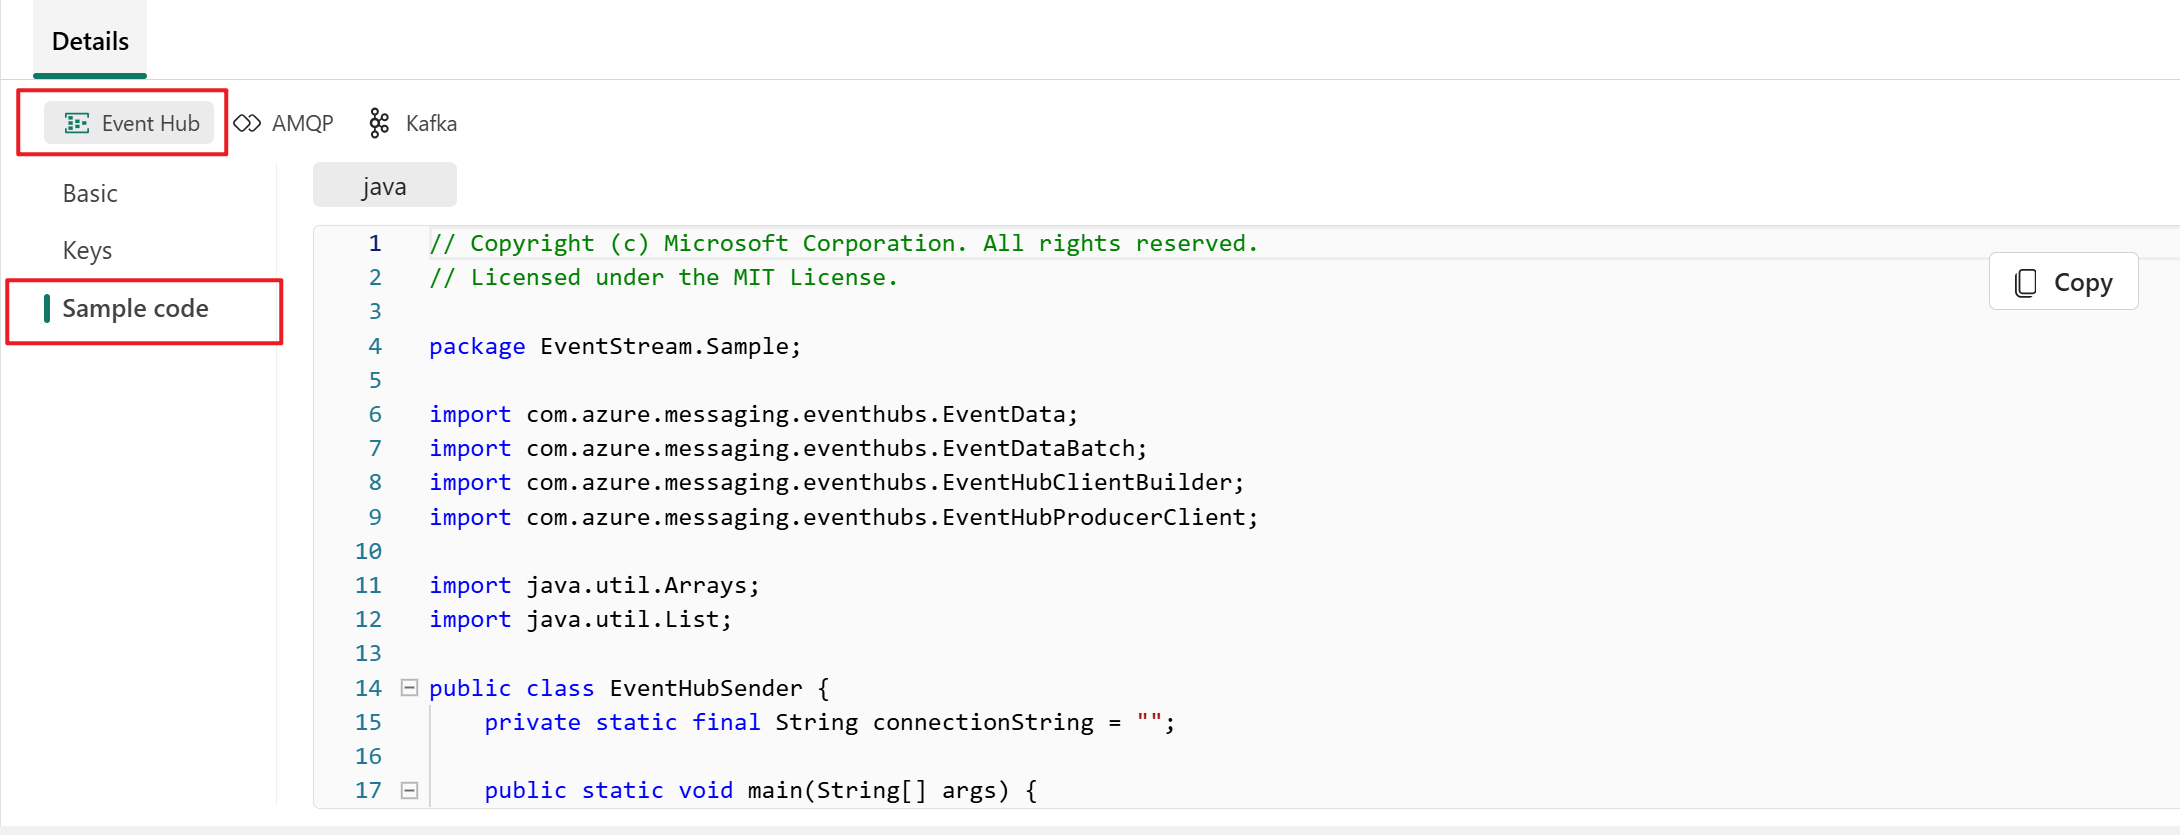
SAS Key Authentication provides information about connection keys. It also provides a link to the sample code, with the corresponding keys embedded, that you can use to stream the events to your eventstream. The information on this page varies by protocol.

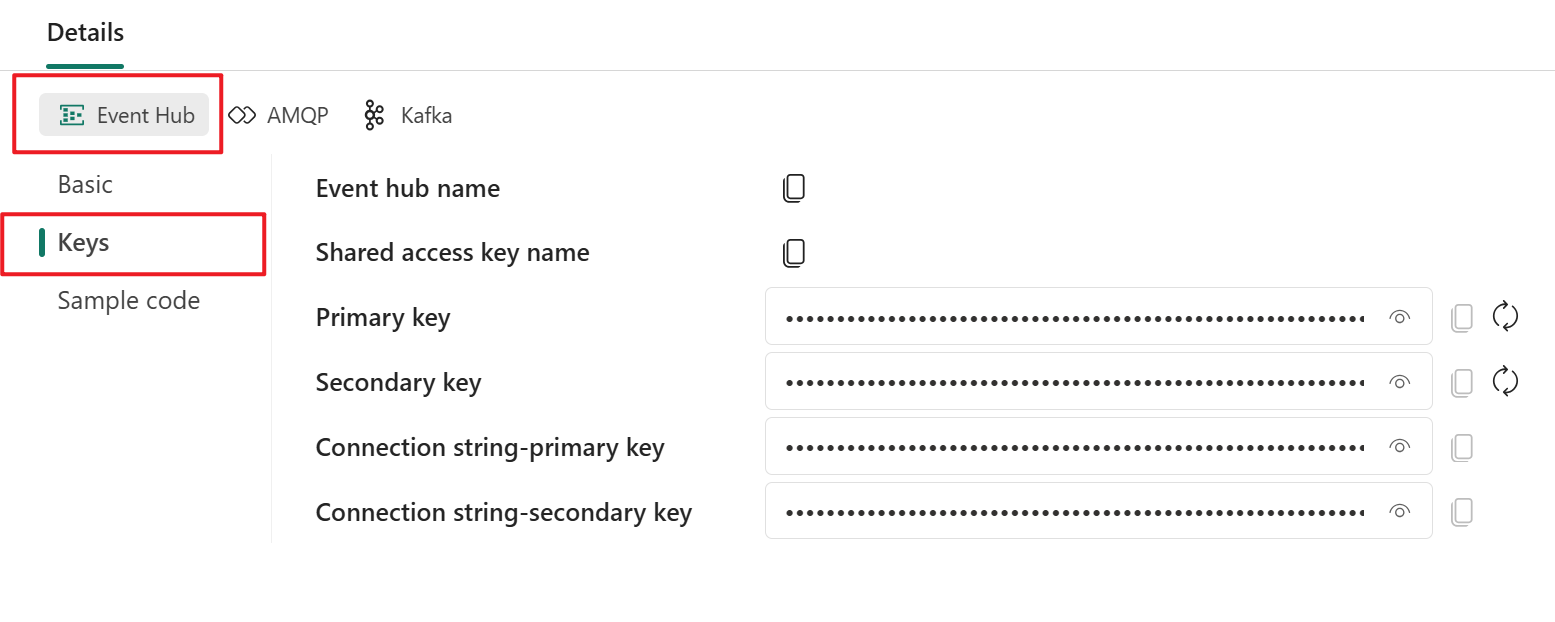
Event hub
The SAS Key Authentication tab for the Event Hub protocol contains information related to an event hub's connection string. The information includes Event hub name, Shared access key name, Primary key, Secondary key, Connection string-primary key, and Connection string-secondary key.
The event hub format is the default for the connection string, and it works with the Azure Event Hubs SDK. This format allows you to connect to your eventstream via the Event Hubs protocol.
The following example shows what the connection string looks like in event hub format:
Endpoint=sb://eventstream-xxxxxxxx.servicebus.windows.net/;SharedAccessKeyName=key_xxxxxxxx;SharedAccessKey=xxxxxxxx;EntityPath=es_xxxxxxx
If you select the Show sample code button, you see the ready-to-use Java code that includes the required information about connection keys in the event hub. Copy and paste it into your application for use.
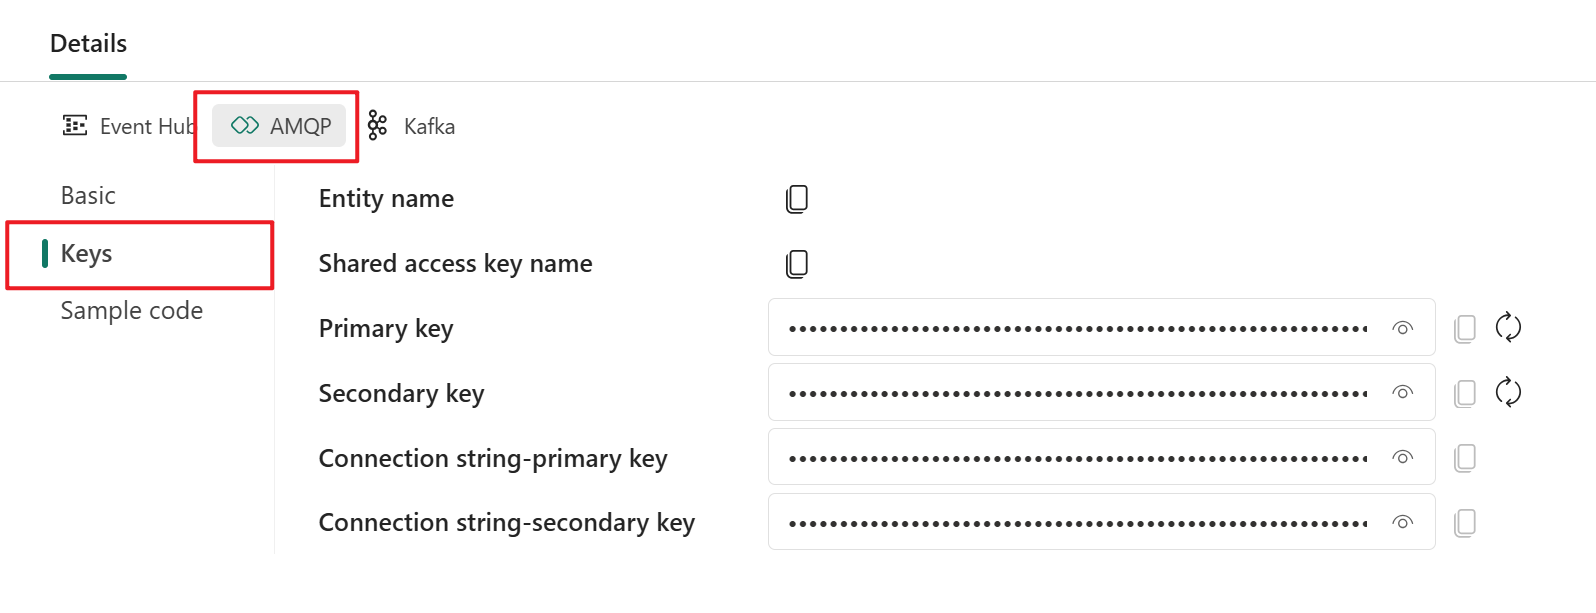
AMQP
The Advanced Message Queuing Protocol (AMQP) format is compatible with AMQP 1.0, which is a standard messaging protocol that supports interoperability between various platforms and languages. You can use this format to connect to your eventstream by using the AMQP protocol.
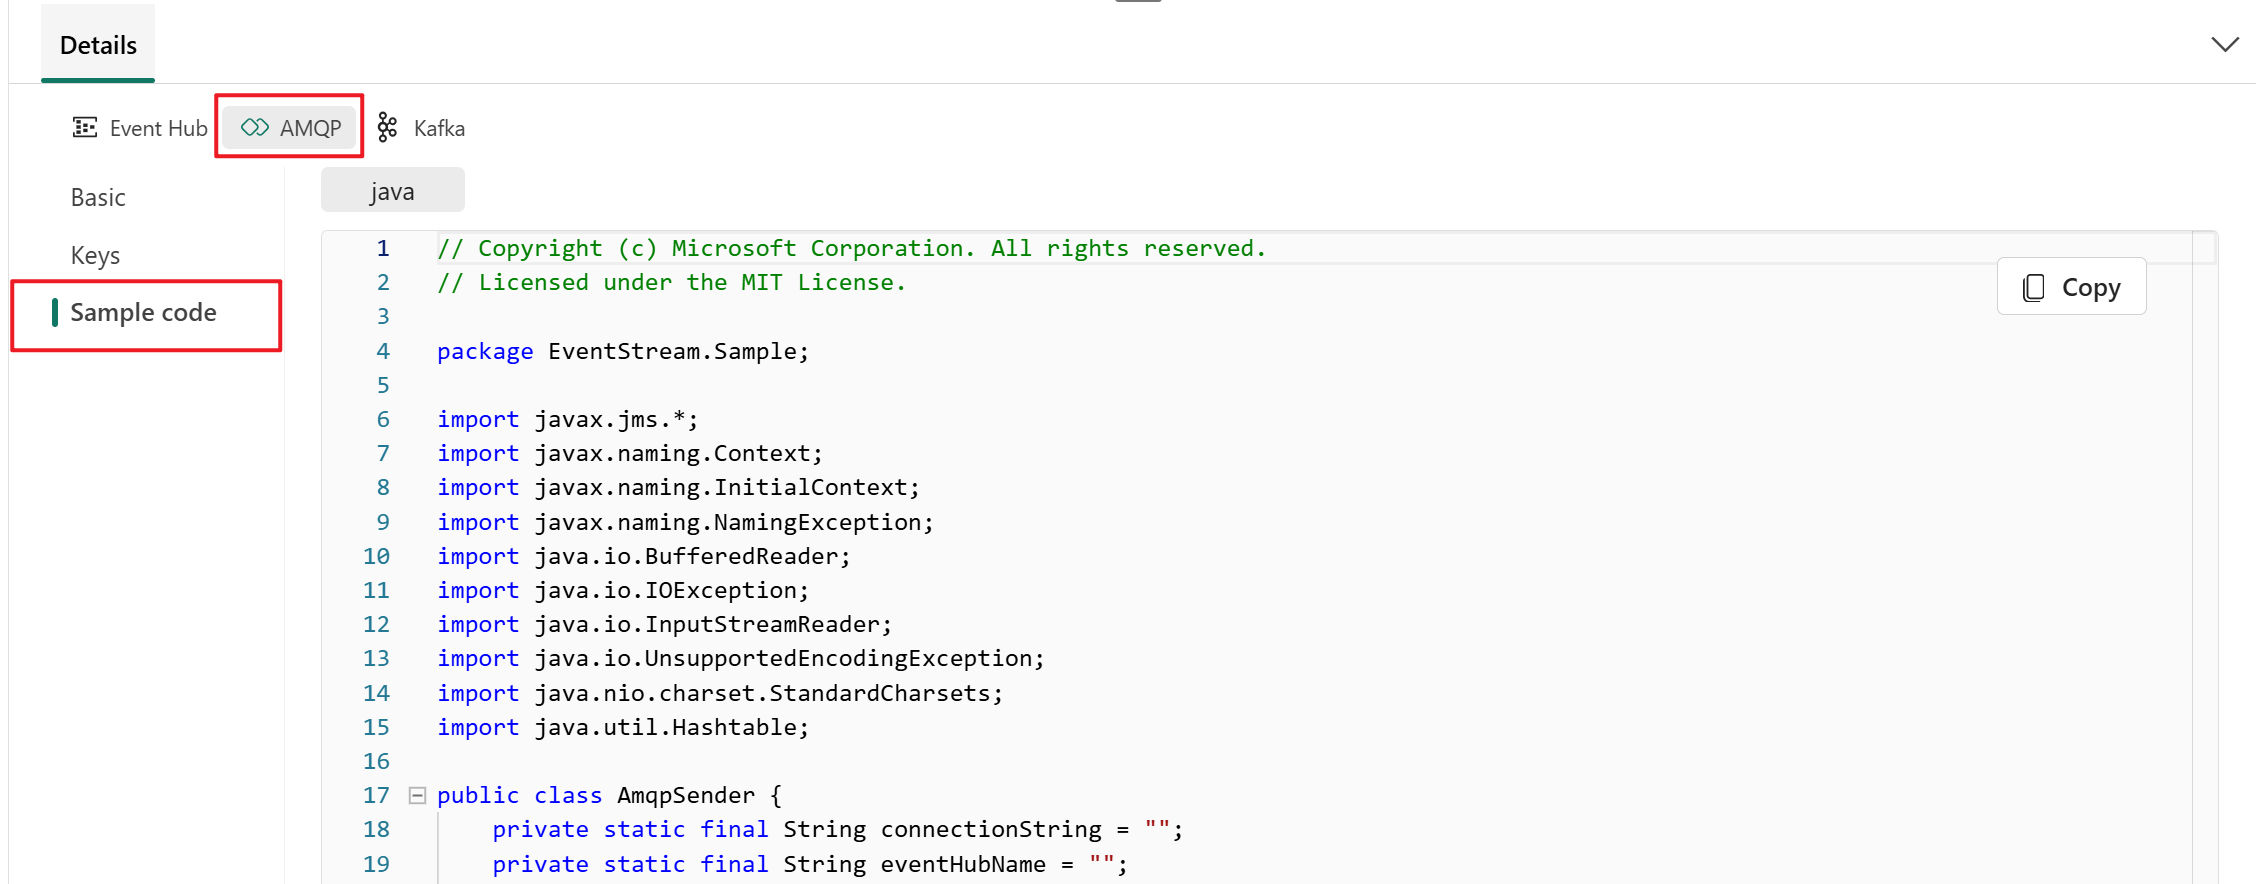
When you select the Show sample code button, you see the ready-to-use Java code with connection key information in AMQP format.
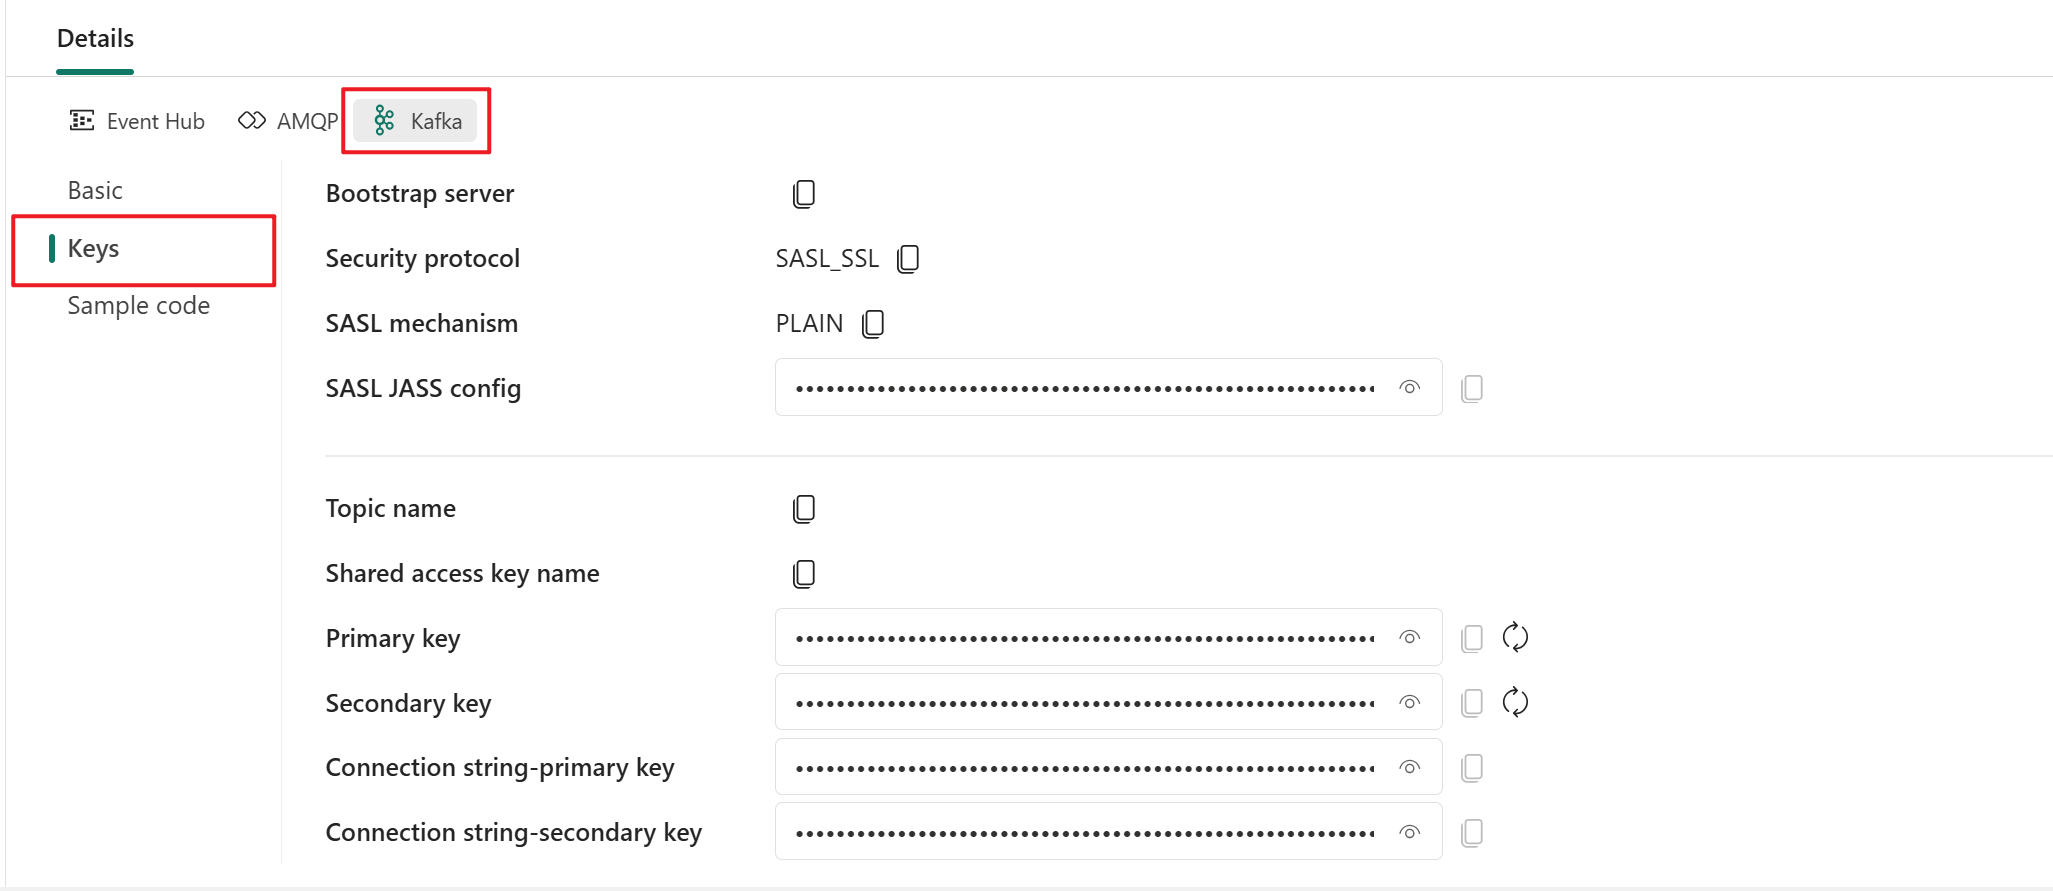
Kafka
The Kafka format is compatible with the Apache Kafka protocol, which is a popular distributed streaming platform that supports high-throughput and low-latency data processing. You can use the SAS Key Authentication information for the Kafka protocol format to connect to your eventstream and stream the events.
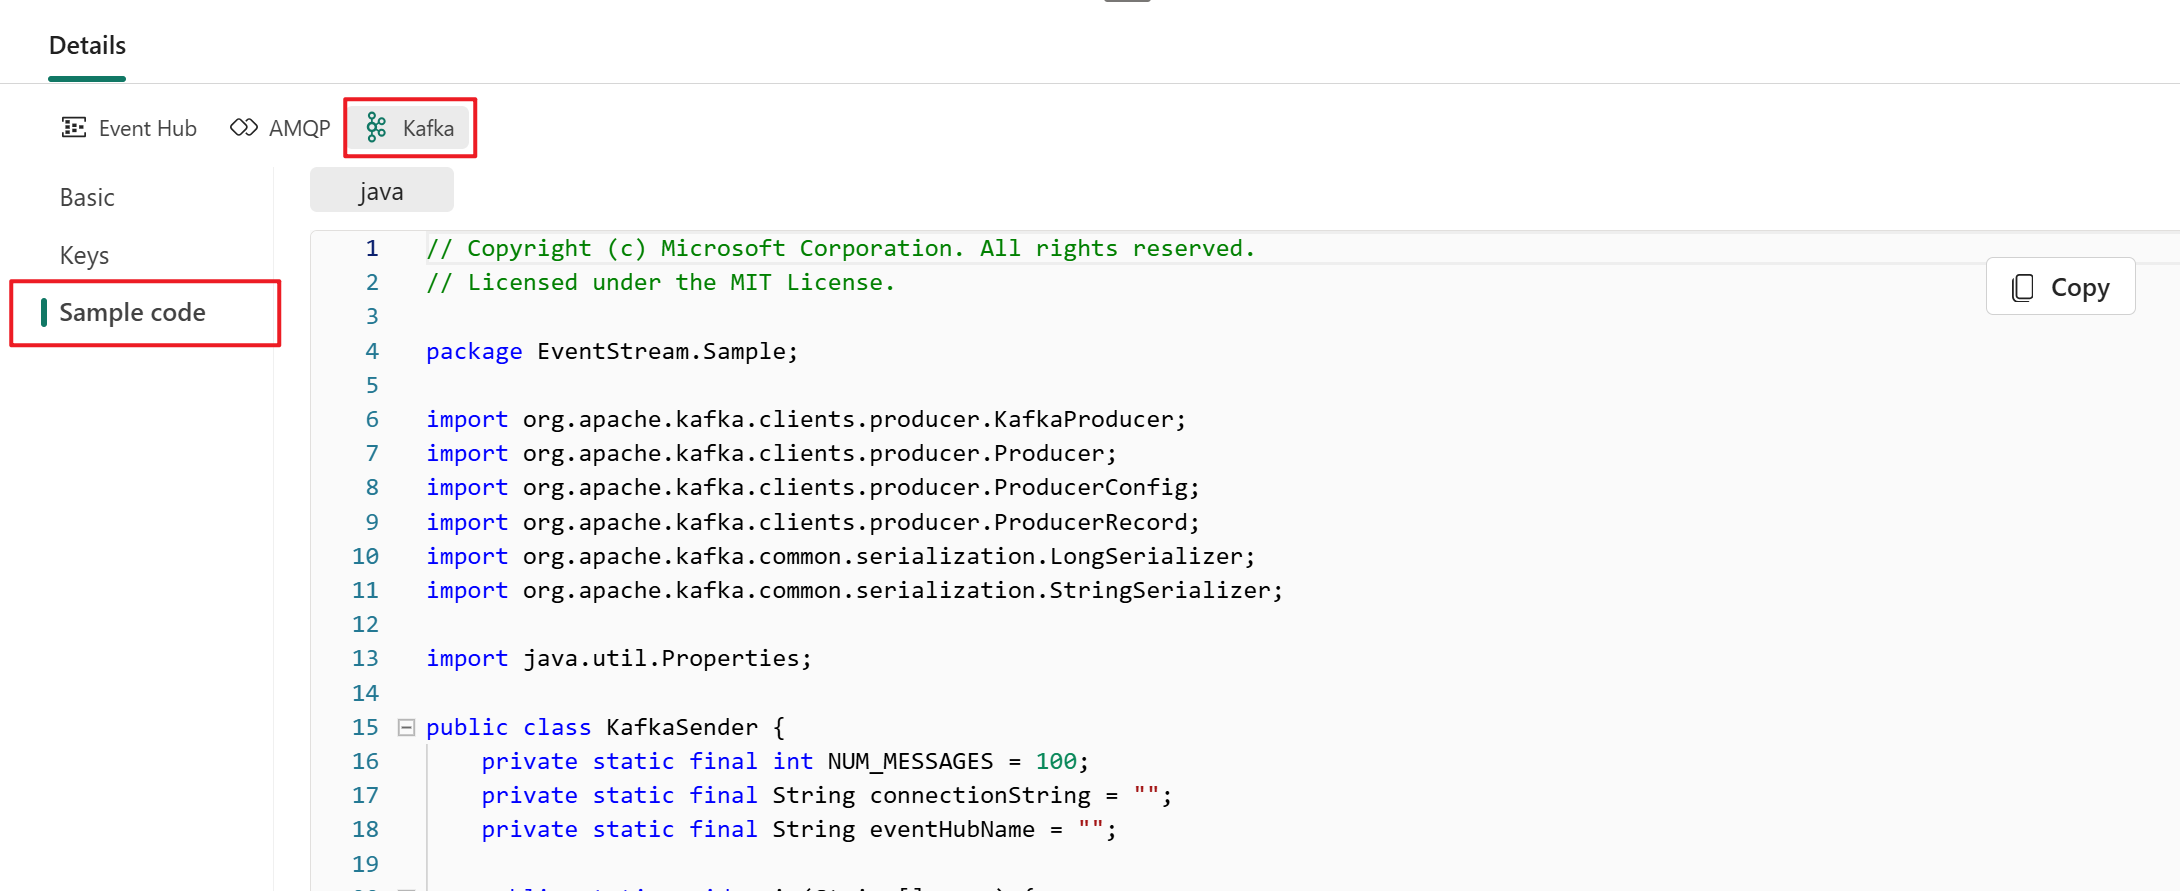
When you select the Show sample code button, you see the ready-to-use Java code, including the necessary connection keys in Kafka format. Copy it for your use.
For a clear guide on using the custom endpoint with the Kafka protocol, refer to this tutorial. It provides detailed steps for streaming and consuming events.
Note
- You can choose the protocol format that suits your application needs and preferences, and then copy and paste the connection string into your application. You can also refer to or copy the sample code, which shows how to send or receive events by using various protocols.
- To close the sample code view, select Hide sample code.
Configure eventstream destinations to use schemas
Currently, only the eventhouse, custom endpoint, and derived stream destinations are supported for eventstreams with extended features enabled. This section shows you how to add and configure an eventhouse destination when extended features (like schema support) are enabled for the eventstream.
Configure a schema for a custom endpoint destination
Select Transform events or add destination, and then select CustomEndpoint.
On the Custom endpoint pane, specify a name for the destination.
For Input schema, select the schema for events. You make a selection in this box when you enable schema support for an eventstream.

For detailed steps on configuring a custom endpoint destination, see Add a custom endpoint or custom app destination to an eventstream.
Configure schemas for an eventhouse destination
Select Transform events or add destination, and then select Eventhouse.
On the Eventhouse pane, configure the following schema-related settings:
For Input schema, select one or more schemas from the dropdown list.

Note
If you selected the Dynamic schema via headers option when configuring an Event Hubs source, you might have configured multiple schemas for the source and mapped them to various properties and their values.
For Table creation method, select A single table with all schemas combined or Separate tables for each schema, depending on your requirements.

For Write data with, select one of the following options:
- Payload only: Write extracted payload data to the table. If there are multiple input schemas, data is sent to multiple tables.
- Metadata and payload: Write metadata and payload data to a single table. Example columns include
source,subject,type, anddata.


For detailed steps on configuring an eventhouse destination, see Add an eventhouse destination to an eventstream.
Related content
- For a list of supported sources, see Add and manage an event source in an eventstream.