Note
Access to this page requires authorization. You can try signing in or changing directories.
Access to this page requires authorization. You can try changing directories.
Create a Fabric Activator rule from a Fabric map to monitor KQL database data from an eventhouse and take action when the data meets a condition. For example, use an alert to notify an operations team when a vehicle's status becomes critical.
For an overview of supported sources, evaluation behavior, ownership, and limitations, see Activator alerts in Fabric Maps.
Important
This feature is in preview.
Prerequisites
- A workspace with a Microsoft Fabric-enabled capacity.
- An existing Fabric map that you authored and can edit.
- An eventhouse data layer in the map.
- Read access to the eventhouse that supplies the layer data.
- Permission to create an Activator item or save a rule to an existing Activator item.
- Any permissions required to configure the selected action.
Create a new alert
The layer from which you select Add alert determines the eventhouse source and KQL output that the rule monitors.
Open the Fabric map in edit mode.
In the Data layers pane, select More options (...) for the eventhouse layer that contains the data you want to monitor.
Select Manage alerts (Preview), and then select Add alert.
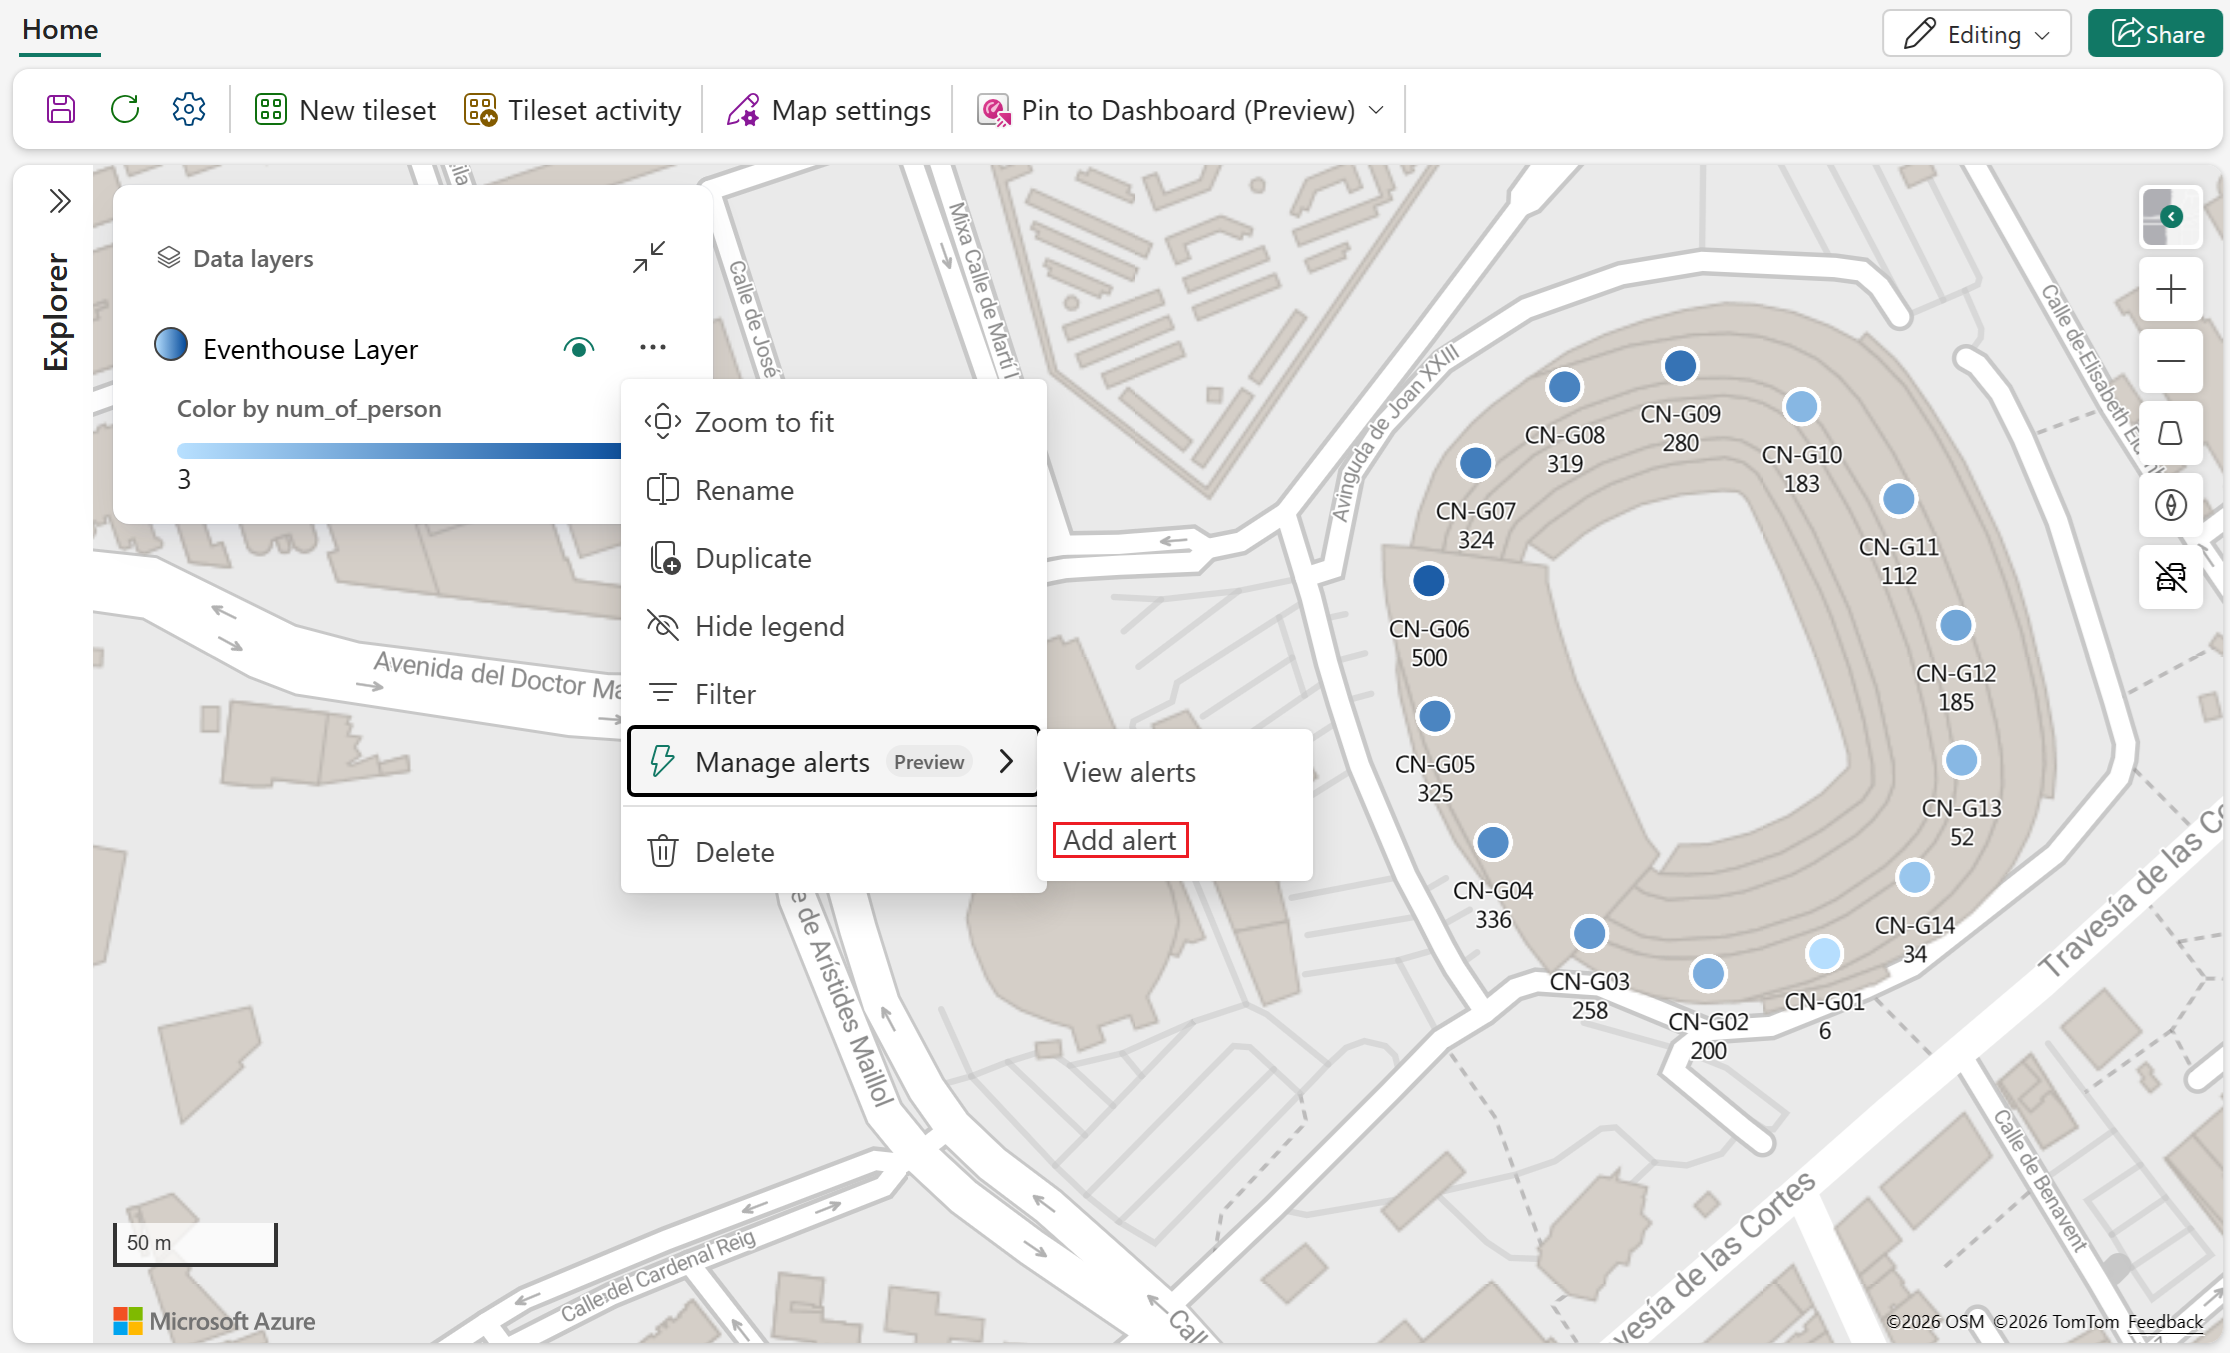
Configure the alert rule
The Add rule pane opens for the new alert you're creating. The pane consists of five sections: Details, Monitor, Condition, Action, and Save location. Each section contains properties for that category of rule settings. For definitions of the sections and their purposes, see Rule settings.
Use the following sections to configure the rule. When finished, select Create.
Details section
For Rule name, enter a name that identifies the rule.
Monitor section
The eventhouse layer that you selected populates the source and generated KQL query.
Review the eventhouse source and generated KQL query.
For Run query every, select how often Activator queries the source data.
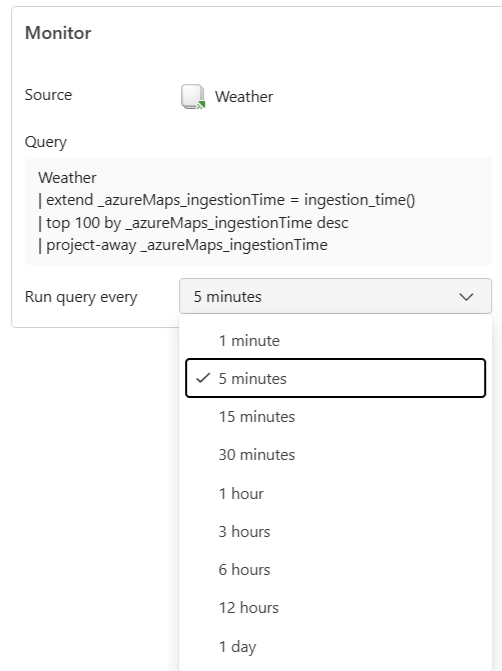
More frequent queries detect changes sooner but consume more Fabric capacity. For guidance on choosing a schedule, see Query frequency for query data sources.
The available fields come from the KQL table, function, or materialized view used by the selected layer. The output can include values calculated or summarized by KQL. Design the query output to include the value that you want to monitor and any identifier that the rule needs for grouping.
Important
For an eventhouse layer that uses a KQL database table directly, only the last 100 ingested rows are available to Activator. For more information, see Kusto integration limitations.
Condition section
For Check, select On each event or On each event when.
To evaluate each asset, region, or other logical object independently, select the field that identifies that object or group for Grouping field.
If you selected On each event when, select the field to evaluate for When. Then select a Condition and enter a Value when required.
For Occurrence, select how often or how long the condition must be true before the action runs.
To limit which events the rule evaluates, select Add filter and configure up to three filters.
Note
Add filter is available only after you select a Grouping field.
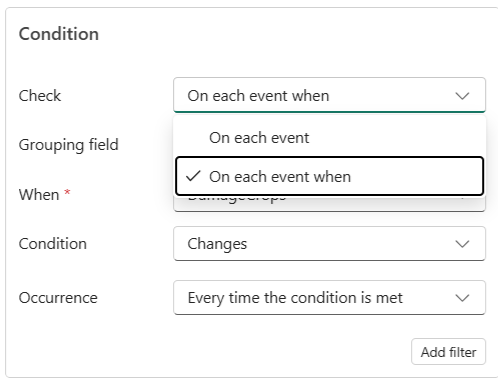
The grouping field identifies the logical objects that Activator evaluates separately. For example, grouping vehicle telemetry by VehicleId lets Activator evaluate the condition for each vehicle instead of treating all vehicle events as one stream.
For descriptions of condition operators, occurrence options, and filters, see Detection settings in Activator.
Action section
For Select action, select a notification, Fabric activity, or custom action.
Complete the fields for the selected action.
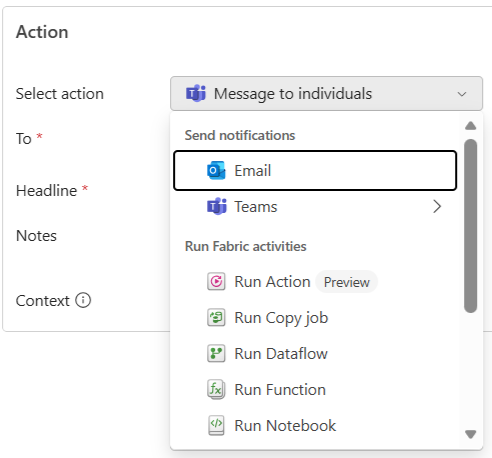
Notification fields can reference values from the monitored data. Enter @ or use the tag button to select a property for fields such as Headline and Notes. Use Context to select other properties to include in the alert message. The object ID and activation time are included by default.
For action-specific requirements and configuration steps, see Configure actions for Activator rules.
Save location section
Select the workspace where you want to save the alert for Workspace.
For Item, select an existing Activator item or select Create a new item.
If you selected Create a new item, enter the name of the new Activator item in the New item name field.
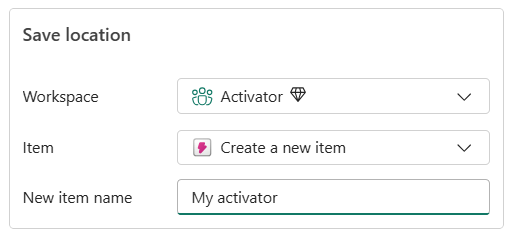
Select Create to create the rule.
Verify the alert rule
- Open the resulting rule in Activator.
- Review the rule's monitored data, condition, and action.
- If the rule is stopped, select Start. Activator evaluates new data after the rule starts; it doesn't activate retroactively for previously ingested data.
- To preview a notification, select Send me a test alert. This option is available when Activator has a past event for which the rule condition is true. The test alert is sent to you rather than the configured recipients.
- After data meets the condition, review the rule's History tab and confirm that the expected action ran.
For more information, see Test your rule and Start and stop your rule.
Review notification content
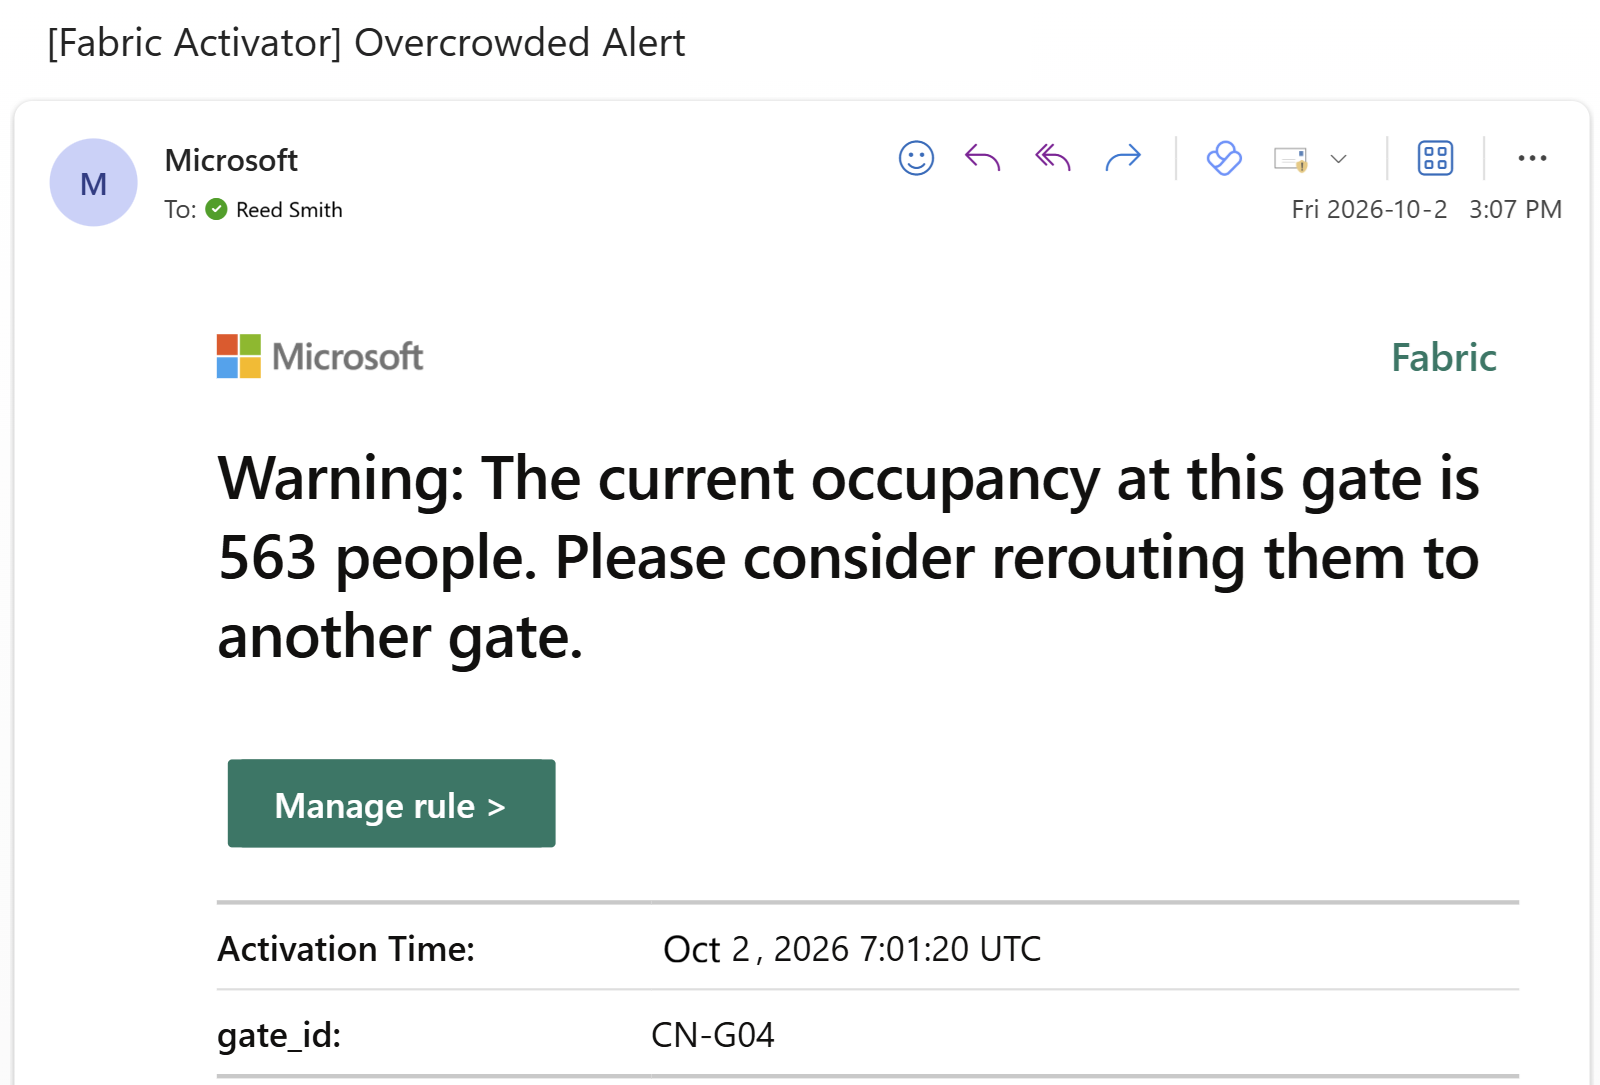
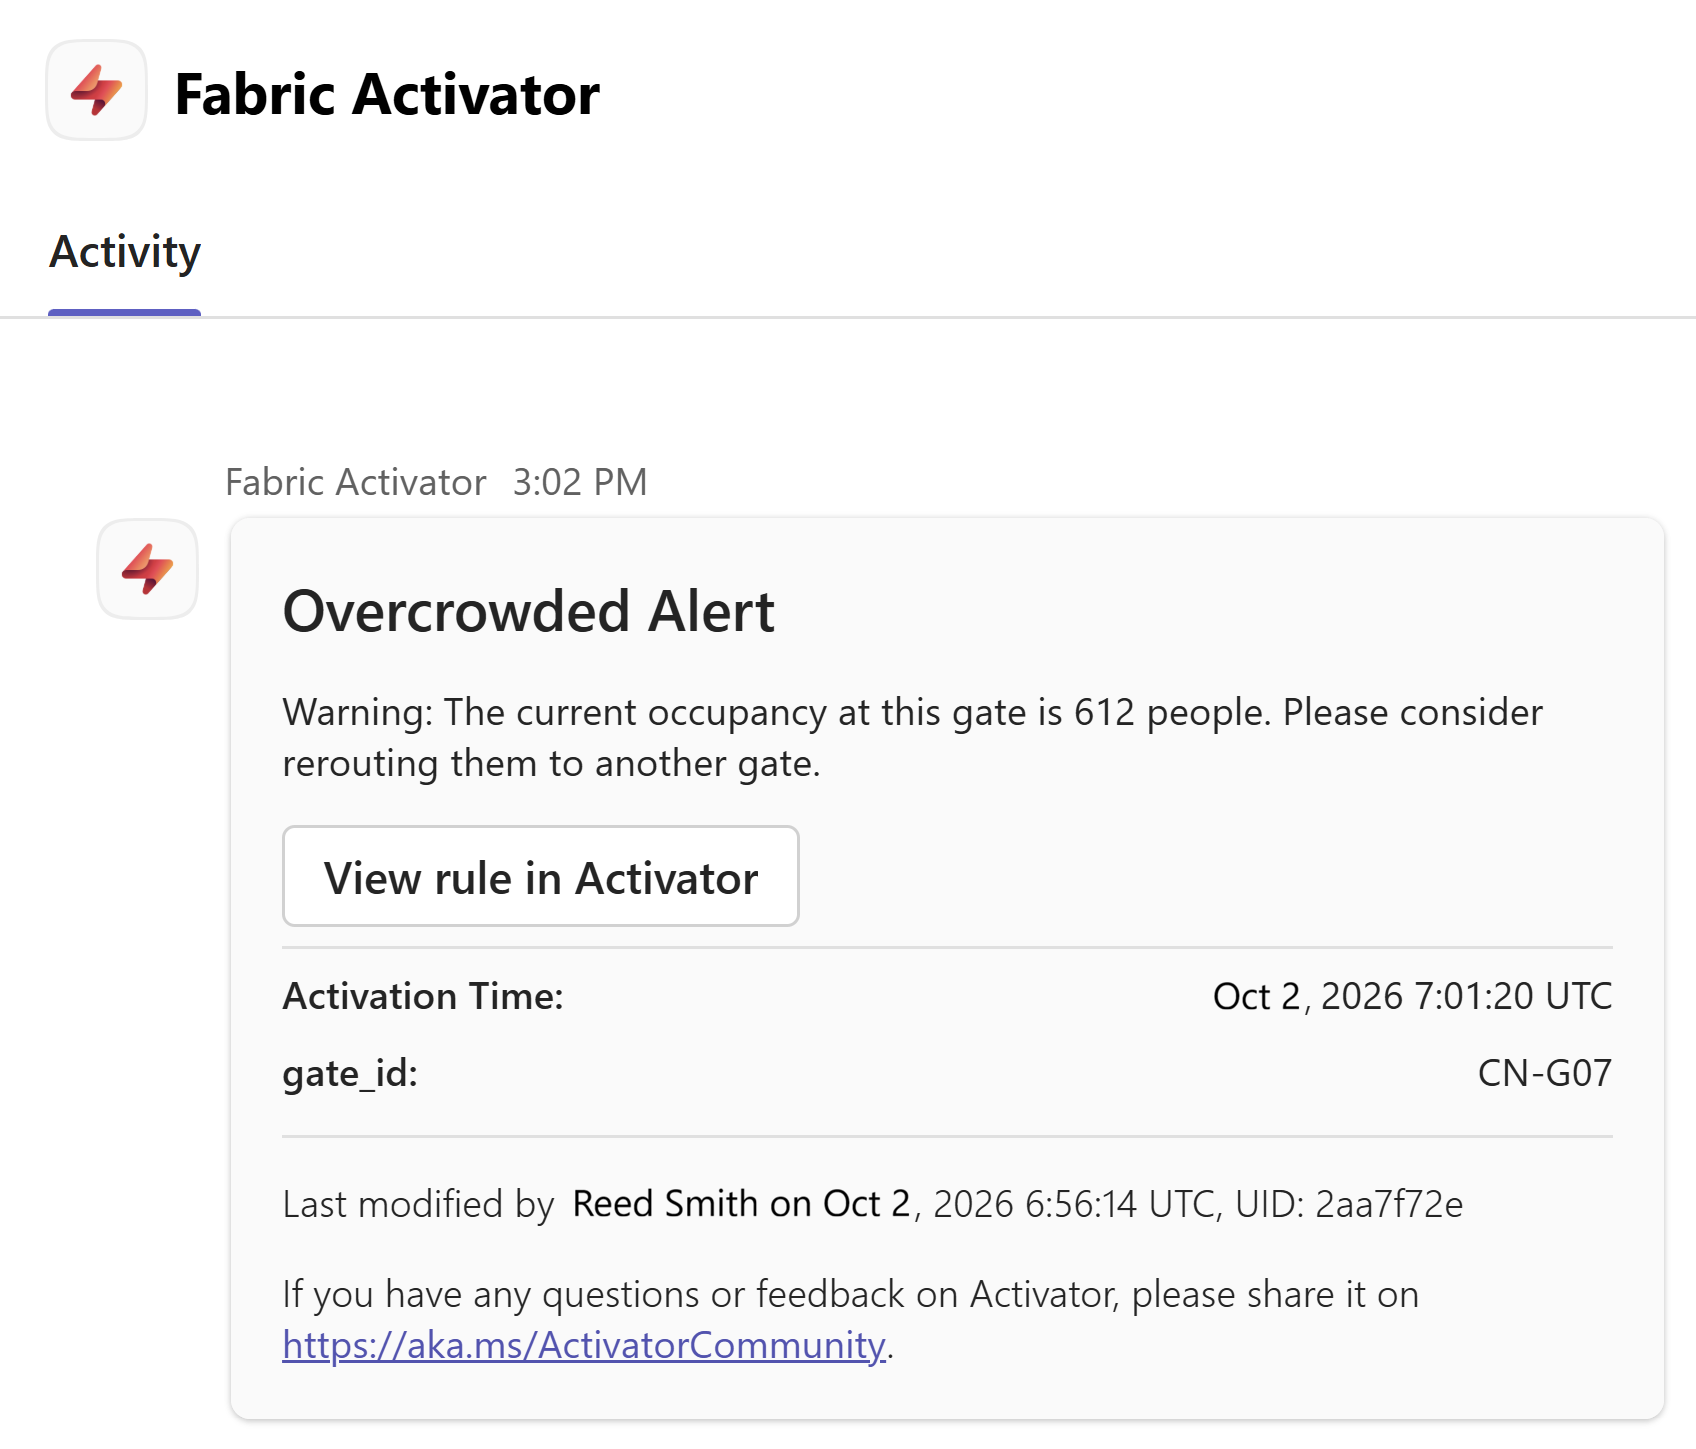
Email and Teams notifications display the configured headline and message, the activation time, and the context properties selected for the action. Each notification also includes a link to open the rule in Activator.
The following example shows an email notification:
The following example shows a Teams notification:
View existing alerts
Use View alerts to open the Rules pane for a layer and review rules that are already created.
- Open the Fabric map in edit mode.
- In the Data layers pane, select More options (...) for the eventhouse layer whose alerts you want to view.
- Select Manage alerts (Preview), and then select View alerts.
The Rules pane opens. It shows the Activator item where the layer's rules are stored, lists any existing rules, and displays the Add rule button.
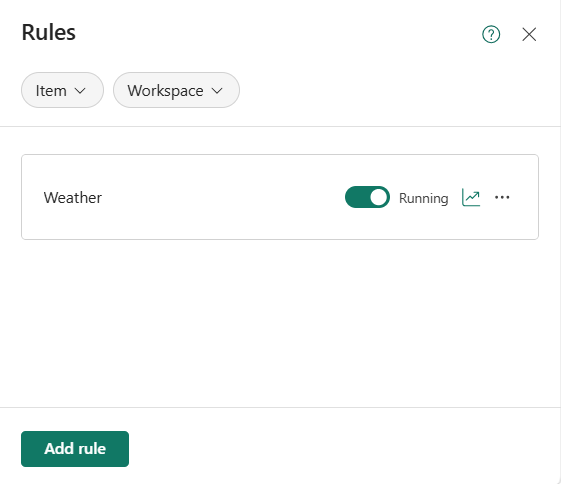
From the Rules pane, you can:
- Open an existing rule in Activator to review or manage it.
- Select Add rule to create another rule for the layer.
Manage a rule in Activator
During preview, only the map author can edit an Activator rule created from the map. Other users who can view or edit the map can't edit the rule.
Open the rule in Activator to perform the following tasks:
- Select Stop to stop evaluating data and running actions. Select Start to resume the rule.
- Change the condition or action, and then select Update so that the running rule uses the changes.
- Review the rule's analytics and History tab.
- Delete the rule when it's no longer needed.
For more information about starting, stopping, updating, and deleting rules, see Start and stop your rule.
Note
After you delete a rule, it might continue to monitor data and run actions for up to five minutes while back-end processing completes.
Troubleshooting
| Problem | Resolution |
|---|---|
| The rule doesn't evaluate all rows from a KQL database table. | Eventhouse layers that use a KQL database table directly make only the last 100 ingested rows available to Activator. Use a KQL function or materialized view to return aggregated or filtered results. For more information, see Kusto integration limitations. |
| The alert command isn't available. | Confirm that the map is open in edit mode, that you authored the map and can edit it, and that the map contains an eventhouse layer. Other source types don't support Activator alerts. |
| A layer isn't listed. | Confirm that the layer uses an eventhouse source and that you still have read access to the source. |
| A field isn't available. | Confirm that the field is part of the KQL output for the selected layer. |
| The condition is met, but the action doesn't run. | Confirm that the rule is running, review its History tab, and verify that you have permission to use the configured action. A rule doesn't activate retroactively for data ingested before it starts. |
| A notification isn't received. | Check the configured recipients and the rule's History tab. Then verify the recipient and action requirements in Configure actions for Activator rules. |
| The rule uses unexpected data. | Review the selected layer, grouping field, and source data. Panning, zooming, layer visibility, and styling don't scope the rule. |
Related content
- Create Activator alerts from a Real-Time Dashboard
- Query frequency for query data sources
- Understand Activator capacity consumption, usage reporting, and billing
- Activator limitations
- Create layers from Kusto data
- Manage map permissions