Note
Access to this page requires authorization. You can try signing in or changing directories.
Access to this page requires authorization. You can try changing directories.
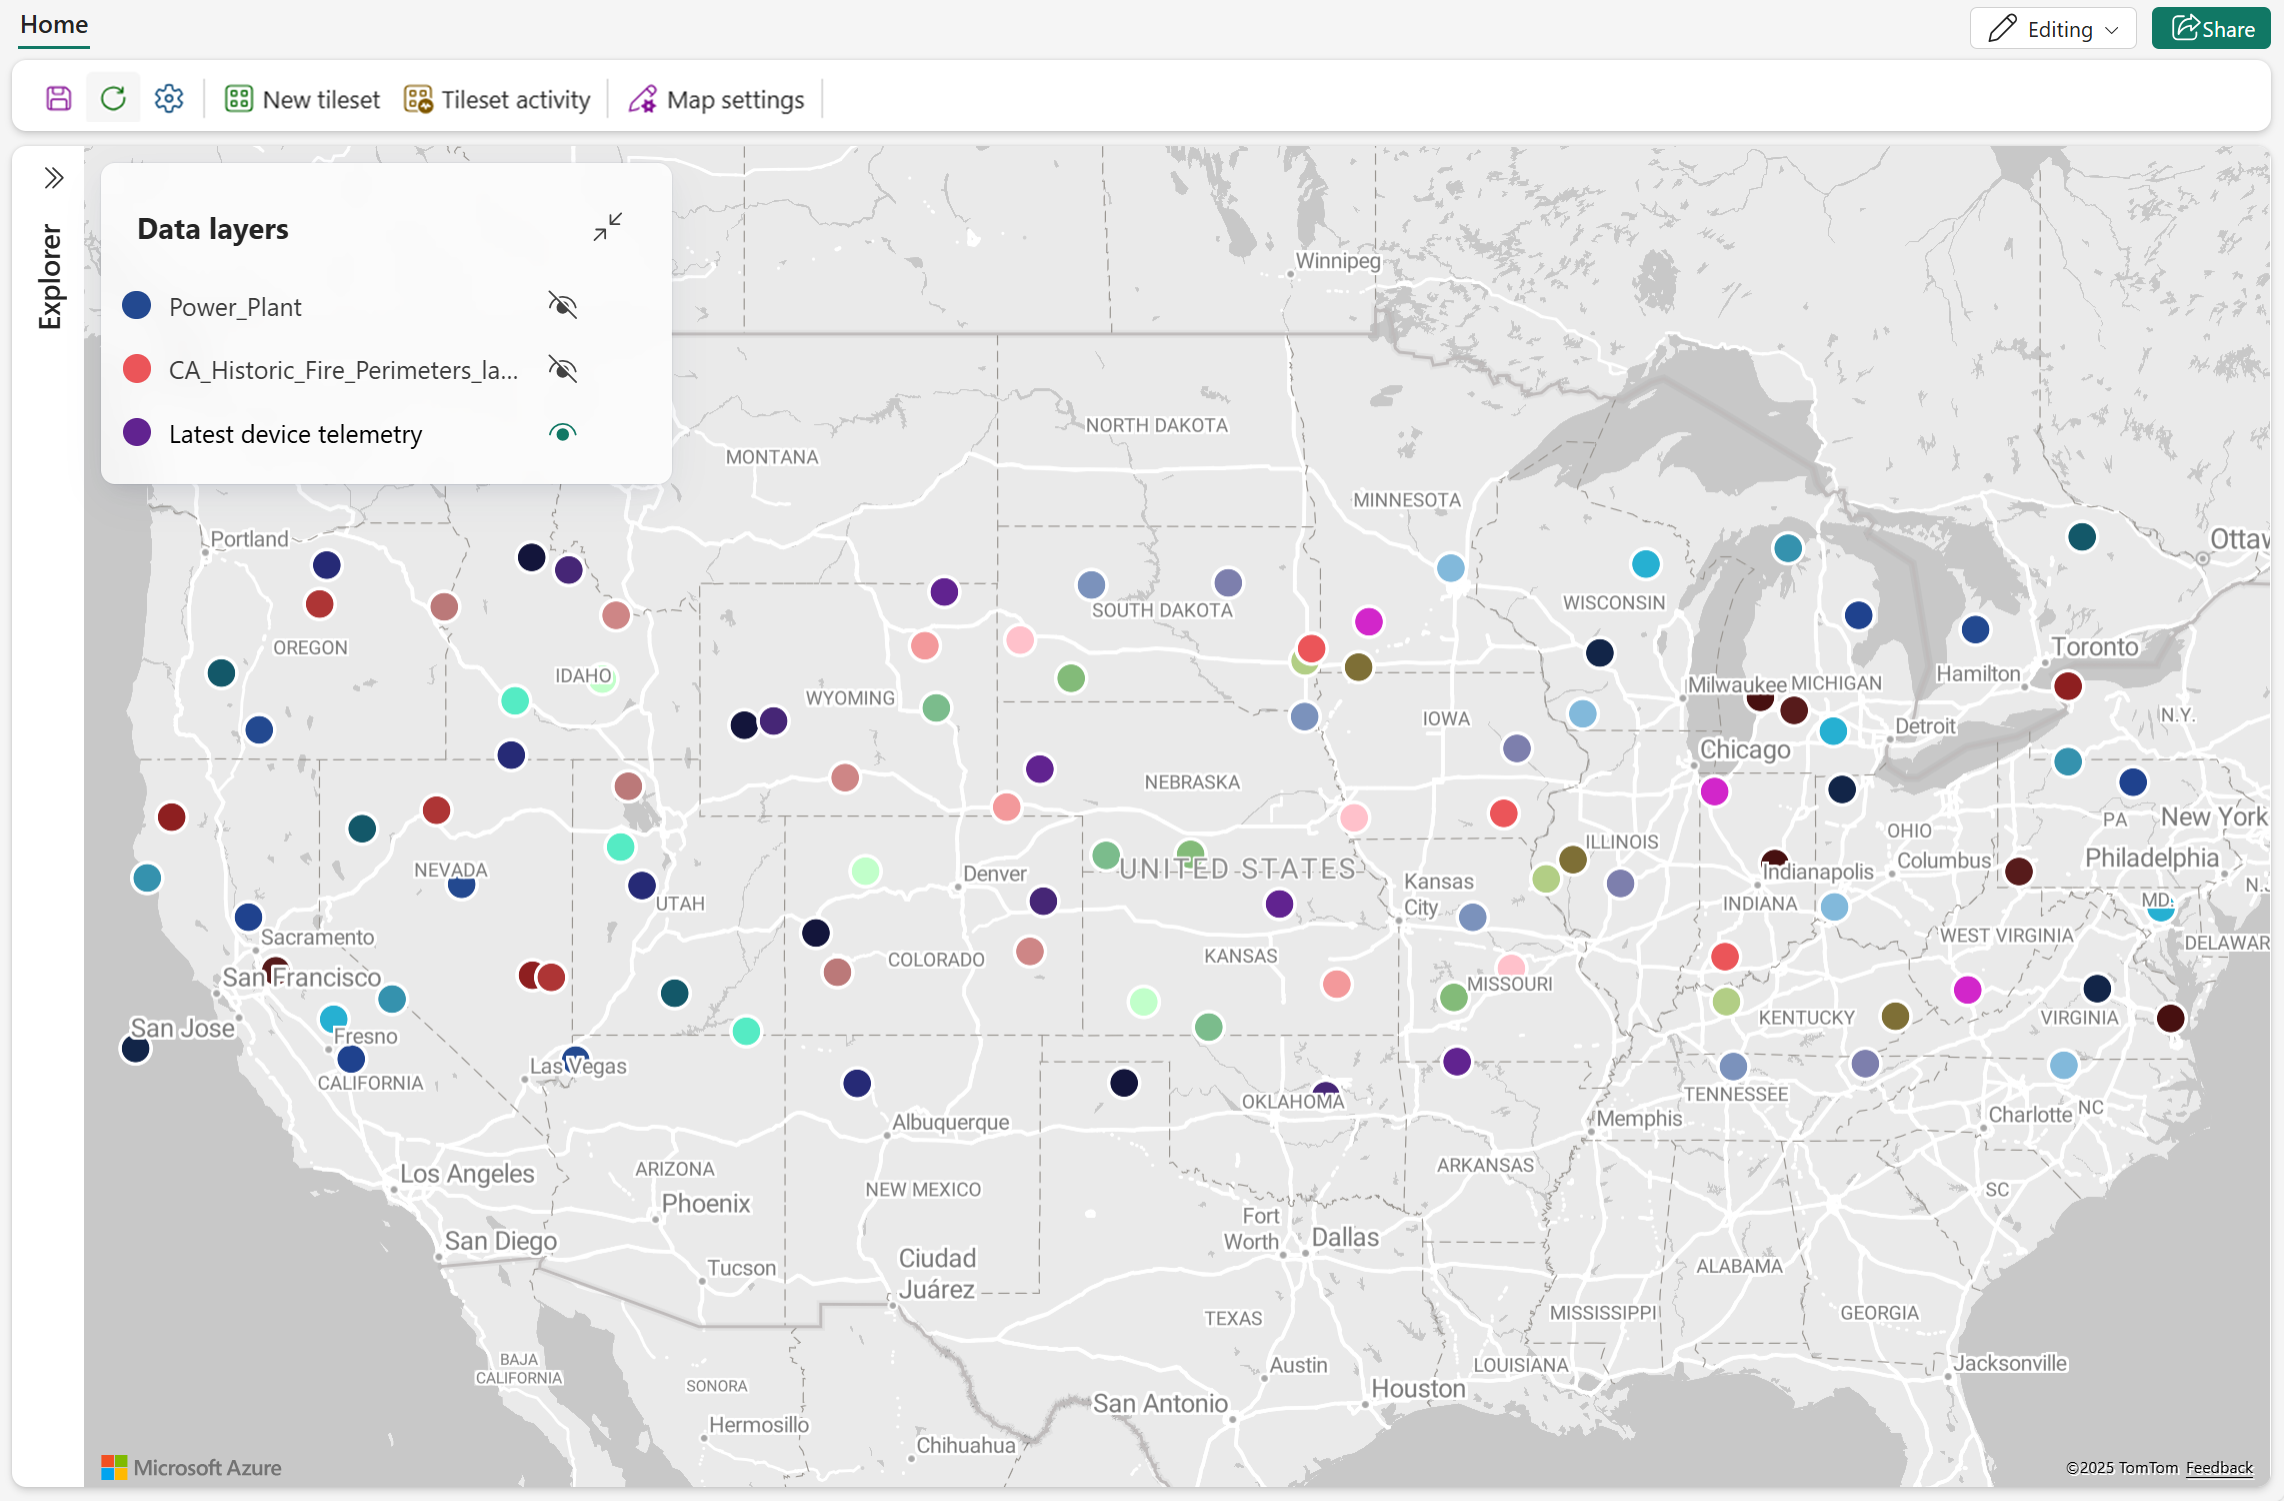
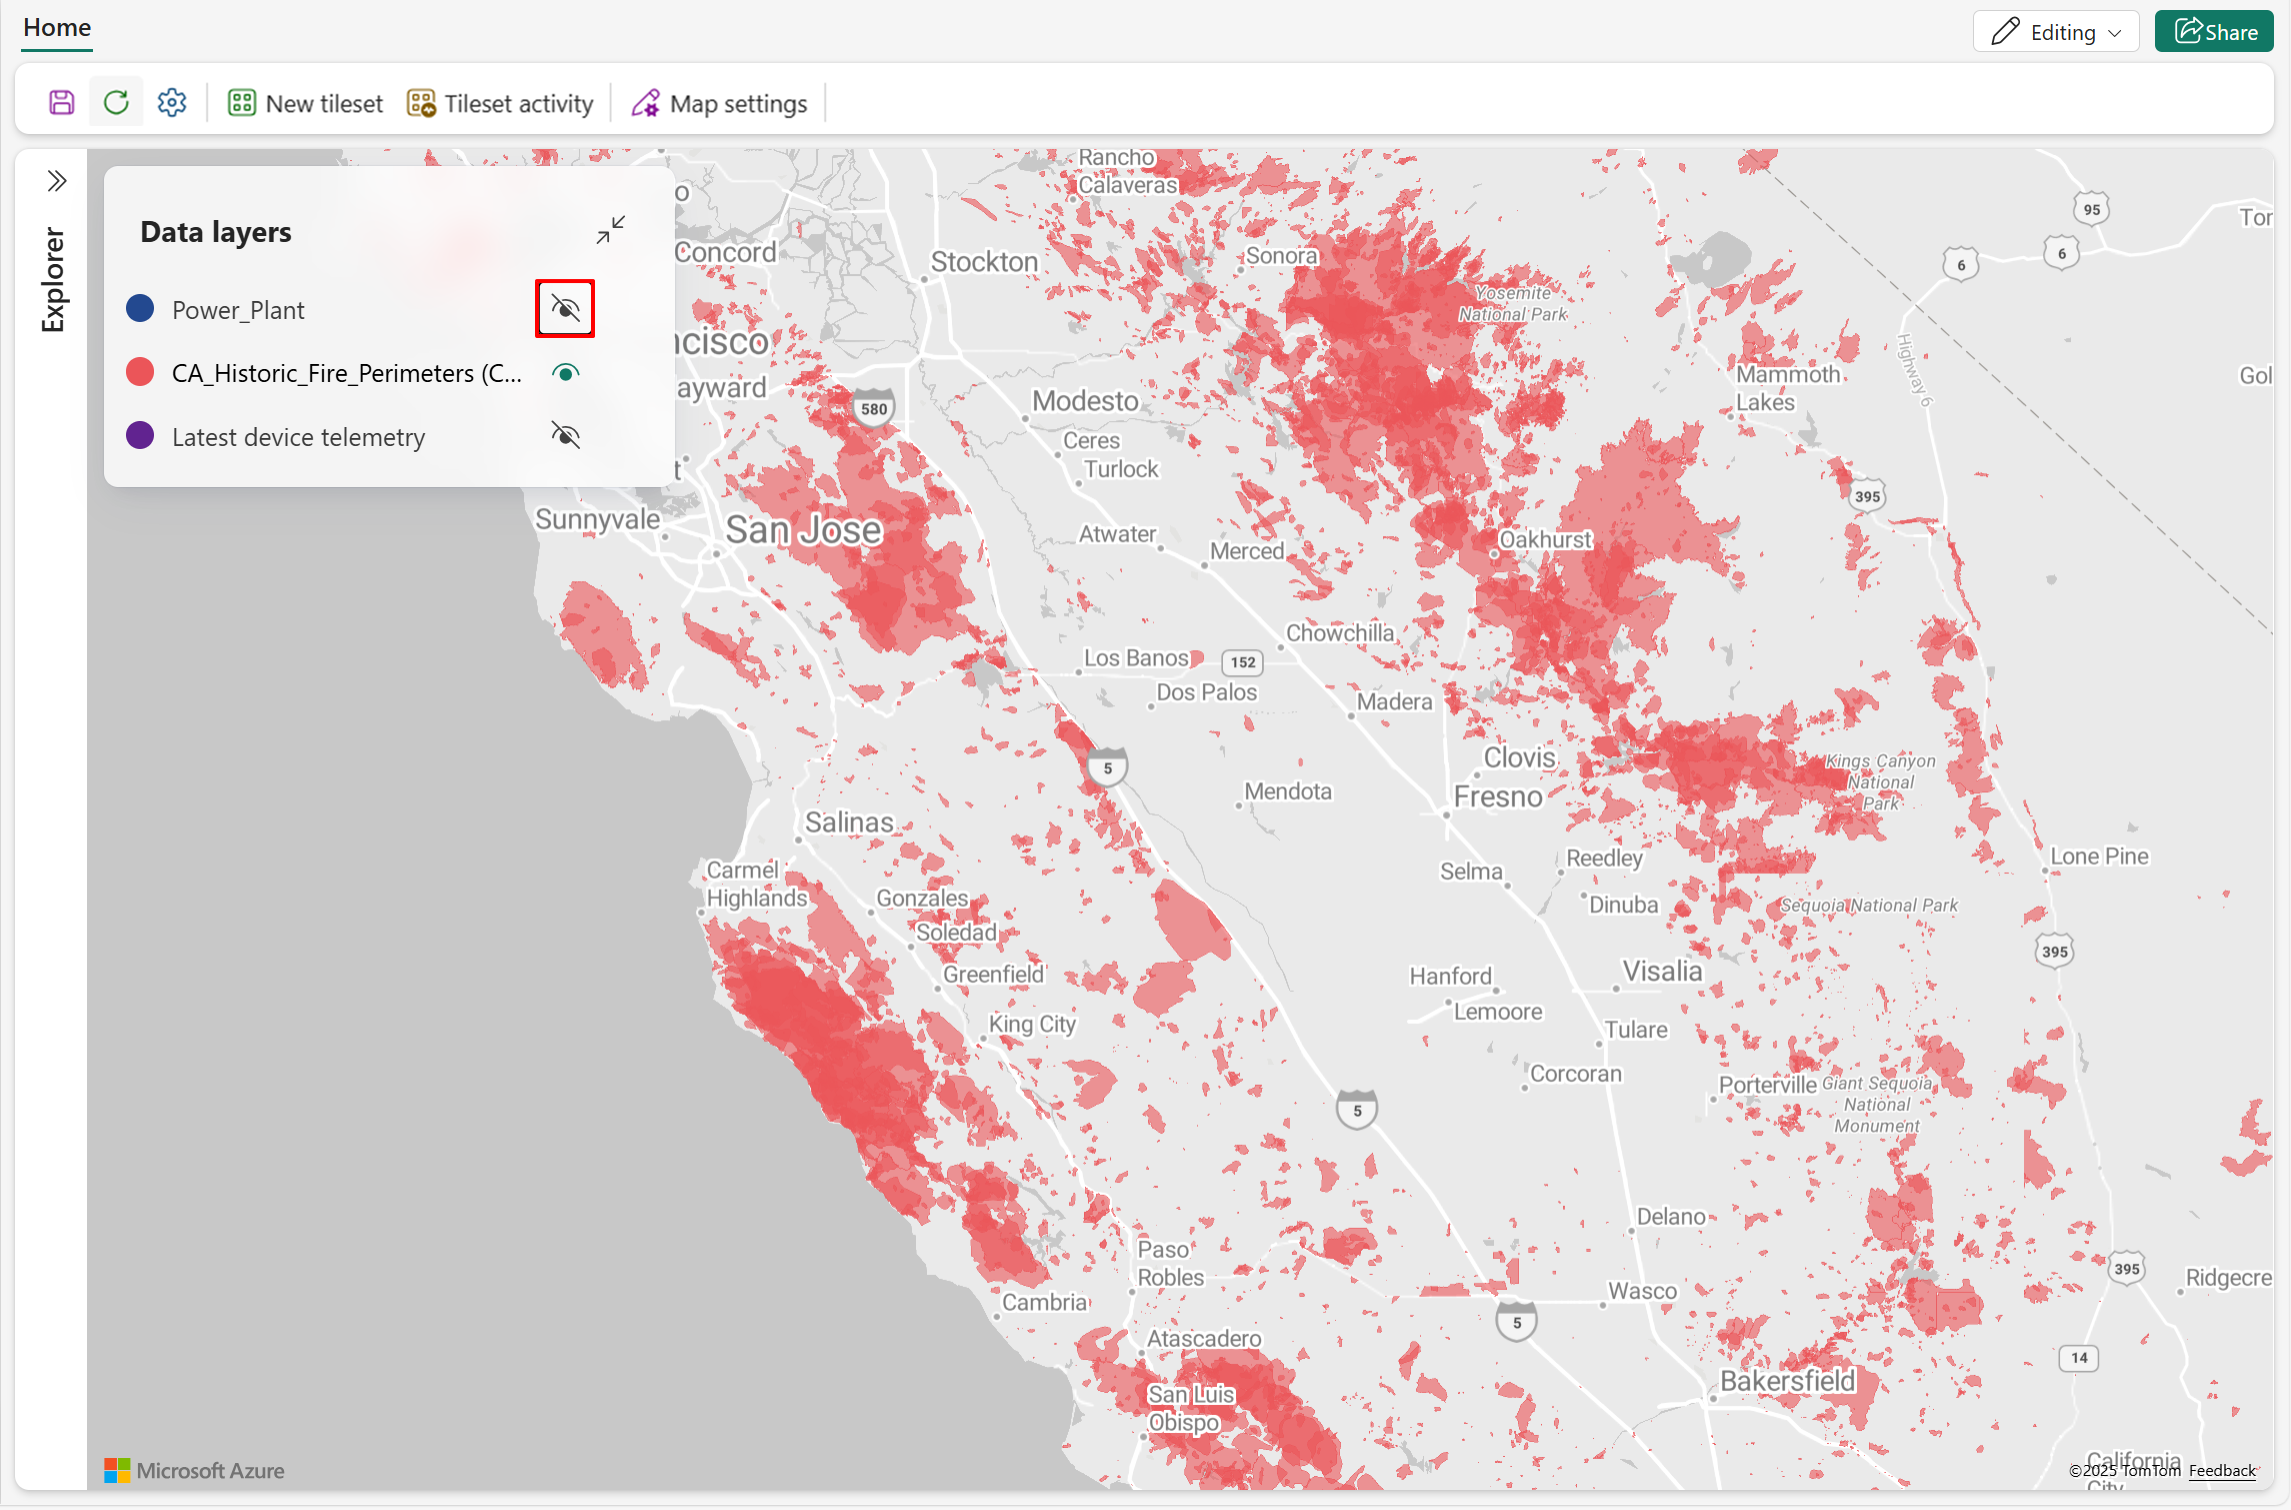
When a map contains multiple data layers, keeping them organized helps maintain clarity and usability. The Data layers pane provides tools to manage layers, including reordering, renaming, duplicating, and deleting layers. This article explains how to use these tools to keep your maps clean, maintainable, and easy to interpret.
Show or hide data layers
- Select the visibility icon to show a data layer.

- Select the visibility icon again to hide a data layer.


Reorder data layers
Drag a data layer to change its display order relative to other layers on the map.
The following screenshot demonstrates how to reorder data layers. To improve visual clarity in overlapping areas, move the Power Plant layer to the topmost position on the map. Placing point‑based layers above polygon layers makes overlapping features easier to see and interpret.

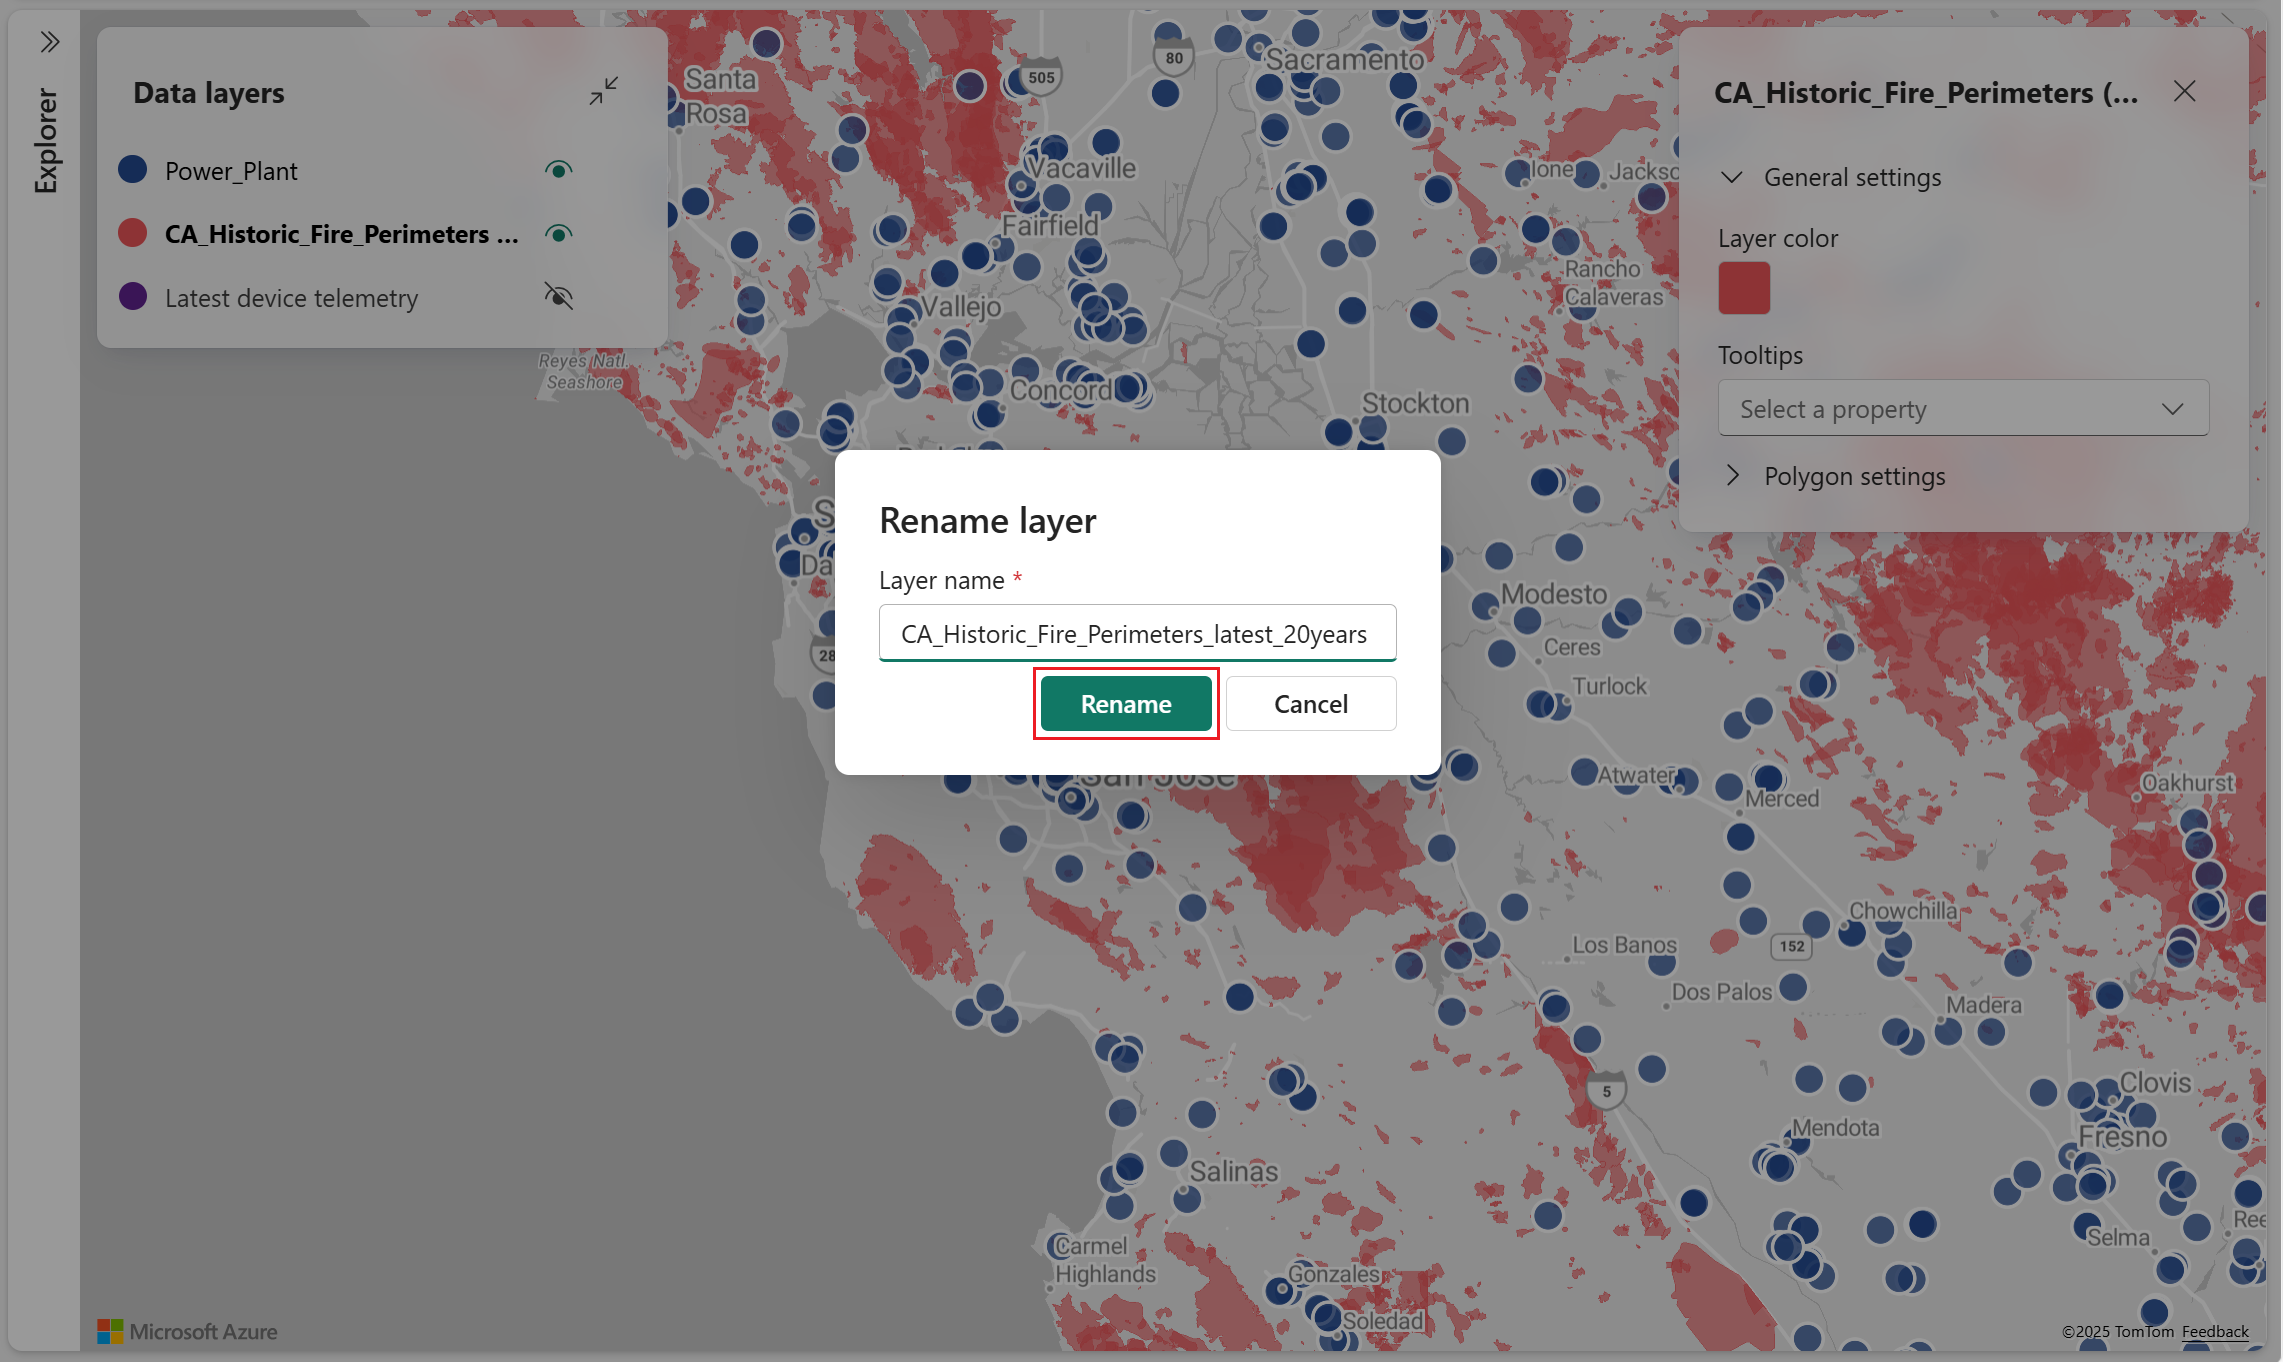
Rename data layers
By default, a data layer uses the name of the entity it was created from. You can change the name at the time of creation, and can also change it at any point after. The following steps show how to change the name of an existing data layer.
- Select the data layer to rename, then select Rename in the popup menu.
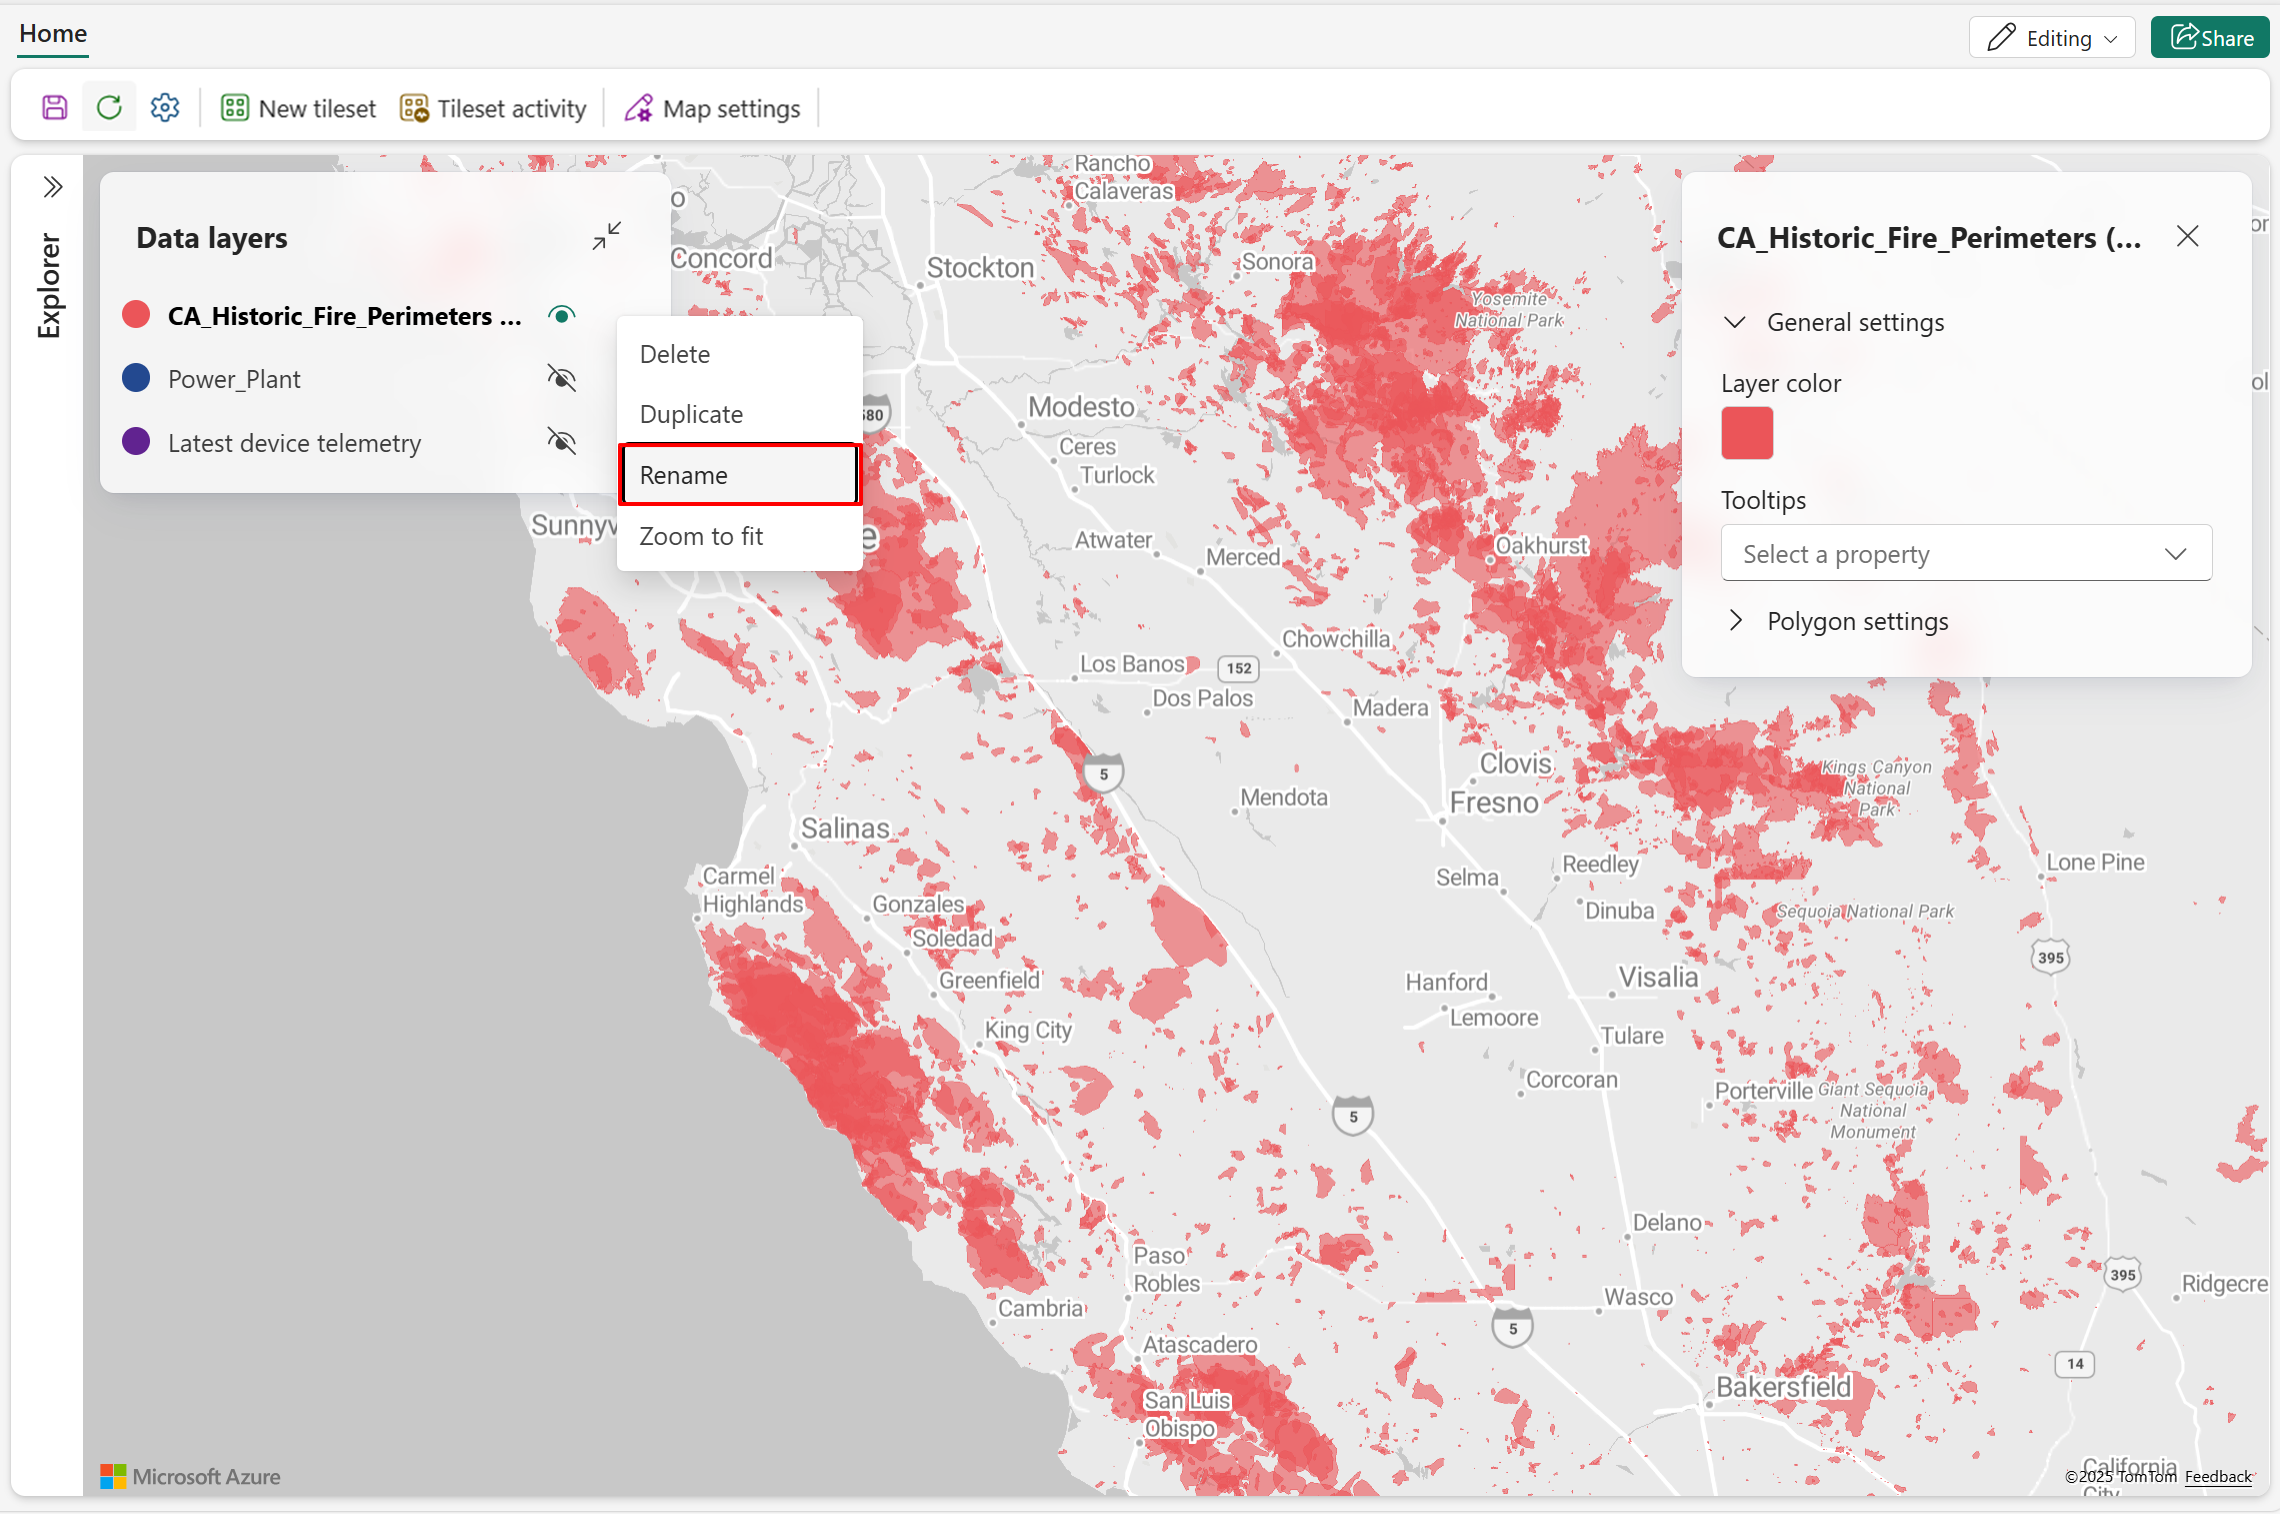
- Enter the new name, then select Rename.


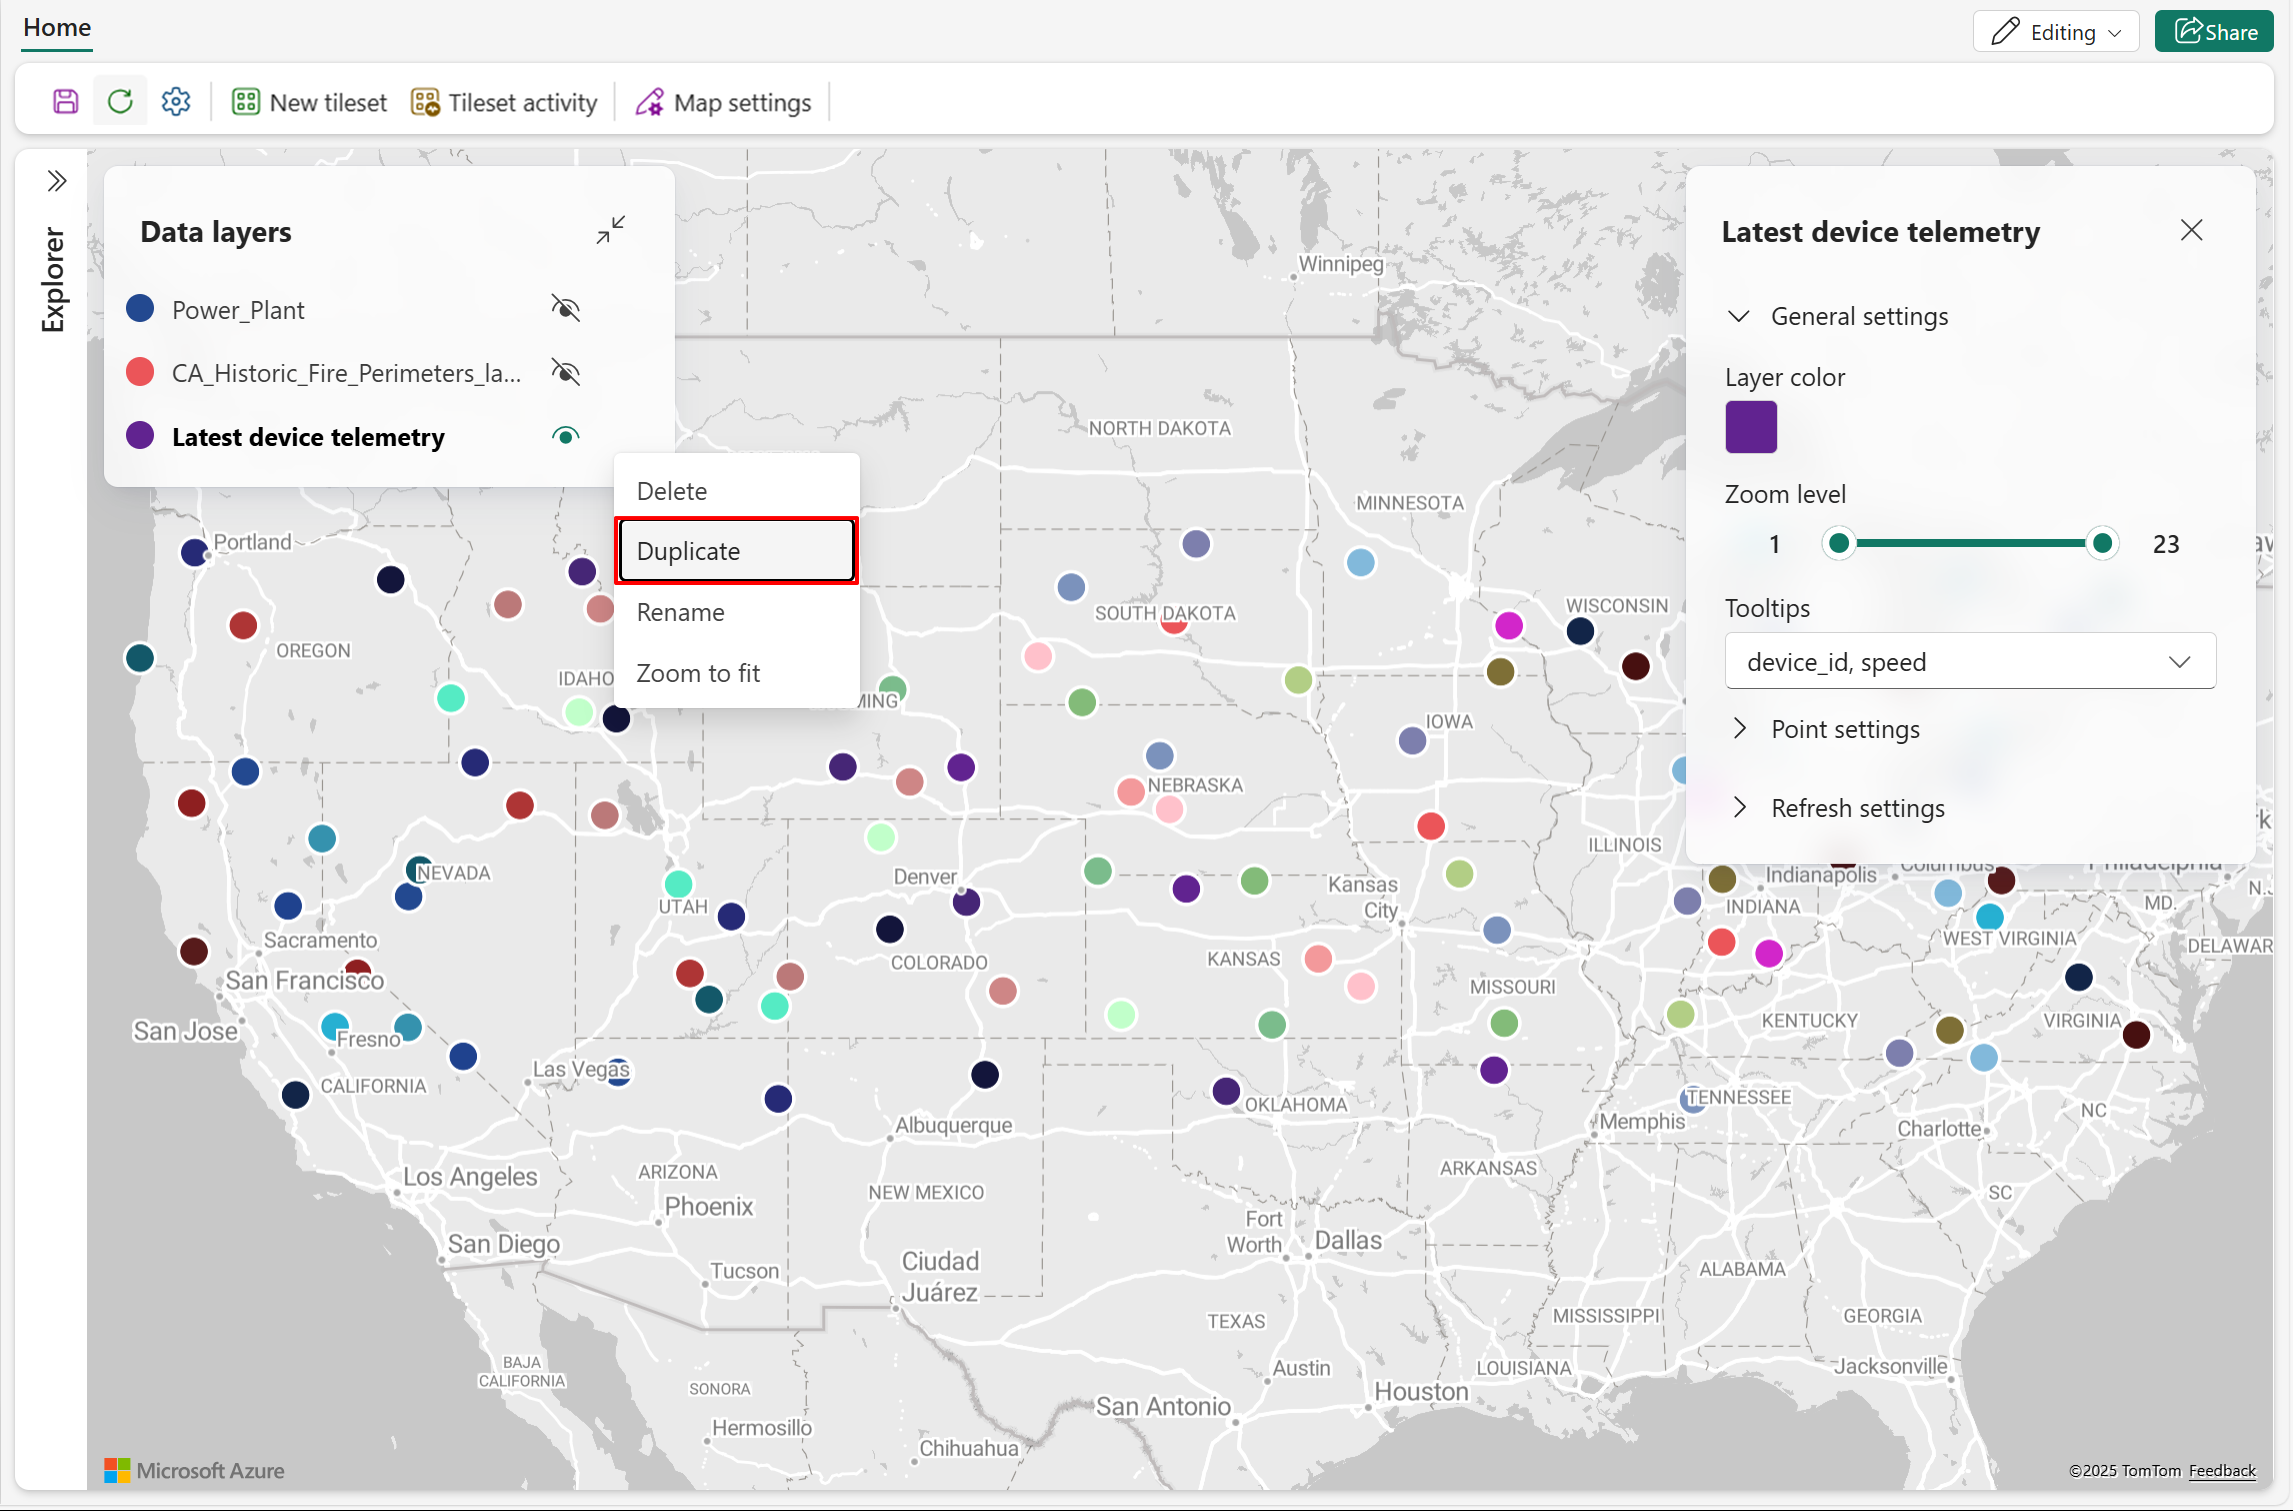
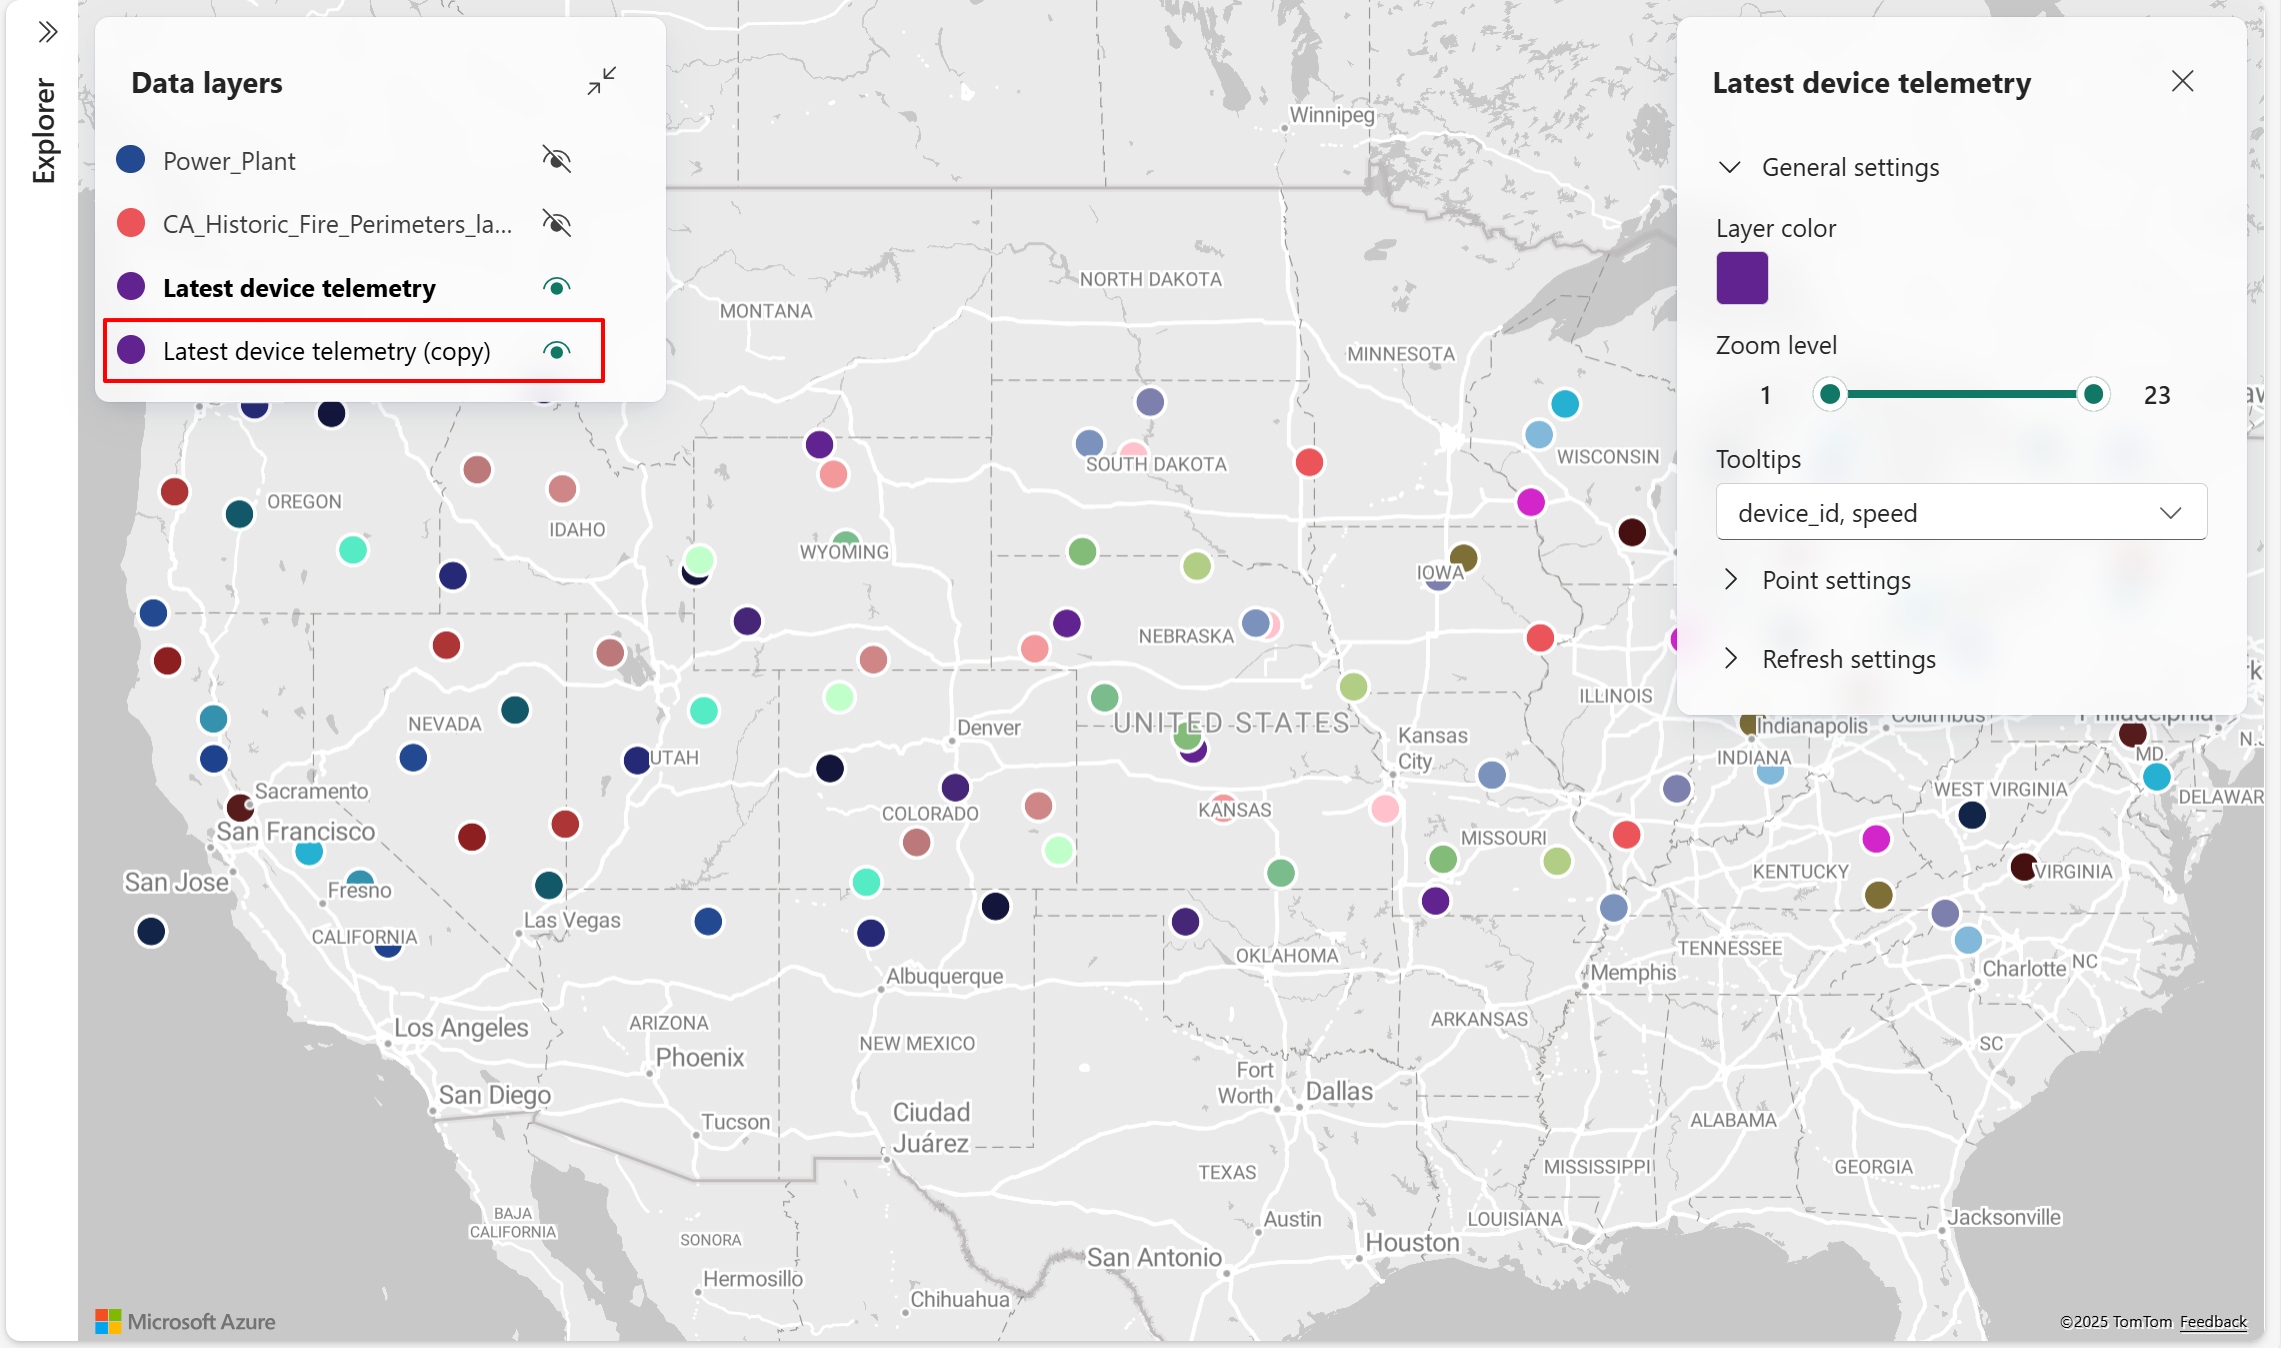
Duplicate data layers
A new data layer can be created by duplicating an existing one. After duplication, customize the layer's name and settings to highlight specific data dimensions or attributes.
Note
Enabling Clustering on a duplicated layer applies clustering to both layers because they reference the same dataset.
- Choose the data layer you want to duplicate, then select Duplicate in the popup menu.
- A new data layer is created with the same settings as the original, except the name includes "(copy)" to indicate duplication.


Zoom to fit
Zoom to fit centers the map view on the selected data layer and adjusts it to display the full extent of that layer, making it easier to locate and explore spatial data.
- Choose the data layer you want to view, then select Zoom to fit in the popup menu.
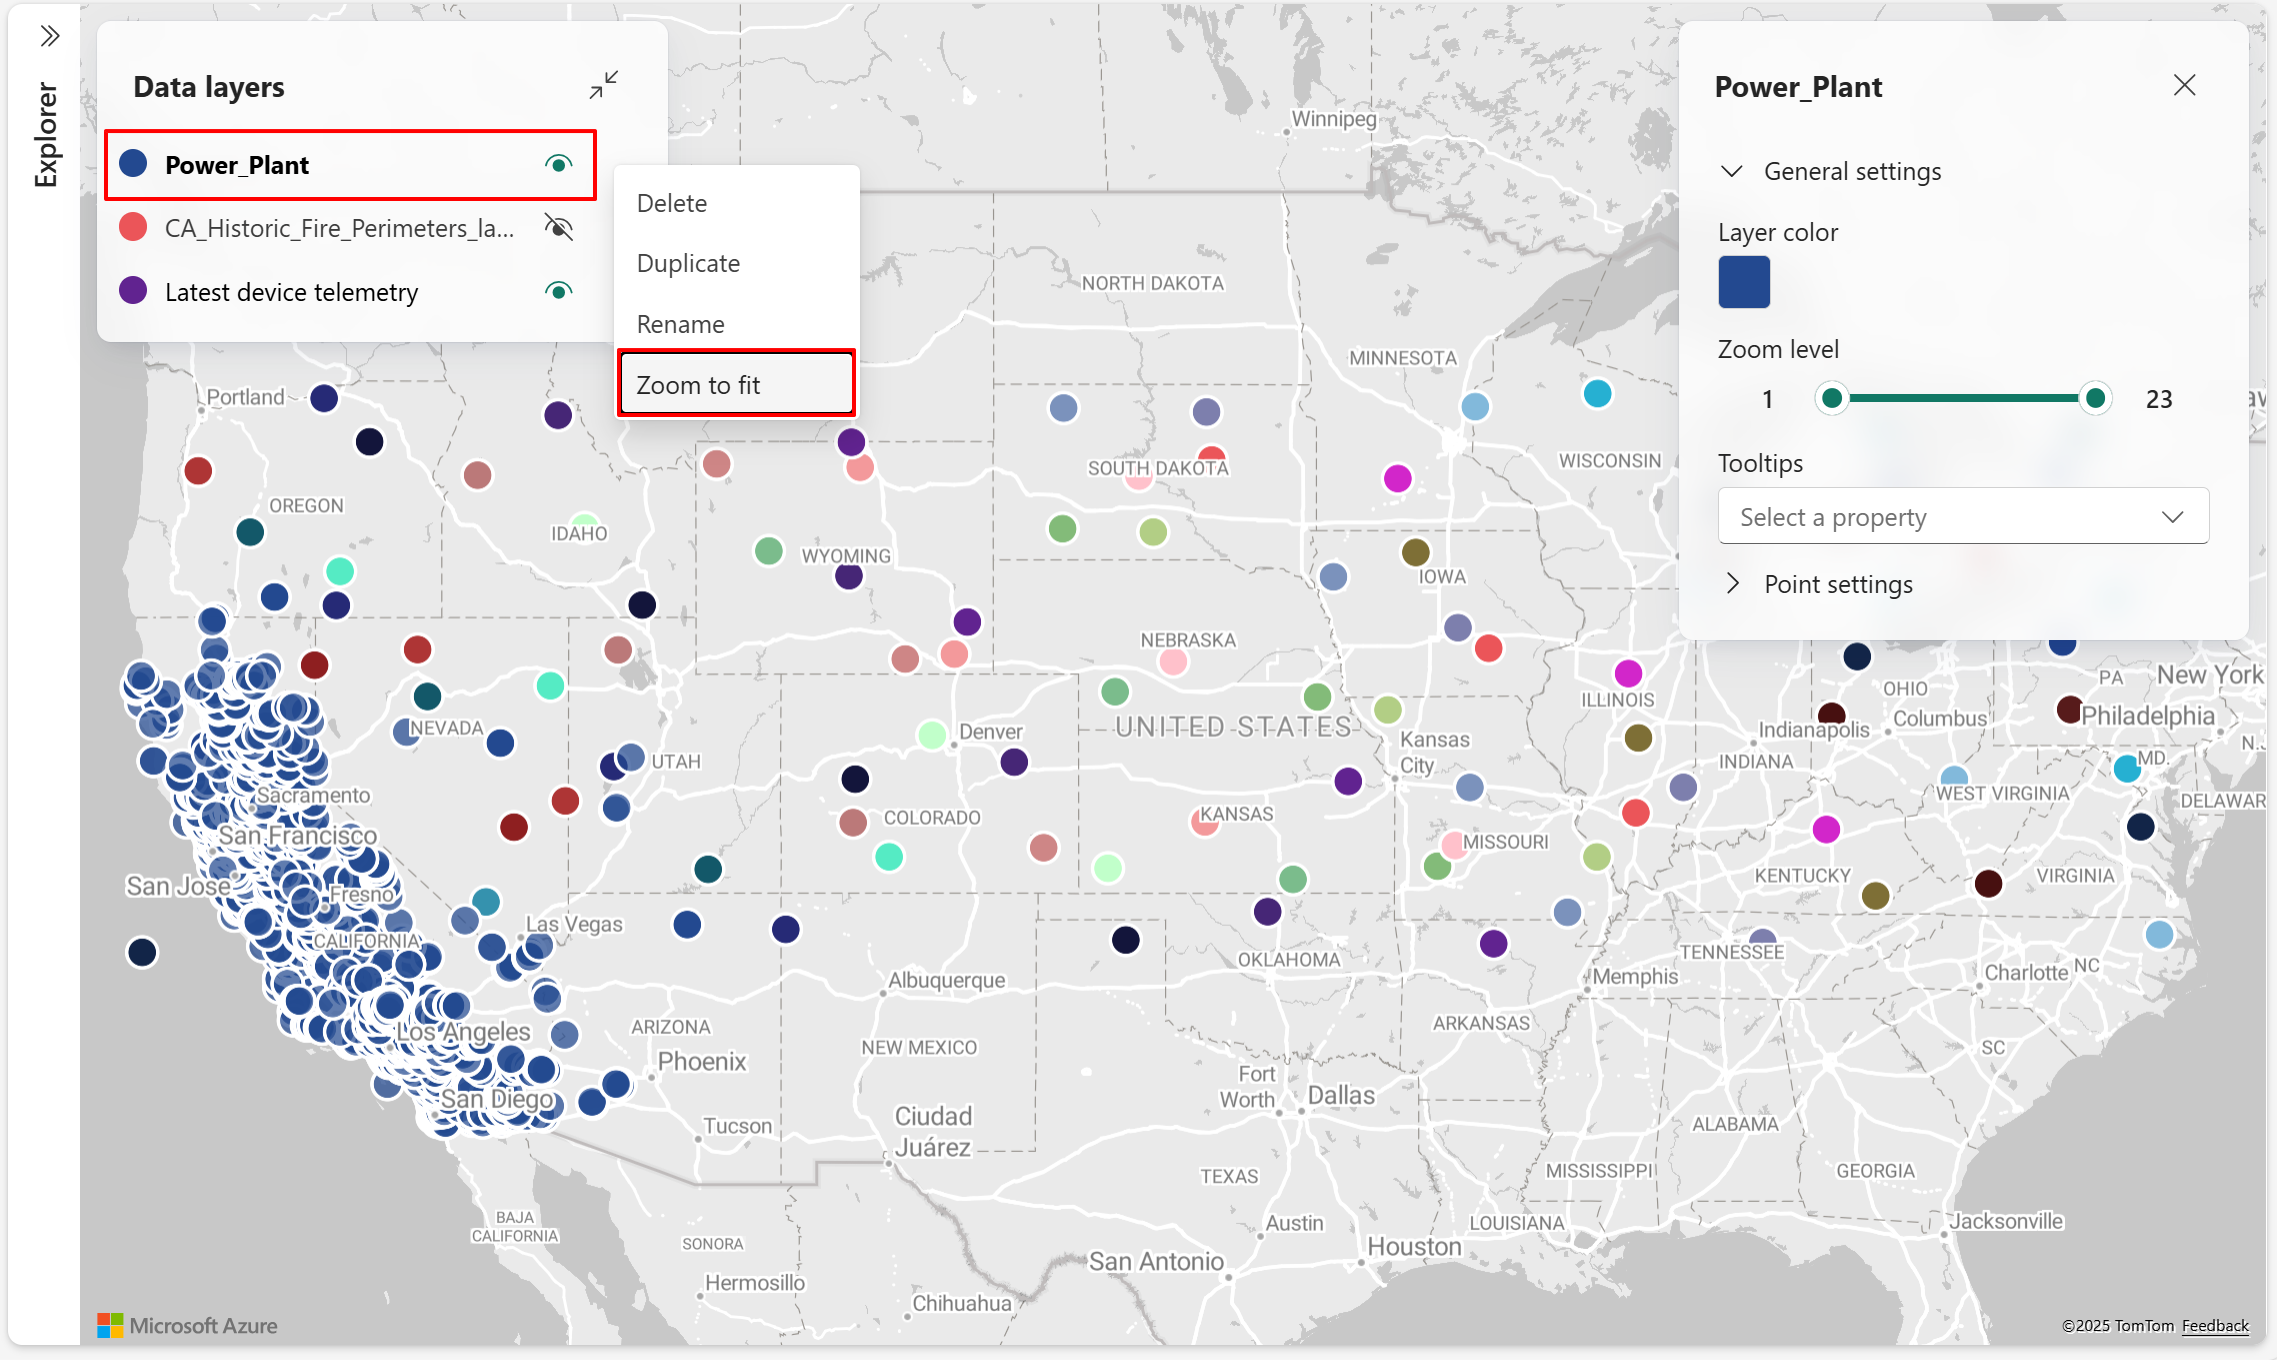
- The map view centers on the selected data layer and adjusts to display its full spatial extent.


Note
Zoom to fit is unavailable for PMTiles layers when bounds metadata is missing.
Delete data layers
Delete a data layer to permanently remove it from the map. The following steps show how to delete an existing data layer.
Choose the data layer you want to remove from the map, then select Delete in the popup menu.
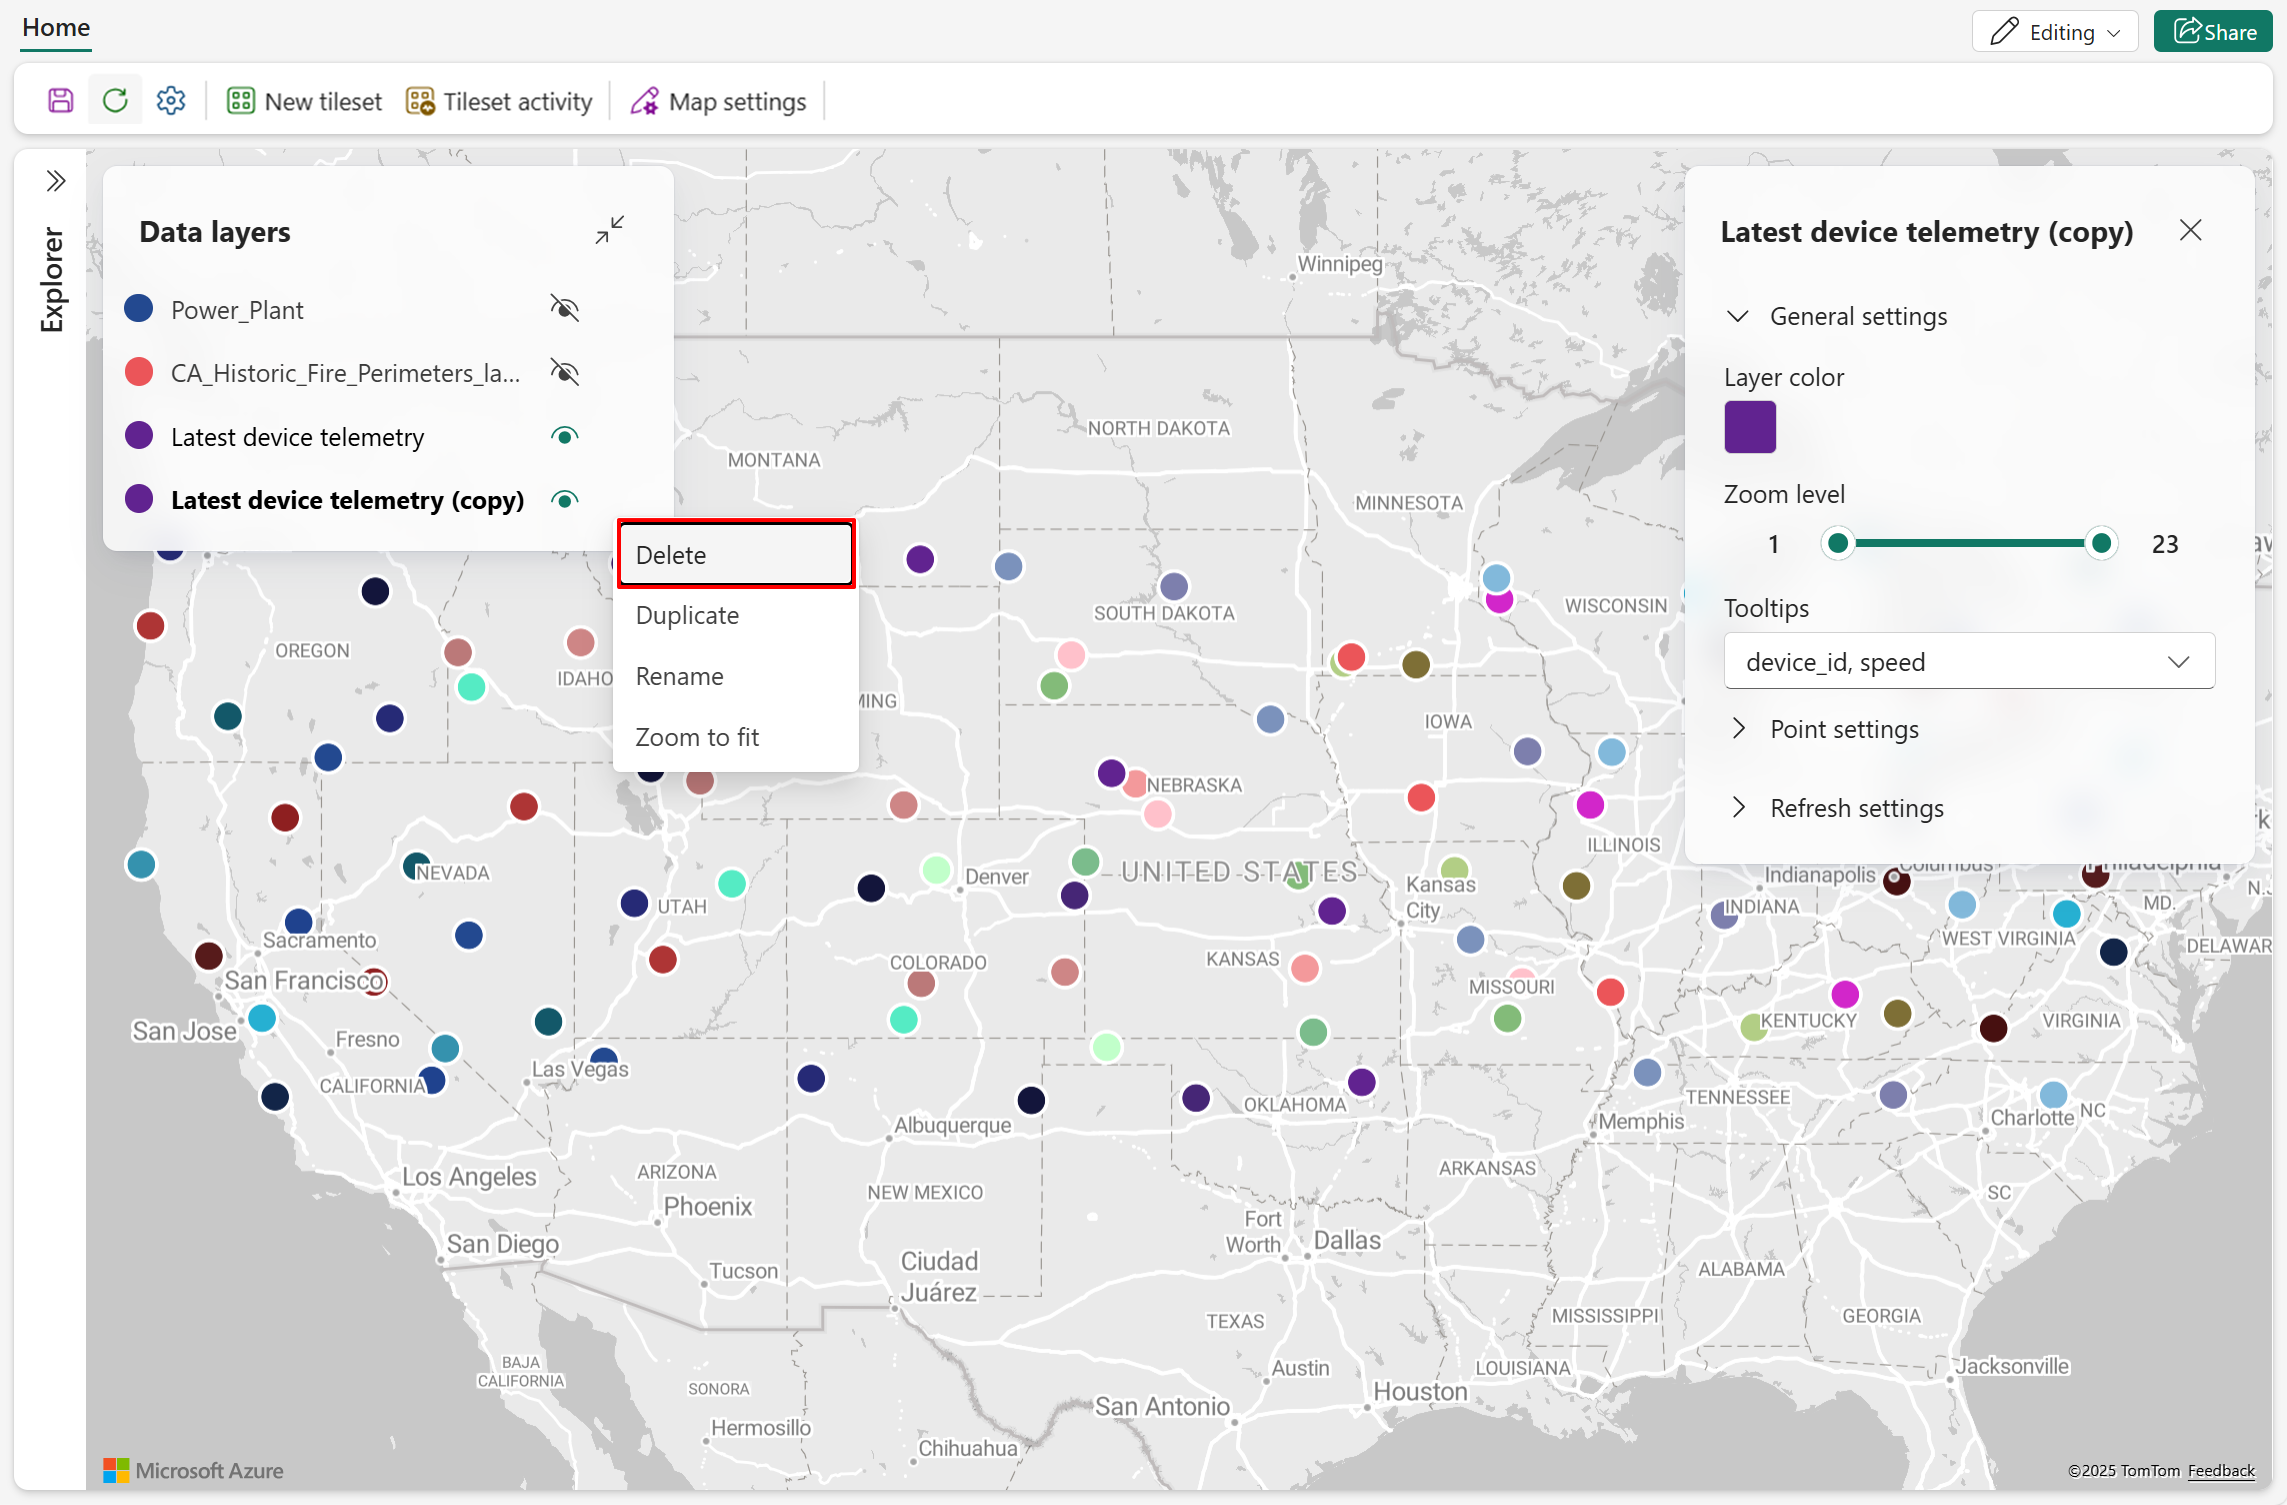
The layer is removed from both the map and the Data layers list.