Debug a packaged GDK game with Unity
This topic will teach you how to debug a GDK game with Unity.
Overview
Some GDK platform features do not work in the editor, only a packaged GDK build. In order to set breakpoints and debug your code in a packaged version of your GDK game, follow the instructions below.
How to debug
- In the Unity Editor's main menu, go to File > Build Settings... to open the Build Settings dialog.
- In the Build Settings dialog, make sure you have PC, Mac & Linux Standalone as the platform.
- Make sure the Development Build, Script Debugging checkboxes are checked. If you are using Unity 2018+, you can also check the Wait For Managed Debugger checkbox to debug your games startup code.

- Close the Build Settings dialog.
- In the Unity Editor's the main menu, select the GDK > Build and Run menu option.
- Click the Build and Run button to build and launch your game.
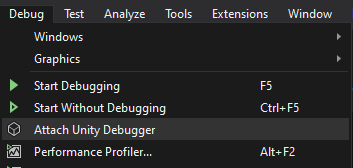
- Once your game has launched, go to Visual Studio and select Attach Unity Debugger.
- In the Select Unity Instance dialog, select the player.
- Now you can set breakpoints, inspect variables and other take other debugging actions.