Note
Access to this page requires authorization. You can try signing in or changing directories.
Access to this page requires authorization. You can try changing directories.
Overview
The <fileExtensions> element contains a collection of <add> elements that specify unique file name extensions that IIS will either allow or deny, depending on how each <add> element is defined. By using the <fileExtensions> element, you can fine-tune the types of content that your server will make available to Web clients.
For example, if you set the allowUnlisted attribute to false, all requests for files with extensions that are not contained in the list of allowed extensions will be denied. By using the <clear> element, you can clear the list of the file name extensions that have already been defined, then you can specify just the file name extensions that you want to allow.
Note
When request filtering blocks an HTTP request because of a denied file name extension, IIS 7 will return an HTTP 404 error to the client and log the following HTTP status with a unique substatus that identifies the reason that the request was denied:
| HTTP Substatus | Description |
|---|---|
404.7 |
File Extension Denied |
This substatus allows Web administrators to analyze their IIS logs and identify potential threats.
Compatibility
| Version | Notes |
|---|---|
| IIS 10.0 | The <fileExtensions> element was not modified in IIS 10.0. |
| IIS 8.5 | The <fileExtensions> element was not modified in IIS 8.5. |
| IIS 8.0 | The <fileExtensions> element was not modified in IIS 8.0. |
| IIS 7.5 | The <fileExtensions> element was not modified in IIS 7.5. |
| IIS 7.0 | The <fileExtensions> element of the <requestFiltering> collection was introduced in IIS 7.0. |
| IIS 6.0 | The <fileExtensions> element replaces the IIS 6.0 UrlScan [AllowExtensions] and [DenyExtensions] features. |
Setup
The default installation of IIS 7 and later includes the Request Filtering role service or feature. If the Request Filtering role service or feature is uninstalled, you can reinstall it using the following steps.
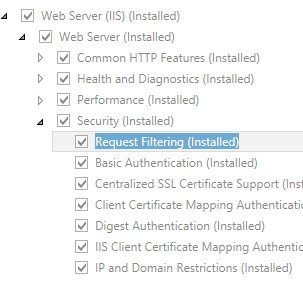
Windows Server 2012 or Windows Server 2012 R2
- On the taskbar, click Server Manager.
- In Server Manager, click the Manage menu, and then click Add Roles and Features.
- In the Add Roles and Features wizard, click Next. Select the installation type and click Next. Select the destination server and click Next.
- On the Server Roles page, expand Web Server (IIS), expand Web Server, expand Security, and then select Request Filtering. Click Next.
 .
. - On the Select features page, click Next.
- On the Confirm installation selections page, click Install.
- On the Results page, click Close.
Windows 8 or Windows 8.1
- On the Start screen, move the pointer all the way to the lower left corner, right-click the Start button, and then click Control Panel.
- In Control Panel, click Programs and Features, and then click Turn Windows features on or off.
- Expand Internet Information Services, expand World Wide Web Services, expand Security, and then select Request Filtering.
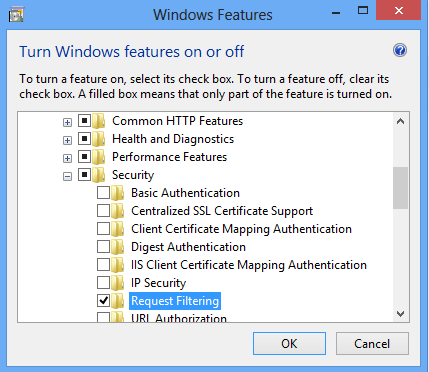
- Click OK.
- Click Close.
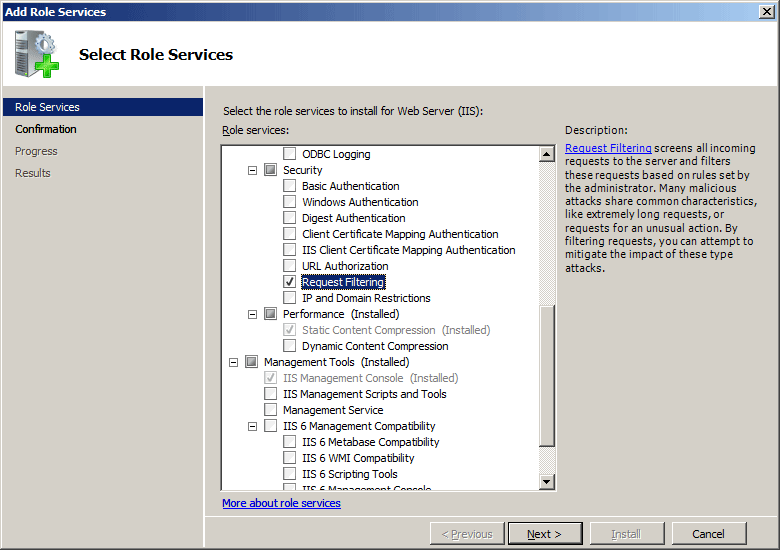
Windows Server 2008 or Windows Server 2008 R2
- On the taskbar, click Start, point to Administrative Tools, and then click Server Manager.
- In the Server Manager hierarchy pane, expand Roles, and then click Web Server (IIS).
- In the Web Server (IIS) pane, scroll to the Role Services section, and then click Add Role Services.
- On the Select Role Services page of the Add Role Services Wizard, select Request Filtering, and then click Next.
- On the Confirm Installation Selections page, click Install.
- On the Results page, click Close.
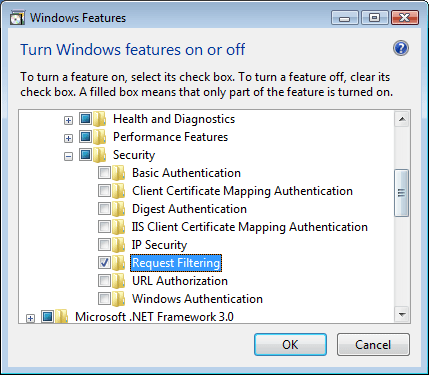
Windows Vista or Windows 7
- On the taskbar, click Start, and then click Control Panel.
- In Control Panel, click Programs and Features, and then click Turn Windows Features on or off.
- Expand Internet Information Services, then World Wide Web Services, and then Security.
- Select Request Filtering, and then click OK.
How To
Note for IIS 7.0 users: Some of the steps in this section may require that you install the Microsoft Administration Pack for IIS 7.0, which includes a user interface for request filtering. To install the Microsoft Administration Pack for IIS 7.0, please see the following URL:
How to deny access to a specific file name extension
Open Internet Information Services (IIS) Manager:
If you are using Windows Server 2012 or Windows Server 2012 R2:
- On the taskbar, click Server Manager, click Tools, and then click Internet Information Services (IIS) Manager.
If you are using Windows 8 or Windows 8.1:
- Hold down the Windows key, press the letter X, and then click Control Panel.
- Click Administrative Tools, and then double-click Internet Information Services (IIS) Manager.
If you are using Windows Server 2008 or Windows Server 2008 R2:
- On the taskbar, click Start, point to Administrative Tools, and then click Internet Information Services (IIS) Manager.
If you are using Windows Vista or Windows 7:
- On the taskbar, click Start, and then click Control Panel.
- Double-click Administrative Tools, and then double-click Internet Information Services (IIS) Manager.
In the Connections pane, go to the connection, site, application, or directory for which you want to modify your request filtering settings.
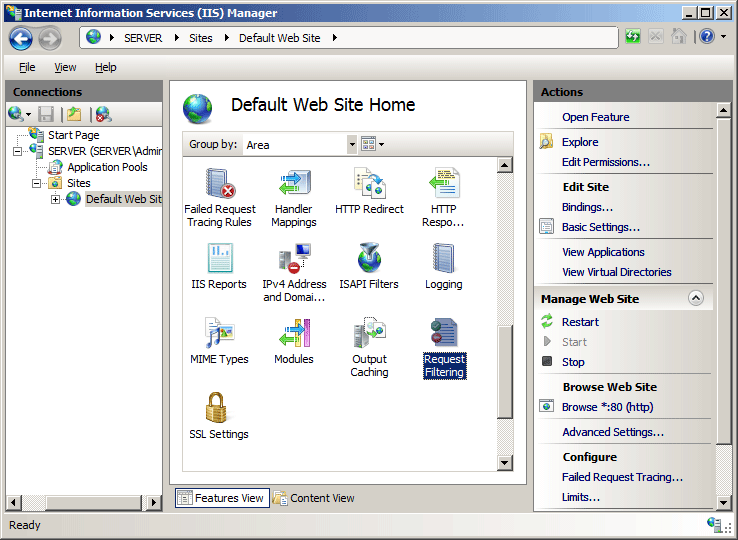
In the Home pane, double-click Request Filtering.

In the Request Filtering pane, click the File Name Extensions tab, and then click Deny File Name Extension... in the Actions pane.
In the Deny File Name Extension dialog box, enter the file name extension that you wish to block, and then click OK.
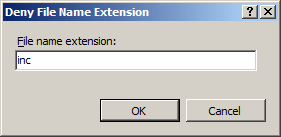 For example, to prevent access to files with a file name extension of .inc, you would enter "inc" in the dialog box.
Configuration
Attributes
| Attribute | Description |
|---|---|
allowUnlisted |
Optional Boolean attribute. Specifies whether the Web server should process files that have unlisted file name extensions. If you set this attribute to true, you must list all file name extensions you want to deny. If you set this attribute to false, you must list all file name extensions you want to allow. The default value is true. |
applyToWebDAV |
Optional Boolean attribute. Specifies whether these settings should also apply to WebDAV requests. |
Child Elements
| Element | Description |
|---|---|
add |
Optional element. Adds a file name extension to the collection of file name extensions. |
clear |
Optional element. Removes all references to file name extensions from the <fileExtensions> collection. |
remove |
Optional element. Removes a reference to a file name extension from the <fileExtensions> collection. |
Configuration Sample
The following example Web.config file will configure two options. It will configure request filtering to allow WebDAV access to all file name extensions, and it will configure IIS to deny access to files with a file name extension of .inc, which are sometimes used as include files for applications.
<configuration>
   <system.webServer>
      <security>
         <requestFiltering>
            <fileExtensions applyToWebDAV="false">
               <add fileExtension=".inc" allowed="false" />
            </fileExtensions>
         </requestFiltering>
      </security>
   </system.webServer>
</configuration>
Sample Code
The following code samples will add an entry to the list of file name extensions for the Default Web Site that will deny access to all files with an extension of .inc, which are sometimes used as include files for applications, and they will configure request filtering to allow WebDAV access to hidden segments.
Note
To use the same samples to allow access, you would set the value of the allowed attribute to true instead of false in each of these examples.
AppCmd.exe
appcmd.exe set config "Default Web Site" -section:system.webServer/security/requestFiltering /fileExtensions.applyToWebDAV:"False"

appcmd.exe set config "Default Web Site" -section:system.webServer/security/requestFiltering /+"fileExtensions.[fileExtension='.inc',allowed='False']"
PowerShell
Start-IISCommitDelay

$fileExtensions = Get-IISConfigSection -CommitPath 'Default Web Site' -SectionPath 'system.webServer/security/requestFiltering' | Get-IISConfigCollection -CollectionName 'fileExtensions'

New-IISConfigCollectionElement -ConfigCollection $fileExtensions -ConfigAttribute @{ 'fileExtension' = '.inc'; 'allowed' = $false } -AddAt 0

Set-IISConfigAttributeValue -ConfigElement $fileExtensions -AttributeName 'applyToWebDAV' -AttributeValue $false

Stop-IISCommitDelay
C#
using System;
using System.Text;
using Microsoft.Web.Administration;

internal static class Sample
{
   private static void Main()
   {
      using (ServerManager serverManager = new ServerManager())
      {
         Configuration config = serverManager.GetWebConfiguration("Default Web Site");
         ConfigurationSection requestFilteringSection = config.GetSection("system.webServer/security/requestFiltering");

         ConfigurationElement fileExtensionsElement = requestFilteringSection.GetChildElement("fileExtensions");
         fileExtensionsElement["applyToWebDAV"] = false;
         ConfigurationElementCollection fileExtensionsCollection = fileExtensionsElement.GetCollection();

         ConfigurationElement addElement = fileExtensionsCollection.CreateElement("add");
         addElement["fileExtension"] = @"inc";
         addElement["allowed"] = false;
         fileExtensionsCollection.Add(addElement);

         serverManager.CommitChanges();
      }
   }
}
VB.NET
Imports System
Imports System.Text
Imports Microsoft.Web.Administration

Module Sample

   Sub Main()
      Dim serverManager As ServerManager = New ServerManager
      Dim config As Configuration = serverManager.GetWebConfiguration("Default Web Site")
      Dim requestFilteringSection As ConfigurationSection = config.GetSection("system.webServer/security/requestFiltering")

      Dim fileExtensionsElement As ConfigurationElement = requestFilteringSection.GetChildElement("fileExtensions")
      fileExtensionsElement("applyToWebDAV") = False
      Dim fileExtensionsCollection As ConfigurationElementCollection = fileExtensionsElement.GetCollection

      Dim addElement As ConfigurationElement = fileExtensionsCollection.CreateElement("add")
      addElement("fileExtension") = "inc"
      addElement("allowed") = False
      fileExtensionsCollection.Add(addElement)

      serverManager.CommitChanges()
   End Sub

End Module
JavaScript
var adminManager = new ActiveXObject('Microsoft.ApplicationHost.WritableAdminManager');
adminManager.CommitPath = "MACHINE/WEBROOT/APPHOST/Default Web Site";
var requestFilteringSection = adminManager.GetAdminSection("system.webServer/security/requestFiltering", "MACHINE/WEBROOT/APPHOST/Default Web Site");

var fileExtensionsElement = requestFilteringSection.ChildElements.Item("fileExtensions");
fileExtensionsElement.Properties.Item("applyToWebDAV").Value = false;
var fileExtensionsCollection = fileExtensionsElement.Collection;

var addElement = fileExtensionsCollection.CreateNewElement("add");
addElement.Properties.Item("fileExtension").Value = "inc";
addElement.Properties.Item("allowed").Value = false;
fileExtensionsCollection.AddElement(addElement);

adminManager.CommitChanges();
VBScript
Set adminManager = WScript.CreateObject("Microsoft.ApplicationHost.WritableAdminManager")
adminManager.CommitPath = "MACHINE/WEBROOT/APPHOST/Default Web Site"
Set requestFilteringSection = adminManager.GetAdminSection("system.webServer/security/requestFiltering", "MACHINE/WEBROOT/APPHOST/Default Web Site")

Set fileExtensionsElement = requestFilteringSection.ChildElements.Item("fileExtensions")
fileExtensionsElement.Properties.Item("applyToWebDAV").Value = False
Set fileExtensionsCollection = fileExtensionsElement.Collection

Set addElement = fileExtensionsCollection.CreateNewElement("add")
addElement.Properties.Item("fileExtension").Value = "inc"
addElement.Properties.Item("allowed").Value = False
fileExtensionsCollection.AddElement(addElement)

adminManager.CommitChanges()