Note
Access to this page requires authorization. You can try signing in or changing directories.
Access to this page requires authorization. You can try changing directories.
Important
Some or all of this functionality is available as part of a preview release. The content and the functionality are subject to change.
You can customize Salesforce data ingestion by adding new tables from Salesforce or by adding new columns to existing tables. This article provides guidance on both scenarios.
Add new tables from Salesforce
To add new tables, you must modify the ingestion pipeline and update the merge logic.
Modify the ingestion pipeline
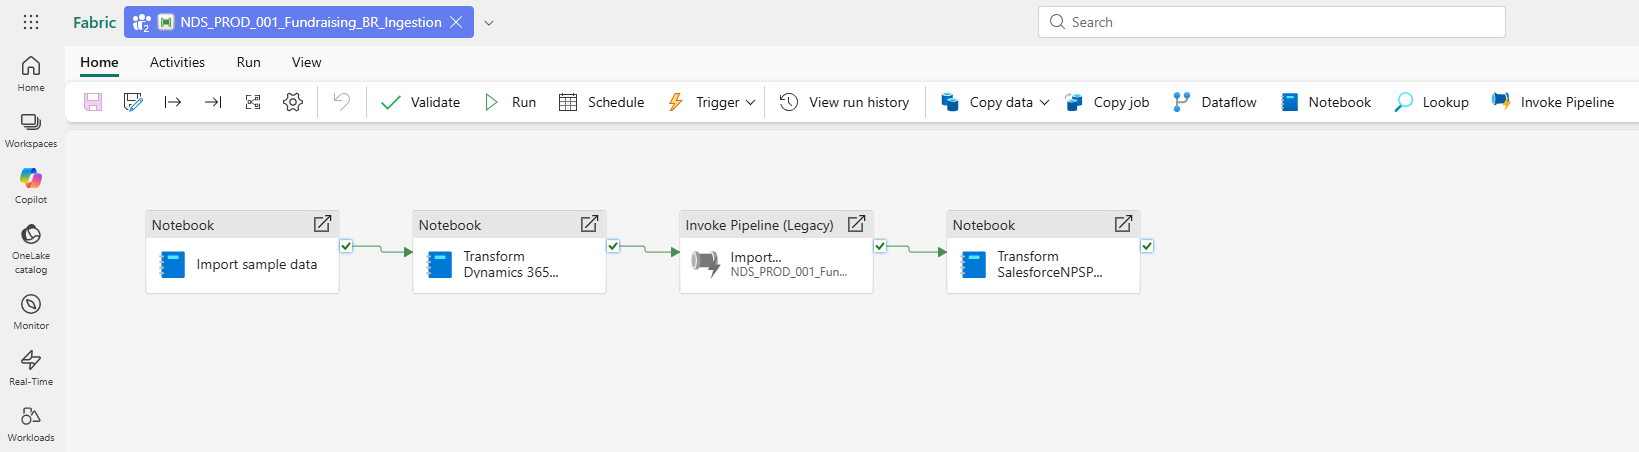
Open the Fundraising_SalesforceNPSP_BR_Load pipeline. This pipeline handles the incremental loading of Salesforce data into the bronze layer.
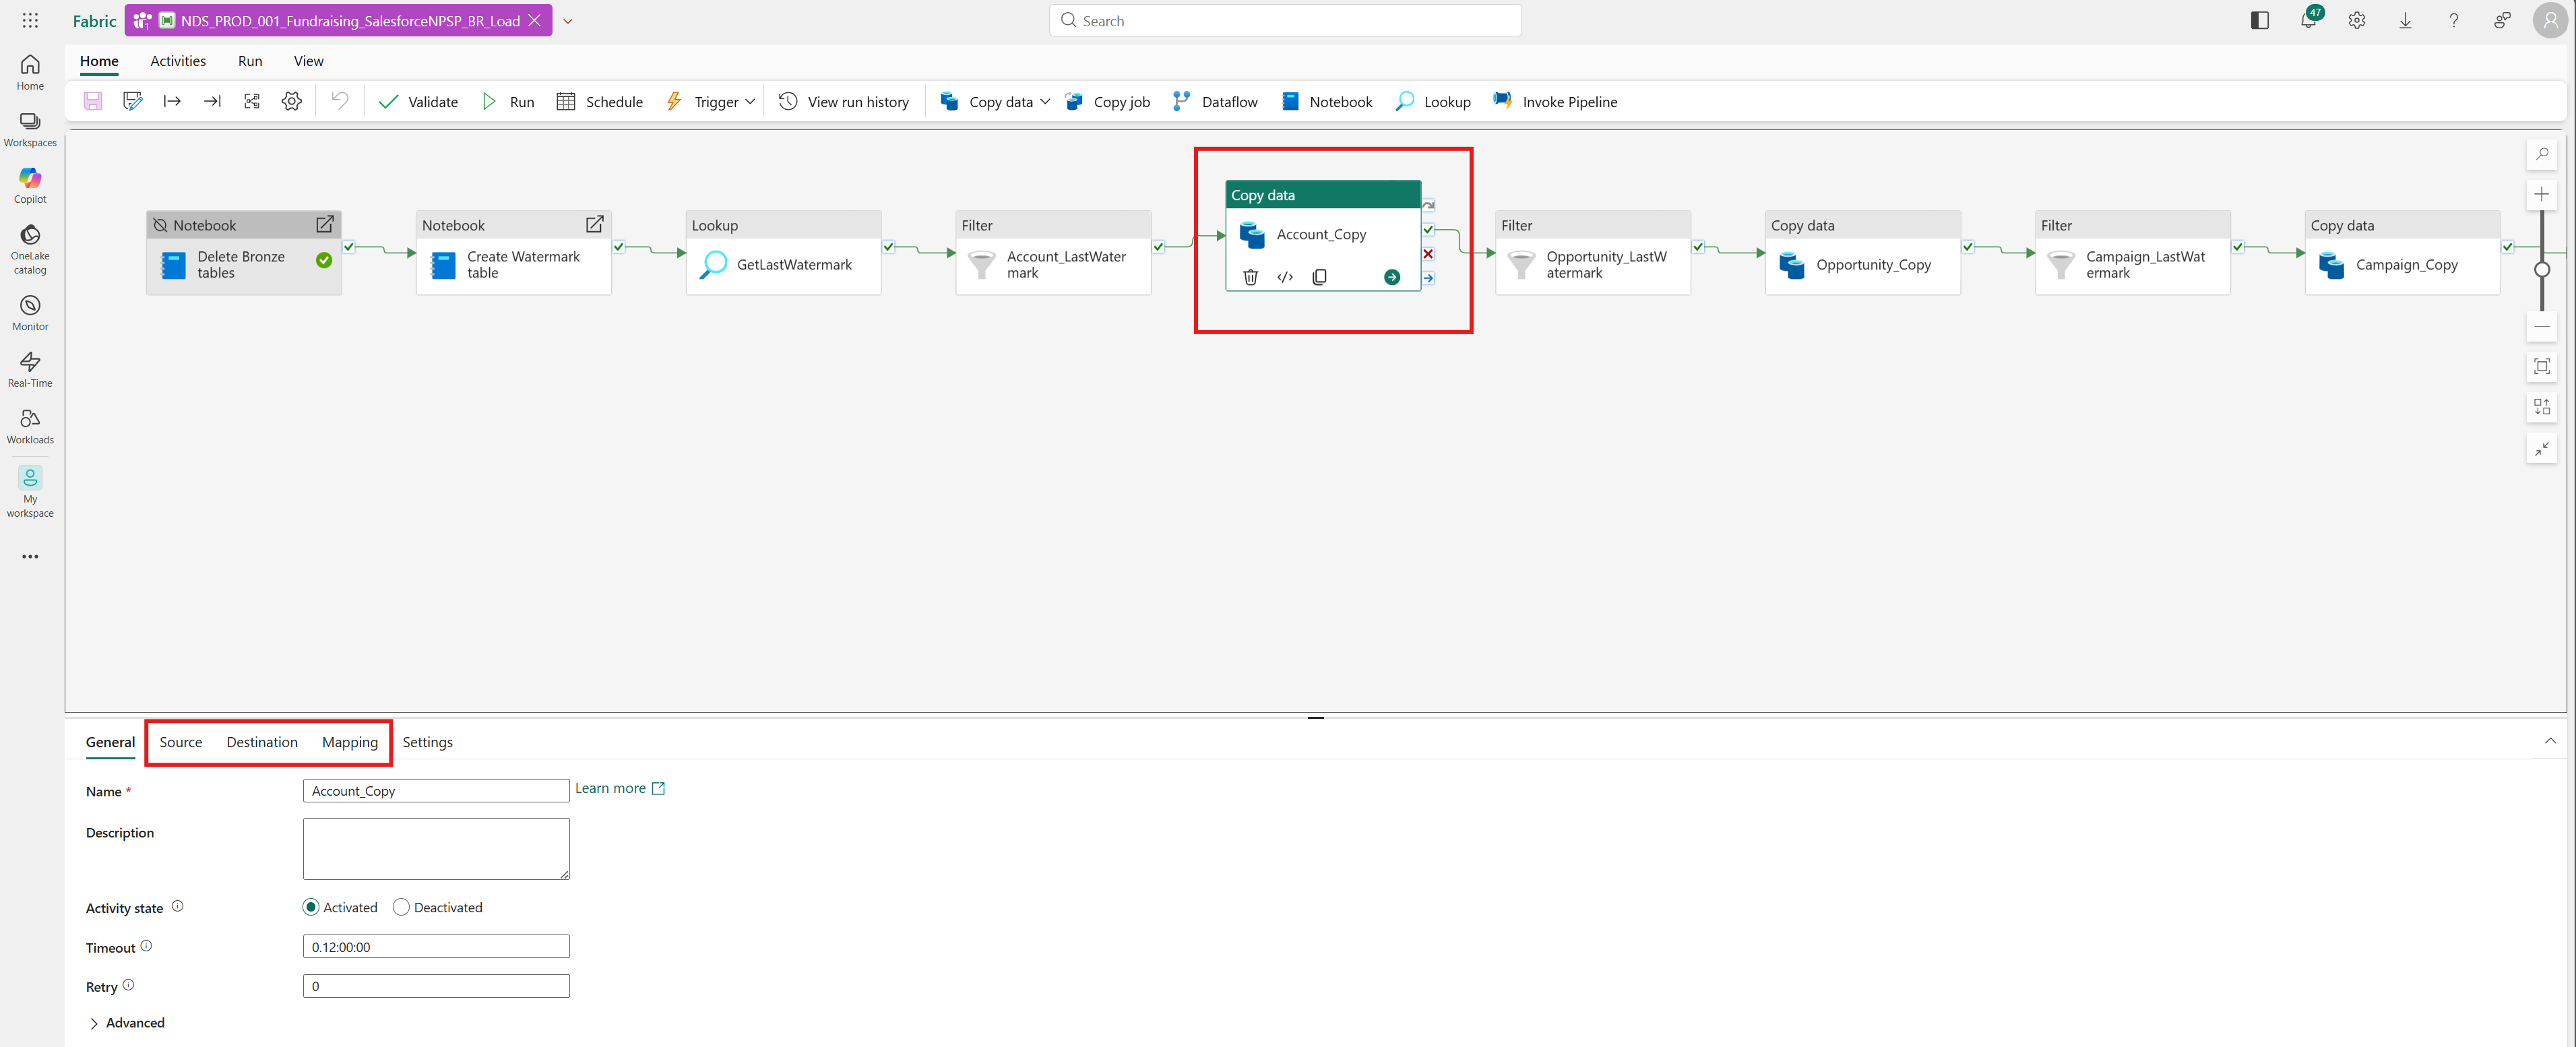
Add a new Copy data activity for each extra table.
- Follow the same structure used for existing tables.
- Update the source, destination, and mapping for the newly added Copy Activity.
- Ensure that the source and sink datasets are properly configured.
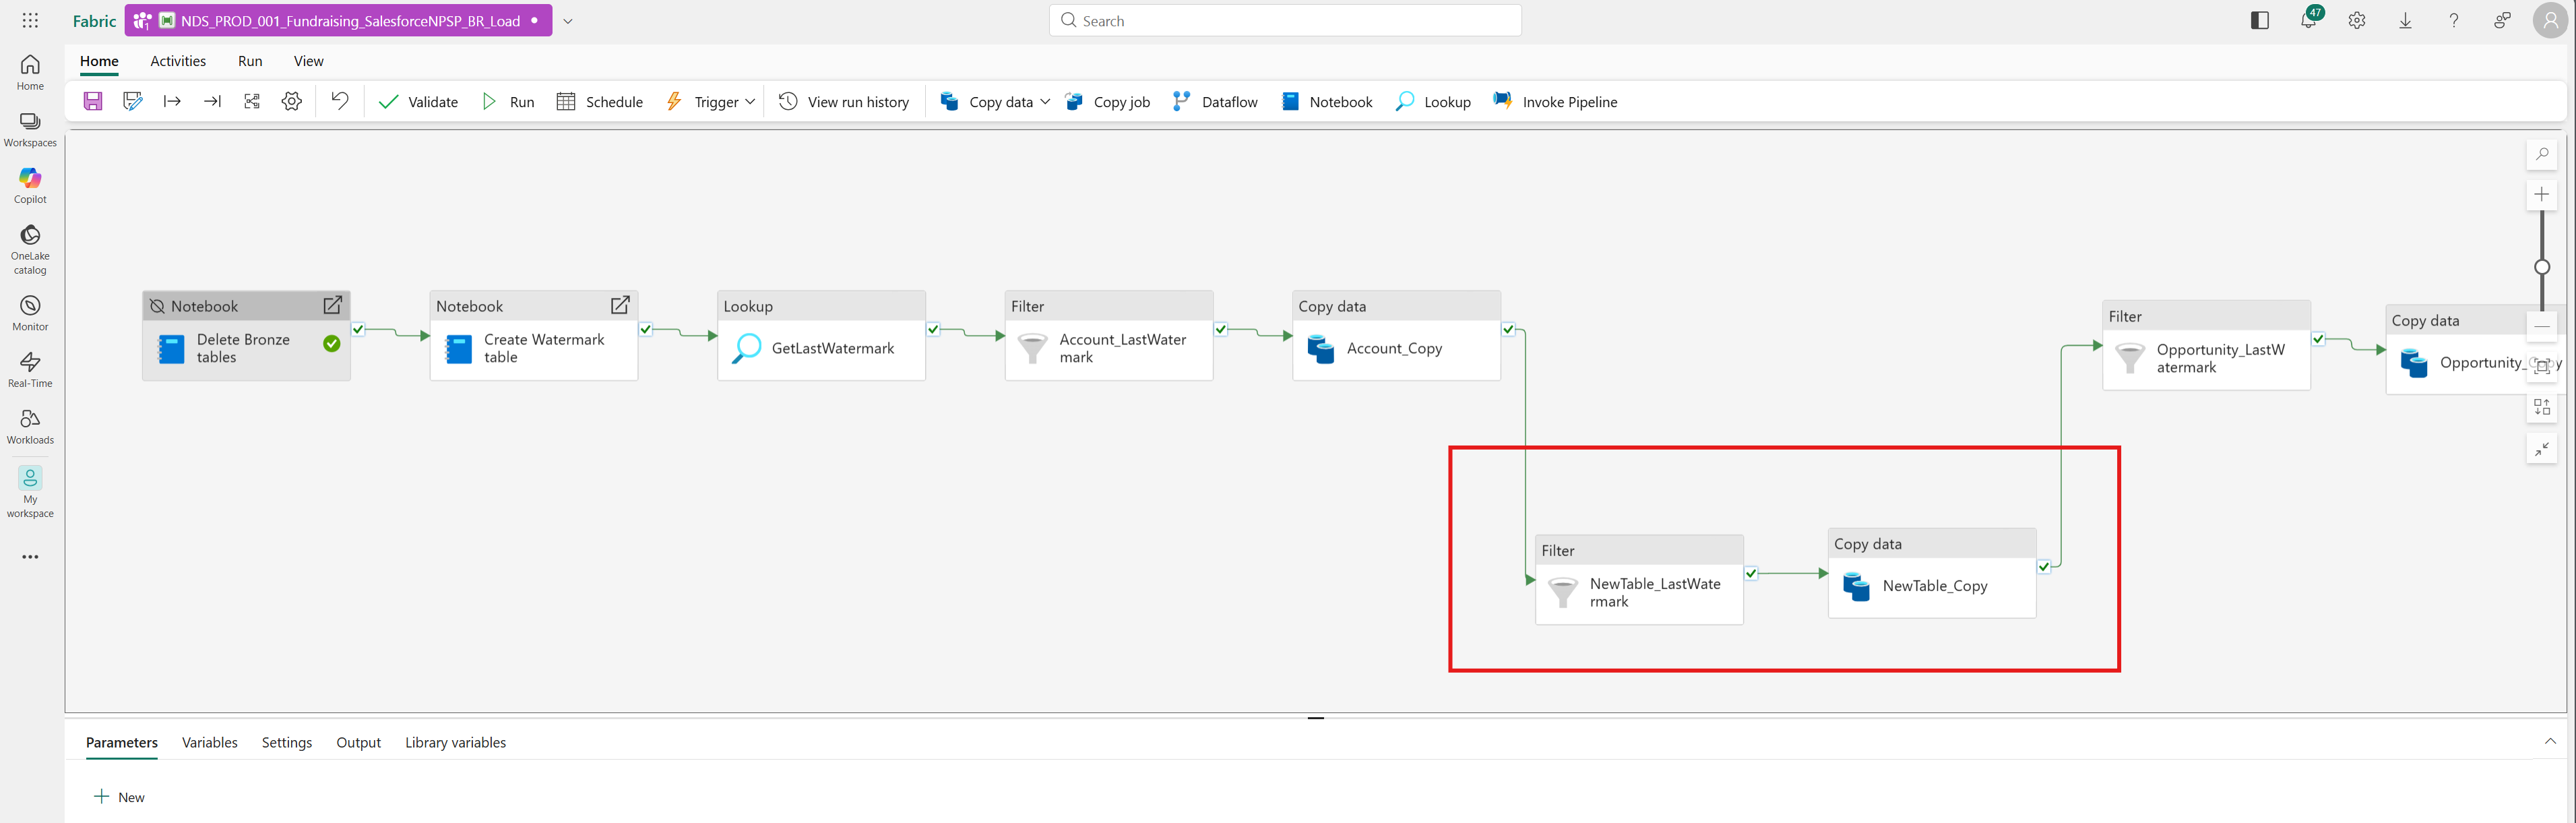
Insert a Filter activity before each Copy data activity to ensure the watermark of the last update for this table is used for comparison.
Update the merge logic
Modify the Fundraising_SalesforceNPSP_BR_Merge notebook.
Add the new table names to the
main_table_namesarray so that you can allow merging from staging into the final bronze tables.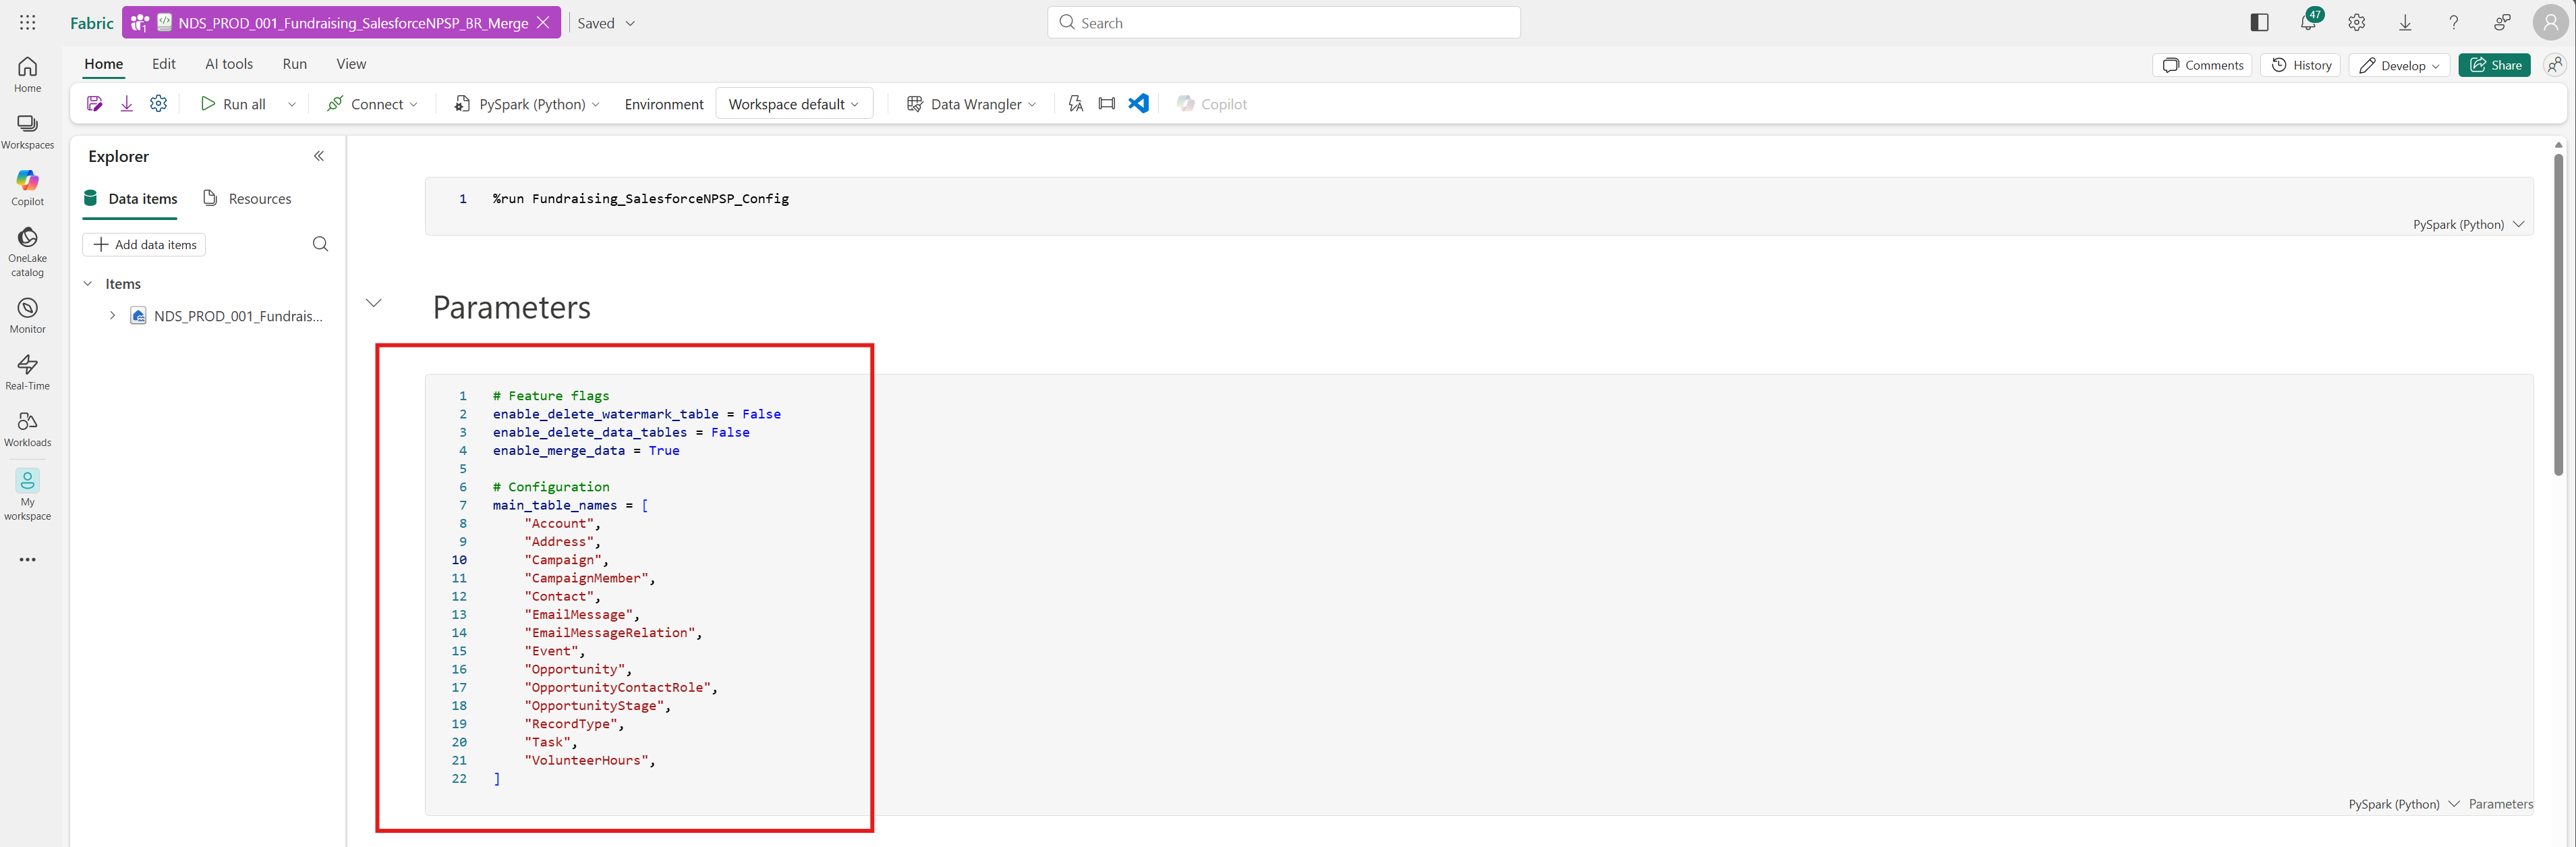
Add new columns to existing tables
To ingest more columns into existing Salesforce tables in the bronze lakehouse, follow these steps:
Open the Fundraising_SalesforceNPSP_BR_Load pipeline. This pipeline handles the incremental loading of Salesforce data into the bronze layer.
Edit the existing Copy data activity.
a. Open the Copy data activity.
b. Navigate to the Source tab.
c. Edit the SOQL query by adding the desired column.Edit the mapping.
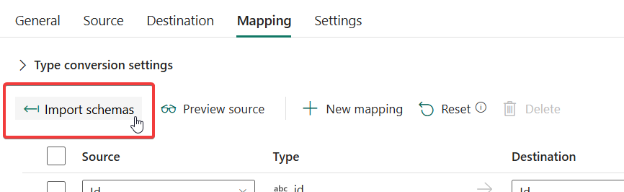
a. Navigate to Mapping tab and select Import schemas.
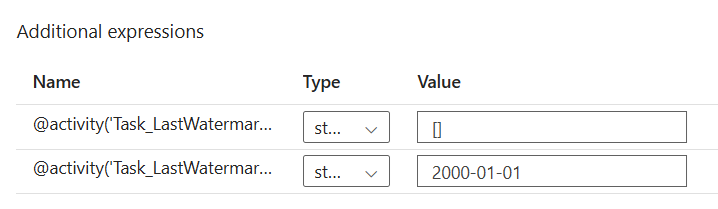
b. To run the Import mapping command, use example values as shown in the following image:
Save the data pipeline. With the next pipeline run, the merge process automatically adds the new column to the corresponding table.
Next steps
You can now process your data through the transformation and enrichment pipelines.
Transform data to the silver layer
To make your new data available in the silver layer:
- Extend the pipeline in the bronze layer to the silver layer to set up the transformation pipeline.
- Customize or extend the silver data model to create new tables or modify the silver layer schema.
- Customize the transformation logic to define how your Salesforce data is transformed.
Optionally, you can customize the configuration logic to add custom configuration settings for your transformations.
Enrich data to the gold layer
To make your transformed data available for reporting:
- Extend the pipeline in the silver layer to the gold layer to set up the enrichment pipeline.
- Customize or extend the gold data model to create new analytical tables or modify the gold layer schema.
- Customize the enrichment logic to create custom calculations and metrics.
Optionally, you can customize the segmentation logic to define custom constituent segments based on your organization's needs.