Manage files in Environmental Credit Service (preview)

Important
Some or all of this functionality is available as part of a preview release. The content and the functionality are subject to change. You can access the Environmental Credit Service (preview) sandbox environment for a 30-day trial. To use Environmental Credit Service (preview) in a production environment, complete the Environmental Credit Service (preview) sign up form.
You can attach, view, and delete files for assets like project, claim, credits as part of the Environmental Credit Service (preview) workflows. Organizations can upload files and file references by providing the files SAS URI. For each document attached to the asset, Environmental Credit Service (preview) will generate a hash for the document, which can be referenced later for validating the integrity of the document.
For instructions on performing these tasks with Environmental Credit Service (preview) APIs, go to Environmental Credit Service (preview) API reference overview.
Attach files
Transacting organizations of an asset can attach files to the asset as part of various workflows.
The following validations are in place with respect to the files that are being attached to the asset:
Environmental Credit Service (preview) doesn’t support the following file types: EXE, PHP, ASP, JSP, JS, SH, PS, and TS.
Environmental Credit Service (preview) doesn’t support files over 25 MB. (This validation is applicable only for the uploaded files.)
All the files that are uploaded or attached by providing the reference URI should be accessible to Environmental Credit Service (preview). For example, the file shouldn’t be password protected.
Use the following steps to upload and attach a file. These steps are similar across Environmental Credit Service (preview).
Select Attach to open the Attach file(s) side panel. To upload files, select + to open the file selection dialog box.
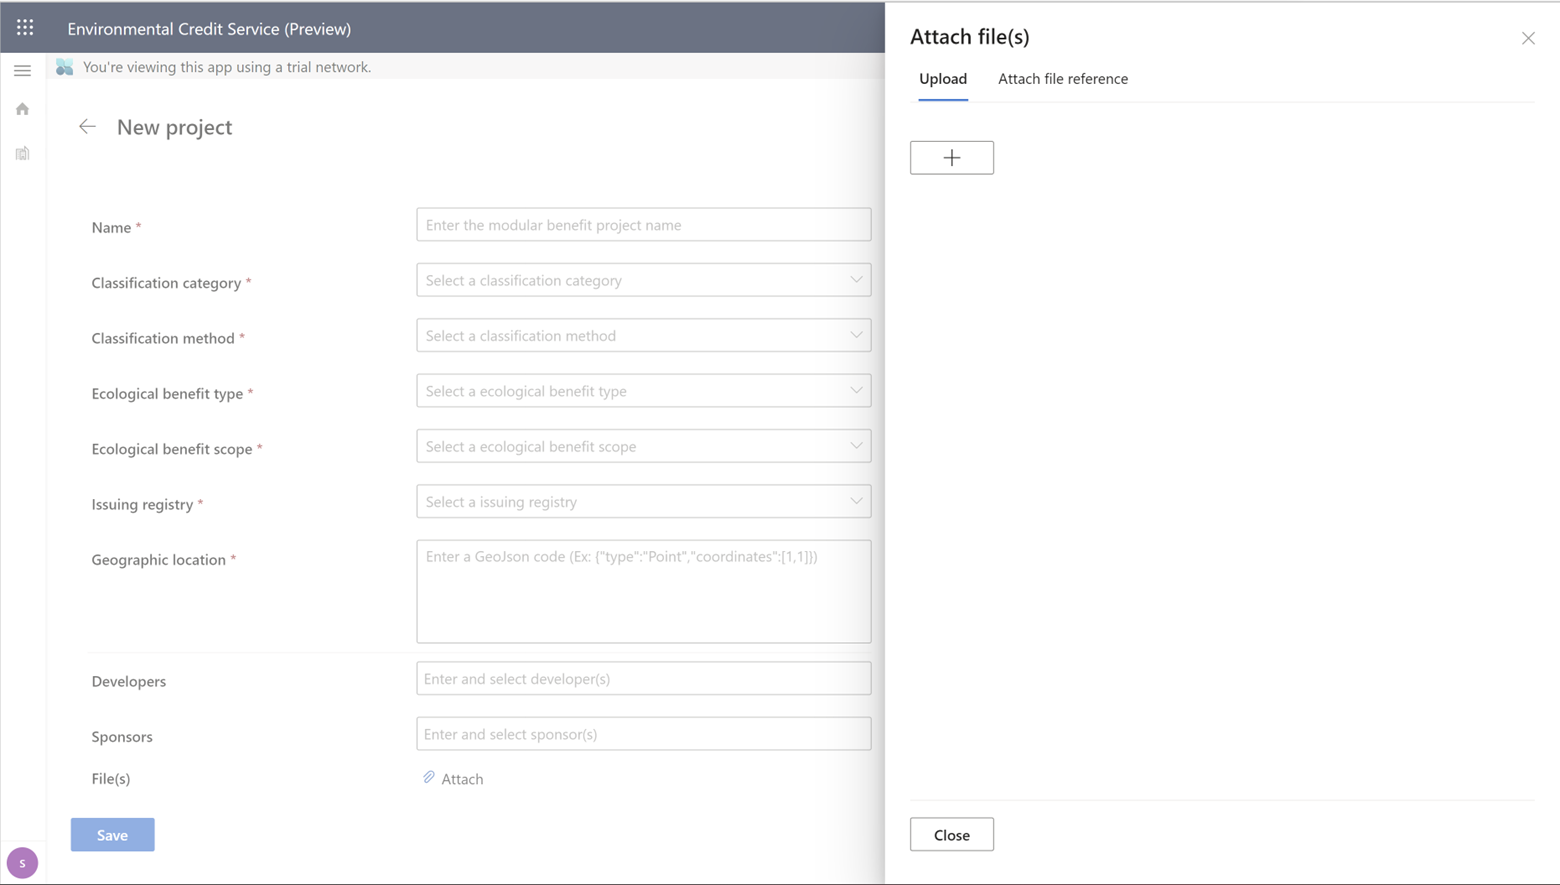
Select the required files from your device, and then provide one or more descriptive tags for each file. Tags should help others understand what the file is about.

After selecting all the files to upload, select the Upload button to upload all the files to Environmental Credit Service (preview). Leave the side panel open until the upload operation completes so you know whether the files were uploaded successfully.
If a file upload fails, an inline error displays just below the file. Based on the error, you can either try uploading the same file again or upload another file.
If you’re using a different Azure storage, you can just attach the URI reference of the file from your existing storage. This URI reference should be publicly accessible by Environmental Credit Service (preview).
Add the URI and the descriptive tag. If you want to attach more than 1 SAS URI, select + to add more. After adding all the file URIs, select Attach to attach them to the asset.
Select Close to close the side panel.


All the files that are successfully uploaded display under the Files section on the screen from where you selected the Attach icon.
Note
If you're uploading files as part of a workflow, complete the workflow to attach files to the asset. Otherwise, the uploaded files won't be added to the asset.

View files
Transacting organizations and stakeholders of the asset can view files attached to the asset. They can also download files that have been uploaded to Environmental Credit Service (preview).
The following steps are similar across Environmental Credit Service (preview) features.
All the files in Environmental Credit Service (preview) are attached to the respective assets. You can view the list of files attached to an asset on the asset detail page or on the various proposal detail views in the Files section.
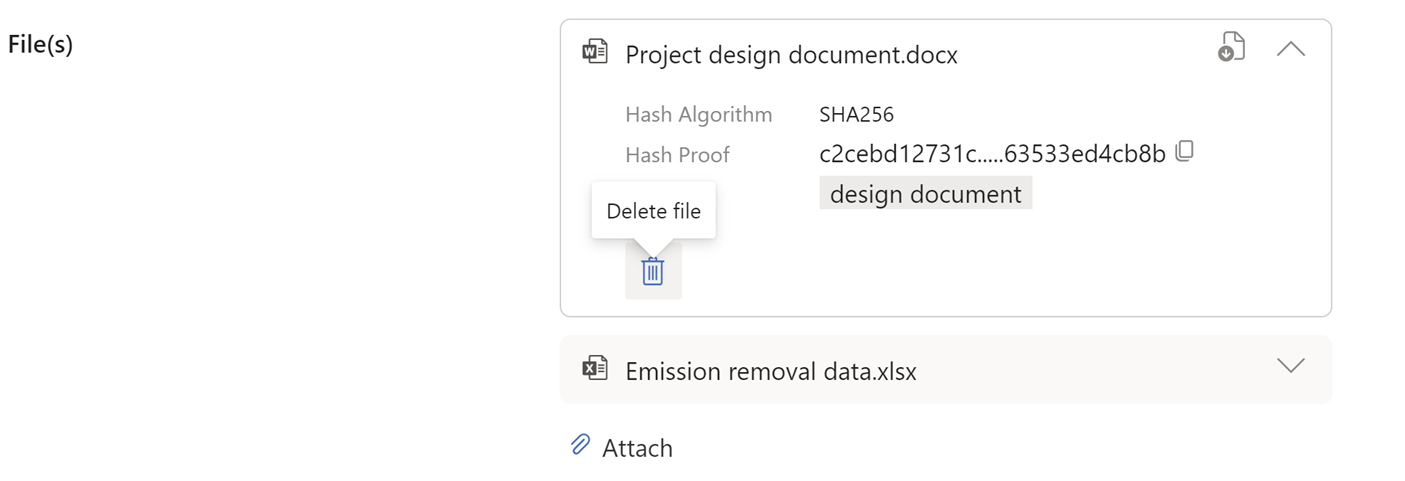
Select the accordion link in front of the file name to view the file properties.
You can download the uploaded files by selecting the Download icon.
Delete files
The organization that uploads the file can delete the file if the file is uploaded as part of a workflow and the workflow hasn’t been submitted by the organization.
The following steps are similar across Environmental Credit Service (preview) features.
After you attach a file, it will appear in the Files section. Select the accordion link next to the filename to expand the accordion.
Select the Delete icon to delete the file.
See also
Environmental Credit Service (preview) overview Environmental Credit Service (preview) glossary