Note
Access to this page requires authorization. You can try signing in or changing directories.
Access to this page requires authorization. You can try changing directories.
This Quickstart shows you how to use the MIP File SDK, to list the sensitivity labels configured for your organization.
Prerequisites
If you haven't already, be sure to complete the following prerequisites before continuing:
- Complete Quickstart: Client application initialization (C++) first, which builds a starter Visual Studio solution. This "List sensitivity labels" Quickstart relies on the previous one, for proper creation of the starter solution.
- Optionally: Review Classification labels concepts.
Add logic to list the sensitivity labels
Add logic to list your organization's sensitivity labels, using the File engine object.
Open the Visual Studio solution you created in the previous "Quickstart: Client application initialization (C++)" article.
Using Solution Explorer, open the .cpp file in your project that contains the implementation of the
main()method. It defaults to the same name as the project containing it, which you specified during project creation.Add the following
usingdirective afterusing mip::FileEngine;, near the top of the file:using std::endl;Toward the end of the
main()body, below the closing brace}of the lastcatchblock and abovereturn 0;(where you left off in the previous Quickstart), insert the following code:// List sensitivity labels cout << "\nSensitivity labels for your organization:\n"; auto labels = engine->ListSensitivityLabels(); for (const auto& label : labels) { cout << label->GetName() << " : " << label->GetId() << endl; for (const auto& child : label->GetChildren()) { cout << "-> " << child->GetName() << " : " << child->GetId() << endl; } } system("pause");
Create a PowerShell script to generate access tokens
Use the following PowerShell script to generate access tokens, which are requested by the SDK in your AuthDelegateImpl::AcquireOAuth2Token implementation. The script uses the Get-MsalToken cmdlet from the MSAL.PS module you installed earlier, in "MIP SDK Setup and configuration".
Create a PowerShell Script file (.ps1 extension), and copy/paste the following script into the file:
$authorityand$resourceUrlare updated later, in the following section.- Update
$appIdand$redirectUri, to match the values you specified in your Microsoft Entra app registration.
$authority = '<authority-url>'                   # Specified when SDK calls AcquireOAuth2Token()
$resourceUrl = '<resource-url>'                  # Specified when SDK calls AcquireOAuth2Token()
$appId = '0edbblll-8773-44de-b87c-b8c6276d41eb'  # App ID of the Microsoft Entra app registration
$redirectUri = 'bltest://authorize'              # Redirect URI of the Microsoft Entra app registration
$scope = $resourceUrl + "/.default"
$response = Get-MsalToken -ClientId $appId -Authority $authority -RedirectUri $redirectUri -Scopes $scope -Interactive
$response.AccessToken | clip                     # Copy the access token text to the clipboard
Save the script file so you can run it later, when requested by your client application.
Build and test the application
Finally, build and test your client application.
Use F6 (Build Solution) to build your client application. If you have no build errors, use F5 (Start debugging) to run your application.
If your project builds and runs successfully, the application prompts for an access token, each time the SDK calls your
AcquireOAuth2Token()method. You can reuse a previously generated token, if prompted multiple times and the requested values are the same.To generate an access token for the prompt, go back to your PowerShell script and:
Update the
$authorityand$resourceUrlvariables. They must match the values that are specified in the console output in step #2. These values are provided by the MIP SDK in thechallengeparameter ofAcquireOAuth2Token():Run the PowerShell script. The
Get-MsalTokencmdlet triggers a Microsoft Entra authentication prompt, similar to the example below. Specify the same account provided in the console output in step #2. After successful sign-in, the access token will be placed on the clipboard.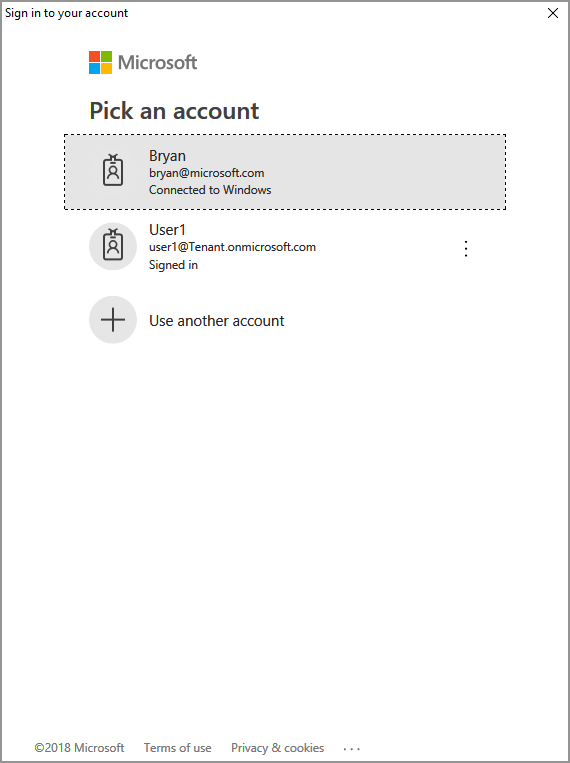
You may also need to give consent, to allow the application to access the MIP APIs, while running under the sign-in account. This happens when the Microsoft Entra application registration isn't pre-consented (as outlined in "MIP SDK setup and configuration"), or you're signing in with an account from a different tenant (other than the one where your application is registered). Simply click Accept to record your consent.

After pasting the access token into the prompt from step #2, your console output should show the sensitivity labels, similar to the following example:
Non-Business : 87ba5c36-17cf-14793-bbc2-bd5b3a9f95cz
Public : 83867195-f2b8-2ac2-b0b6-6bb73cb33afz
General : f42a3342-8706-4288-bd31-ebb85995028z
Confidential : 074e457c-5848-4542-9a6f-34a182080e7z
Highly Confidential : f55c2dea-db0f-47cd-8520-a52e1590fb6z

Press any key to continue . . .
Note
Copy and save the ID of one or more of the sensitivity labels (for example,
f42a3342-8706-4288-bd31-ebb85995028z), as you will use it in the next Quickstart.


Troubleshooting
Problems during execution of C++ application
| Summary | Error message | Solution |
|---|---|---|
| Bad access token | An exception occurred... is the access token incorrect/expired? Failed API call: profile_add_engine_async Failed with: [class mip::PolicySyncException] Failed acquiring policy, Request failed with http status code: 401, x-ms-diagnostics: [2000001;reason="OAuth token submitted with the request cannot be parsed.";error_category="invalid_token"], correlationId:[35bc0023-3727-4eff-8062-000006d5d672]' C:\VSProjects\MipDev\Quickstarts\AppInitialization\x64\Debug\AppInitialization.exe (process 29924) exited with code 0. Press any key to close this window . . . |
If your project builds successfully, but you see output similar to the left, you likely have an invalid or expired token in your AcquireOAuth2Token() method. Go back to Create a PowerShell script to generate access tokens and regenerate the access token, update AcquireOAuth2Token() again, and rebuild/retest. You can also examine and verify the token and its claims, using the jwt.ms single-page web application. |
| Sensitivity labels aren't configured | n/a | If your project builds successfully, but you have no output in the console window, be sure your organization's sensitivity labels are configured correctly. See MIP SDK setup and configuration, under "Define label taxonomy and protection settings" for details. |
Next Steps
Now that you've learned how to list the sensitivity labels for your organization, try the next quickstart: