Migration Testing Guide
Note
This testing guide has been revised as of October 2022. The following steps should take around 30 minutes to complete. The new sections added are:
- Instructions to render and test AWLI V3
- Staffing and non-staffing customer setup
- Staffing and non-staffing consent screen examples
- Mobile devices testing
Important
- Refer to this section for any troubleshooting while testing the AWLI V3 widget.
- For any unresolved issues encountered during testing, create a Zendesk ticket detailing the issue along with apiKeys and sample job URLs used for testing.
- If you want to build to the AWLI V3 widget directly, create a Zendesk ticket expressing your interest to build to V3 for the next steps
How to Render and Test AWLI V3
Repeat the following steps to test all career site templates that your customers can use:
- If you support both staffing and non-staffing customers, find a job page with a working AWLI V2 button for each type of customer (if AWLI V2 does not work , create a zendesk ticket with apiKey and sample job url). Refer to the Staffing and Non-Staffing Customer Setup topic for instructions on how to setup a staffing and non-staffing customer for testing, if needed.
- Steps to test when not signed into LinkedIn.
- Go to www.linkedin.com and sign out of your account (if you are already signed in).
- Follow the steps in the Guide to Render Apply With LinkedIn v3.0 topic to render the AWLI V3 button on the selected job page from Step 1.
- Once the AWLI V3 button renders, click the button. A page for Sign into LinkedIn will open in a new window.
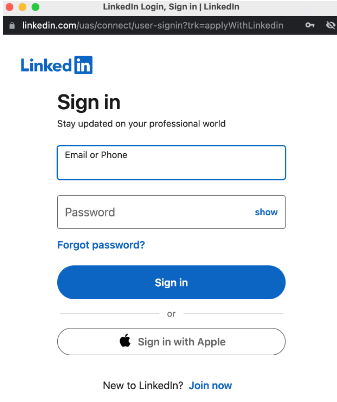
- Sign into your LinkedIn account by providing your login credentials.
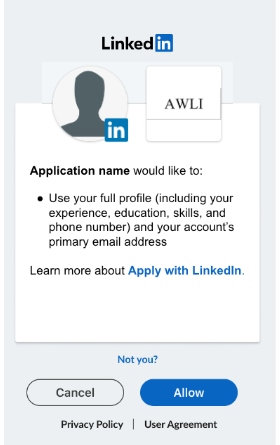
- After successfully signing in, you should be redirected to an OAuth consent screen in the same window. The text on the consent screen varies for staffing and non-staffing customers. Refer to the Staffing and Non-Staffing Consent Screen Examples for more information.
- Check for the following details on the consent screen
- Logo - For Customers (e.g Proprietary ATS or Career Page Solution), the logo should be the customer logo. For Partners (e.g ATS), the logo should be the ATS logo.
- Application name - For Customers, the application name should be their application name. For Partners, it should be the relevant customers' application name provided as part of the step for configuring customer application. Partners should check all of their customer application names for accuracy, and if needed, create a ticket on Zendesk with a list of their customers' application client ID and corresponding names.
- Clicking Allow on the consent screen should close the consent window and take you back to your career site job page. Refer to Step 4 below for further testing steps.
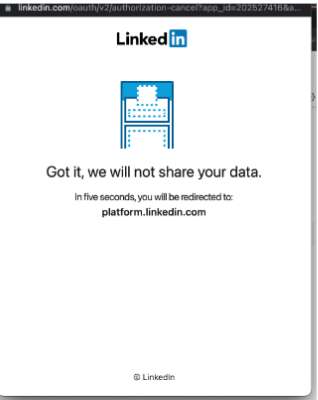
- Clicking Cancel on the consent screen should display the below page for 5 seconds in the same window before the window closes. You should then be taken back to your career site job page.
- Steps to test when already signed into LinkedIn
- Go to www.linkedin.com and sign into your account if you are not signed in.
- Follow the steps in the Guide to Render Apply With LinkedIn v3.0 topic to render the AWLI V3 button on the selected job page from Step 1.
- Once the AWLI V3 button renders, click on the button.
- An OAuth consent screen page will open in a new window. The text on the consent screen varies for staffing and non-staffing customers. Refer to the Staffing and Non-Staffing Consent Screen Examples for more information.
- Check for the following details on the consent screen
- Logo - For Customers (e.g. Proprietary ATS or Career Page Solution), the logo should be the customer logo. For Partners (e.g. ATS), the logo should be the logo of the ATS.
- Application name - For Customers, the application name should be their application name. For Partners, it should be the relevant customers' application name provided as part of the step for configuring customer application. Partners should check all of their customer application names for accuracy, and if needed, create a ticket on Zendesk with a list of their customers' application client ID and corresponding names.
- Clicking Allow on the consent screen should close the consent window and take you back to your career site job page. Refer to Step 4 below for further testing steps.
- Clicking Cancel on the consent screen should display the below page for 5 seconds in the same window before the window closes. You will then be taken back to your career site job page.
- Steps to test after clicking Allow on OAuth consent screen
- Make sure your career site job page displays the applicant’s profile data shared by LinkedIn via the callback function. This callback function is a configuration (data-callback-method) set during the initial Apply With LinkedIn Plugin integration.
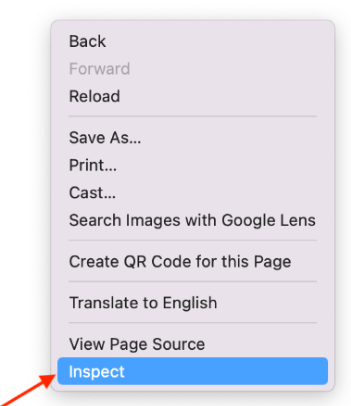
- Open developer tools by right clicking anywhere on the page and select the Inspect option. Click on the Network tab in developer tools.
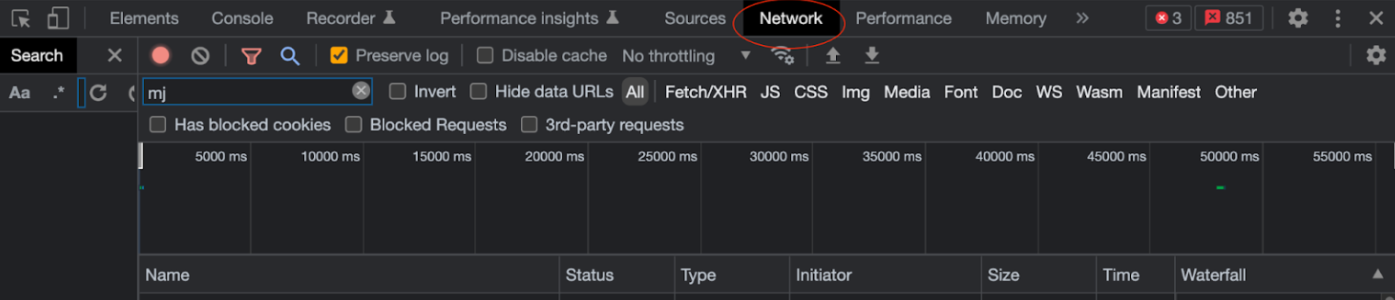
- Filter the network tab by “apply-with-linkedin”.

- Complete applying to the job by submitting the application.
- Once the application is submitted, check the Network tab for a call to the LinkedIn AWLI widget with CONVERSION mode as shown below.
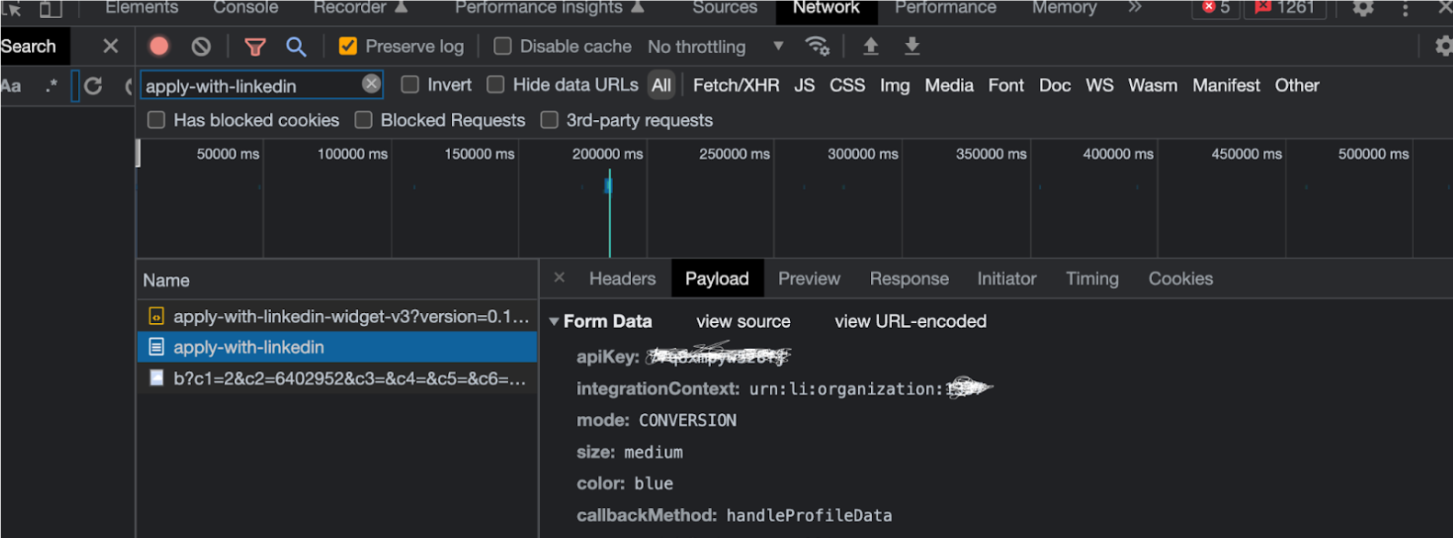
Note
Once the applicant/user gives consent to share a profile with an employer, the OAuth consent screen for the same employer will not appear for the next 30 minutes
Staffing and Non-Staffing Customer Setup
- For Non-Staffing Customers
- Enable a customer for the AWLI integration via LinkedIn’s Onboarding widget. The configuring customer document provides details on how to integrate with LinkedIn’s Onboarding widget and how to enable a customer for AWLI.
- Make sure the AWLI V2 button renders and works for this customer.
- For Staffing Customers
- Enable a customer for AWLI integration via LinkedIn’s Onboarding widget. The configuring customer document provides details on how to integrate with LinkedIn’s Onboarding widget and how to enable a customer for AWLI.
- Use the “integration context” from the above step to create a Zendesk ticket to enable the customer for Staffing set up.
- Make sure the AWLI V2 button renders and works for this customer.
Staffing and Non-Staffing Consent Screen Examples
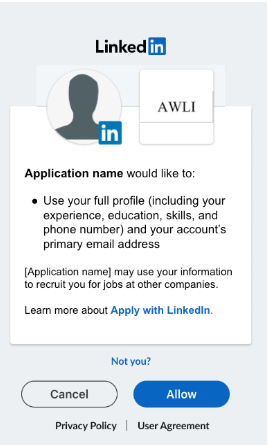
The consent screen for Staffing and Non-Staffing customers varies in text as shown below
Non- Staffing Customer Consent Screen
Staffing Customer Consent Screen
Mobile Devices Testing
To test that the AWLI button renders correctly and that the end to end flow works correctly for iOS and Android devices such as mobile phones and tablets, use a browser device simulator/responsive mode.
More information on using browser simulators can be found below:
- Chrome: https://developer.chrome.com/docs/devtools/device-mode/
- Firefox: https://firefox-source-docs.mozilla.org/devtools-user/responsive_design_mode/
Guide to Render Apply With LinkedIn v3.0
To test if there are any problematic customizations, complete the following steps detailed below:
Find a page on your career site with a currently working AWLI button
Test the new version of AWLI by setting a local storage value in the career site with the following key and value. You can return back to the current version of AWLI by removing these values.
localStorage.setItem(‘in.awli.v3.enabled’, ‘true’)
Key -  “in.awli.v3.enabled”
Value - “true”
Refer to the below topic Enabling AWLI V3 using Local Storage Flag for details with screenshots
Note
To test with your test/stage developer application, simply browse to a test job page with a working AWLI button and it should render the AWLI V3 button
Enabling AWLI V3 using Local Storage Flag
Listed below are the steps to enable AWLI v3 using local storage flag:
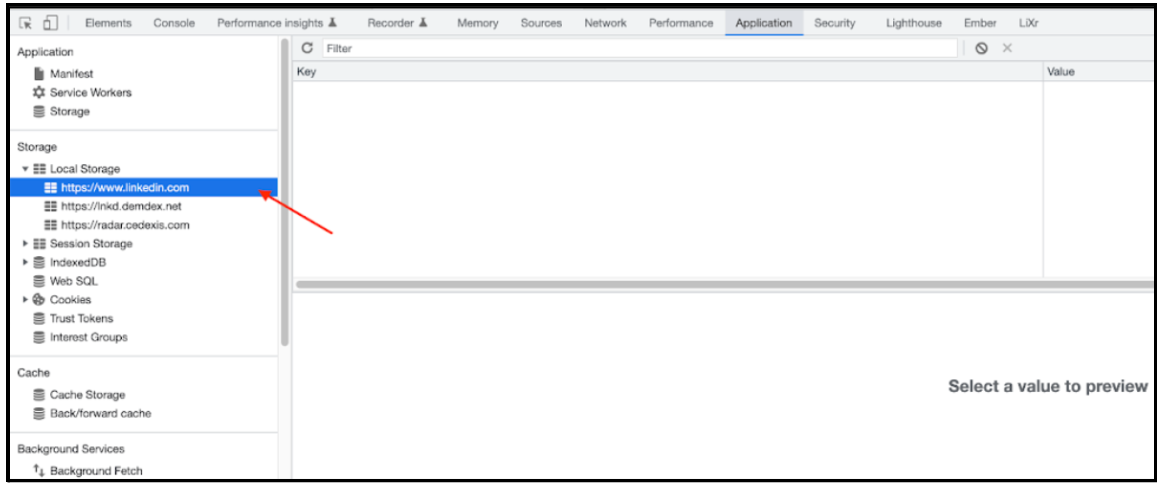
- Open Chrome developer tools by right clicking anywhere on the page and select the Inspect option
- Click the Application tab in the developer tools
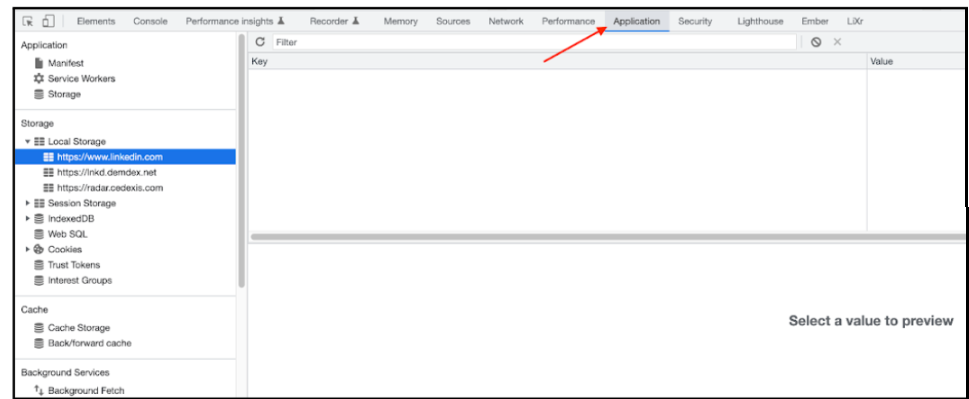
- Click your career site URL where AWLI is being loaded in the local storage section. In the screenshot we are using linkedin.com as an example but your career site will be different
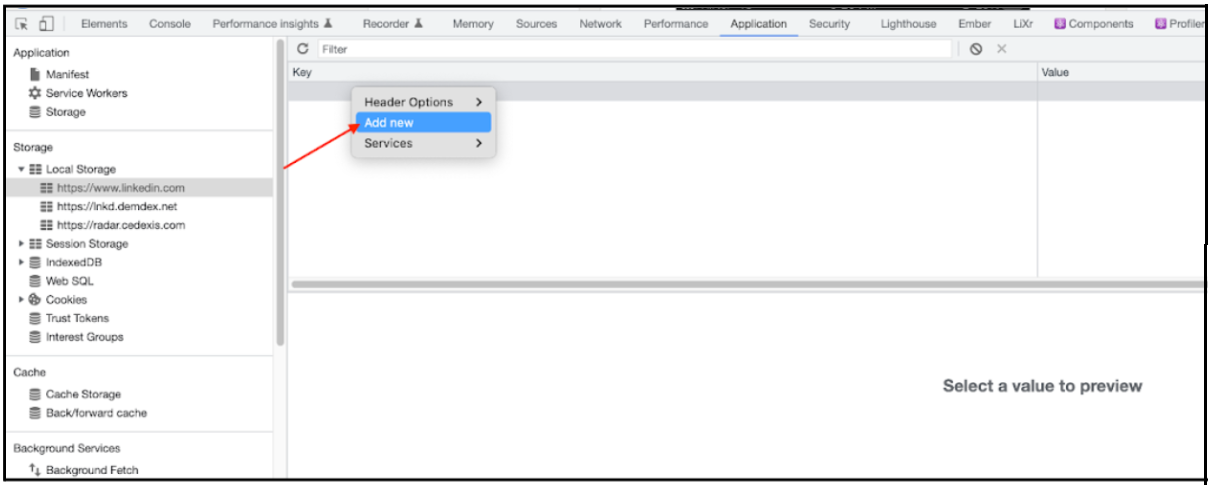
- Right click the empty row under the Key column and select “Add new” to add a new row
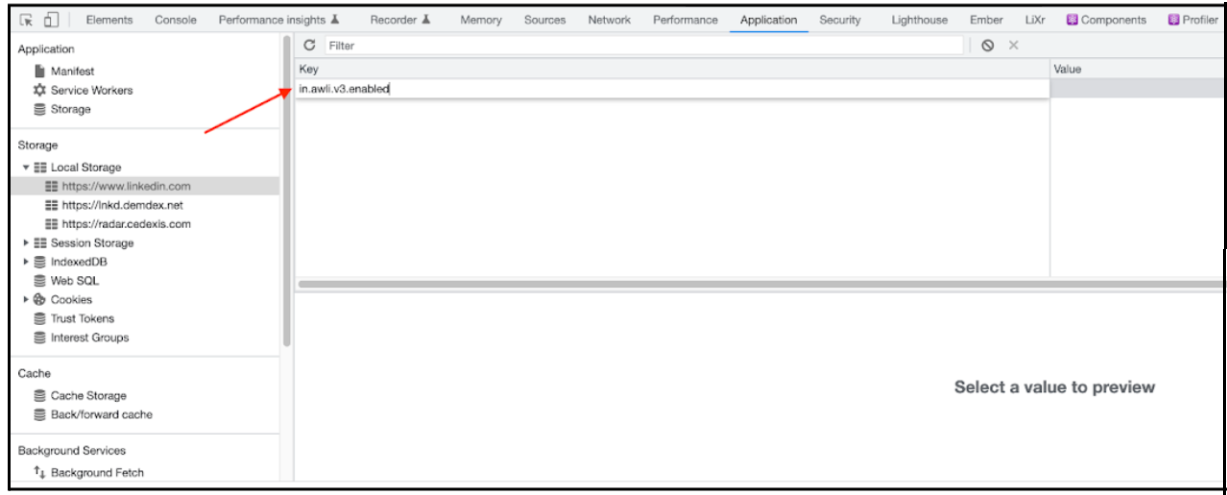
- Type “in.awli.v3.enabled” as the key name
- Right click the Value column for the newly added row and select Edit “Value”
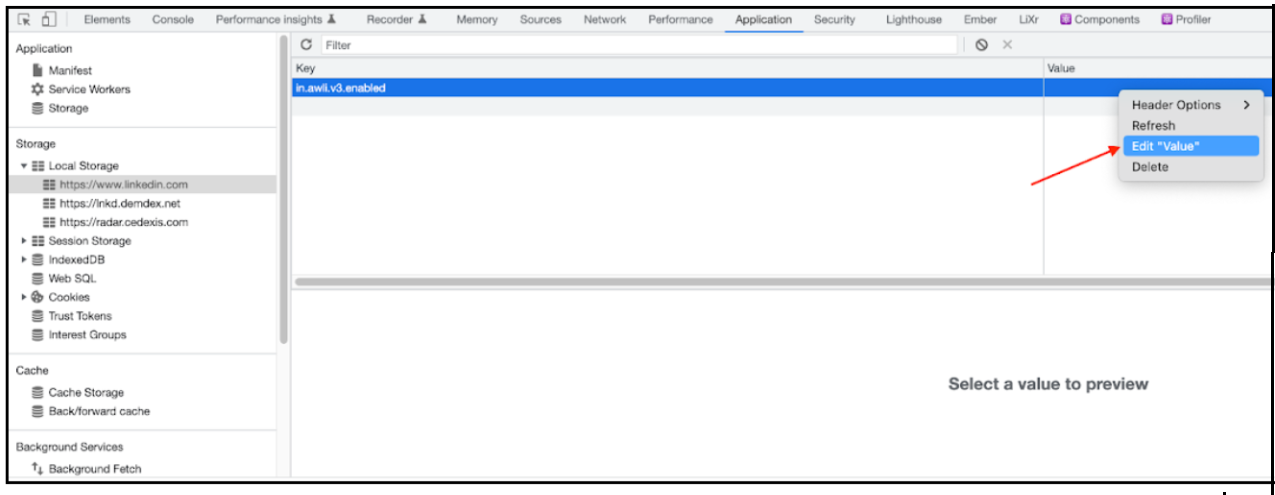
- Type “true” as the Value
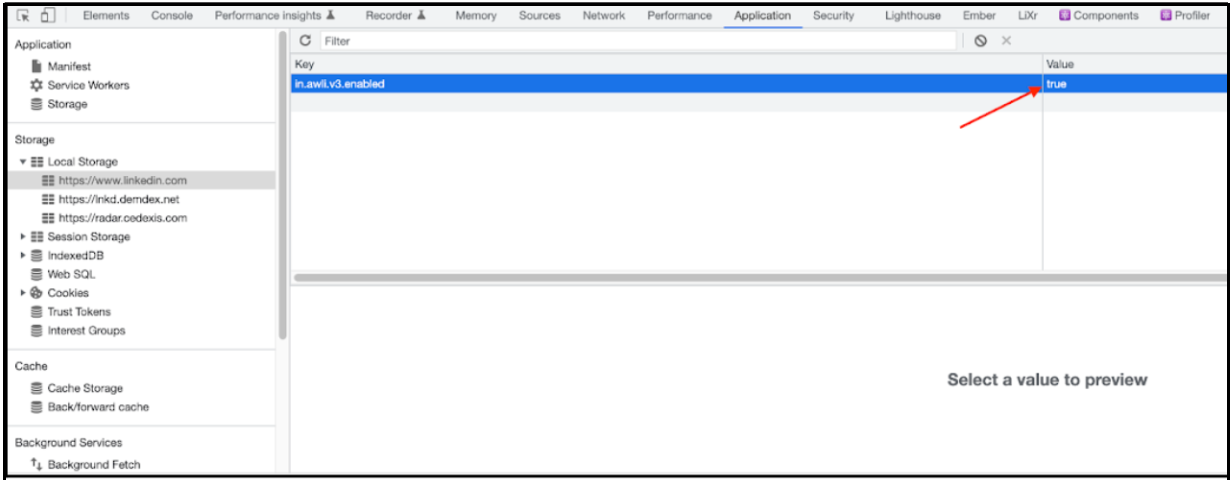
- Refresh the page, the AWLI V3 widget should appear

Issues and Resolution
Below are common issues that might occur while testing the new AWLI along with their corresponding resolution:
- If multiple sites appear in Step 3 (above) and AWLI v3 is not working even after enabling the flag on your career site, try setting the key on all of the sites listed in local storage
- In case the AWLI V3 widget does not appear as shown in step 8 (above), then repeat step 3 and add the key to all sites listed in local storage
Here are some sample issues to look out for:
New AWLI widget/button does not render:
- CSS or Javascript customizations have been made on top of LinkedIn’s AWLI widget. These customizations need to be removed in order to properly render the new AWLI widget
- The page is already loading LinkedIn’s in.js script. This preload of “in.js” script needs to be removed or load “in.js” with the same API key used for AWLI. Note that LinkedIn uses API key to uniquely identify a customer. Please create only one API key per customer and avoid loading multiple instances of in.js with different API keys on a page
New AWLI widget/button renders but there are multiple buttons on the same page
- Make sure to integrate with AWLI only once per job page
New AWLI widget renders but it is not aligned properly or is cut-off
- File a Zendesk ticket detailing the issue along with apiKeys and sample job URLs used for testing
New AWLI widget renders but when clicked, a new window with
something went wrongopens:- File a Zendesk ticket detailing the issue along with apiKeys and sample job URLs used for testing
Company logo is incorrect or blank in the OAuth consent screen:
- File a ticket via Zendesk and attach the correct logo. Our teams will then process the update and confirm once it is completed
Feedback
Coming soon: Throughout 2024 we will be phasing out GitHub Issues as the feedback mechanism for content and replacing it with a new feedback system. For more information see: https://aka.ms/ContentUserFeedback.
Submit and view feedback for