Note
Access to this page requires authorization. You can try signing in or changing directories.
Access to this page requires authorization. You can try changing directories.
Mesh enables no-code customization of 3D environments that help your organization create experiences tailored to your business goals.
Why customize an event?
As a host for a Mesh event, you have many tools at your disposal to orchestrate an experience for attendees.
Along with tools to interact with and manage attendees, you have a Control Panel to manage aspects of the environment.
With the Control panel, you can control individual objects like playing a video when people enter the event, or execute a pre-planned sequence of actions like queuing a video, displaying images, and showing a Screenshare simultaneously.
Types of customizations
Add objects through the Editor like Screenshares, Images, Videos, or Text. Drag and resize these objects easily by selecting the objects and moving them around the environment.

Use the Control Panel to granularly adjust or configure Objects that you have in your environment using the Controls tab.
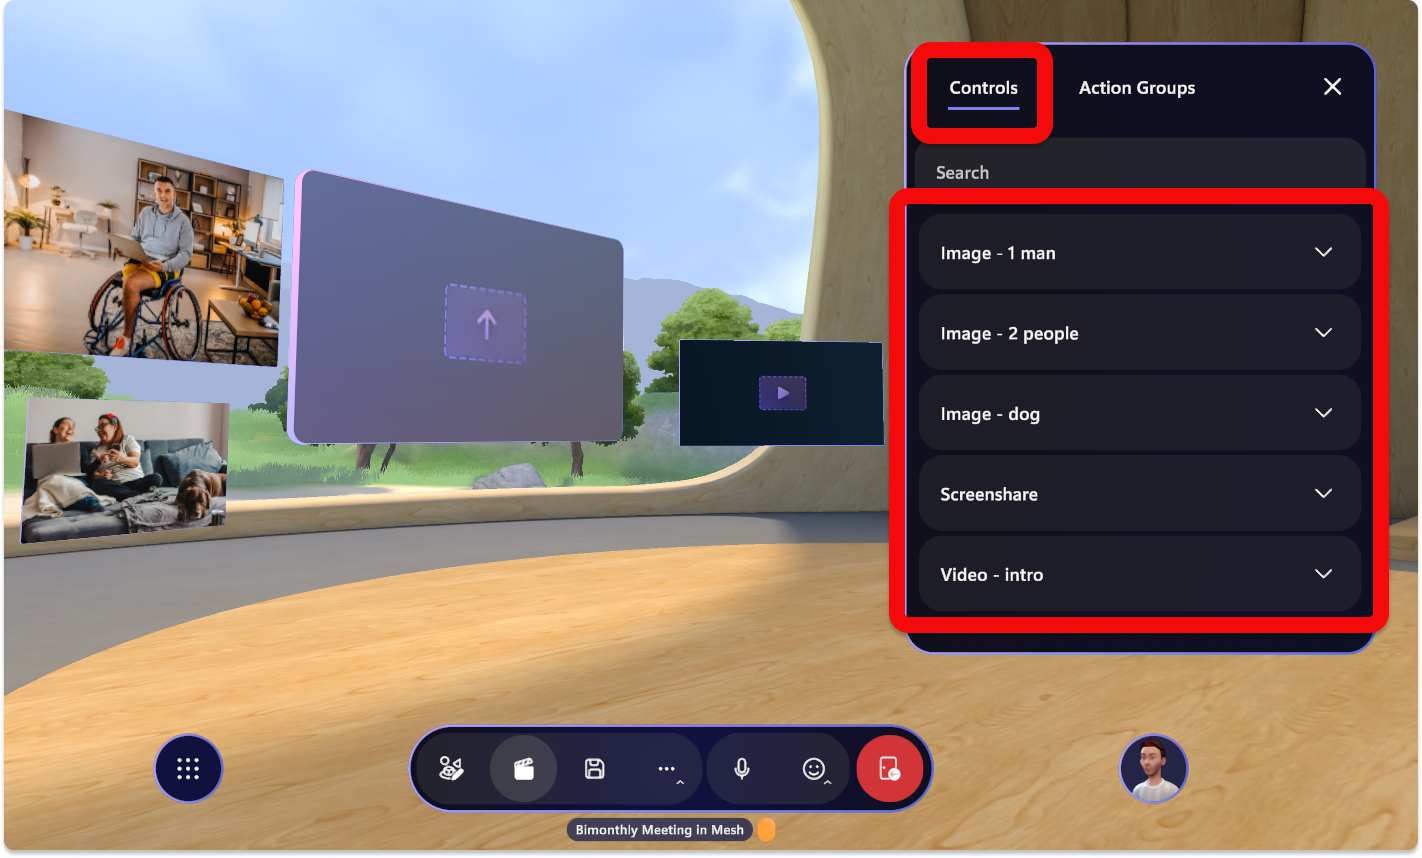
Use the Control Panel > Action Groups tab to control multiple objects at once for an experience such as displaying photos of your team, or showing a company logo and playing a video.
Considerations before starting your event
To ensure the event runs smoothly, ensure that you customize and save customizations at least 30 minutes before the event start time. Once someone joins the event, saving customizations is not available.
Anyone who has been invited as a Co-organizer can customize an event. Do this with caution, knowing that any edits you make will directly alter the Event or Template that event attendees will join.
How to customize an event
Customization flow
At a high level, this is the flow you can expect to follow when customizing your event:
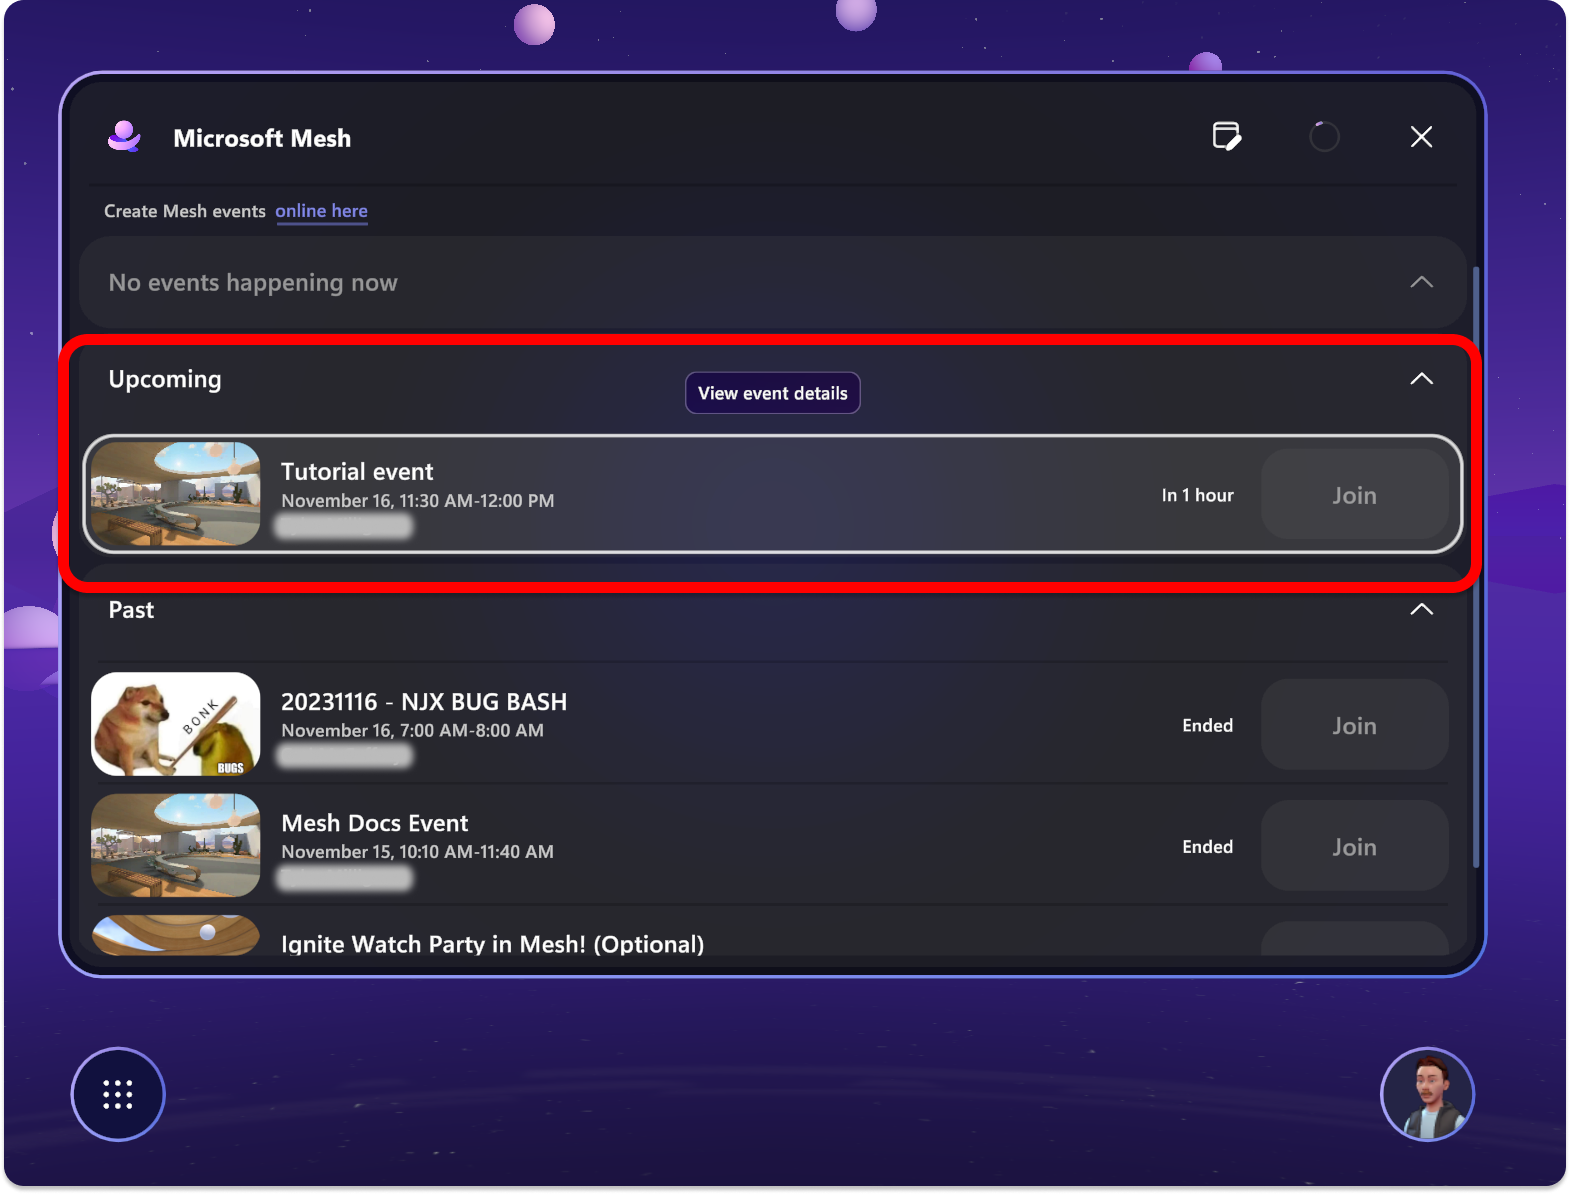
Once your event is created using https://mesh.cloud.microsoft/, open the Mesh app to find and start customizing your event.
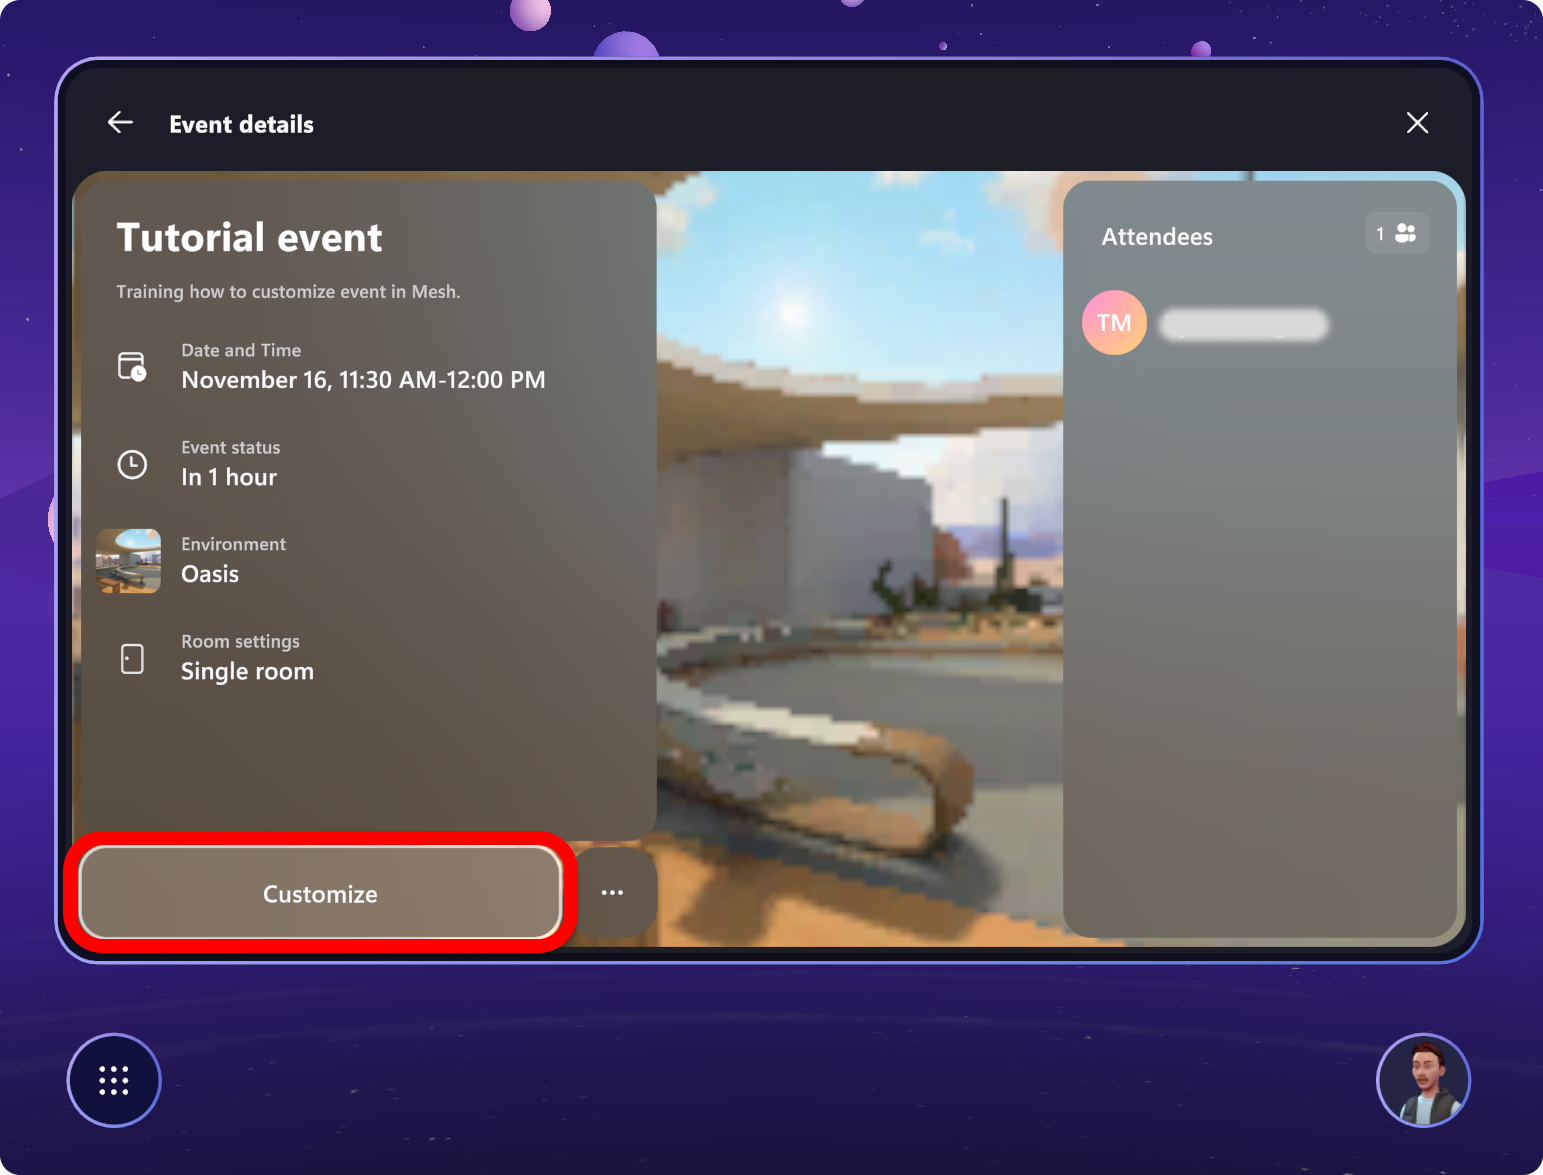
Enter a Customization session for your Event or Template.
Add content using the Editor.
Configure content with the Control panel to be used in your live event. You can edit the Controls of each object individually or group them together in Action Groups.
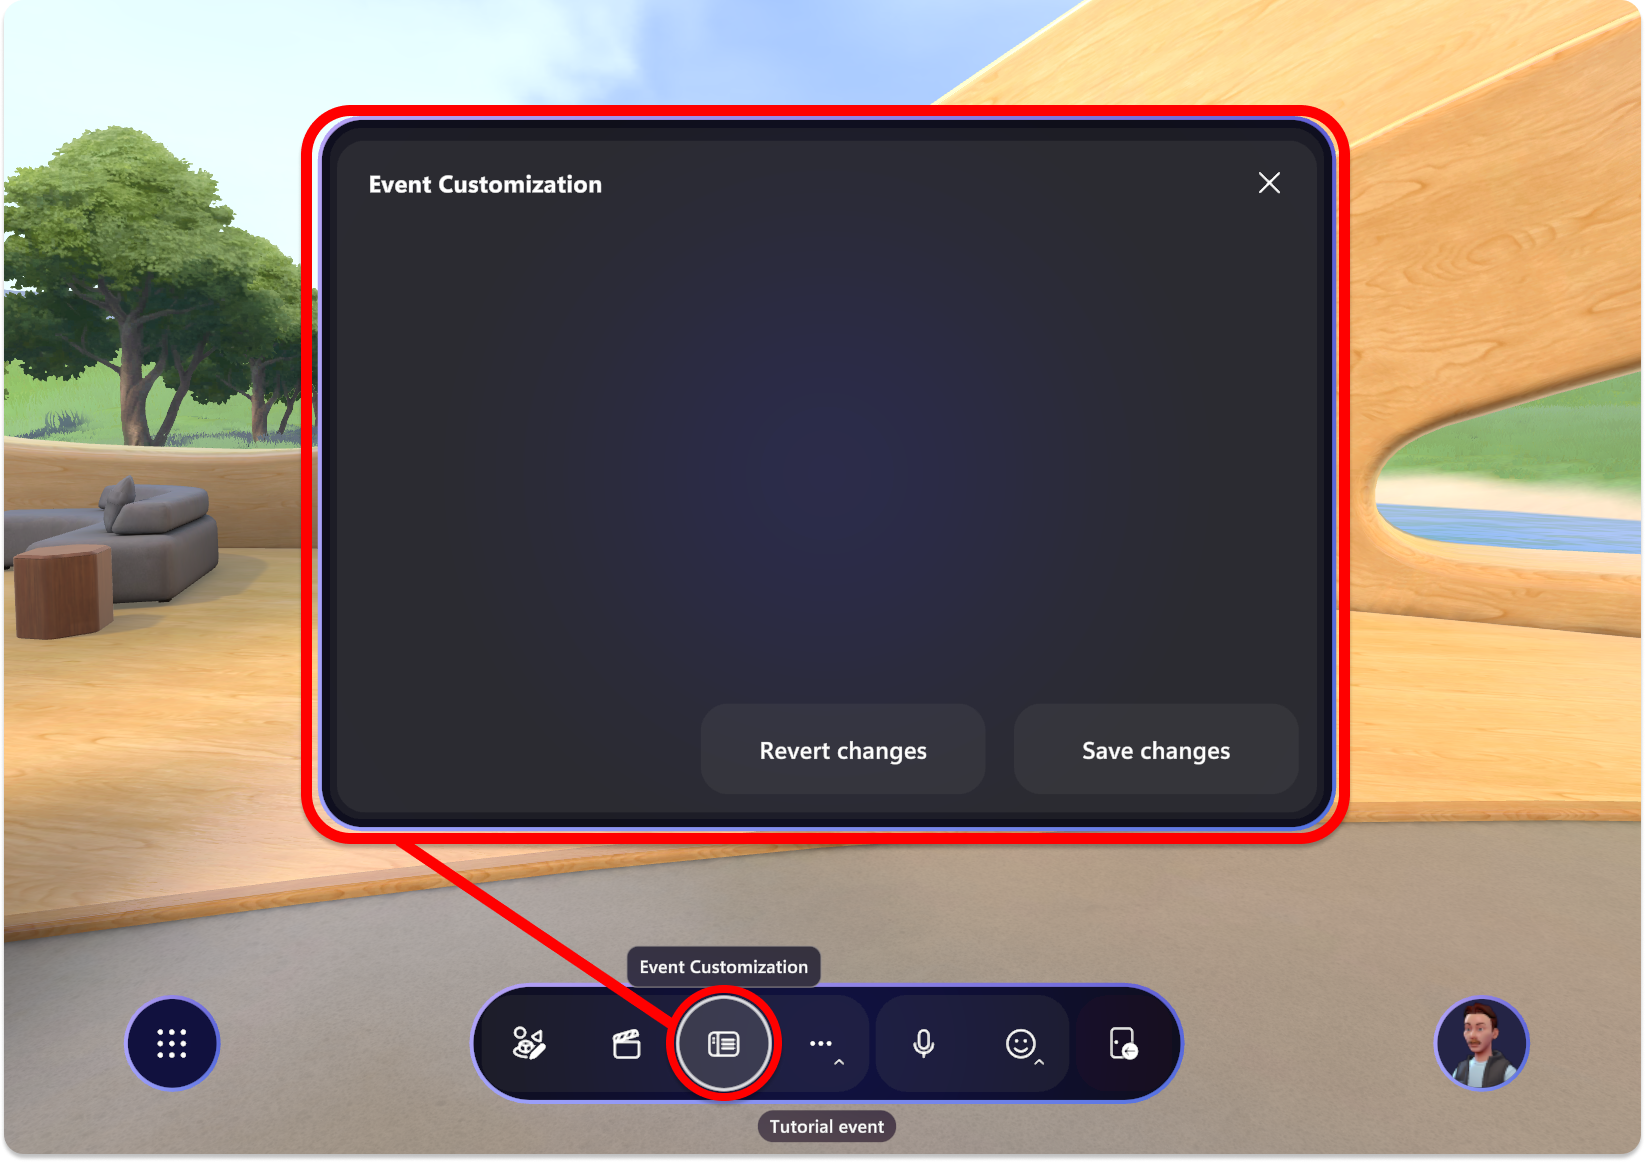
Save changes in the Event Customization window.
Enter a Customization session for a template or event
Customize a Template
To learn more about creating a Template, see how to Create Template.
In the Microsoft Mesh app, select the Manage Templates button.
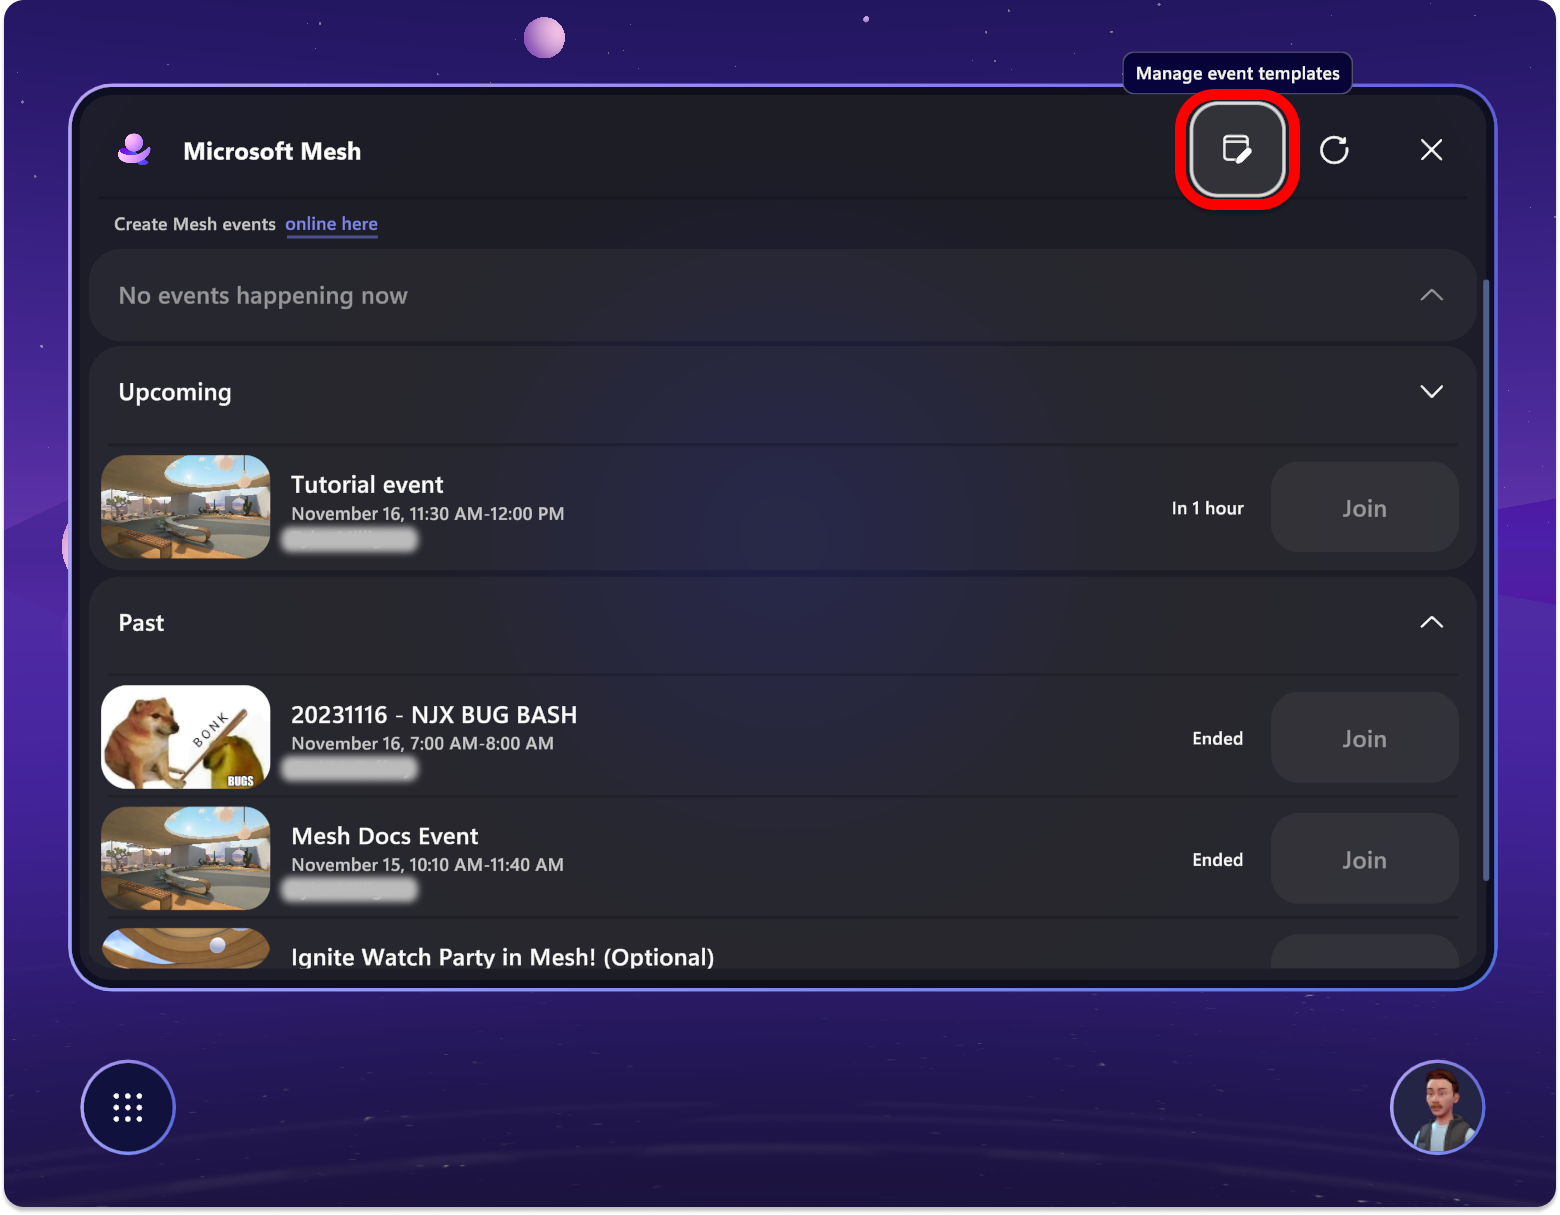
Find your Template draft.
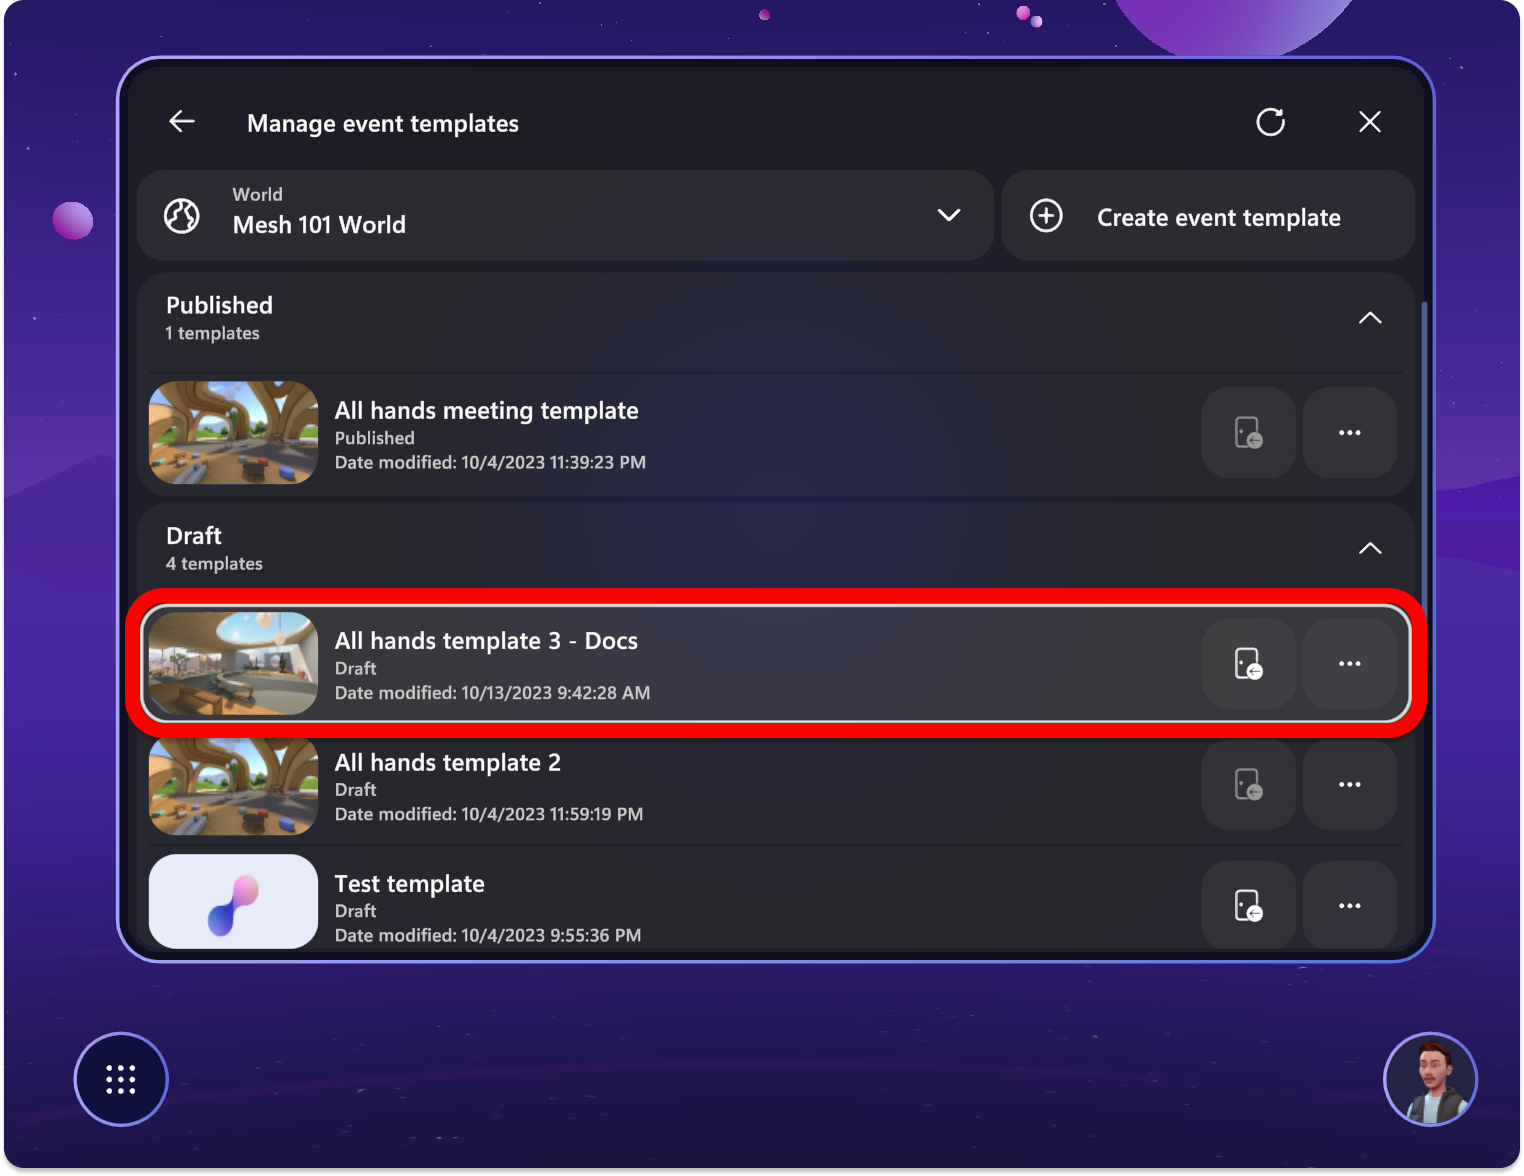
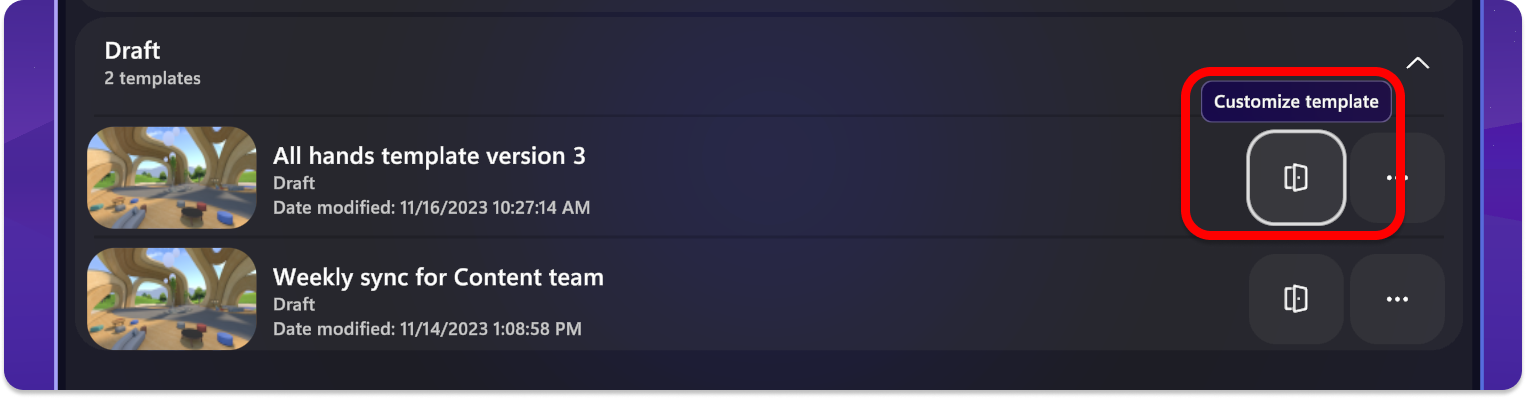
Select the Customize event experience button to start customizing the Template.
Start customizing
Now that you've created an event and joined the Event customization experience, it's time customize it in the Microsoft Mesh app and add any run-of-show tools you'd like to use.
At a high level, there are three major steps to customize your event or template:
Add content using the Environment Editor (or playable content uploaded from Unity to a custom environment).
Select the object to edit its properties.
Use the Control Panel to adjust your objects or create Action Groups to control multiple objects simultaneously.
Save changes in the Save window. Or select Revert to discard recent changes and revert to the last saved state.
Add content with Editor
Use the Editor to place content in your environment and customize the content displayed in each object.
The three objects that you can add to through the editor are Video, Screenshare, and Image.
| Object | Controls | Notes |
|---|---|---|
| Video | URL, Looping, Volume, Backplate, Visible | Direct links to videos hosted via SharePoint or HTTPS URLs and .MP4 file types only. |
| Screenshare | Visible | Display screen as an event host with Organizer or Co-Organizer privileges. |
| Image | URL, Orientation, Backplate, Visible | Direct links to images hosted via SharePoint or HTTPS URLs |
| Text | Display text, Auto resize, Text style, Font Size, Show backplate, Visible | Simple text for labels, signage, and attendee instructions |
Use the Editor to add content to your environment that can be controlled during your run-of-show.
Select the Editor button.
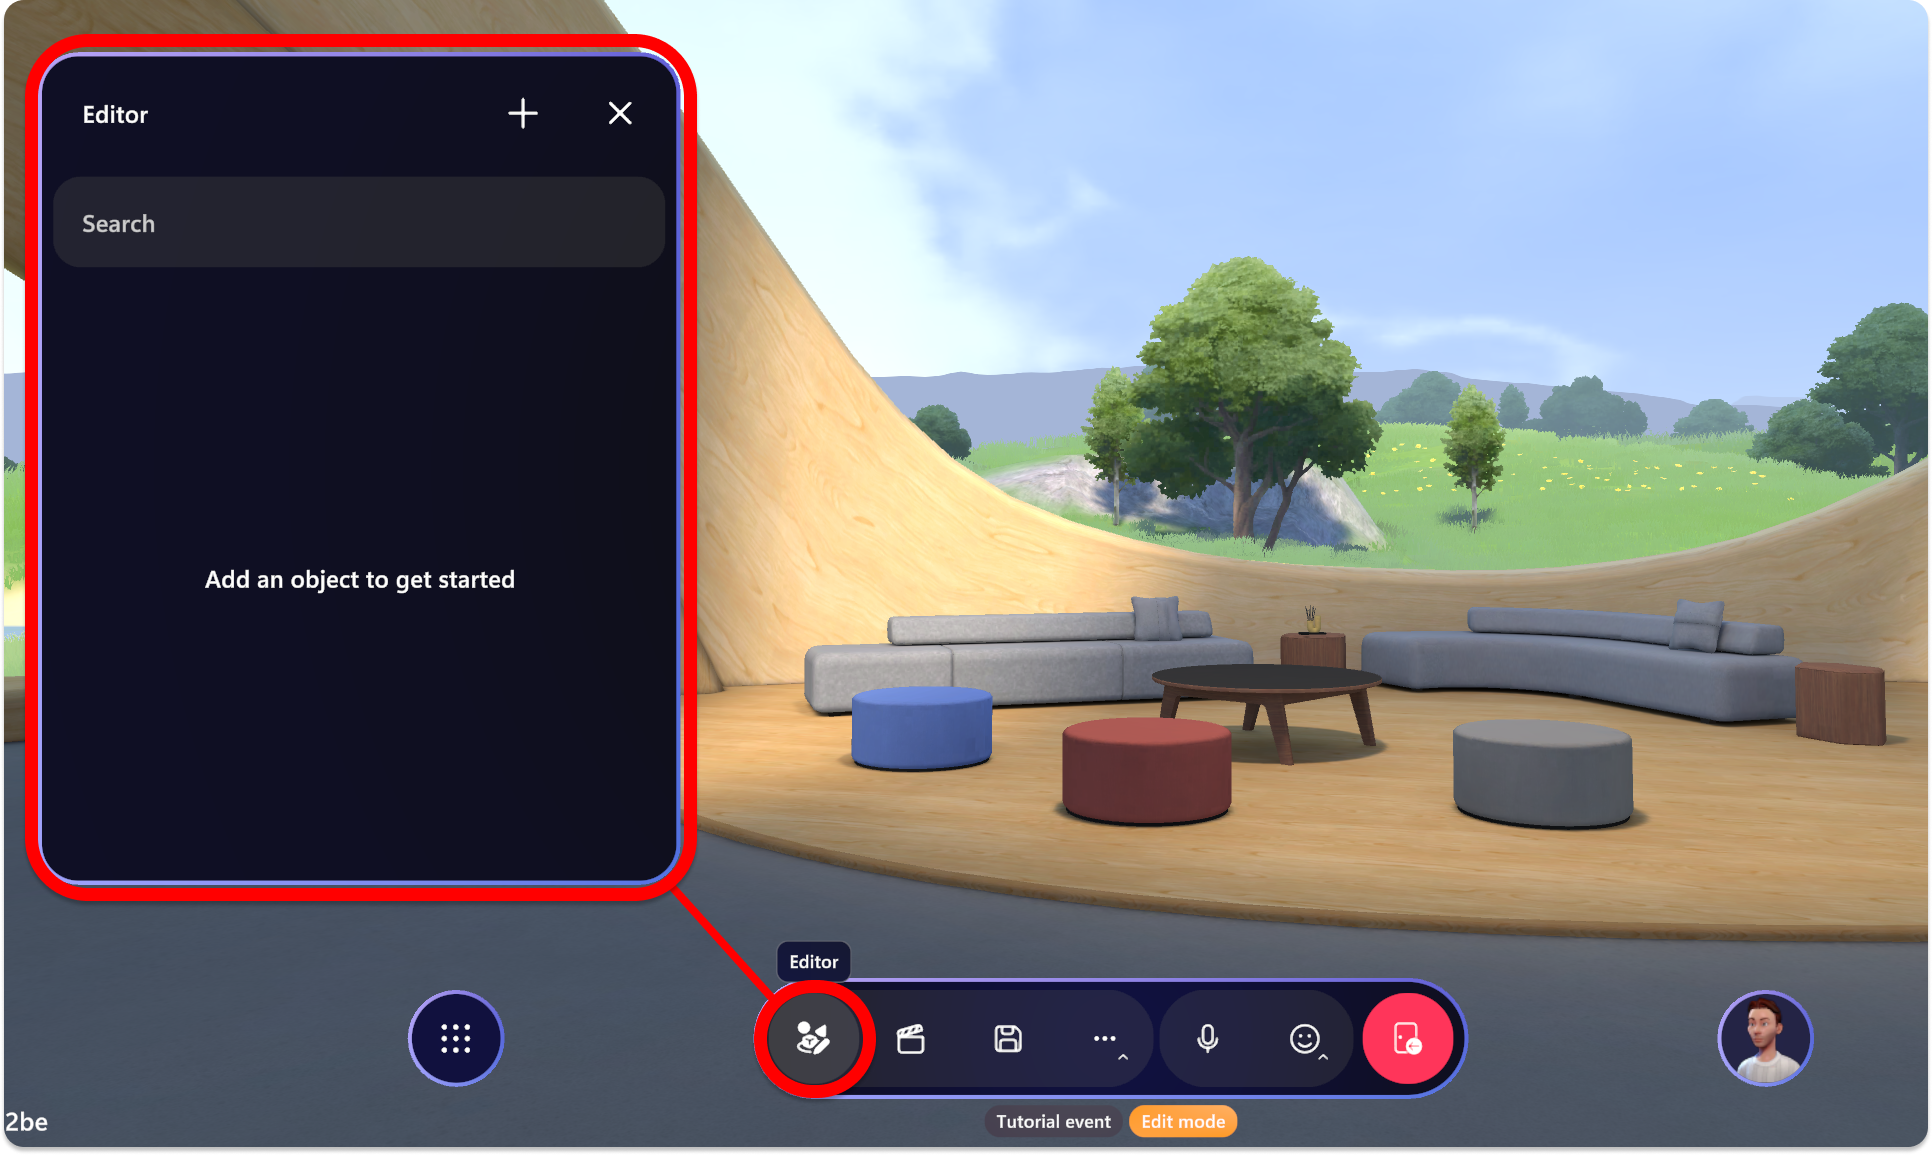
Select the + plus button to open the Catalog of objects that you can add. Select one to add it to the environment editor.
Once you've added an object, you'll see it show up in the Objects window as shown below:
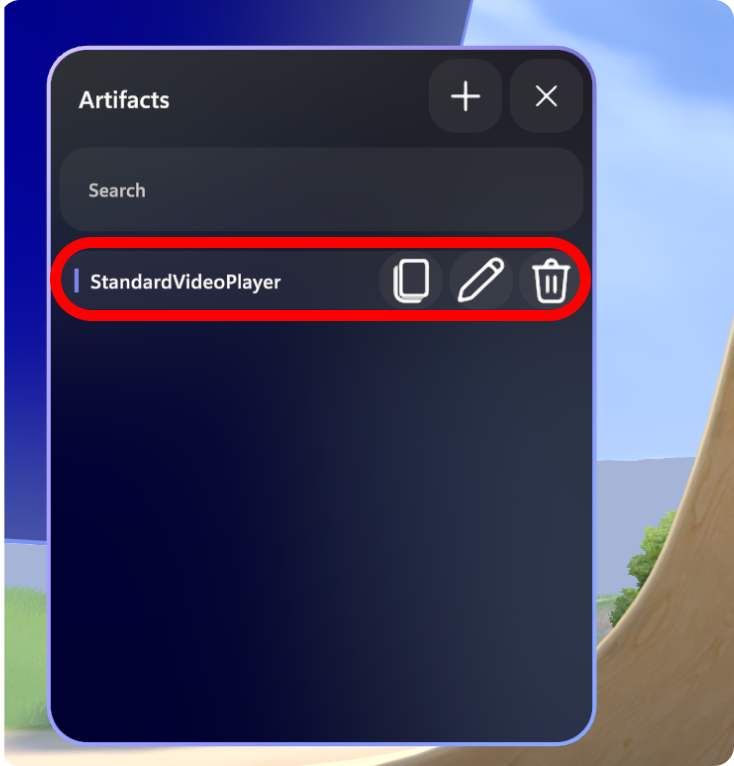
Note the Edit, Duplicate, and Delete buttons for the selected object.
Now you can manipulate the object as you'd like. Select it with your cursor and then use the manipulation tool to adjust position, rotation, and scale.
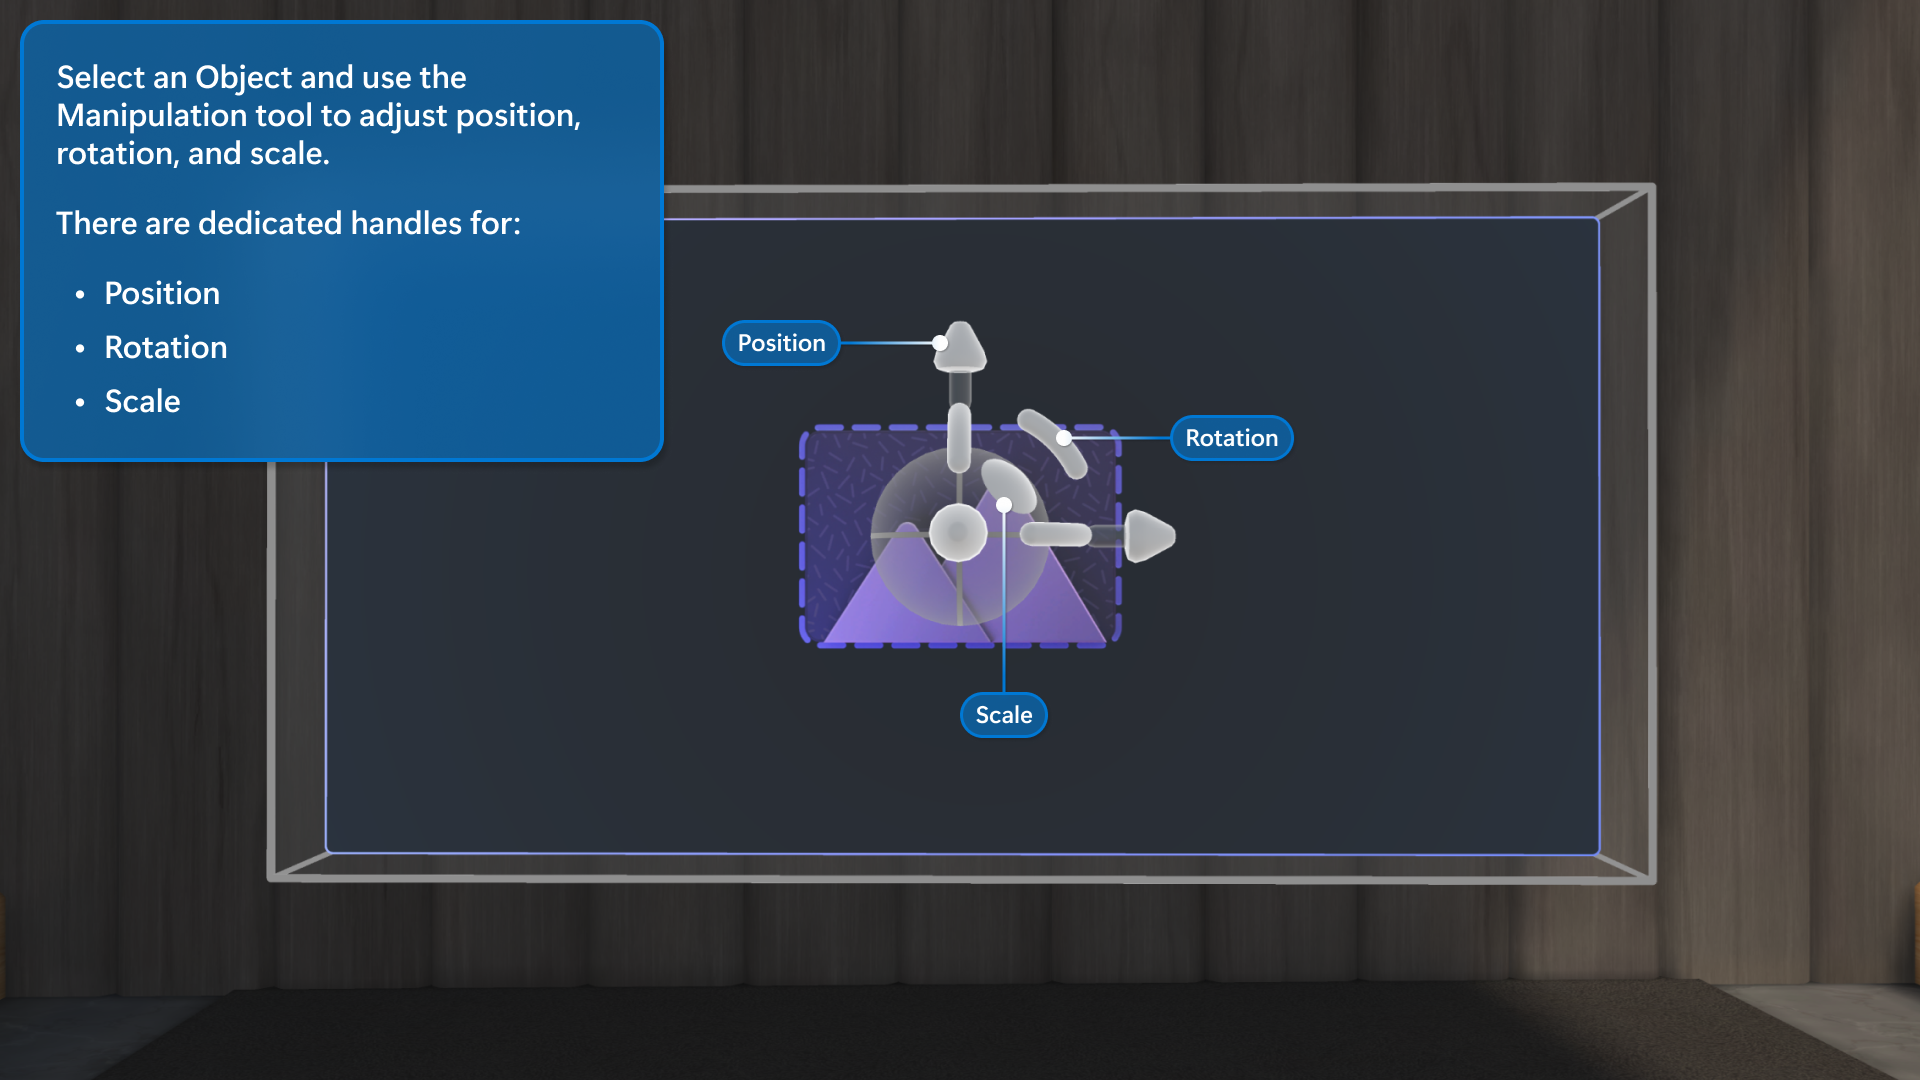
You can also use a few other shortcuts for moving Objects around:
- Select and drag your object to move it left, right, up, or down.
- Alt + Select and drag up or down to move the object toward and away from you.
- Shift + Select and drag up or down to make the object bigger or smaller.
Tip
while you are moving an object you’ll see a small line drawn from your object down to the floor. This can help you position your objects relative to landmarks in the scene such as the edge of a stage or a piece of furniture.
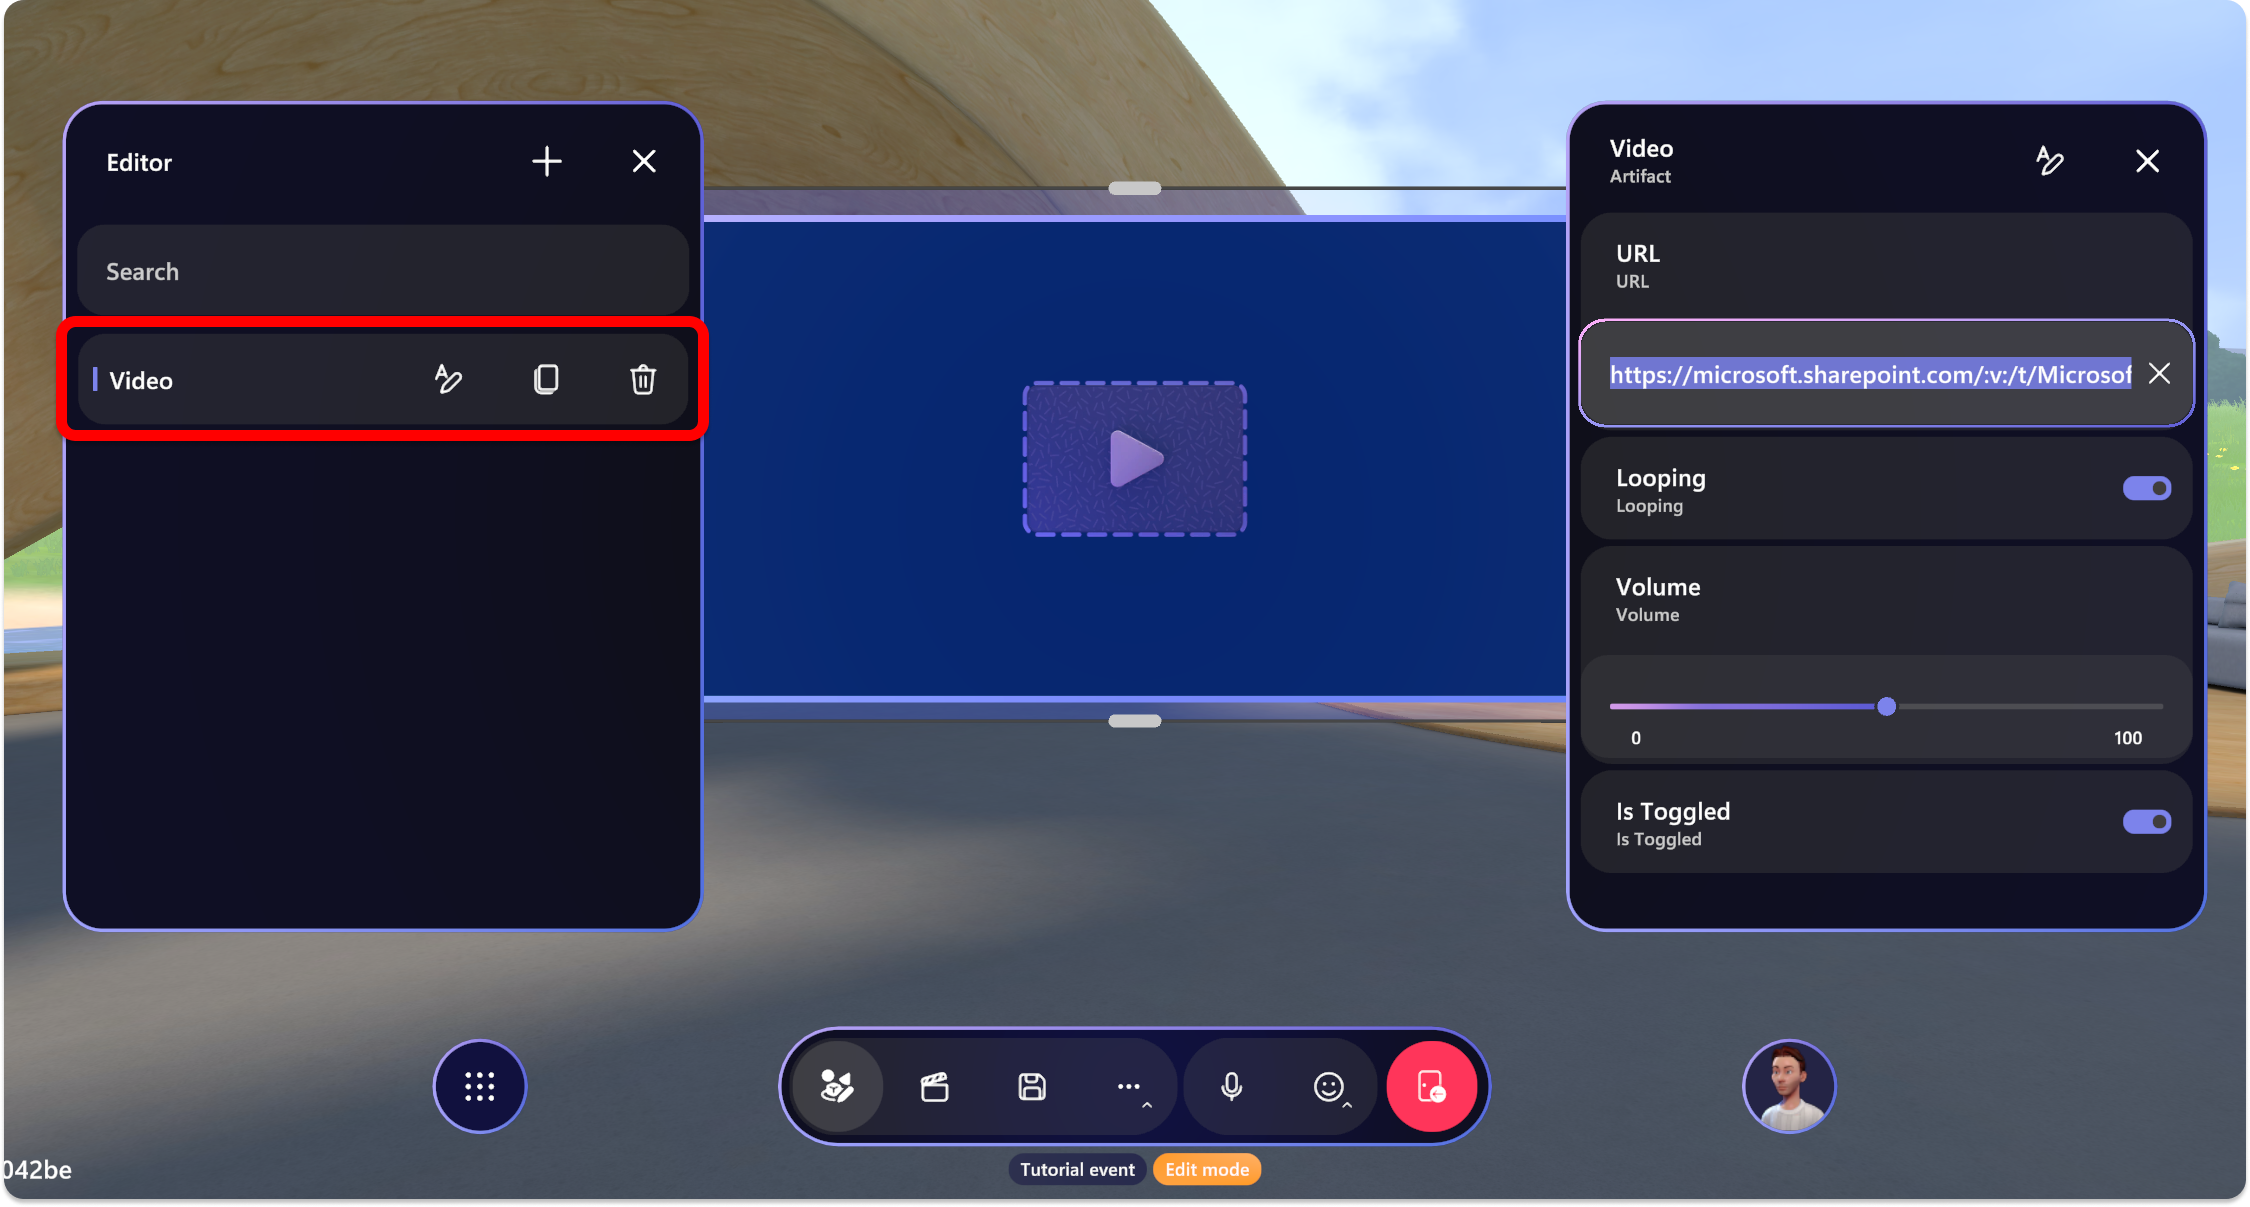
Edit object controls
Once you've added an object, you can maneuver it around the spaces and select it to edit the controls.
Select an added object and adjust the controls to suit your preferences.
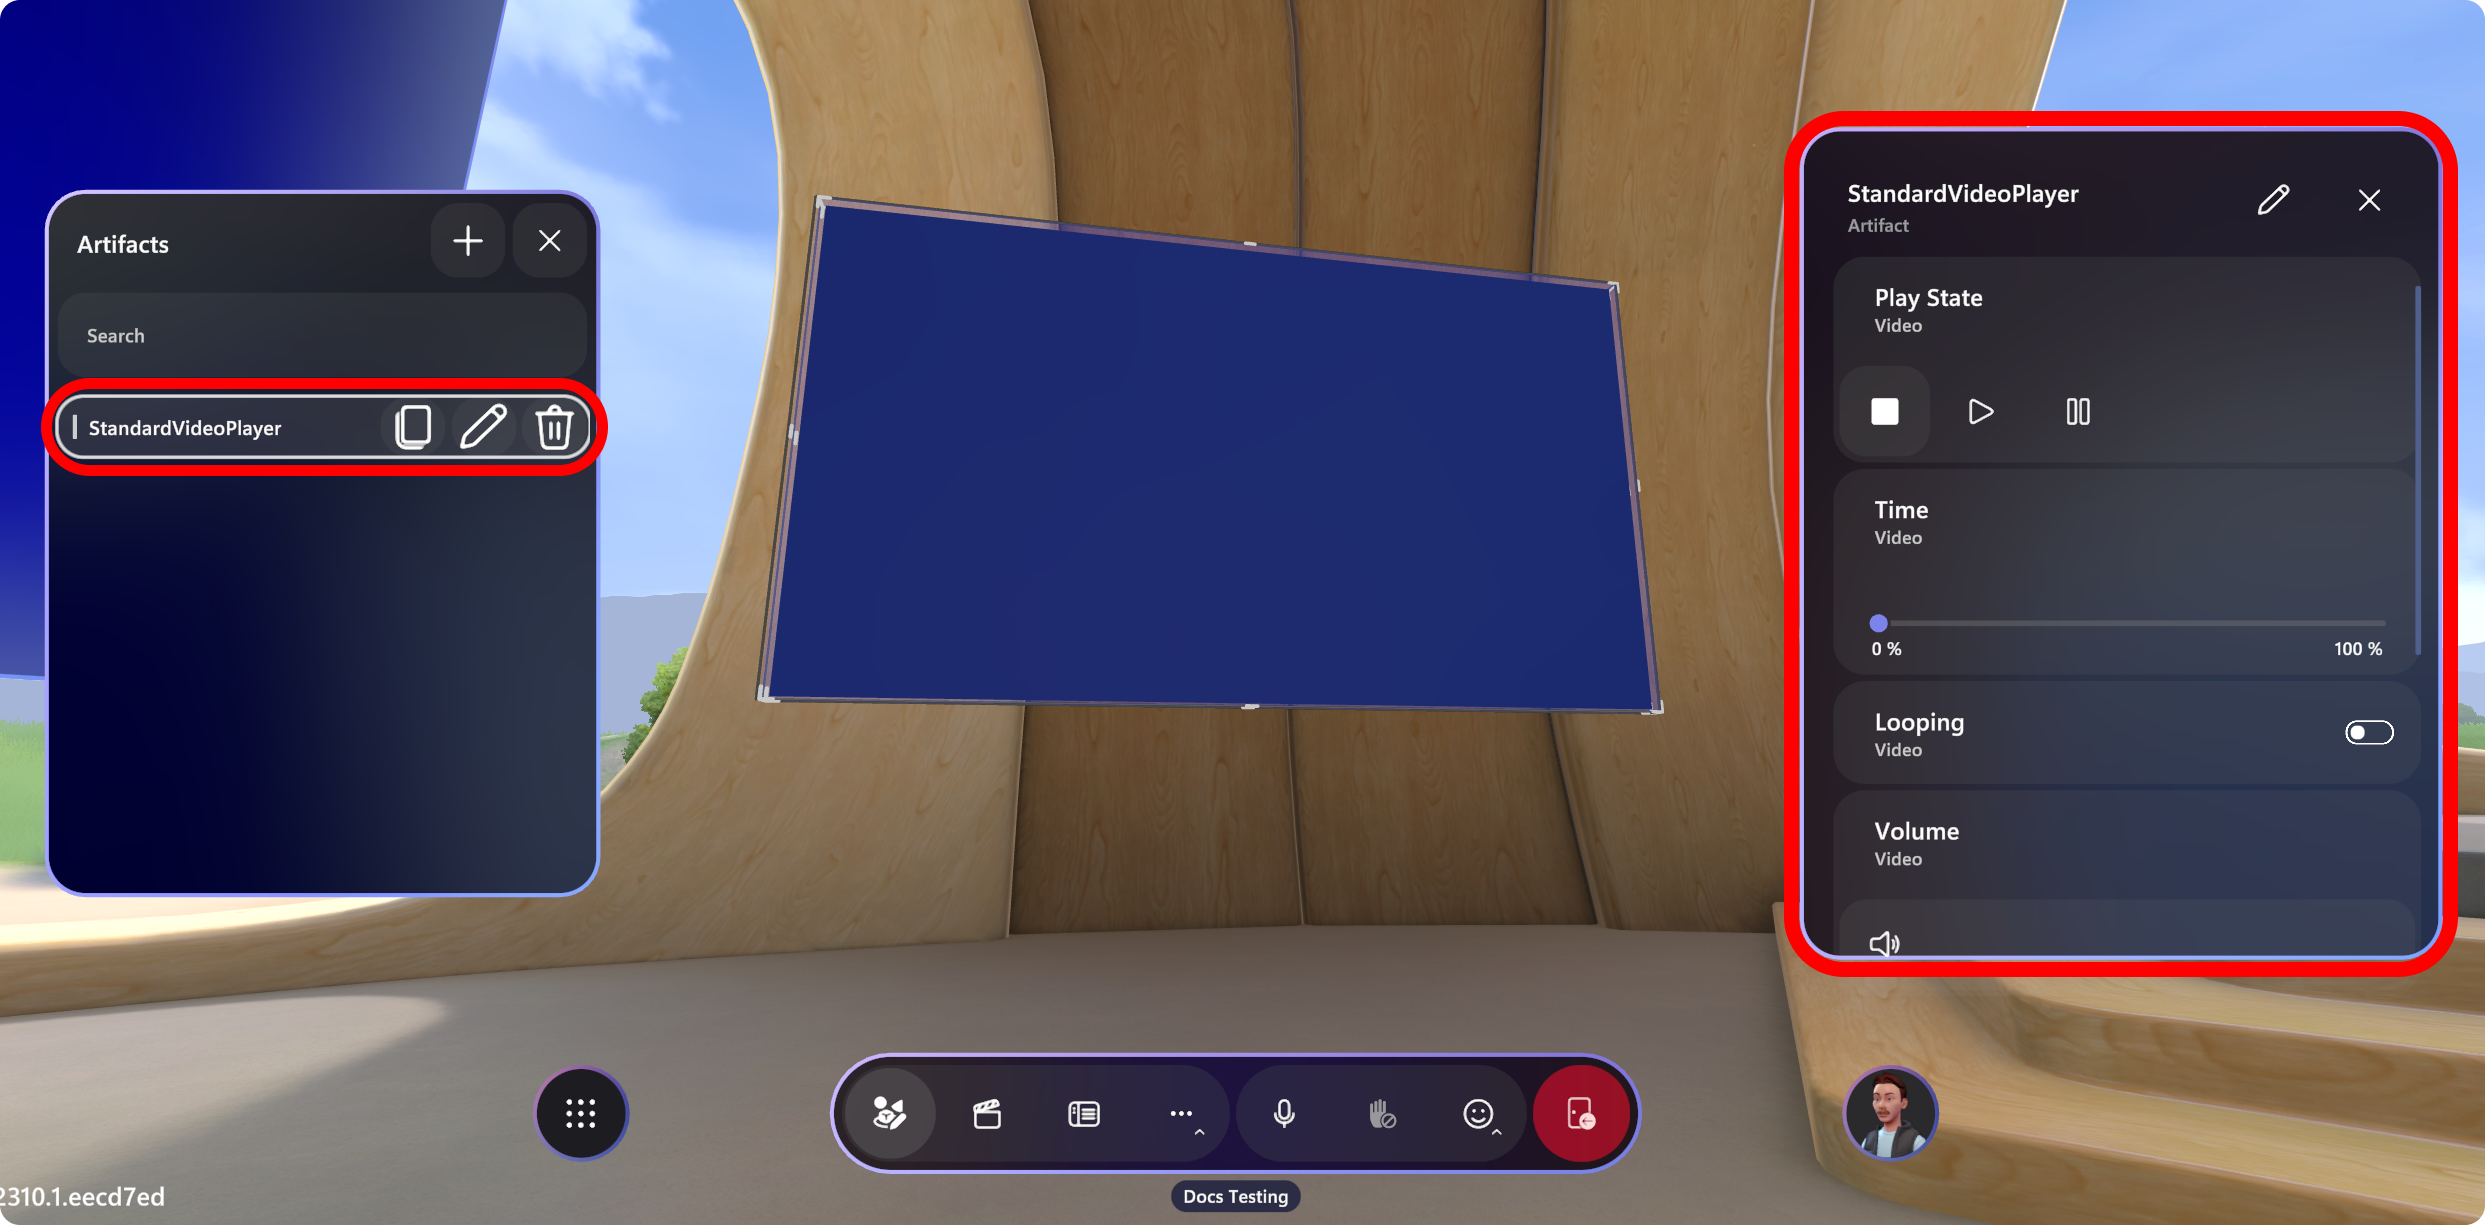
Configure the controls for the object. For example, you can add the URL for your video:
Tip
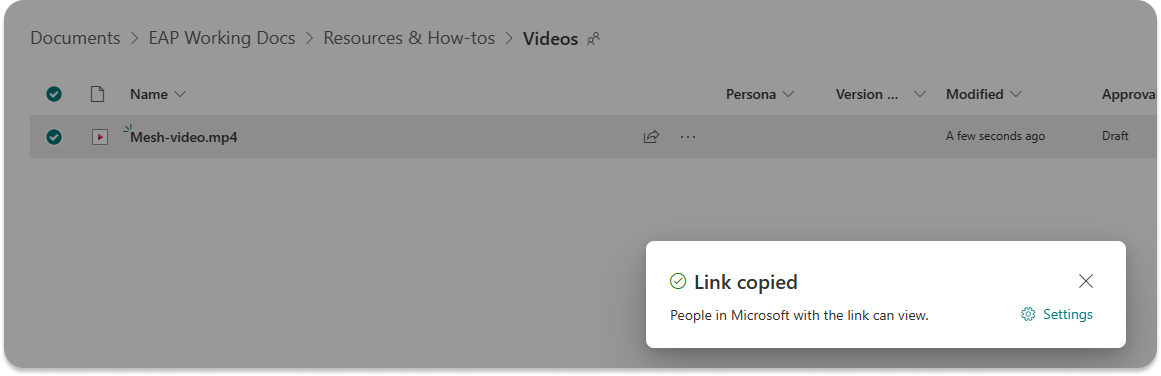
Use the Share or the Copy Link functionality in SharePoint to copy the link of the video or image that you want to share and paste it in the Video player or Image object URL field.
Prepare content with the Control panel
The Control panel holds all the controls available for your content during the event. Like having a technical booth for theatrical technicians, it's designed to give the organizer the ability to orchestrate a performance in real time.
You can try out the controls during the customization session, but make sure you set everything back to how you want your event to look when it starts and then save your changes (or if you're just practicing, you can use Revert changes in the save dialog).
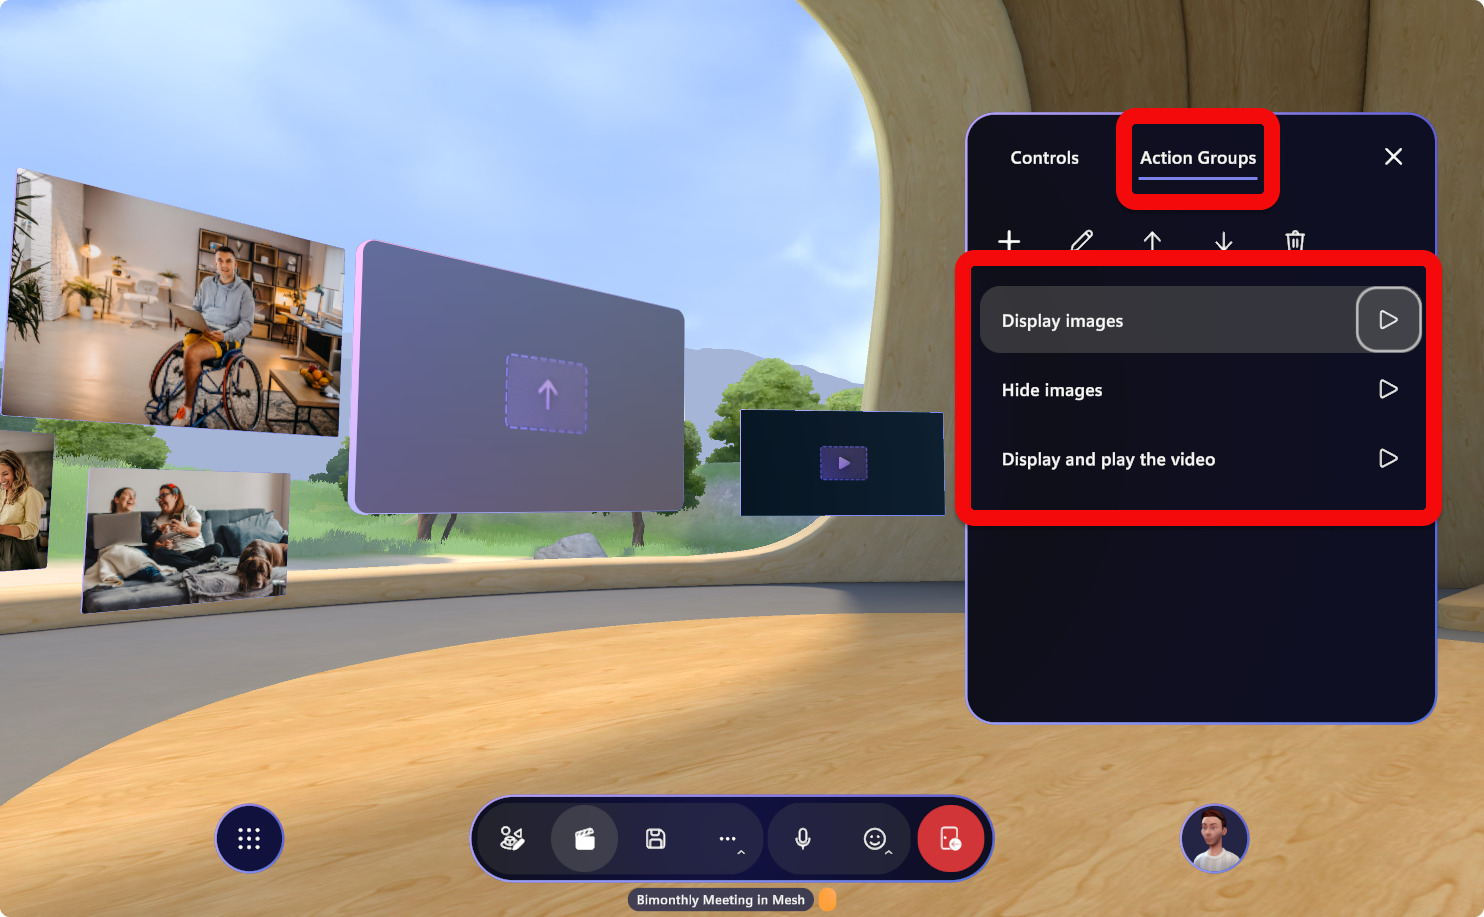
Create an Action Group
Sometimes you want to trigger multiple production elements simultaneously, like starting a video and revealing a banner image at the same time. To simplify multiple actions into just one click in the Control Panel, you can create an Action Group.
Action Groups allow organizers to take a bunch of content, preconfigure the controls for it, and save everything to a single-click group in the Control Panel.
For example, you might want to create an Action Group that contains all of the things you’d like to trigger for the Welcome portion of your event. Here, you might want to hide a countdown video, toggle the screenshare object to visible, and unfurl some logos. If you add each element individually to the Control Panel, you will have to take multiple actions to trigger these changes. Or you can simplify it all down to one-click with an Action Group.
To create an Action Group, start by opening your Control Panel and selecting the “Action Groups” tab:
Select the + button then type in your name for the Action Group.
In the Action group panel, select the Pencil icon then choose the objects you want to add to the group and Confirm.

For each object, choose the Pencil icon to choose which properties you want to control then select the controls you want to be included in the Action Group.
Adjust the controls for each object and select the Save icon. You'll see the Action Group show up in the Control Panel to the right.
Repeat for all Action Groups you want, then you'll have a sequence of Actions available for use in your event.
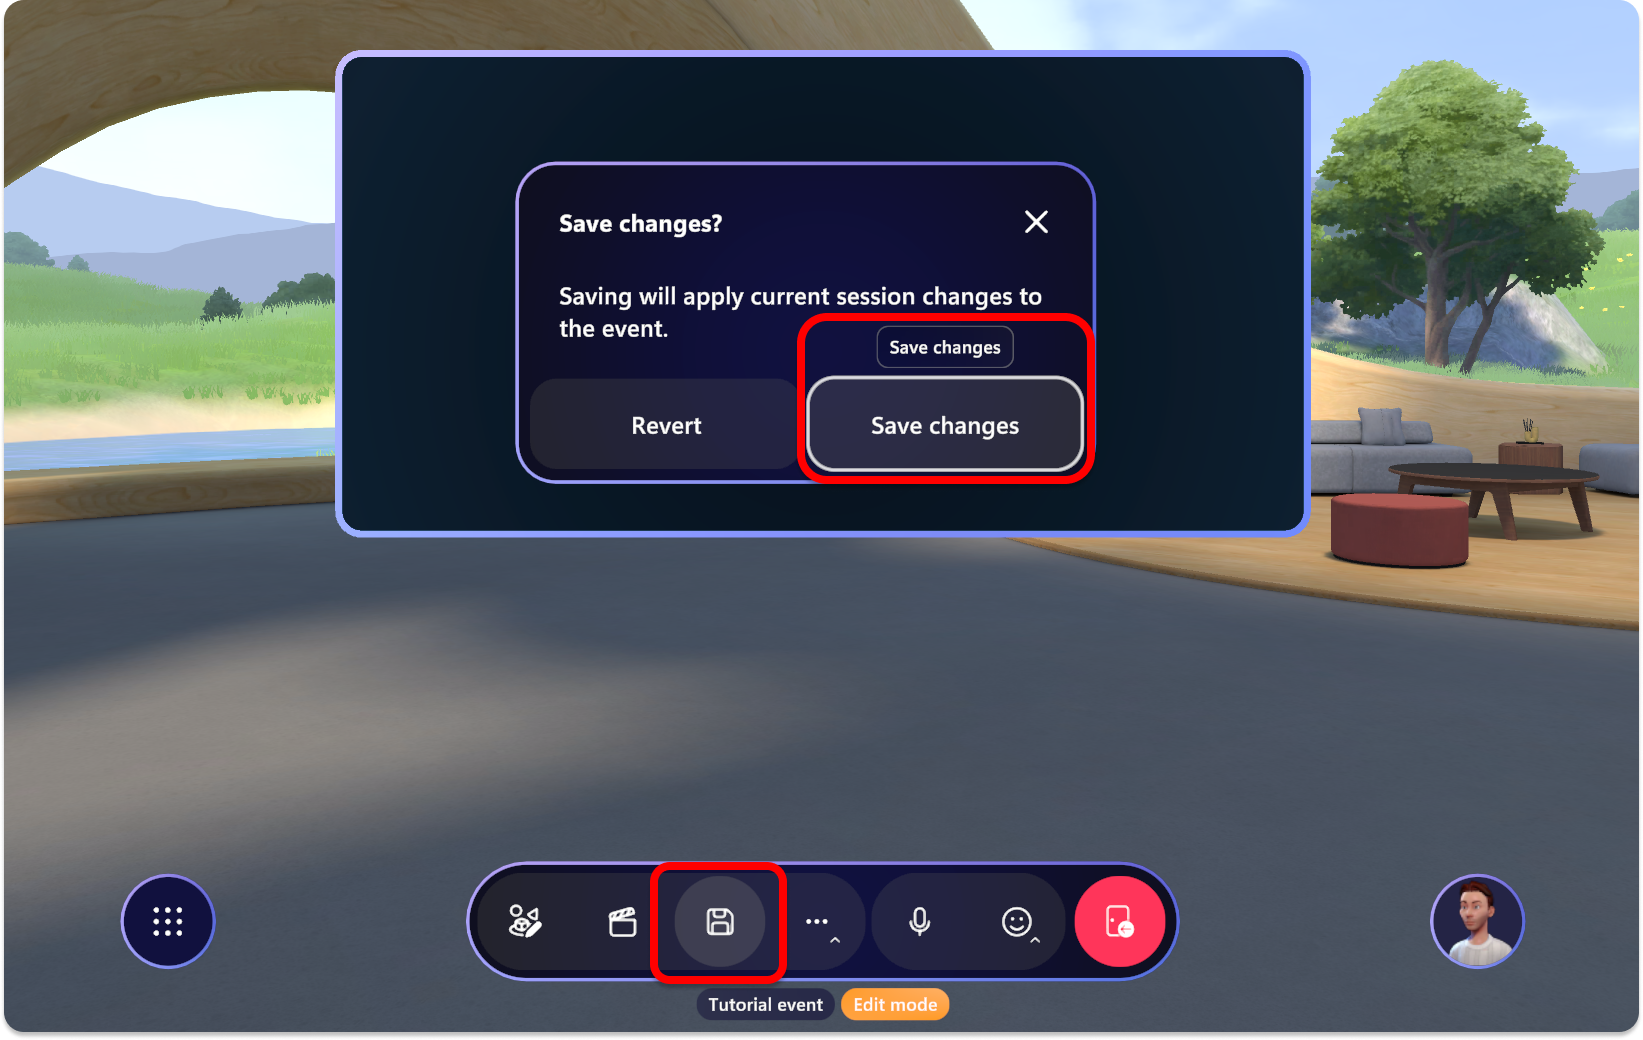
Save your content
Before you start your event, you must save the changes that you've made to your environment.
Select the Save button or Revert changes.