Note
Access to this page requires authorization. You can try signing in or changing directories.
Access to this page requires authorization. You can try changing directories.
The Agent settings page in Microsoft 365 admin center provides centralized controls for managing AI agents across your organization. These settings help administrators enforce security, compliance, and governance standards while enabling flexibility for collaboration and productivity.
Overview
The Agent settings page includes the following configuration options:
- Agent management rules - Set and run rules to manage or perform actions on agents.
- Agent and plugin access - Specify which categories of AI agents and plugins are permitted for use within the organization.
- Security templates - Create preset policies, rules, and allow lists for new AI agents to ensure consistency and compliance.
- Sharing - Manage who can share AI agents within your organization and define the methods they can use to share them.
- User access - Control which users or groups can interact with AI agents and plugins, aligning access with organizational roles and permissions.
- Agent feedback sharing - Control whether agent usage feedback is shared with agent developers to help improve agent quality and reliability.
- Tags - Manage the labels that admins and users apply to agents to organize and find them.
These settings allow you to customize agent behavior, control access, and maintain compliance with enterprise standards.

Agent management rules
Agent management rules in the Microsoft 365 Admin Center (MAC) enable tenant administrators to apply governance and lifecycle controls across AI agents at scale by using bulk administrative actions.
Instead of manually reviewing and taking action on agents individually, use agent management rules to:
- Identify agents that meet defined conditions
- Review impacted agents before running the rule
- Apply governance actions across affected agents in bulk
This experience helps organizations maintain compliance, ownership accountability, and deployment consistency across agents while keeping administrators in the control loop.
Supported rule-based bulk actions
Agent management rules currently support the following governance scenarios:
- Install Microsoft agents
- Reassign ownerless agents created with Agent Builder to manager
- Block ownerless agents without usage
- Apply a template to agents
- Reject agent publish requests older than a specified number of days
Install Microsoft agents
Microsoft first-party (1P) agents are consistently among the most installed and widely used agents. However, administrators currently lack a scalable way to install these agents proactively across their tenant.
By using the Install Microsoft (1P) Agents rule, you can:
- Identify Microsoft-published agents within the tenant
- Review eligible agents before installation
- Install selected agents for all users through a single bulk action
- Microsoft agents appear as installed and are readily available for end-users in the organization
Reassign ownerless agents created with Agent Builder to manager
Agents become ownerless when their original creator leaves the organization. Administrators must currently identify and transfer ownership manually, which can result in lifecycle governance gaps.
Note
This rule only supports agents created by using Microsoft Copilot Agent Builder.
By using the Reassign Ownerless Agents rule, you can:
- Identify agents that no longer have a valid owner
- Review ownerless agents before reassignment
- Transfer ownership by using a bulk reassignment action to the manager of the previous owner based on Microsoft Entra ID hierarchy
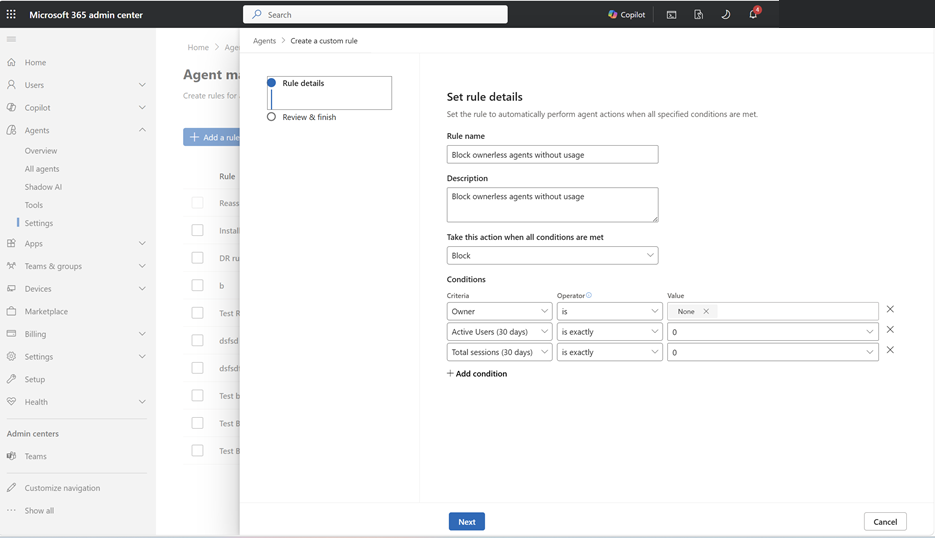
Block ownerless agents without usage
Admins can create a custom rule to block multiple ownerless agents that have no usage.
Apply a template
Use the Apply template action in an agent management rule to apply security policies to existing agents. This action helps you apply policies at scale after agents are published instead of applying policies to each agent individually.
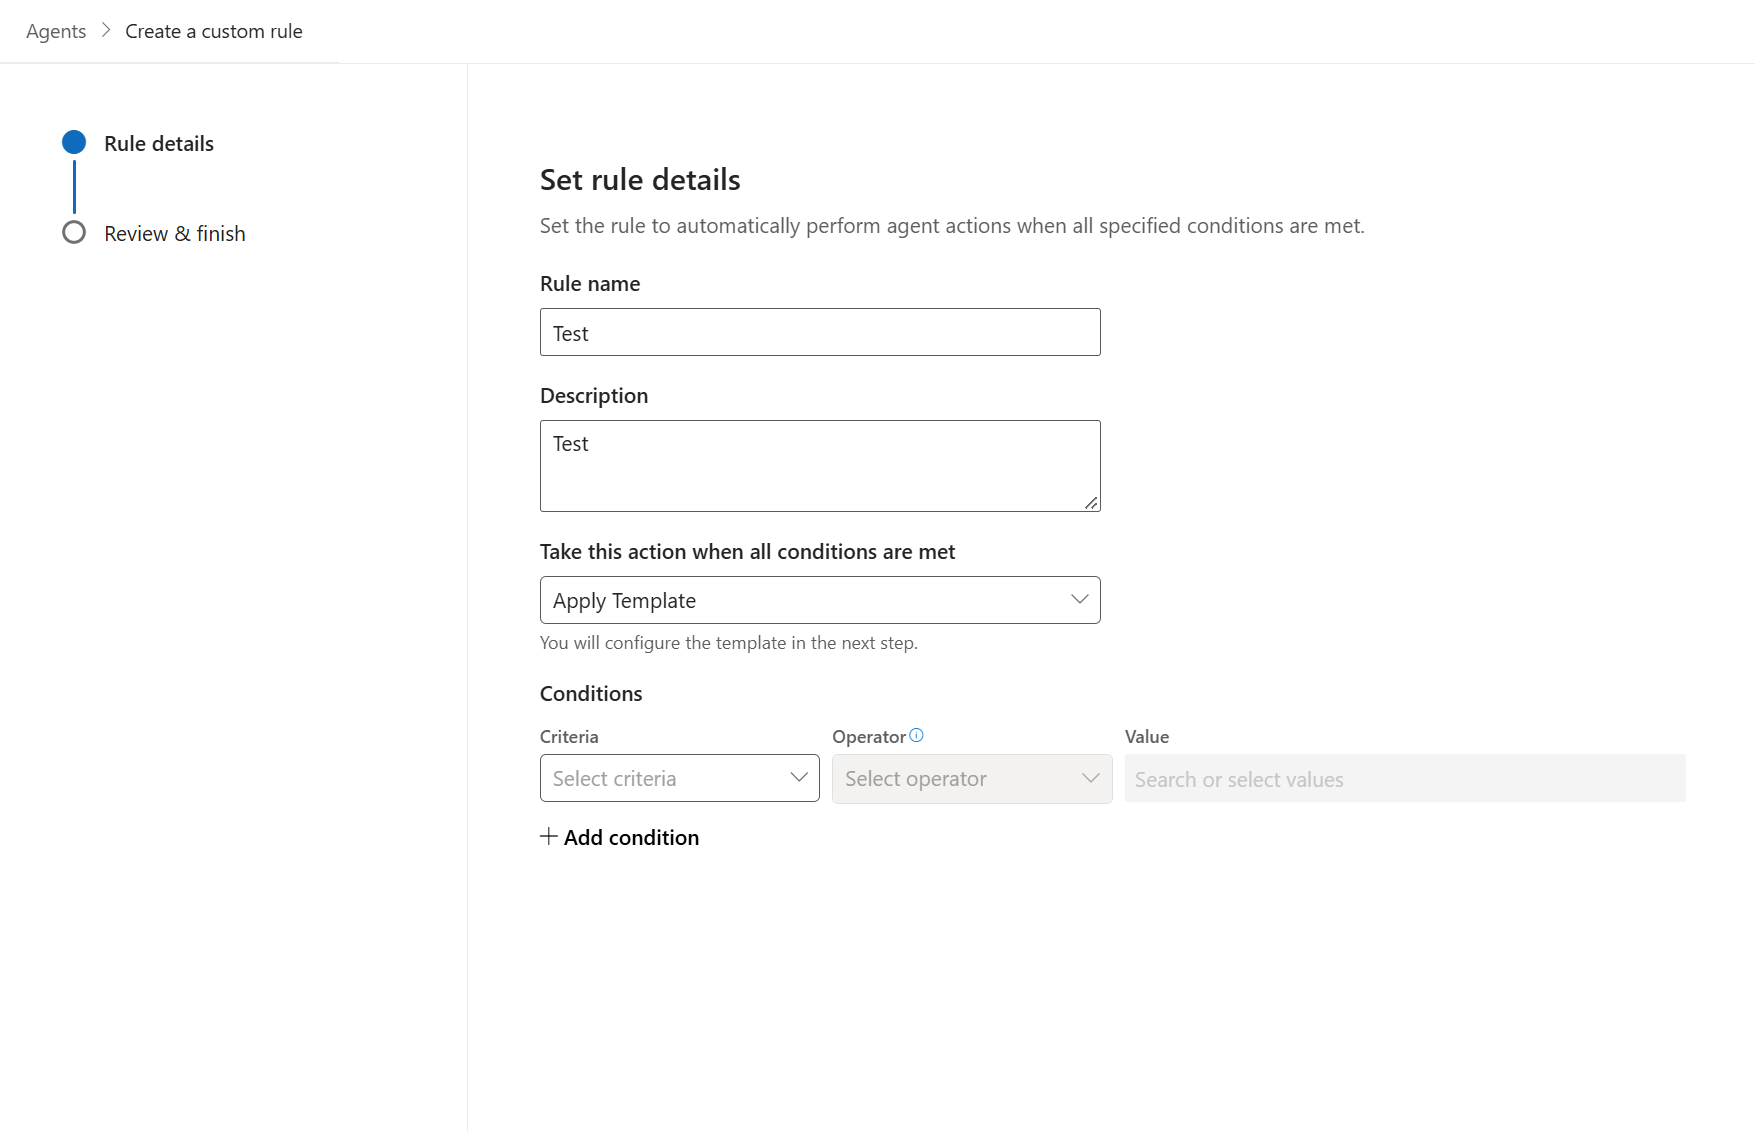
When you create the rule, define conditions that identify the agent instances you want to manage. The rule evaluates agents in the registry that have an agent identity. It doesn't apply to agent blueprints or AI teammates.
To apply a template:
- In the Microsoft 365 admin center, go to Agents > Settings > Agent management rules, and then select Add rule.
- Select Apply template as the rule action.
- Define the applicable criteria that determine which agent instances the rule applies to.
- Choose a preexisting template, or select policies from the Custom section to create a custom configuration. Review the selected policies, and then save the rule.
- In the rule details pane, choose all agents or select a subset of agents from the list. Run the rule to apply the template.
The Apply template action is a one-time bulk operation. It isn't a scheduled rule.
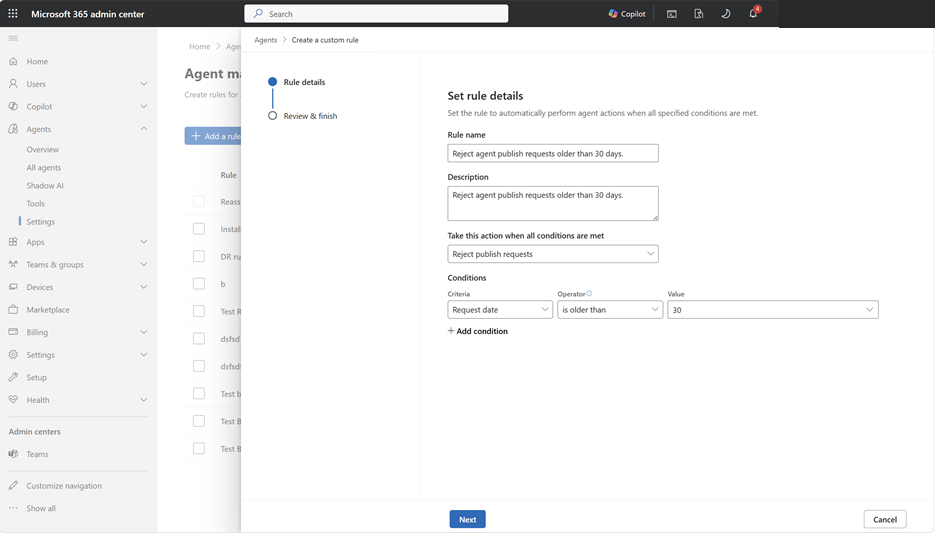
Reject agent publish requests older than a specified number of days
Admins can create a custom rule to reject multiple agent publish requests that are older than a specified number of days.
Agent and plugin access
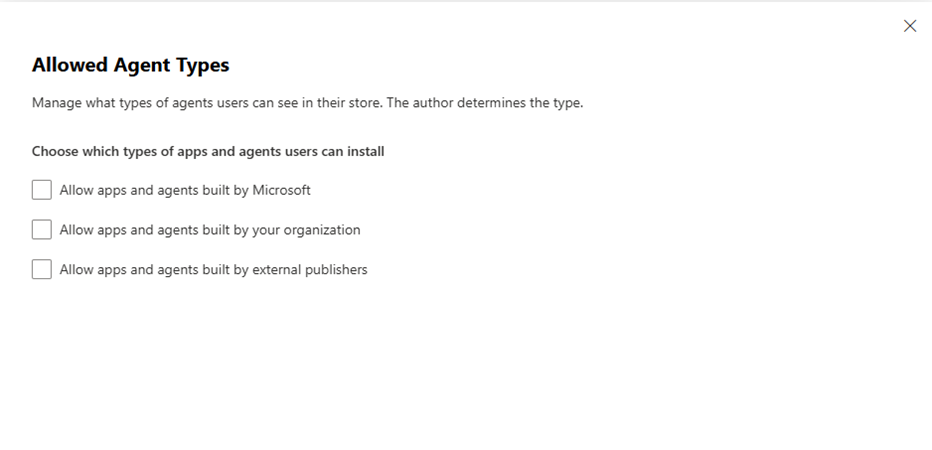
The Agent and plugin access setting controls which types of agents and plugins users can view and install from the agent catalog. Plugins include tools, MCP servers, connectors, skills, and other AI artifacts that extend agents. Select from the following options:
Allow agents and plugins built by Microsoft - Enables users to install agents and plugins created by Microsoft.
Allow agents and plugins built by your organization - Enables users to install custom agents and plugins developed within your tenant.
Allow agents and plugins built by external publishers - Enables users to install non-Microsoft agents and plugins built by external developers.
Tip
- If you disable an option, agents and plugins of that type don't appear for users in the Agent store.
- Users see agents and plugins built by Microsoft even if you disable the setting, but they can't install those agents and plugins.
Policy templates
To enhance governance and security for agents, apply a template that includes predefined security policies.
For more information about templates, see Policy templates.
Sharing
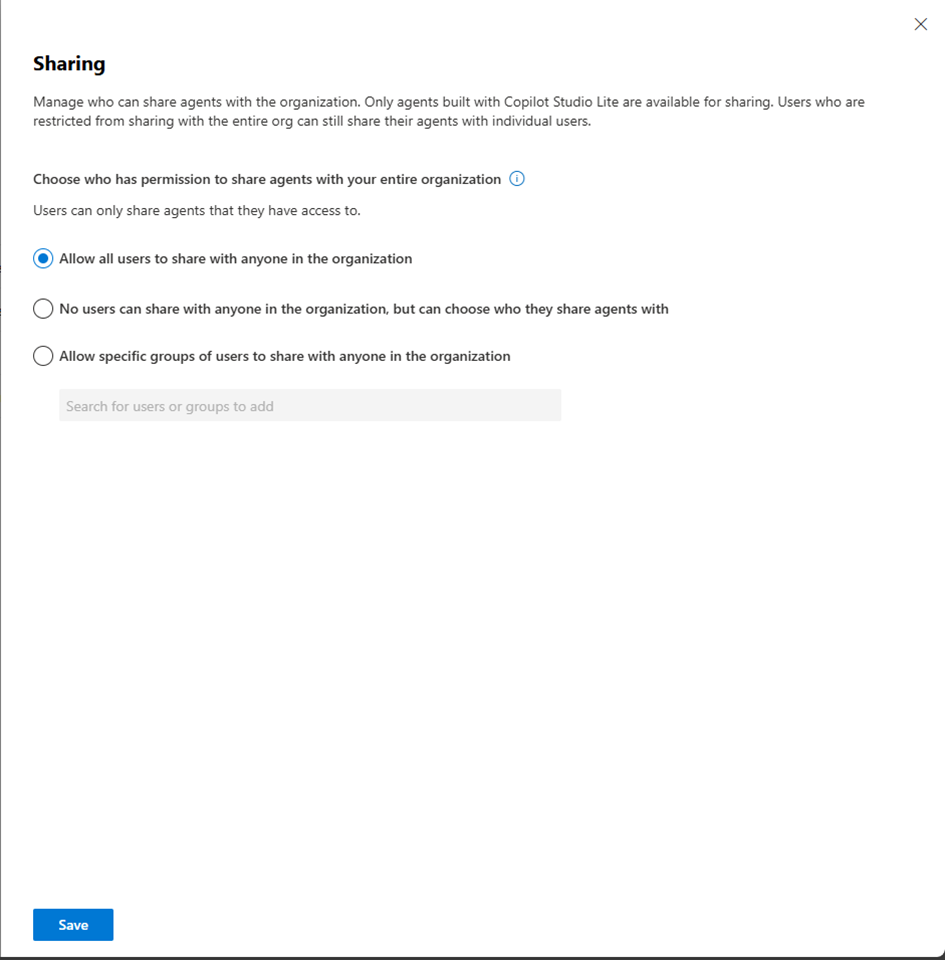
Use Sharing to set who can share agents within your organization and how sharing works.
Options include:
All users - All users can share their agents with others in your tenant.
No users - Disable sharing at the org level, but users can still share directly with specific individuals.
Specific users - Restrict broad sharing permissions to designated groups.
Sharing control only applies to agents built with Microsoft Copilot Agent Builder.
User access
Use User access to control how members of your organization access and install agents and plugins. Plugins include tools, MCP servers, connectors, skills, and other AI artifacts.
Note
As the administrator, use discretion when managing individual agent and plugin distribution and costs.
To manage access to Copilot agents and plugins, follow these steps:
Open the Microsoft 365 admin center in your browser.
Select Agents > Settings > User access to manage your organization's agents and plugins.
Select who can access agents and plugins within your organization.
The setting has three options:
All users - This option is the default. It means that all users in the organization can access agents and plugins, subject to the existing app policies and user assignments.
No users - This option means that no users in the organization can access agents and plugins.
Specific users or groups - This option lets you select specific users or groups in your organization to have access to agents and plugins. While some users in your organization might have permission to install and use agents and plugins from the Agent Registry list, only the users or groups you select in this setting can use agents and plugins.
Important
Data processed by non-Microsoft services isn't subject to Microsoft agreements. Review the terms provided by non-Microsoft agent and plugin publishers to make sure that you're familiar with the data handling and privacy practices of the agent or plugin. In addition, consult your internal policies before allowing access.
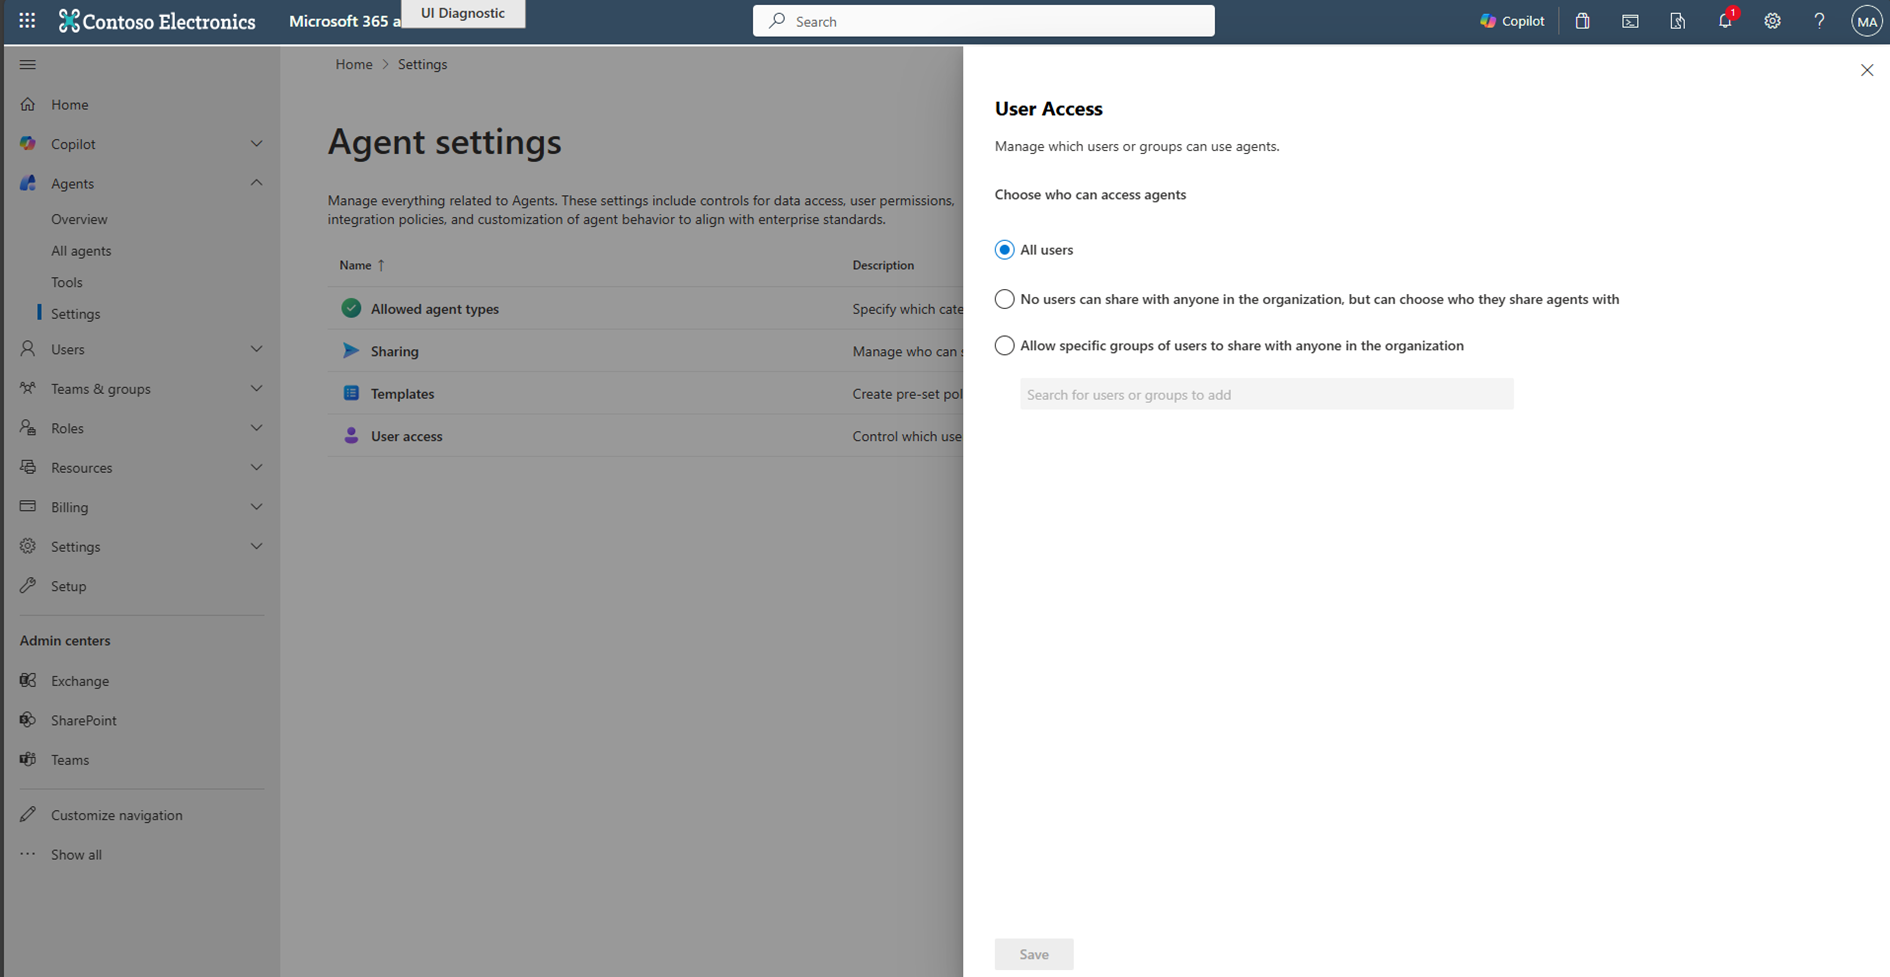
Select Save to update your Copilot agent and plugin settings for your tenant.
Agent feedback sharing
The Agent feedback sharing setting controls whether developers receive feedback about an agent, including thumbs-up or thumbs-down ratings and comments. Sharing feedback helps developers improve agent quality and reliability. This setting doesn't affect whether people can rate agents or what data an agent can access.
Choose from the following options:
| Option | Description |
|---|---|
| No agents | Developers don't receive feedback for any agents. |
| All agents | Developers receive feedback for all agents. |
| Selected agents | Developers receive feedback only for agents you select. |
To configure agent feedback sharing:
- In the Microsoft 365 admin center, select Agents > Settings > Agent feedback sharing.
- Select No agents, All agents, or Selected agents.
- If you select Selected agents, choose the agents whose feedback you want to share.
- Select Save.
Manage tags
Admins and users apply tags as labels to agents, so they can organize and find them easily. Manage your organization's tags from one place to help people apply them consistently. You can add a description to explain when to use each tag.
In the Microsoft 365 admin center, select Agents > Settings > Tags. The Tags page lists each tag, its description, and the number of agents that use it. From this page, you can:
- Create a tag by selecting Add and entering a name. Your organization can have up to 50 tags.
- Add or edit a description to explain when to apply a tag.
- Filter the list to find a tag.
- Delete a tag that you no longer need.
Important
Deleting a tag removes it from every agent that uses it. Check the agent count before you delete a tag. If your organization reaches the 50-tag limit, delete an existing tag before you create another one.