Configure authentication for Microsoft 365 support integration with ServiceNow
Prerequisites
These prerequisite steps are required to set up Microsoft 365 support integration.
Microsoft Entra administrator
[Microsoft Entra Admin] Create Microsoft Entra Application for Outbound under your Microsoft 365 tenant.
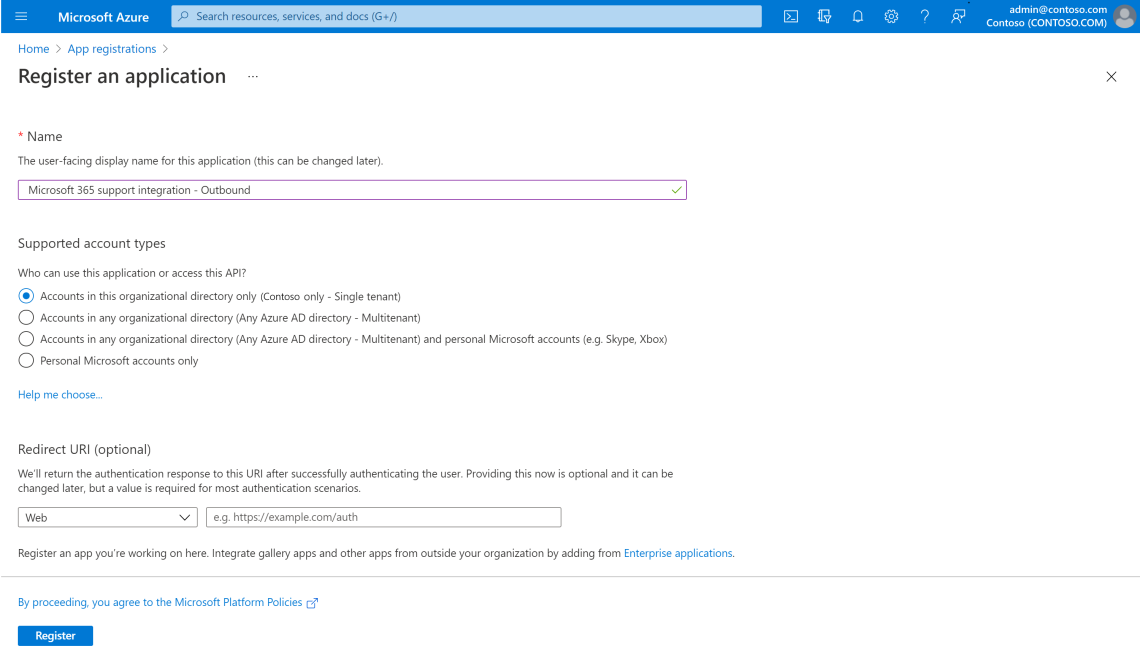
Log on to the Azure Portal with your Microsoft 365 tenant credentials and go to the App registrations page to create a new application.
Select Accounts in this organizational directory only ({Microsoft-365-tenant-name} only – Single tenant) and select Register.
Go to Authentication and select Add a platform. Select the Web option and enter the redirect URL:
https://{your-servicenow-instance``}.service-now.com/oauth_redirect.do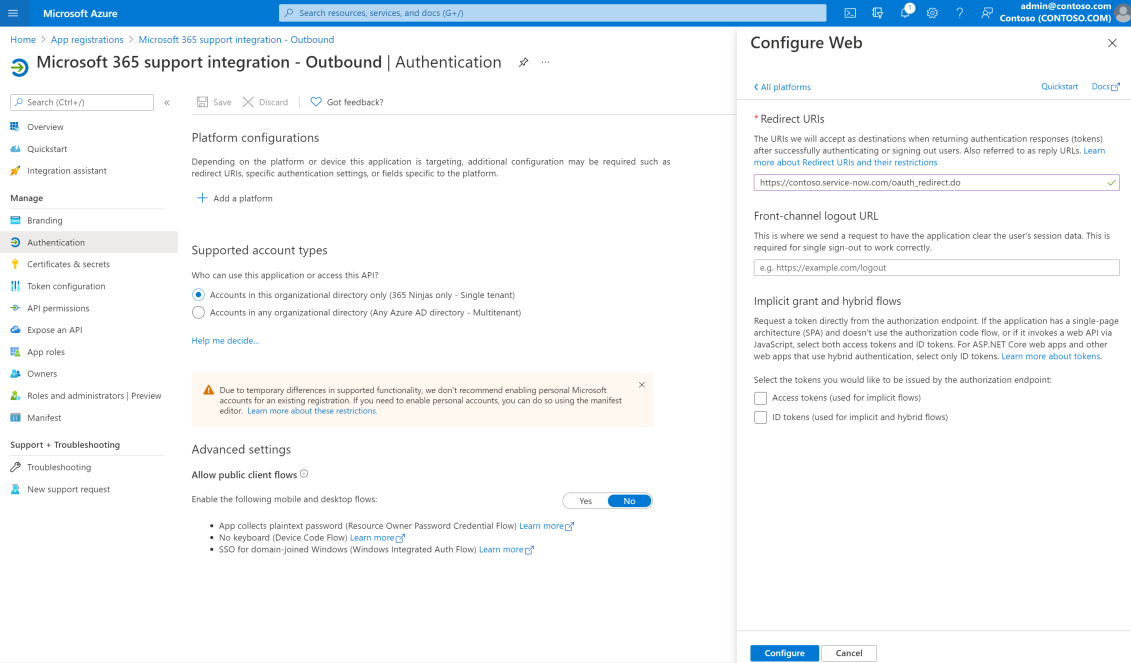
Get the Application Client ID and create a Client secret and get that value.
[ServiceNow Admin] Set up the Outbound OAuth Provider in ServiceNow.
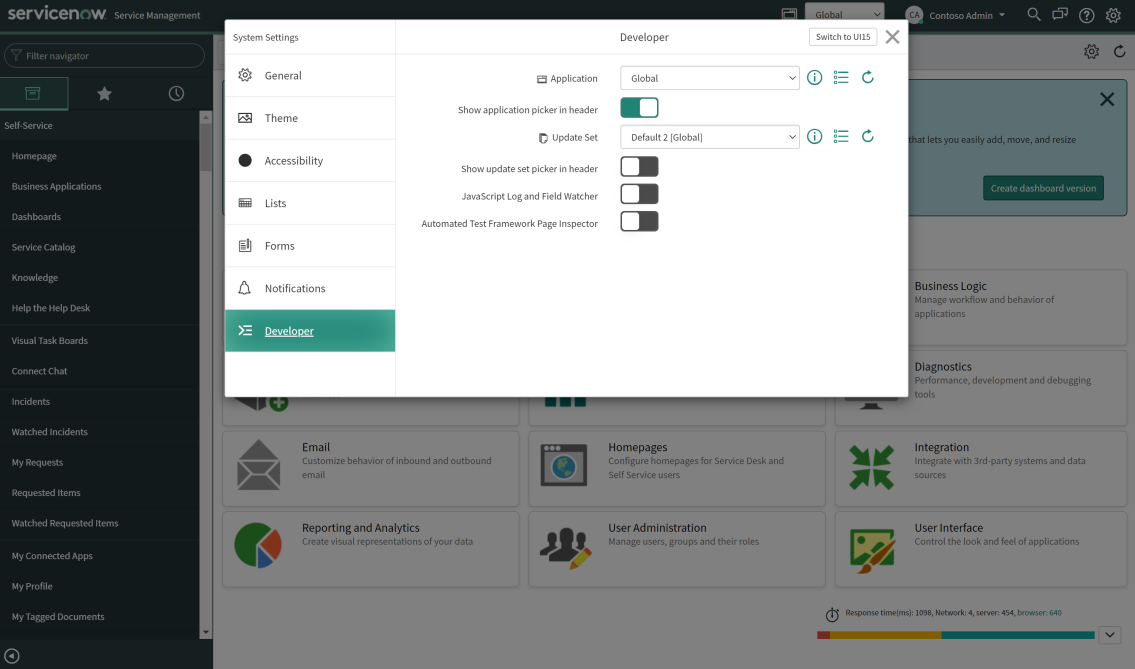
If the scope is not set to Global, go to Settings > Developer > Applications and switch to Global.
Go to System OAuth > Application Registry.
Create a new application by using the Connect to a third party OAuth Provider option and entering these values:
Client ID: This is the Client ID of the application created in step #1.
Client Secret: This is the Client Secret value of the application created in step #3.
Default Grant type: Client Credentials
Token URL:
https://login.microsoftonline.com/{microsoft-365-tenant-name}/oauth2/tokenRedirect URL:
https://{service-now-instance-name``}.service-now.com/auth_redirect.do


[OPTIONAL] Allow the service's IP addresses to Microsoft 365 support integration
If your company is limiting internet access with your own policies, enable network access for the service of Microsoft 365 support integration by allowing the IP addresses below for both inbound and outbound API access:
52.149.152.32
40.83.232.243
40.83.114.39
13.76.138.31
13.79.229.170
20.105.151.142
Note
This terminal command lists all active IPs of the service for Microsoft 365 support integration: nslookup`` connector.rave.microsoft.com
Configure the Microsoft 365 support integration application
These steps are required to set up the integration between your ServiceNow instance and Microsoft 365 support.
To open the Microsoft 365 support integration setup wizard, type Microsoft 365 in the ServiceNow navigator and select Setup.
Steps performed by a ServiceNow administrator
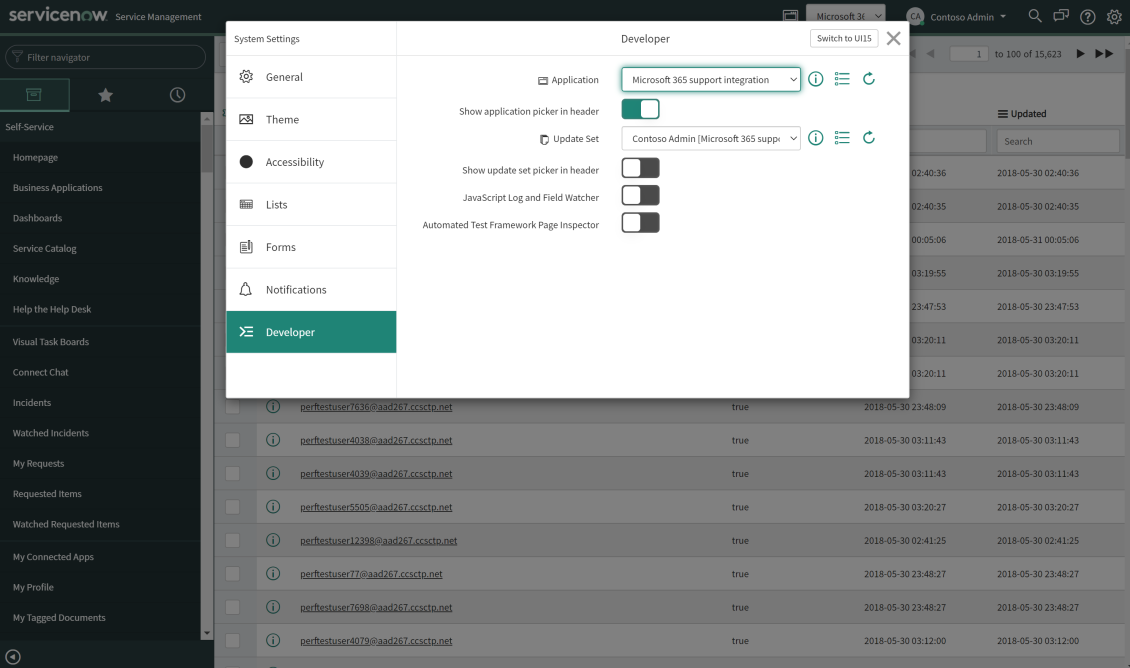
Switch the scope to Microsoft 365 support integration.
Go to Microsoft 365 Support > Setup to open the integration workflow.
Note
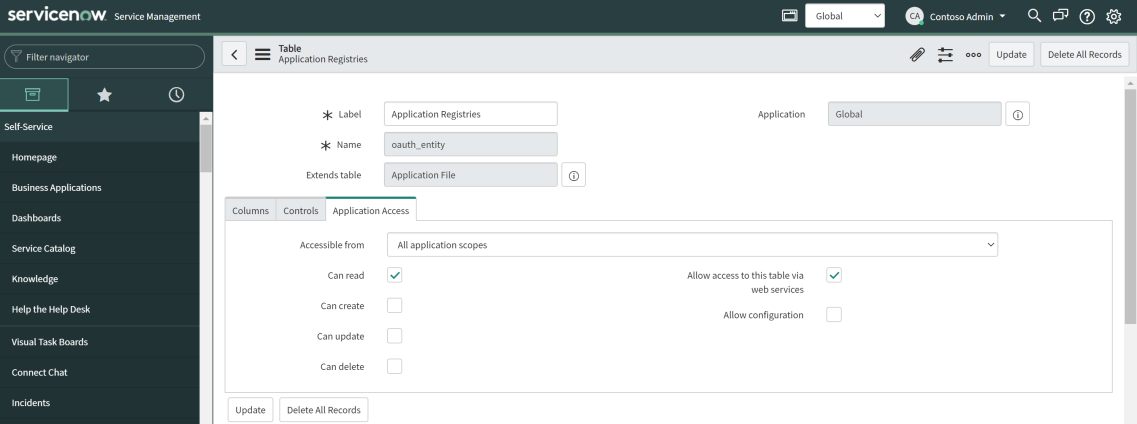
If you see the error "Read operation against 'oauth_entity' from scope 'x_mioms_m365_assis' has been refused due to the table's cross-scope access policy," it was caused by your table access policy. You must make sure All application scopes > Can read is checked for the table oauth_entity.
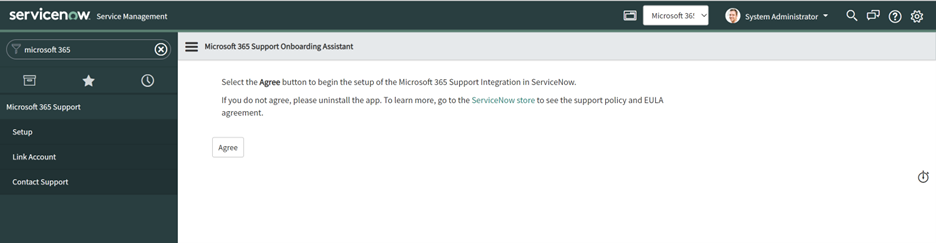
Select Agree to continue.
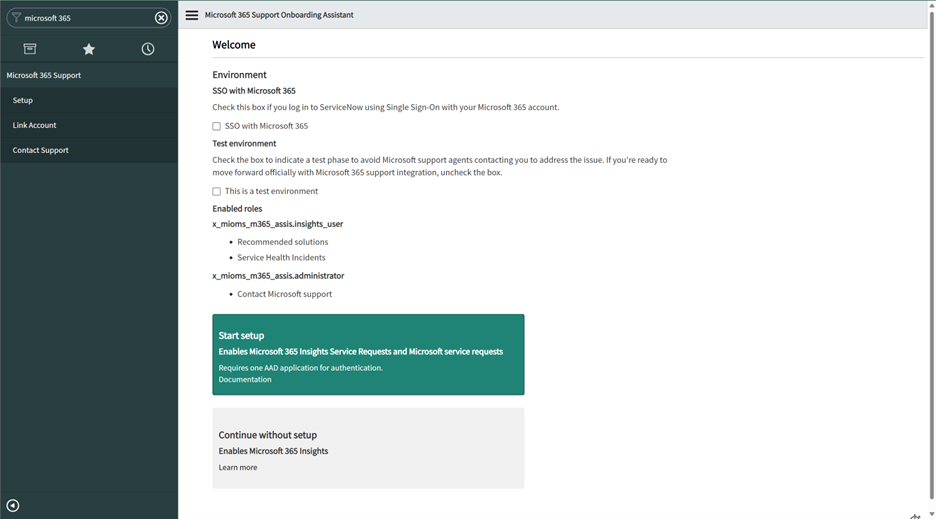
Configure the environment and start the setup.
If this installation is on a test environment, select the option This is a test environment. You can disable this option after the setup and your tests are completed later.
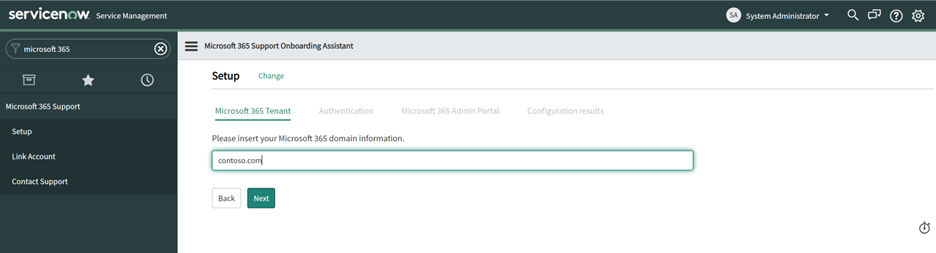
Enter your Microsoft 365 tenant domain.
Configure authentication settings.
Register the Microsoft Entra app.
After completing the instructions in the prerequisites section, select Done. Otherwise, follow the instructions in the wizard to create the necessary application registration in Microsoft Entra ID.

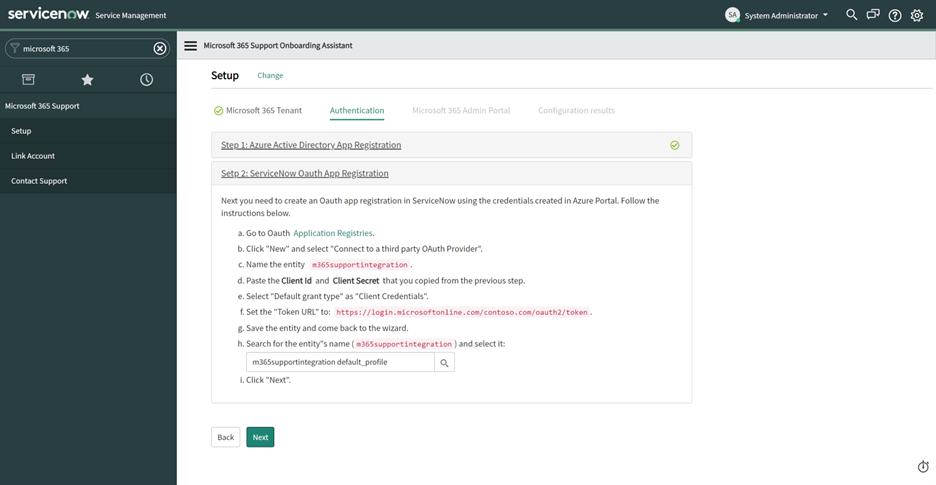
Register the ServiceNow OAuth app.
After completing the instructions in the prerequisites section, select the newly created OAuth application registration and select Next. Otherwise, follow the instructions to create the entity in ServiceNow, and then select the new application registration.


Steps performed by a Microsoft 365 administrator in the Microsoft 365 admin portal
Note
Do not select Test setup before the Microsoft 365 administrator finishes performing the next steps.
Verify that the following information is correct.

Note
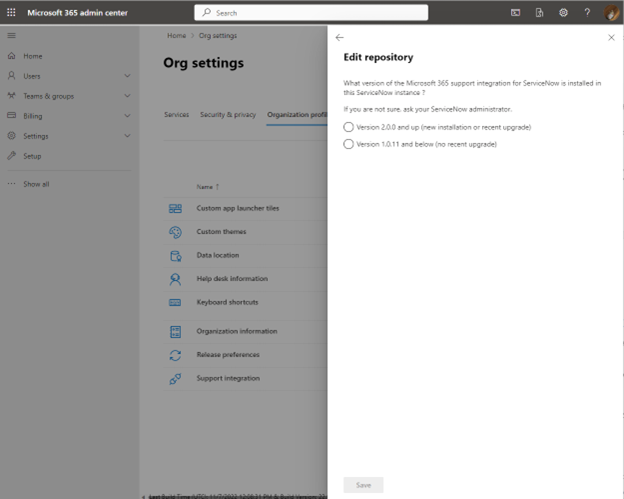
The following steps configure the Microsoft 365 support integration for ServiceNow application version 2.0.0 and later. If you've installed version 1.0.11 or earlier, you can't configure a new installation of the application.
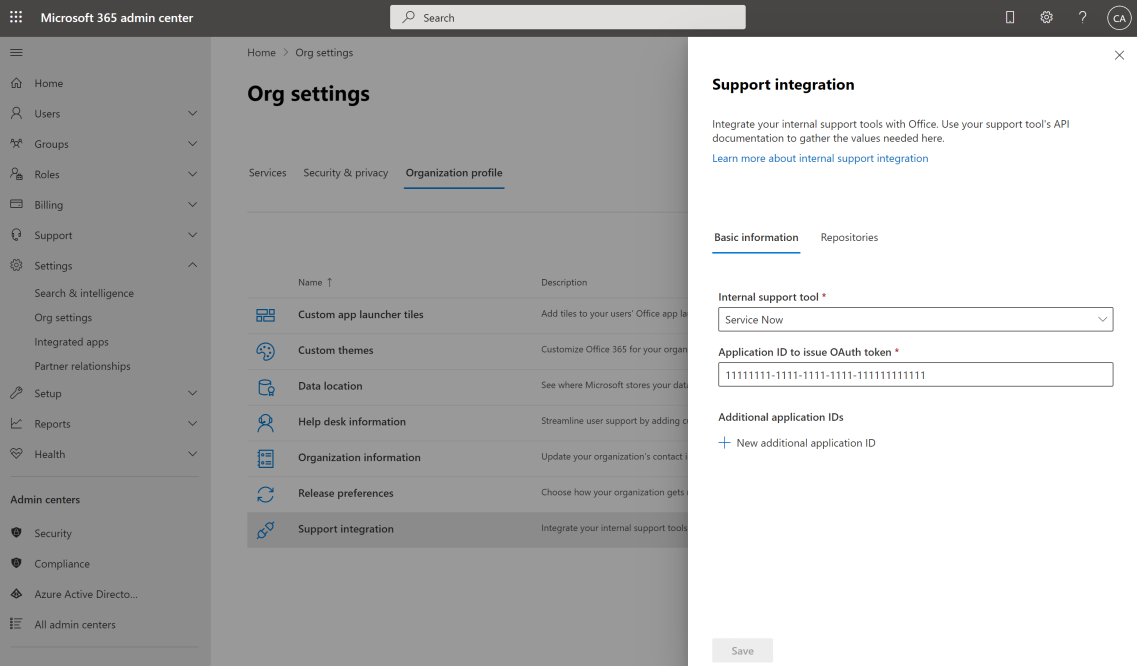
Configure the support integration settings:
Select the Basic information tab > Internal support tool > ServiceNow, and enter the Outbound App ID value in the Application ID to issue Auth Token field. This Outbound App ID is on Step 6 – Complete the Integration, which was created in Prerequisite step #1.
On the Repositories tab, select New repository and update it with the following settings:
If you have version 1.0.11 or earlier installed, you must upgrade the application to version 2.0.0 or later.
Repository: The Repository ID value from Step 6 – Complete the Integration, which was created in Prerequisite step #1. Endpoint: The Endpoint value from Step 6 – Complete the Integration, which was created in Prerequisite step #1.
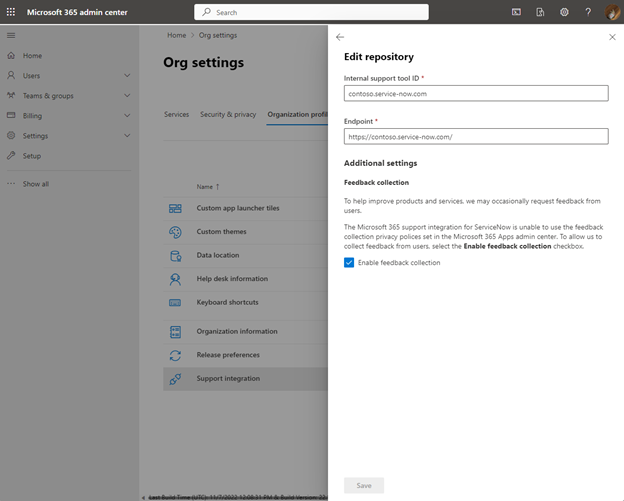
Select Save.


Steps performed in ServiceNow by a ServiceNow administrator.
A ServiceNow administrator tests the connection and completes the setup.
- To complete the setup, go back to your ServiceNow instance and select Test setup.
Test setup
The Microsoft 365 support integration app executes tests to make sure the integration is working. If there's a problem with the configuration, an error message explains what needs to be fixed. Otherwise, the application is ready.

Enable Microsoft support integration for an existing user
Microsoft 365 support integration is enabled for the user with one of these roles:
x_mioms_m365_assis.insights_user—This role is required to view the Recommended Solutions & Articles and Microsoft Service Health features in the ServiceNow incident view.
x_mioms_m365_assis.administrator—This role is required to escalate ServiceNow incidents to Microsoft support using a linked Microsoft 365 admin account. Follow the next section to link your admin account in the app's settings and finalize the steps to create Microsoft support cases.
In order for every member of your organization to be able to escalate ServiceNow incidents as support cases to Microsoft, each member must have the x_mioms_m365_assis.administrator role applied. The x_mioms_m365_assis.insights_user role is required to gain access to the Recommended Solutions & Articles and Microsoft Service Health information in the ServiceNow incident view; it is not required to create Microsoft support cases.
Link Microsoft 365 Admin account
Continue with these instructions if you are looking to escalate your ServiceNow incidents to Microsoft support from your ServiceNow instance via the app.
If any users are provisioned with the role x_mioms_m365_assis.administrator and are using different Microsoft 365 accounts to manage a Microsoft 365 support case, they must set up their Microsoft 365 admin email account by navigating to Microsoft 365 support > Link Account. Each member is not required to link their Microsoft 365 tenant email account. You are only required to enter a single valid Microsoft 365 admin email account that has ticket creation permissions. The app will only maintain a single admin account for this purpose.

Feedback
Coming soon: Throughout 2024 we will be phasing out GitHub Issues as the feedback mechanism for content and replacing it with a new feedback system. For more information see: https://aka.ms/ContentUserFeedback.
Submit and view feedback for