Note
Access to this page requires authorization. You can try signing in or changing directories.
Access to this page requires authorization. You can try changing directories.
The Booking Page is where you set up what your external facing booking page will look like. Once you customize and publish your booking page, people will use it to book appointments with you.
To customize your booking page, sign in to microsoft365.com, and then go to Bookings > Booking page. You can customize the booking page with the following options. Once you've setup up your Booking Page, you can publish it so people can start booking appointments with you.
Watch: Customize and publish your booking page
Steps
In Microsoft 365, select the app launcher, and then select Bookings.
Under Shared booking pages, choose the booking page you want to customize.
Then select Booking page.
The section below gives you information about setting up your bookings page and how to publish your page.
Configure booking page Publish your calendar live to make your service bookable. You have the options to share the link to your calendar via email and Twitter, and to add a Book Now button to a Facebook page. The link can also be embedded in your organization’s Web site.
The internal Booking Page looks like this:

Booking page access control: Require a Microsoft 365 account from my organization to book Selecting this option will only allow those within your organization to view your page or book any services. Access to the page is authorized via credential checks to ensure the visitor belongs to an account within the tenant.
Booking page access control: Disable direct search engine indexing of booking page This setting prevents your page from appearing in the search results for Google, Bing, or other search engines. Selecting this box will ensure access to the page is limited to the generated page link.
Customer data usage consent When selected, text requesting the user's or customer's consent for your organization to use their data will appear on the Self-Service page. The box will have to be checked by the user in order to complete the booking.
Scheduling policy, Email notifications, and Staff All of these settings are similar to the ones available for each service on the Services tab.
Availability This is an option to set specific time and date ranges of availability for a service. Otherwise, Bookings will default to your business hours. You can use the Availability option here for scenarios such as holidays or extended hours.
Customize your page Choose colors and logos that appear on the Self-Service page, such as for brand consistency.
Region and time zone settings Here you can set your time zone and language preferences for the Self-Service page. We recommend setting your local time zone. For visitors to your Self-Service page, Bookings automatically detects their local time zones and will show availability to them in their own time zones. For example, if an appointment is available at 1:00pm PST, someone in CST will see the available time displayed as 3:00pm CST.
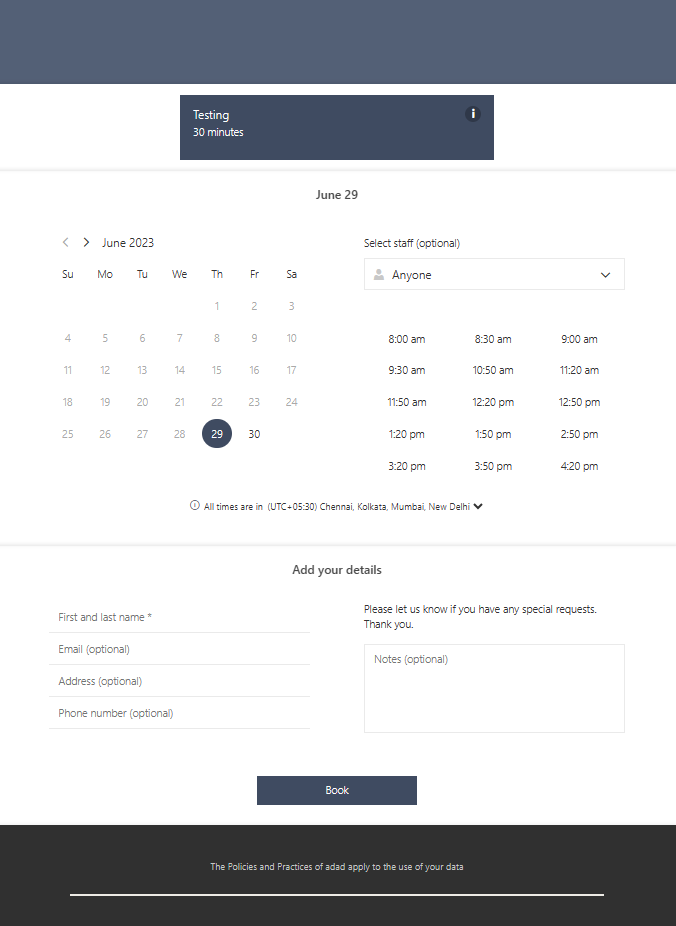
Once you publish your booking page, customers will see your booking page where they can book appointments with you. The customer facing booking page looks like this:

Add a marketing campaign ID to a Bookings page URL
Keep track of your Bookings marketing campaigns by adding a campaign ID to the end of your Booking page URL.
Use a campaign ID to see how your marketing campaigns are doing. Add a campaign ID you choose to the end of your Bookings page URL and use the campaign ID in your different marketing platforms to see which of your campaigns are connecting with customers.
Add campaign ID
In Microsoft 365, select the App launcher, and then select Bookings.
Choose your calendar and in the left navigation pane, select Booking page and copy your booking page URL and paste it into a text editing program, like Notepad.

Add a campaign ID to the end of the Booking page URL. For example, if your booking page URL looks like this, https://outlook.office365.com/owa/calendar/TailspinToys@contosopetscom.onmicrosoft.com/bookings/, you would choose an ID to add to the end. For example, if you wanted to track your booking details from your Twitter page, you could add Twitter to the end of the URL. The new URL that you would add to your Twitter page would look like this: https://outlook.office365.com/owa/calendar/TailspinToys@contosopetscom.onmicrosoft.com/bookings/?RefID=Twitter. Use different campaign IDs to track the marketing campaigns you're running.
Note
Characters in the campaign ID must be one of the following: alphanumeric characters, underscore or hyphen. Make sure you test your Campaign ID url by copying and pasting into a web browser.
Track campaign IDs
You can track how your campaigns are doing by downloading a report (TSV file) that shows you the last four months of activities of your Bookings calendar. The TSV file will show you four months of data, but you can select different four month periods over the course of a year. For more information on how to download the report, see Reporting info for Bookings.
Unpublish the booking page
To unpublish the booking page, go to the Booking page and select Unpublish.