eDiscovery solution series: Data spillage scenario - Search and purge
Important
This article applies only to the classic eDiscovery experience. The classic eDiscovery experience will be retired in August 2025 and won't be available as an experience option in the Microsoft Purview portal after retirement.
We recommend that you start planning for this transition early and start using the new eDiscovery experience in the Microsoft Purview portal. To learn more about using the most current eDiscovery capabilities and features, see Learn about eDiscovery.
What is data spillage and why should you care? Data spillage is when a confidential document is released into an untrusted environment. When a data spillage incident is detected, it's important to quickly assess the size and locations of the spillage, examine user activities around it, and then permanently purge the spilled data from the system.
Tip
If you're not an E5 customer, use the 90-day Microsoft Purview solutions trial to explore how additional Purview capabilities can help your organization manage data security and compliance needs. Start now at the Microsoft Purview trials hub. Learn details about signing up and trial terms.
Data spillage scenario
You're a lead information security officer at Contoso. You are informed of a data spillage situation where an employee unknowingly shared a highly confidential document with multiple people through email. You want to quickly assess who received this document internally and externally. Once identified, you would like to share case findings with other investigators to review, and then permanently remove the data from Office 365. After the investigation is complete, you want to generate a report with the evidence of permanent removal and other case details for any future reference.
Scope of this article
This document provides a list of instructions on how to permanently remove a message from Microsoft 365 so that it's not accessible or recoverable. To delete a message and make it recoverable until the deleted item retention period expires, see Search for and delete email messages in your organization.
Workflow for managing data spillage incidents
Here's a how to manage a data spillage incident:

Step 1: Manage who can access the case and set compliance boundaries (Optional)
Step 2: Create an eDiscovery case
Step 3: Search for the spilled data
Step 4: Review and validate case findings
Step 5: Use message trace log to check how spilled data was shared
Step 6: Prepare the mailboxes
Step 7: Permanently delete the spilled data
Step 8: Verify, provide a proof of deletion, and audit
Things to know before you start
- The data spillage workflow described in this article doesn't delete chat messages in Microsoft Teams. To search for and delete Teams chat messages, see Search and purge chat messages in Teams.
- When a mailbox is on hold, a deleted message remains in the Recoverable Items folder until the retention period expires or the hold is released. Step 6 describes how to remove hold from the mailboxes. Check with your records management or legal departments before removing the hold. Your organization might have a policy that defines whether a mailbox on hold or a data spillage incident takes priority.
- To control which user mailboxes a data spillage investigator can search and manage who can access the case, you can set up compliance boundaries and create a custom role group, which is described in Step 1. To do this, you have to be a member of the Organization Management role group or be assigned the role management role. If you or an administrator in your organization has already set compliance boundaries, you can skip Step 1.
- To create a case, you must be a member of the eDiscovery Manager role group or be a member of a custom role group that's assigned the Case Management role. If you're not a member, ask a Microsoft 365 administrator to add you to the eDiscovery manager role group.
- To create and run a Content Search, you have to be a member of the eDiscovery Manager role group or be assigned the Compliance Search management role. To delete messages, you have to be a member of the Organization Management role group or be assigned the Search And Purge management role. For information about adding users to a role group, see Assign eDiscovery permissions.
- To search the audit log eDiscovery activities in Step 8, auditing must be turned on for your organization. You can search for activities that were performed within the last 90 days. To learn more about how to enable and use auditing, see the Auditing the data spillage investigation process section in Step 8.
(Optional) Step 1: Manage who can access the case and set compliance boundaries
Depending on your organizational practice, you need to control who can access the eDiscovery case used to investigate a data spillage incident and set up compliance boundaries. The easiest way to do this is to add investigators as members of an existing role group in the Microsoft Purview portal and then add the role group as a member of the eDiscovery case. For information about the built-in eDiscovery role groups and how to add members to an eDiscovery case, see Assign eDiscovery permissions.
You can also create a new role group that aligns with your organizational needs. For example, you might want a group of data spillage investigators in the organization to access and collaborate on all data spillage cases. You can do this by creating a "Data Spillage Investigator" role group, assigning the appropriate roles (Export, RMS Decrypt, Review, Preview, Compliance Search, and Case Management), adding the data spillage investigators to the role group, and then adding the role group as a member of the data spillage eDiscovery case. See Set up compliance boundaries for eDiscovery investigations in Office 365 for detailed instructions on how to do this.
Step 2: Create an eDiscovery case
An eDiscovery case provides an effective way to manage your data spillage investigation. You can add members to the role group that you created in Step 1, add the role group as a member of new a eDiscovery case, perform iterative searches to find the spilled data, export a report to share, track the status of the case, and then refer back to the details of the case if needed. Consider establishing a naming convention for eDiscovery cases used for data spillage incidents, and provide as much information as you can in the case name and description so you can locate and refer to in the future if necessary.
To create a new case, you can use eDiscovery in the Microsoft Purview portal. See "Create a new case" in Get started with eDiscovery (Standard).
Step 3: Search for the spilled data
Now that you've created a case and managed access, you can use the case to iteratively search to find the spilled data and identify the mailboxes that contain the spilled data. You will use the same search query that you used to find the email messages to delete those same messages in Step 7.
To create a content search associated with an eDiscovery case, see Search for content in a eDiscovery (Standard) case.
Important
The keywords that you use in the search query may contain the actual spilled data that you're searching for. For example, if you searching for documents containing a social security number and you use the it as search keyword, you must delete the query afterwards to avoid further spillage. See Deleting the search query in Step 8.
Step 4: Review and validate case findings
After you create a content search, you need to review and validate that the search results and verify that they consist only of the email messages that must be deleted. In a content search, you can preview a random sampling of 1,000 email messages without exporting the search results to avoid further data spillage. You can read more about the preview limitations at Limits for Content Search.
If you have more than 1,000 mailboxes or more than 100 email messages per mailbox to review, you can divide the initial search into multiple searches by using additional keywords or conditions such as date range or sender/recipient and review the results of each search individually. Make sure to note down all search queries to use when you delete messages in Step 7.
When you find an email message that contains spilled data, check the recipients of the message to determine if it was shared externally. To further trace a message, you can collect sender information and date ranges so you can use the message trace logs. This process is described in Step 5.
After you verified the search results, you may want to share your findings with others for a secondary review. People who you assigned to the case in Step 1 can review the case content in both eDiscovery and Microsoft Purview eDiscovery (Premium) and approve case findings. You can also generate a report without exporting the actual content. You can also use this same report as a proof of deletion, which is described in Step 8.
To generate a statistical report:
Go to the Search page in the eDiscovery case, and select the search that you want to generate a report for.
On the flyout page, select More > Export report.
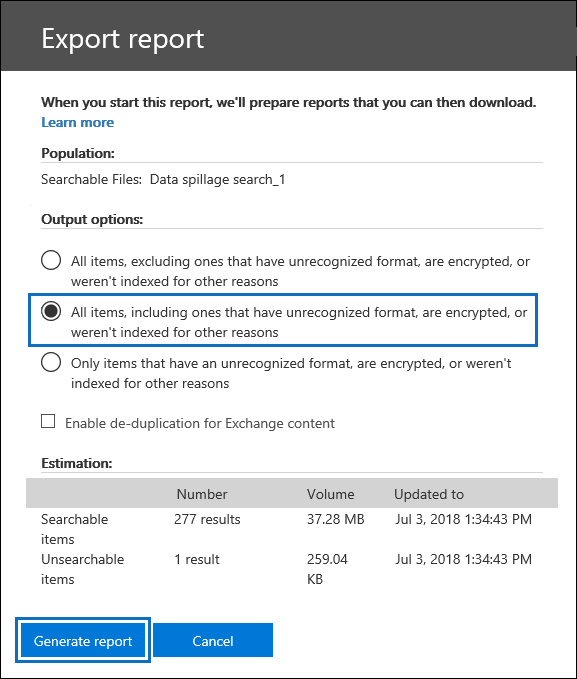
The Export report page is displayed.

Select All items, including ones that have unrecognized format, are encrypted, or weren't indexed for other reasons and then select Generate report.
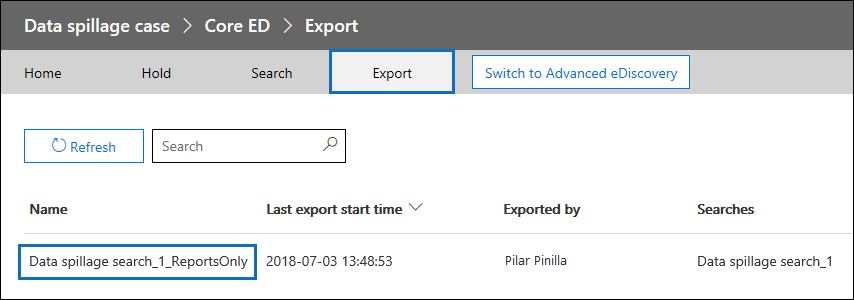
In the eDiscovery case, select Export to display the list of export jobs. You may have to select Refresh to update the list to display the export job you created.
Select the export job, and then select Download report on the flyout page.

The Export Summary report contains the number of locations found with results and the size of the search results. You can use this to compare with the report generated after deletion and provide as a proof of deletion. The Results report contains a more detailed summary of the search results, including the subject, sender, recipients, if the email was read, dates, and size of each message. If any of the details in this report contains that actual spilled data, be sure to permanently delete the Results.csv file when the investigation is complete.
For more information about exporting reports, see Export a Content Search report.
Step 5: Use message trace log to check how spilled data was shared
To further investigate if email with spilled data was shared, you can optionally query the message trace logs with the sender information and the date range information that you gathered in Step 4. The retention period for message trace is 30 days for real-time data and 90 days for historical data.
You can use Message trace in the Microsoft Purview portal or use the corresponding cmdlets in Exchange Online PowerShell. It's important to note that message tracing doesn't offer full guarantees on the completeness of data returned. For more information about using Message trace, see:
Step 6: Prepare the mailboxes
After you review and validate that the search results contain only the messages that must be deleted, you need to collect a list of the email addresses of the impacted mailboxes to use in Step 7 when you delete the spilled data. You may also have to prepare the mailboxes before you can permanently delete email messages depending on whether single item recovery is enabled on the mailboxes that contain the spilled data or if any of those mailboxes are on hold.
Get a list of addresses of mailboxes with spilled data
Note
For a limited time, the classic eDiscovery experience is available in the new Microsoft Purview portal. Enable Purview portal classic eDiscovery experience in eDiscovery experience settings to display the classic experience in the new Microsoft Purview portal.
There are two ways to collect a list of email addresses of mailboxes with spilled data.
Option 1: Get a list of addresses of mailboxes with spilled data
Open the eDiscovery case, go to the Search page and select the appropriate content search.
On the flyout page, select View results.
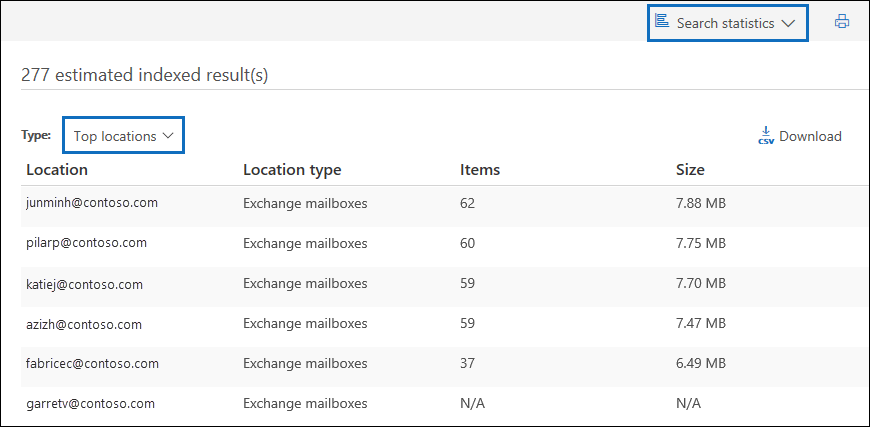
In the Individual results drop down list, select Search statistics.
In the Type drop down list, select Top locations.

A list of mailboxes that contain search results is displayed. The number of items in each mailbox that match the search query is also displayed.
Copy the information in the list and save it to a file or select Download to download the information to a CSV file.
Option 2: Get mailbox locations from the export report
Open the Export Summary report that you downloaded in Step 4. In the first column in the report, the email address of each mailbox is listed under Locations.
Prepare the mailboxes so you can delete the spilled data
If single item recovery is enabled or if a mailbox is placed on hold, a permanently deleted (purged) message will be retained in Recoverable Items folder. So before you can purge spilled data, you need to check the existing mailbox configurations and disable single item recovery and remove any hold or retention policy. Keep in mind that you can prepare one mailbox at a time, and then run the same command on different mailboxes or create a PowerShell script to prepare multiple mailboxes at the same time.
- See "Step 1: Collect information about the mailbox" in Delete items in the Recoverable Items folder of cloud-based mailboxes on hold for instructions about how to check if single item recovery is enabled or if the mailbox is placed on hold or it's assigned to a retention policy.
- See "Step 2: Prepare the mailbox" in Delete items in the Recoverable Items folder of cloud-based mailboxes on hold for instructions about disabling single item recovery.
- See "Step 3: Remove all holds from the mailbox" in Delete items in the Recoverable Items folder of cloud-based mailboxes on hold for instructions about how to remove a hold or retention policy from a mailbox.
- See "Step 4: Remove the delay hold from the mailbox" in Delete items in the Recoverable Items folder of cloud-based mailboxes on hold for instructions about removing the delay hold that is placed on the mailbox after any type of hold is removed.
Important
Check with your records management or legal departments before removing a hold or retention policy. Your organization may have a policy that defines whether a mailbox on hold or a data spillage incident takes priority.
Be sure to revert the mailbox to previous configurations after you verify that the spilled data has been permanently deleted. See the details in Step 7.
Step 7: Permanently delete the spilled data
Using the mailbox locations that you collected and prepared in Step 6 and the search query that was created and refined in Step 3 to find email messages that contain the spilled data, you can now permanently delete the spilled data. As previously explained, to delete messages, you have to be a member of the Organization Management role group or be assigned the Search And Purge management role. For information about adding users to a role group, see Assign eDiscovery permissions.
To delete the spilled messages, see Search for and delete email messages.
Keep the following limits in mind when deleting spilled data:
The maximum number of mailboxes in a search that you can use to delete items by doing a search and purge action is 50,000. If the search that you create in Step 3 searches more than 50,000 mailboxes, the purge action will fail. Searching more than 50,000 mailbox in a single search might typically happen when you configure the search to include all mailboxes in your organization. This restriction still applies even when less than 50,000 mailboxes contain items that match the search query.
A maximum of 10 items per mailbox can be removed at one time. Because the capability to search for and remove messages is intended to be an incident-response tool, this limit helps ensure that messages are quickly removed from mailboxes. This feature isn't intended to clean up user mailboxes.
Important
Email items in a review set in an eDiscovery (Premium) case can't be deleted by using the procedures in this article. That's because items in a review set are copies of items in the live service that are copied and stored in an Azure Storage location. This means they won't be returned by a content search that you create in Step 3. To delete items in a review set, you have to delete the eDiscovery (Premium) case that contains the review set. For more information, see Close or delete an eDiscovery (Premium) case.
Step 8: Verify, provide a proof of deletion, and audit
The final step in the workflow to manage a data spillage incident is to verify that the spilled data was permanently removed from the mailbox by going to the eDiscovery case and rerunning the same search query that was used to delete that data to confirm that no results are returned. After you confirm the spilled data has been permanently removed, you can export a report and include it (along with the original report) as a proof of deletion. Then you can close the case which will allow you to reopen it if you have to refer to it in the future. Additionally, you can also revert mailboxes to their previous state, delete the search query used to find the spilled data, and search for auditing records of tasks performed when managing the data spillage incident.
Reverting the mailboxes to their previous state
If you changed any mailbox configuration in Step 6 to prepare the mailboxes before the spilled data was deleted, you will need to revert them to their previous state. See "Step 6: Revert the mailbox to its previous state" in Delete items in the Recoverable Items folder of cloud-based mailboxes on hold.
Deleting the search query
If the keywords in the search query that you created and used in Step 3 contains some of all of the actual spilled data, you should delete the search query to prevent further data spillage.
Note
For a limited time, the classic eDiscovery experience is available in the new Microsoft Purview portal. Enable Purview portal classic eDiscovery experience in eDiscovery experience settings to display the classic experience in the new Microsoft Purview portal.
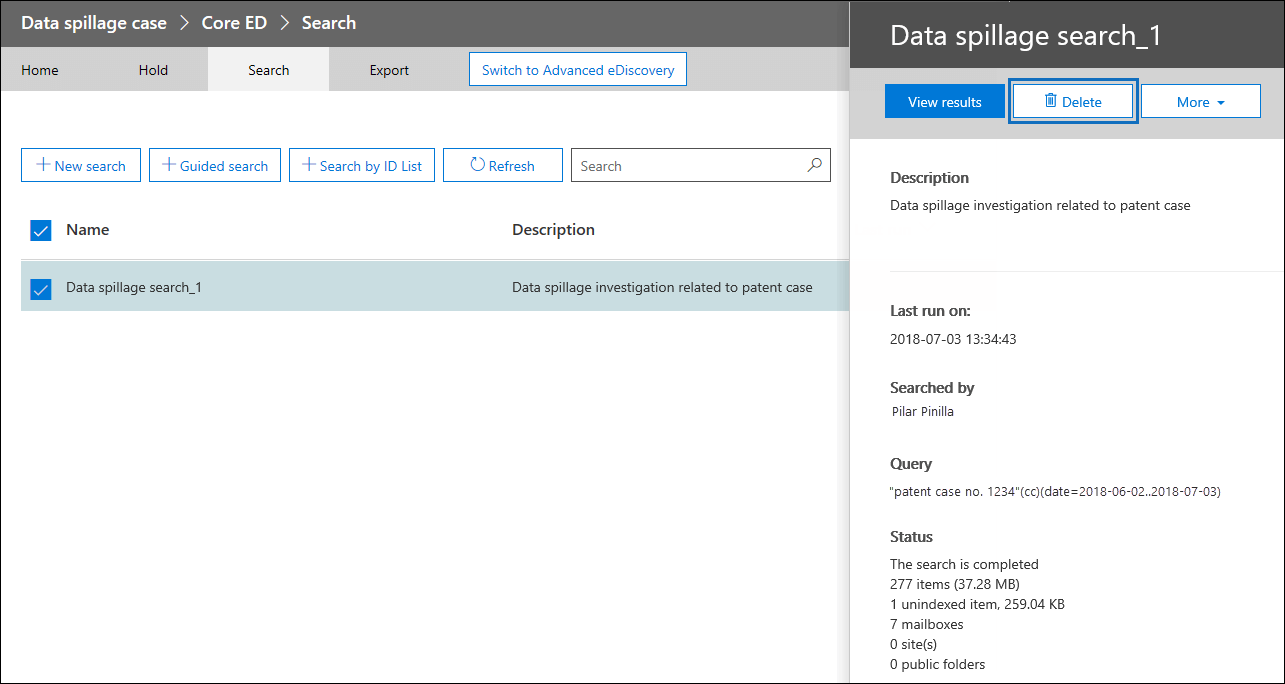
In the Microsoft Purview portal, open the eDiscovery case, go to the Search page, and select the appropriate content search.
On the flyout page, select Delete.

Auditing the data spillage investigation process
You can search the audit log for the eDiscovery activities that were performed during the investigation. You can also search the audit log to return the audit records for the New-ComplianceSearchAction -Purge command that you ran in Step 7 to delete the spilled data. For more information, see: