Step 1. Use Microsoft Syntex to identify contract files and extract data
Your organization needs a way to identify and classify all contract documents from the many files you receive. You also want to be able to quickly view several key elements in each of the contract files identified (for example, Client, Contractor, and Fee amount). You can do this by using Syntex] to create an unstructured document processing model and applying it to a document library.
Overview of the process
Unstructured document processing models uses artificial intelligence (AI) to automate classification of files and extraction of information. These types of models are also optimal in extracting information from unstructured and semi-structured documents where the information you need isn't contained in tables or forms, such as contracts.
Unstructured document processing models use optical character recognition (OCR) technology to scan PDFs, images, and TIFF files, both when you train a model with example files and when you run the model against files in a document library.
First, you need to find at least five example files that you can use to "train" the model to search for characteristics that are specific to the content type you're trying to identify (a contract).
Using Syntex, create a new unstructured document processing model. Using your example files, you need to create a classifier. By training the classifier with your example files, you teach it to search for characteristics that are specific to what you would see in your company's contracts. For example, create an "explanation" that searches for specific strings that are in your contracts, such as Service Agreement, Terms of Agreement, and Compensation. You can even train your explanation to look for these strings in specific sections of the document, or located next to other strings. When you think you have trained your classifier with the information it needs, you can test your model on a sample set of example files to see how efficient it is. After testing, if needed you can choose to make changes to your explanations to make them more efficient.
In your model, you can create an extractor to pull out specific pieces of data from each contract. For example, for each contract, the information you're most concerned about is who the client is, the name of the contractor, and the total cost.
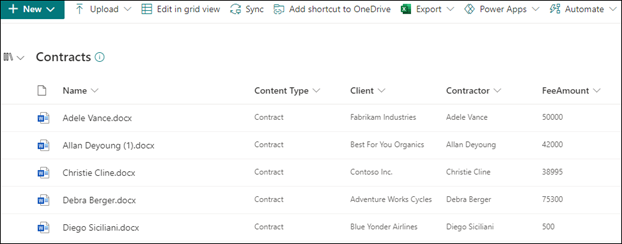
After you successfully create your model, apply it to a SharePoint document library. As you upload documents to the document library, your unstructured document processing model will run and will identify and classify all files that match the contracts content type you defined in your model. All files that are classified as contracts will display in a custom library view. The files will also display the values from each contract that you defined in your extractor.
If you have retention or security requirements for your contracts, you can also use your model to apply a retention label or a sensitivity label that will prevent your contracts from being deleted for a specified period of time or to restrict who can access the contracts.
Steps to create and train your model
Note
For these steps, you can use the example files in the Contracts Management Solution Assets repository. The examples in this repository contain both the model files and the files used to train the model.
Create a Contract model
The first step is to create your Contract model.
From the content center, select New > Model > Teaching method.
On the Create a model with the teaching method pane, in the Name field, type the name of the model. For this contract management solution, you can name the model Contract.
Choose Create. This creates a home page for the model.
Train your model to classify a type of file
Add example files for your model
You need to add at least five example files that are contract documents, and one example file that's not a contract document (for example, a statement of work).
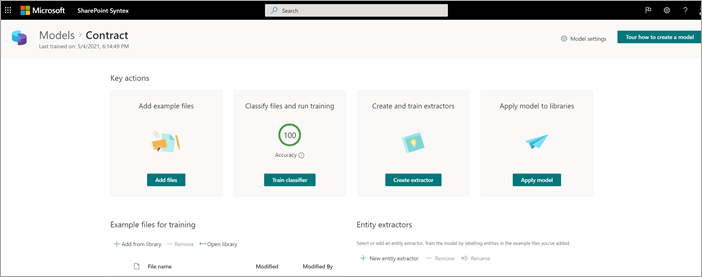
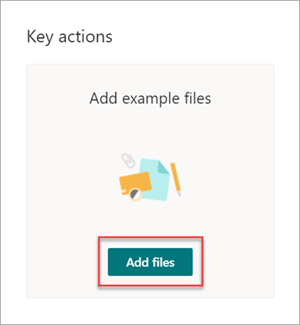
On the Models > Contract page, under Key actions > Add example files, select Add files.
On the Select example files for your model page, open the Contract folder, select files you want to use, and then select Add. If you don't have example files there, select Upload to add them.
Label the files as positive or negative examples
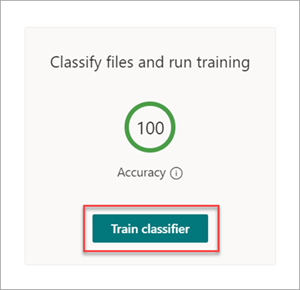
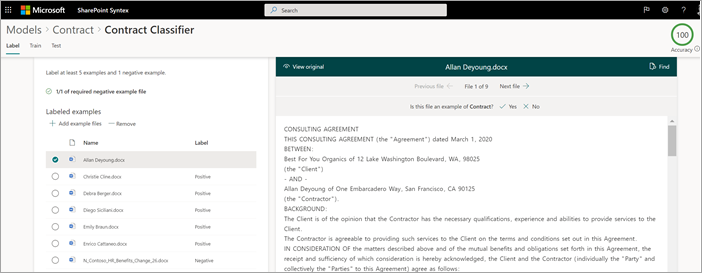
On the Models > Contract page, under Key actions > Classify files and run training, select Train classifier.
On the Models > Contract > Contract classifier page, in the viewer on the top of the first example file, you'll see text asking if the file is an example of the Contract model you created. If it is a positive example, select Yes. If it is a negative example, select No.
From the Labeled examples list on the left, select other files that you want to use as examples, and label them.
Add at least one explanation to train the classifier
On the Models > Contract > Contract classifier page, select the Train tab.
In the Trained files section, you'll see a list of the example files that you previously labeled. Select one of the positive files from the list to display it in the viewer.
In the Explanations section, select New and then Blank.
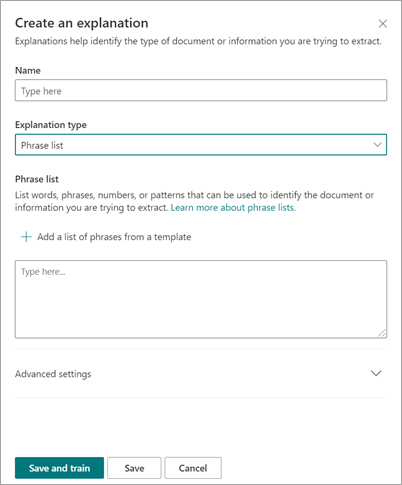
On the Create an explanation page:
a. In the Name field, type the name of the explanation (such as "Agreement").
b. In the Explanation type field, select Phrase list, because you add a text string.
c. In the Phrase list box, type the string (such as "AGREEMENT"). You can select Case sensitive if the string needs to be case-sensitive.
d. Select Save and train.
Test your model
You can test your Contract model on example files it hasn’t seen before. This is optional, but it can be a useful best practice.
On the Models > Contract > Contract classifier page, select the Test tab. This runs the model on your unlabeled example files.
In the Test Files list, your example files display and shows if the model predicted them to be positive or negative. Use this information to help determine the effectiveness of your classifier in identifying your documents.
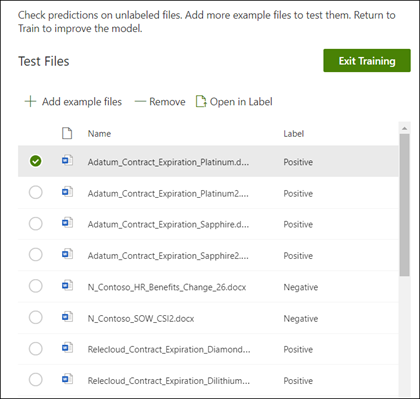
When done, select Exit Training.
Create and train an extractor
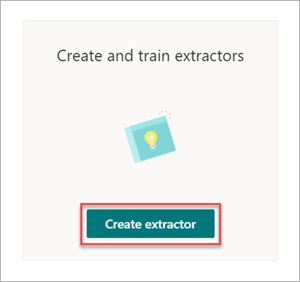
On the Models > Contract page, under Key actions > Create and train extractors, select Create extractor.
On the New entity extractor panel, in the New name field, type the name of your extractor. For example, name it Client if you want to extract the name of the client from each contract.
When you're done, select Create.
Label the entity you want to extract
When you create the extractor, the extractor page opens. Here you see a list of your sample files, with the first file on the list displayed in the viewer.
To label the entity:
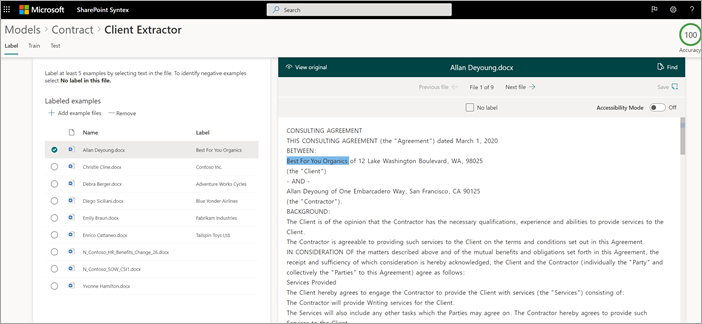
From the viewer, select the data that you want to extract from the files. For example, if you want to extract the Client, you highlight the client value in the first file (in this example, Best For You Organics), and then select Save. You'll see the value display from the file in the Labeled examples list, under the Label column.
Select Next file to autosave and open the next file in the list in the viewer. Or select Save, and then select another file from the Labeled examples list.
In the viewer, repeat steps 1 and 2, then repeat until you saved the label in all the files.
After you've labeled the files, a notification banner displays informing you to move to training. You can choose to label more documents or advance to training.
Add an explanation
You can create an explanation that provides a hint about the entity format itself and variations it might have in the example files. For example, a date value can be in many different formats, such as:
- 10/14/2019
- October 14, 2019
- Monday, October 14, 2019
To help identify the Contract Start Date, you can create an explanation.
In the Explanations section, select New and then Blank.
On the Create an explanation page:
a. In the Name field, type the name of the explanation (such as Date).
b. In the Explanation type field, select Phrase list.
c. In the Value field, provide the date variation as they appear in the sample files. For example, if you have date formats that appear as 0/00/0000, you enter any variations that appear in your documents, such as:
- 0/0/0000
- 0/00/0000
- 00/0/0000
- 00/00/0000
Select Save and train.
Test your model again
You can test your Contract model on example files it hasn’t seen before. This is optional, but it can be a useful best practice.
On the Models > Contract > Contract classifier page, select the Test tab. This runs the model on your unlabeled example files.
In the Test files list, your example files display and shows if the model is able to extract the information you need. Use this information to help determine the effectiveness of your classifier in identifying your documents.
When done, select Exit Training.
Apply your model to a document library
To apply your model to a SharePoint document library:
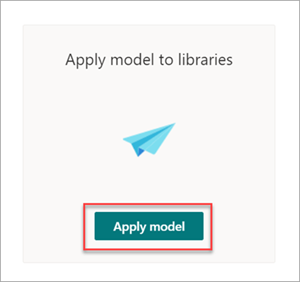
On the Models > Contract page, under Key actions > Apply model to libraries, select Apply model.
On the Add Contract panel, select the SharePoint site that contains the document library that you want to apply the model to. If the site does not show in the list, use the search box to find it. Select Add.
Note
You must have Manage List permissions or Edit rights to the document library you are applying the model to.
After you select the site, select the document library to which you want to apply the model.
Because the model is associated to a content type, when you apply it to the library it will add the content type and its view with the labels you extracted showing as columns. This view is the library's default view by default, but you can optionally choose to have it not be the default view by selecting Advanced settings and clearing the Set this new view as default check box.
Select Add to apply the model to the library.
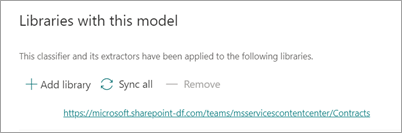
On the Models > Contract page, in the Libraries with this model section, you'll see the URL to the SharePoint site listed.
Under Settings > Library settings:
- Add a column named Status and select Choice as the column type.
- Apply the In review, Approved, and Rejected values.
After you apply the model to the document library, you can begin uploading documents to the site and see the results.
Next step
Step 2. Use Microsoft Teams to create your contract management channel