Note
Access to this page requires authorization. You can try signing in or changing directories.
Access to this page requires authorization. You can try changing directories.
Important
If your tenant is currently using the integration system user (ISU) and Reports as a Service (RaaS) configuration and you aren't ready to upgrade, see Integrate Workday with your Employee Self-Service deployment. The existing setup continues to work without modification.
Important
You need to complete the steps to deploy the Employee Self-Service agent before you can configure this supplemental extension pack.
The Employee Self-Service agent is built on Copilot and uses AI to provide relevant information to employees and take actions on their HR data.
If your organization uses a human resource management system, the Employee Self-Service agent requires access to that system to function most effectively. This article guides you through the simplified Workday integration, in which the Employee Self-Service agent connects to Workday using the signed-in user's identity through a single OAuth connection.
Technical synopsis

This diagram outlines the high-level components that make up the overall solution for the Employee Self-Service agent and the simplified Workday integration. The Employee Self-Service agent connects to Workday using a single OAuth connection. Workday REST and SOAP endpoints are accessed through that same connection, and the signed-in user's identity is used at runtime for every Workday API call.
Different roles need to perform various activities for both initial deployment and ongoing operation. As this solution involves multiple platforms, we recommend that you read through the documentation and understand the process before beginning integration. A first step is to identify stakeholders to set up an environment to deploy the Employee Self-Service agent.
Note
Workday integration is currently configured to retrieve only Employee details and doesn't work for external staff or non-Employees.
Prerequisites
Subscription prerequisites
- A Microsoft Entra user account with active subscription
- Workday single sign-on (SSO) enabled subscription
You also need to meet the prerequisites to deploy the Employee Self-Service agent.
Set up Copilot Studio capacity
We recommend that you set up Copilot Studio capacity to monitor capacity usage of the Employee Self-Service agent over time. Learn more about the deployment process for the Employee Self-Service agent.
Deployment role requirements
| Role | Description | Activities performed | Configuration area |
|---|---|---|---|
| Workday administrator | User who can perform administrative tasks | 1. Create X.509 public key 1. Edit tenant setup - security 1. Manage authentication policies 1. Register API client |
Workday |
| Application administrator or Cloud application administrator or application owner | User who can configure SSO integration with Workday | 1. Add Workday from gallery 1. Configure Microsoft Entra SSO 1. Configure Workday 1. Test SSO |
Microsoft Entra Workday |
| Environment Maker | User who can customize the Employee Self-Service agent | 1. Install and configure Workday extension pack 1. Manage Workday topics 1. Set up user context |
Microsoft Copilot Studio |
| InfoSec/IT Infrastructure/Change control board | User committee responsible for security infrastructure changes | Configure IT platform services such as network and firewall rules | Network firewall policies |
Upgrade from a previous setup
If your Employee Self-Service deployment already integrates with Workday using integration system users and a RaaS report, you don't need to redo your setup. The simplification ships in two parts that affect you differently.
How the update is delivered
The simplified setup ships as two updates:
- Workday connector update - A Microsoft platform-delivered update to the Workday connector that adds optional REST support alongside the existing SOAP support. The update is backward-compatible with existing SOAP scenarios. No customer action is required to receive it.
- ESS Workday package update - Available in Microsoft AppSource. Existing customers receive the update by selecting Settings > Customize > Workday > Update in Microsoft Copilot Studio. The package update doesn't affect the production-running agent and doesn't affect the maker experience until you take the update. New customers install the latest Workday package as part of the standard installation.
After you take the package update
- Go to
make.powerautomate.comand choose the right environment. Edit your existing maker OAuth connection and provide the Workday REST base URL. This field is a new field in the connection configuration. - The maker might be prompted to reauthorize the connection once. This prompting is standard Power Platform behavior when a required field is added to a connector configuration and isn't a defect.
- The maker needs to go to Copilot Studio > Agents > ESS HR/IT > Topics and select the [Admin] - User Context - Setup topic. Remove the previously added topic Workday [System] - 1: Set User Context by selecting the ellipsis (...) and choosing Delete, then add the newly available Workday [System] - 1: Set User Context V2 topic.
- For tenants where Microsoft Entra UPNs don't match Workday login IDs, Microsoft Entra federates to Workday using SAML and Workday resolves the user's identity from SAML claims. A custom non-UPN runtime mapping topic isn't required for most deployments.
What you can decommission on your timeline
Removing your existing ISU accounts, security groups, and RaaS reports from Workday isn't mandatory and isn't part of the upgrade steps. The simplification only removes the Power Platform connection references that point to them. The accounts can remain active in Workday.
Items that can be decommissioned if they aren't used by other integrations:
ISU_WQL_COPILOTandISU_Generic_COPILOTintegration system user accountsISSG_WQL_COPILOTandISSG_Generic_COPILOTintegration system security groups- The
WD_User_ContextRaaS report. The Workday REST endpoint/workers/mereplaces it for the user-context lookup.
Only consider deleting these items from Workday if you're confident they aren't used in non-Employee Self-Service flows or integrations elsewhere in your environment.
Custom scenarios that still require RaaS
The standard path on this page covers all out-of-the-box Employee Self-Service operations without requiring a RaaS report or ISU-based environment configuration.
If you built custom topics in Microsoft Copilot Studio for nonstandard scenarios, for example, custom leave policies, custom absence types, or headcount setups, your existing RaaS reports continue to work and can still be used to build custom topics. This path is unchanged by the simplification.
If you aren't ready to simplify yet
If you aren't yet ready to take a dependency on the Workday REST API, your existing setup continues to work without modification. You can take the updated package, and your existing scenarios still run with your existing ISU connections and RaaS report. There's no fixed deadline for the simplified setup today. See Integrate Workday with your Employee Self-Service deployment for the legacy reference.
Note
Third-party identity provider authentication isn't supported for the Workday integration. The Employee Self-Service agent supports Microsoft Entra-authenticated and Microsoft Entra-federated authentication only. If Microsoft Entra single sign-on is established with Workday, the simplified setup works.
Infrastructure setup for third-party external system solution integration
Most enterprise organizations secure their HR management systems and knowledge sources from external networks, as it's critical to protect sensitive information about employees, organizations, knowledge assets, and more.
When you integrate these enterprise systems into the Employee Self-Service agent, it becomes a more reliable source for providing information to your users. To integrate these systems, you need to make them accessible to the Power Platform environment where the Employee Self-Service agent is hosted.
You need to configure these systems with allowlists for the source IP addresses from which the Employee Self-Service agent is hosted and executed, such as the Power Platform environment. See the following documentation for information on retrieving the list of IP address ranges to configure in the network environment:
- Learn about overall Power Platform URLs and IP address ranges.
- Learn about Managed connectors outbound IP addresses.
For Workday integration, the Employee Self-Service agent uses the Workday REST and SOAP endpoints through a single OAuth connection. Work with your InfoSec team to allowlist the Employee Self-Service agent to communicate with both endpoints. Most existing SOAP firewall rules cover the REST endpoint; some customers might require a separate review.
If any more data security requirements need to be met for SOAP and REST exchange, work with your security specialists to increase the security for data in transit.
Set up SSO for Workday with Microsoft Entra
Note
You can ignore this step if SSO is already established for Workday with Microsoft Entra.
Refer to this documentation to set up SSO for Workday with Microsoft Entra: Microsoft Entra single sign-on (SSO) integration with Workday.
Set up the Workday connector in Microsoft Entra
- Open https://portal.azure.com.
- Navigate to App registrations.
- Locate the application created for the Workday SSO setup.
- Note the Application ID URI for later.
- Go to Manage > Expose an API.
- Add a scope for
user_impersonation:- Select + Add a scope.
- Scope name:
user_impersonation - Who can consent: Admins and users
- Fill in consent display names and descriptions.
- Under Authorized client applications, add the following Workday connector app ID:
4e4707ca-5f53-46a6-a819-f7765446e6ff. - Ensure that the new client application has the
user_impersonationscope added in the previous step. Under API permissions, add theopenid,profile, andUser.ReadMicrosoft Graph permissions:- Select + Add a permission.
- Select Microsoft Graph.
- Choose Delegated permission.
- Select
openid,profile, andUser.Read.
- Select Grant admin consent.
Configure Workday for the Employee Self-Service agent
The following configuration tasks need to be done in Workday by a Workday Administrator:
Note
Ensure SSO is already set up using Configure Workday for Single sign-on with Microsoft Entra ID. Also ensure that the Service Provider ID (in Edit Tenant Setup - Security) matches the application identifier for the application principal created (Microsoft Entra > Enterprise Applications > Workday SSO application).
- Create the X.509 public key
- Edit tenant setup - security
- Manage authentication policies
- Register API client
Task 1: Create the X.509 public key
Use the X.509 public key provided by Microsoft Entra to create a new key in Workday.
Task 2: Edit tenant setup - security
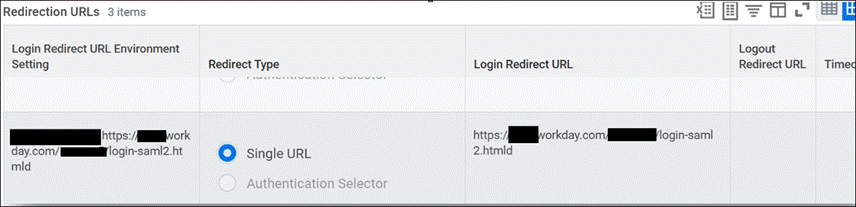
Configure your redirection URL.
Enable OAuth 2.0 clients and SAML authentication by choosing Yes in the OAuth 2.0 Clients Enabled and Enable SAML Authentication sections.
Configure the SAML Identity Provider. Verify the following fields if SSO is already configured for Workday with Microsoft Entra:
| Field | Description |
|---|---|
| Identity provider name | Can be any name. |
| Issuer | Enter the unique identifier for your SAML IdP, which must match the Issuer ID in SAML messages that the IdP sends. You can get this identifier from your IdP. For Microsoft Entra, this entry should be "Microsoft Entra Identifier". |
| X.509 Certificate | Select or create the X.509 public certificate to use to verify the signature on SAML sign-in and sign-out requests. You can get this information from your SAML provider. |
| SP initiated | Select to specify SP-initiated SAML authentication. |
| Service Provider ID | Identifies Workday as the service provider in the Issuer element of SAML messages sent to the IdP. Service Provider ID needs to be unique (the IdP requires this value to be unique on their end). This information needs to match the Identifier (Entity ID) field on Microsoft Entra. These formats are examples (remove the spaces for your own URL): http:// www .workday .com/sbx *http:// www .workday .com/prod *http:// www .workday .com/< tenant name > |
| Sign SP-initiated Request | Set to "No" if your SAML provider isn't using Workday's public key. |
| Do Not Deflate SP-initiated Request | Select this checkbox to ensure that Workday doesn't deflate the message again if the IdP deflates the authentication request message. |
| Always require IdP Authentication | Don't select. |
| IdP SSO Service URL | Enter the URL to which Workday sends SAML authentication requests. You can get this URL from your SAML IdP. For Microsoft Entra, you can get this URL from the Login URL field. |
Task 3: Manage authentication policies
Edit the authentication policy for the Workday tenant. If there are no authentication policies configured yet, create one first.
- Run the report Manage Authentication policies. Then select the Edit button for the policy for the tenant.
- Scope the authentication policy to the OAuth client identity used by the Employee Self-Service agent. Integration system users aren't used in the simplified setup.
- Select SAML as Allowed Authentication Type. If both SAML and User Name Password methods are in use, allow both.
- Make sure you have the SAML option enabled for the All Employees security group, along with any other required method in your Workday environment.
- Execute the task Activate All Pending Authentication Policy Changes to activate all pending authentication policy changes. This step is required to finalize all authentication policy changes.
Task 4: Register API client
This task is required to invoke Workday APIs from an external system such as the Employee Self-Service agent.
When configuring Functional Areas (Scope) on the API client, include the Functional Areas required for the simplified setup: Common v1 (REST) - which covers /workers/me for user-context lookup - plus the standard SOAP scopes used by existing Employee Self-Service scenarios. If a required Functional Area isn't available in the list, set Include Workday Owned Scope to Yes.
The Client ID and the endpoints autogenerated after the client is created must be shared securely with Microsoft Entra Administrators for Microsoft Entra configuration for the Employee Self-Service agent.

Note
Confirm the API clients are set up with the required scopes for the operations supported by the Employee Self-Service agent.
Note
The existing tasks for creating ISU_WQL_COPILOT and ISU_Generic_COPILOT integration system users, ISSG_WQL_COPILOT and ISSG_Generic_COPILOT security groups, and the WD_User_Context RaaS report aren't part of the simplified setup. They're intentionally omitted from this page.
Install the Workday extension pack for the Employee Self-Service agent
The Employee Self-Service agent is designed to have separate extension packs for each third-party external system solution. You need to install the extension pack before starting any configurations or customizations.
The following steps are required to install and enable the Workday extension pack.
Step 1: Install the extension
- Open the Employee Self-Service agent in Copilot Studio.
- Navigate to Settings.
- Select Customize from the left navigation.
- Select Workday and choose Install. Existing customers can update an installed package by selecting Workday under Settings > Customize and choosing Update. The package update doesn't affect the production agent until you take it.
- When prompted, update the connections as described by selecting the ellipses (...) on the right side for each connection.
Step 2: Set up connection authentication
Currently, the Workday connector in Power Platform supports three types of authentication:
- Basic
- Microsoft Entra ID Integrated
- Microsoft Entra ID Integrated with API Management
In this article, you learn how to set up the Microsoft Entra ID Integrated authentication method. You need to complete the SSO configuration in order to do this setup.
Note
We recommend using Microsoft Entra ID Integrated. With this method, users benefit from automatic connection establishment using SSO, and token refresh occurs seamlessly. Use Basic authentication only for testing purposes, as it doesn't support SSO.
When you install the Workday connector, the first step is to set up connections using the form. Fill out the following fields.
Microsoft Entra resource URL (Application ID URI)
Microsoft Entra's app registration created for Workday SSO. Learn how to access app registrations.
- Select All applications.
- Choose the correct application created for Workday SSO.
- In the Overview section, use the Application ID URI under the Essentials tab.
Workday OAuth token URL and Client ID
Workday API client settings have the OAuth token URL.
- Sign in to Workday with privileges to View API Client.
- Identify the correct API client entry from the table and open it (created when setting up SSO in Edit tenant setup - security in Workday).
- In the View API Client page, look for Token Endpoint.
- The value for Client ID appears above the Token Endpoint.
SOAP base URL
Workday report configuration provides the SOAP base URL.
Sign in to Workday with privileges to Run custom report.
Specify the custom report you created.
Provide the input value and run the report.
Select the ellipses (...) next to the report title in the output page.
Select Web Service > View URLs.
Choose WSDL.
In the report XML output window, scroll to the bottom and look for the following tag:
<soapbind:address location="https://wd2-impl-services1.workday.com/ccx/service/<<ReportInstance>>/<<WorkdayInstanceName>>/<<ISUAccount>>/<<ReportName>>"/>
Workday REST base URL
The Workday REST base URL is exposed in the same Workday API client View page used to retrieve the OAuth token URL and Client ID. Provide the REST base URL in the connection configuration. This field is a new field for the simplified setup.
Step 3: Configure connections
During the Workday extension pack installation process, you're prompted for the following connection configurations:
| Connection reference name | Connection reference ID | Expected connection user account |
|---|---|---|
| OAuthUser | new_sharedworkdaysoap_ff0df | Maker (signed-in user) |
| Microsoft Dataverse | msviess_sharedcommondataserviceforapps_92b66 | Maker (signed-in user) |
Ensure that each connection is explicitly set up with its own account, even though the connection status might turn green after the first connection setup.
Step 4: Confirm the Workday flows are turned on
- Open the Workday solution from the Solutions page.
- Select Cloud flows from the sidebar and verify that both workflows are turned on.
- If the cloud flows aren't turned on, select the display names to open the cloud flow and select Turn on in the toolbar.
Step 5: Identity resolution for non-UPN tenants
For tenants where Microsoft Entra UPNs match Workday login IDs, no further action is required. The Microsoft Entra ID Integrated authentication path resolves the signed-in user's identity automatically.
For tenants where Microsoft Entra UPNs don't match Workday login IDs, Microsoft Entra federates to Workday using SAML and Workday resolves the user's identity from SAML claims. A custom non-UPN runtime mapping topic isn't required for most deployments.
Customizations for Workday integration
Use Templates to complete the customizations required for Workday integration. Templates are XML objects that define connection information and data extraction information. Here, you use Templates to retrieve information from Workday.
Templates included in the solution
The following Templates and their associated Copilot topics are listed here:
| Workday Template name | Employee Self-Service agent associated topic |
|---|---|
| HRWorkdayHCMEmployeeGetBaseCompensation | Workday Get BaseCompensation |
| HRWorkdayHCMEmployeeGetCompanyCode | Workday Get CompanyCode |
| HRWorkdayHCMEmployeeGetCostCenter | Workday Get CostCenter |
| HRWorkdayHCMEmployeeGetServiceAnniversary | Workday Get ServiceAnniversary |
| HRWorkdayHCMEmployeeGetContext | Workday System Get UserContext |
| HRWorkdayHCMEmployeeGetEmploymentInfo HRWorkdayHCMEmployeeGetReferenceData |
Employee Get EmploymentInformation |
| HRWorkdayHCMEmployeeGetEmergencyContactInfo HRWorkdayHCMEmployeeGetReferenceData |
Workday Get EmergencyContact |
| HRWorkdayHCMEmployeeGetNationalIds HRWorkdayHCMEmployeeGetReferenceData |
Workday Get NationalIDs |
| HRWorkdayHCMEmployeeGetPassports HRWorkdayHCMEmployeeGetReferenceData |
Workday Get Passports |
| HRWorkdayHCMEmployeeGetVisas HRWorkdayHCMEmployeeGetReferenceData |
Workday Get Visas |
| HRWorkdayHCMEmployeeGetLanguageInformation HRWorkdayHCMEmployeeGetReferenceData |
Workday Get LanguageInformation |
| HRWorkdayHCMEmployeeGetCertifications HRWorkdayHCMEmployeeGetReferenceData |
Workday Get Certifications |
| HRWorkdayHCMEmployeeGetPersonalEmail HRWorkdayHCMEmployeeAddPersonalEmail HRWorkdayHCMEmployeeUpdatePrimaryAndSecondaryEmail |
Workday Update Email |
| HRWorkdayHCMEmployeeGetPhoneNumber HRWorkdayHCMEmployeeAddPhoneNumber HRWorkdayHCMEmployeeUpdatePhoneNumber HRWorkdayHCMEmployeeUpdatePrimaryAndSecondaryPhoneNumber HRWorkdayHCMEmployeeGetReferenceData |
Workday Update PhoneNumber |
Template structure overview
The templates are split into two key components: scenario and requestTemplates.
<WorkdayEntityConfigurationTemplate>
    <Scenario name="GetJobTaxonomy">
        <apiRequests>
            <apiRequest>
                <authType>User</authType>
                <endpoint>...
                </endpoint>
                <requestParameters>...
                </requestParameters>
                <responseProperties>...
                </responseProperties>
            </apiRequest>
        </apiRequests>
    </Scenario>
    <RequestTemplates>
        <RequestTemplate name="Template_GetWorkerRequest">...
        </RequestTemplate>
    </RequestTemplates>
</WorkdayEntityConfigurationTemplate>
Scenario
The scenario object is an XML object used to drive specific customer scenarios in the Employee Self-Service agent flows. The scenario XML node contains a name attribute that describes the scenario from a high-level perspective. Inside the scenario object, there are apiRequests and labels.
apiRequest
The apiRequest nodes contain information that conveys to the Workday API flow how to request data.
<apiRequest>
    <authType>User</authType>
    <endpoint>
        <request>msdyn_HRWorkdayHCMManagerJobTaxonomy_GetWorkerRequest</request>
        <serviceName>Human_Resources</serviceName>
        <version>v41.0</version>
    </endpoint>
    <requestParameters>
        <parameter>
            <name>Include_Roles</name>
            <value>true</value>
        </parameter>
    </requestParameters>
    <responseProperties>
        <property>
            <extractPath>//*[local-name()='Role_Assigner_Reference']/*[local-name()='ID' and @*[local-name()='type']='Organization_Reference_ID']/text()</extractPath>
            <key>OrganizationReferenceID</key>
        </property>
    </responseProperties>
</apiRequest>
requestTemplates
Request templates are XML objects that define the request body that gets sent to Copilot. These templates often contain replaceable values that are filled as part of the flow. Replaceable values appear in curly brackets {example_replaceable_value}.
<requestTemplates>
    <requestTemplate name="msdyn_HRWorkdayHCMManagerJobTaxonomy_GetWorkerRequest">
        <bsvc:Get_Workers_Request xmlns:bsvc="urn:com.workday/bsvc" bsvc:version="v41.0">
            <bsvc:Request_References bsvc:Skip_Non_Existing_Instances="false" bsvc:Ignore_Invalid_References="true">
                <bsvc:Worker_Reference bsvc:Descriptor="Employee_ID">
                    <bsvc:ID bsvc:type="Employee_ID">{Employee_ID}</bsvc:ID>
                </bsvc:Worker_Reference>
            </bsvc:Request_References>
            <bsvc:Response_Filter>
                <bsvc:As_Of_Effective_Date>{As_Of_Effective_Date}</bsvc:As_Of_Effective_Date>
            </bsvc:Response_Filter>
            <bsvc:Response_Group>
                <bsvc:Include_Roles>true</bsvc:Include_Roles>
            </bsvc:Response_Group>
        </bsvc:Get_Workers_Request>
    </requestTemplate>
</requestTemplates>
The following example is a full sample template:
<?xml version="1.0" encoding="utf-8" ?>
<workdayEntityConfigurationTemplate>
    <scenario name="GetJobTaxonomy">
        <apiRequests>
            <apiRequest>
                <authType>User</authType>
                    <endpoint>
                        <request>Template_GetWorkerRequest</request>
                        <serviceName>Human_Resources</serviceName>
                        <version>v42.0</version>
                    </endpoint>
                    <responseProperties>
                        <property>
                            <extractPath>//*[local-name()="Position_Title"]/text()</extractPath>
                            <key>JobTitle</key>
                        </property>
                        <property>
                            <extractPath>//*[local-name()="Business_Title"]/text()</extractPath>
                            <key>BusinessTitle</key>
                        </property>
                        <property>
                            <extractPath>//*[local-name()="Job_Profile_Name"]/text()</extractPath>
                            <key>JobProfile</key>
                        </property>
                        <property>
                            <extractPath>//*[local-name()='Job_Profile_Summary_Data']/*[local-name()='Job_Family_Reference']/*[local-name()='ID' and @*[local-name()='type']='Job_Family_ID']/text()</extractPath>
                            <key>JobFamilyId</key>
                        </property>
                    </responseProperties>
            </apiRequest>
        </apiRequests>
    </scenario>
<requestTemplates>
    <requestTemplate name="Template_GetWorkerRequest">
        <bsvc:Get_Workers_Request xmlns:bsvc="urn:com.workday/bsvc" bsvc:version="v41.0">
            <bsvc:Request_References bsvc:Skip_Non_Existing_Instances="false" bsvc:Ignore_Invalid_References="true">
                <bsvc:Worker_Reference bsvc:Descriptor="Employee_ID">
                    <bsvc:ID bsvc:type="Employee_ID">{Employee_ID}</bsvc:ID>
                </bsvc:Worker_Reference>
            </bsvc:Request_References>
            <bsvc:Response_Filter>
                <bsvc:As_Of_Effective_Date>{As_Of_Effective_Date}</bsvc:As_Of_Effective_Date>
            </bsvc:Response_Filter>
            <bsvc:Response_Group>
                <bsvc:Include_Employment_Information>true</bsvc:Include_Employment_Information>
            </bsvc:Response_Group>
        </bsvc:Get_Workers_Request>
    </requestTemplate>
</requestTemplates>
</workdayEntityConfigurationTemplate>