Note
Access to this page requires authorization. You can try signing in or changing directories.
Access to this page requires authorization. You can try changing directories.
Microsoft Teams is a digital hub that brings conversations, content, and apps together in one place. Because it's built on Microsoft 365, schools benefit from integration with their familiar Office apps and services. Your institution can use Microsoft Teams to create collaborative classrooms, connect in professional learning communities, and communicate with school staff all from a single experience in Microsoft 365 for Education.
To get started, IT administrators need to use the Microsoft 365 Admin Center to enable Microsoft Teams for your school.
Note
If you have an EDU license at the M365 tenant level you must enable Teams from the Microsoft 365 admin center. To do this, go to the Microsoft 365 admin center Settings> Settings > Microsoft Teams. If you don't see Microsoft Teams in the Services list, turn off Try the new admin center to find Settings> Services and add-ins> Microsoft Teams. This change may take up to 24 hours for all users to have access to Teams.
Steps to enable Microsoft Teams for your school
Sign in to M365 with your work or school account.
Select Admin to go to the M365 admin center.
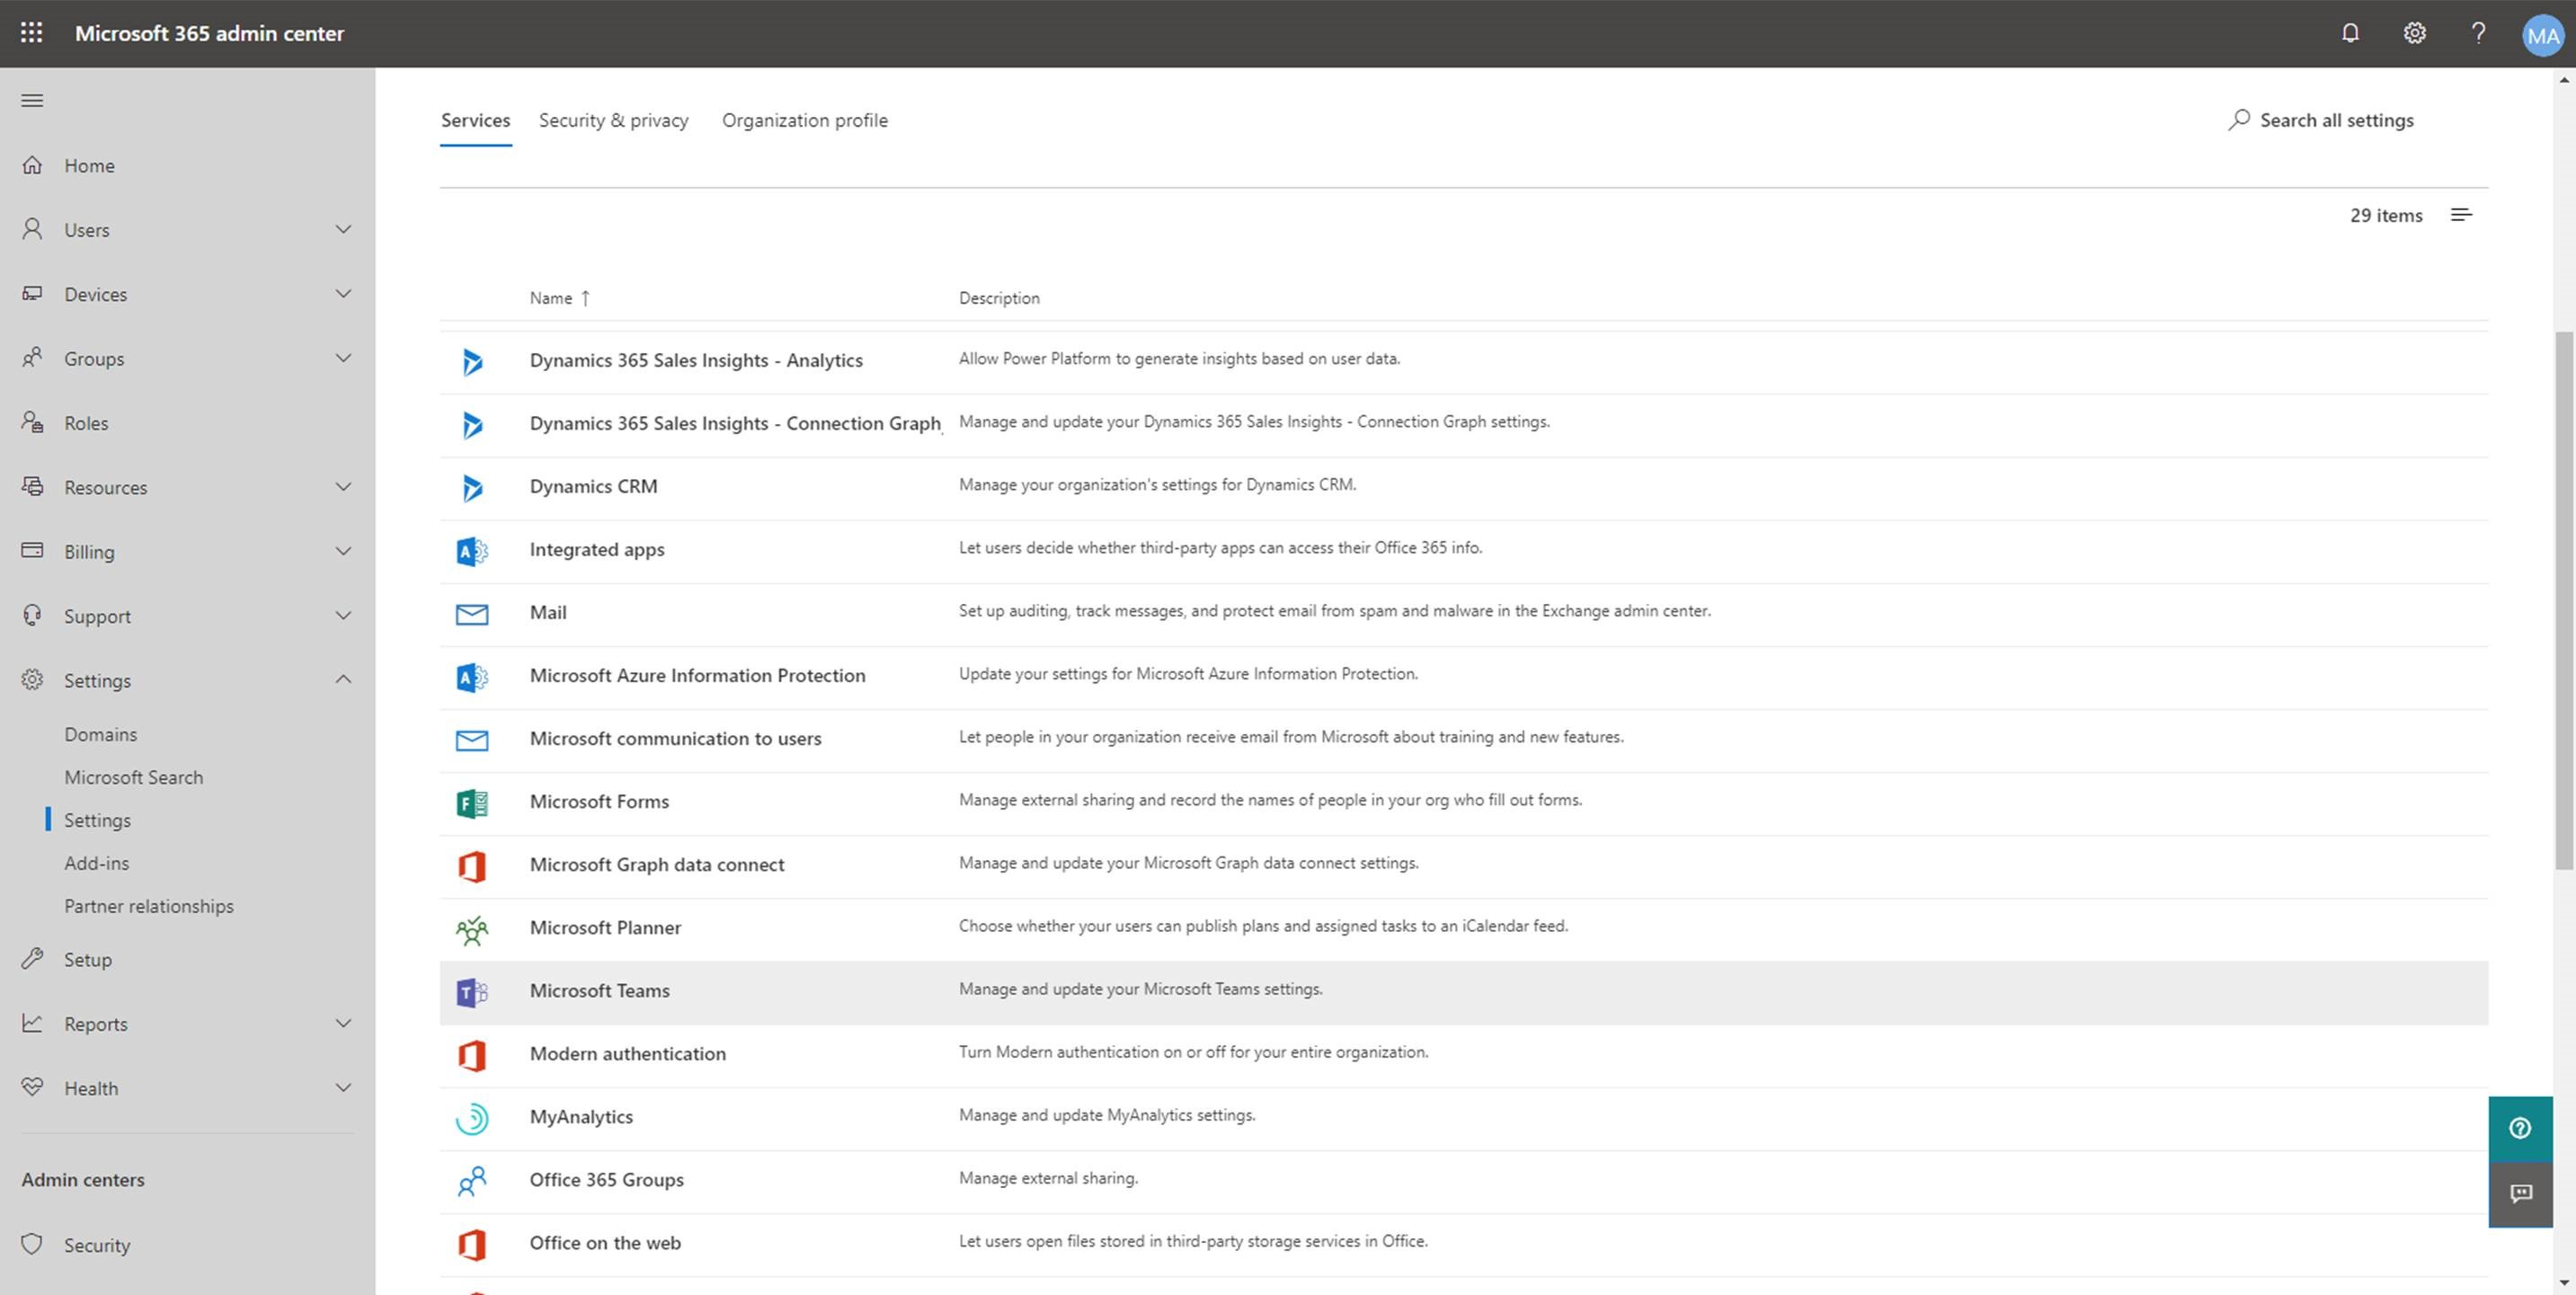
Go to Settings > Settings > Microsoft Teams.
Select go to the old admin center Settings page to navigate to our non-preview settings page and select Microsoft Teams from within the Settings > Services list.
Figure 1 - Select Microsoft Teams from the list of services

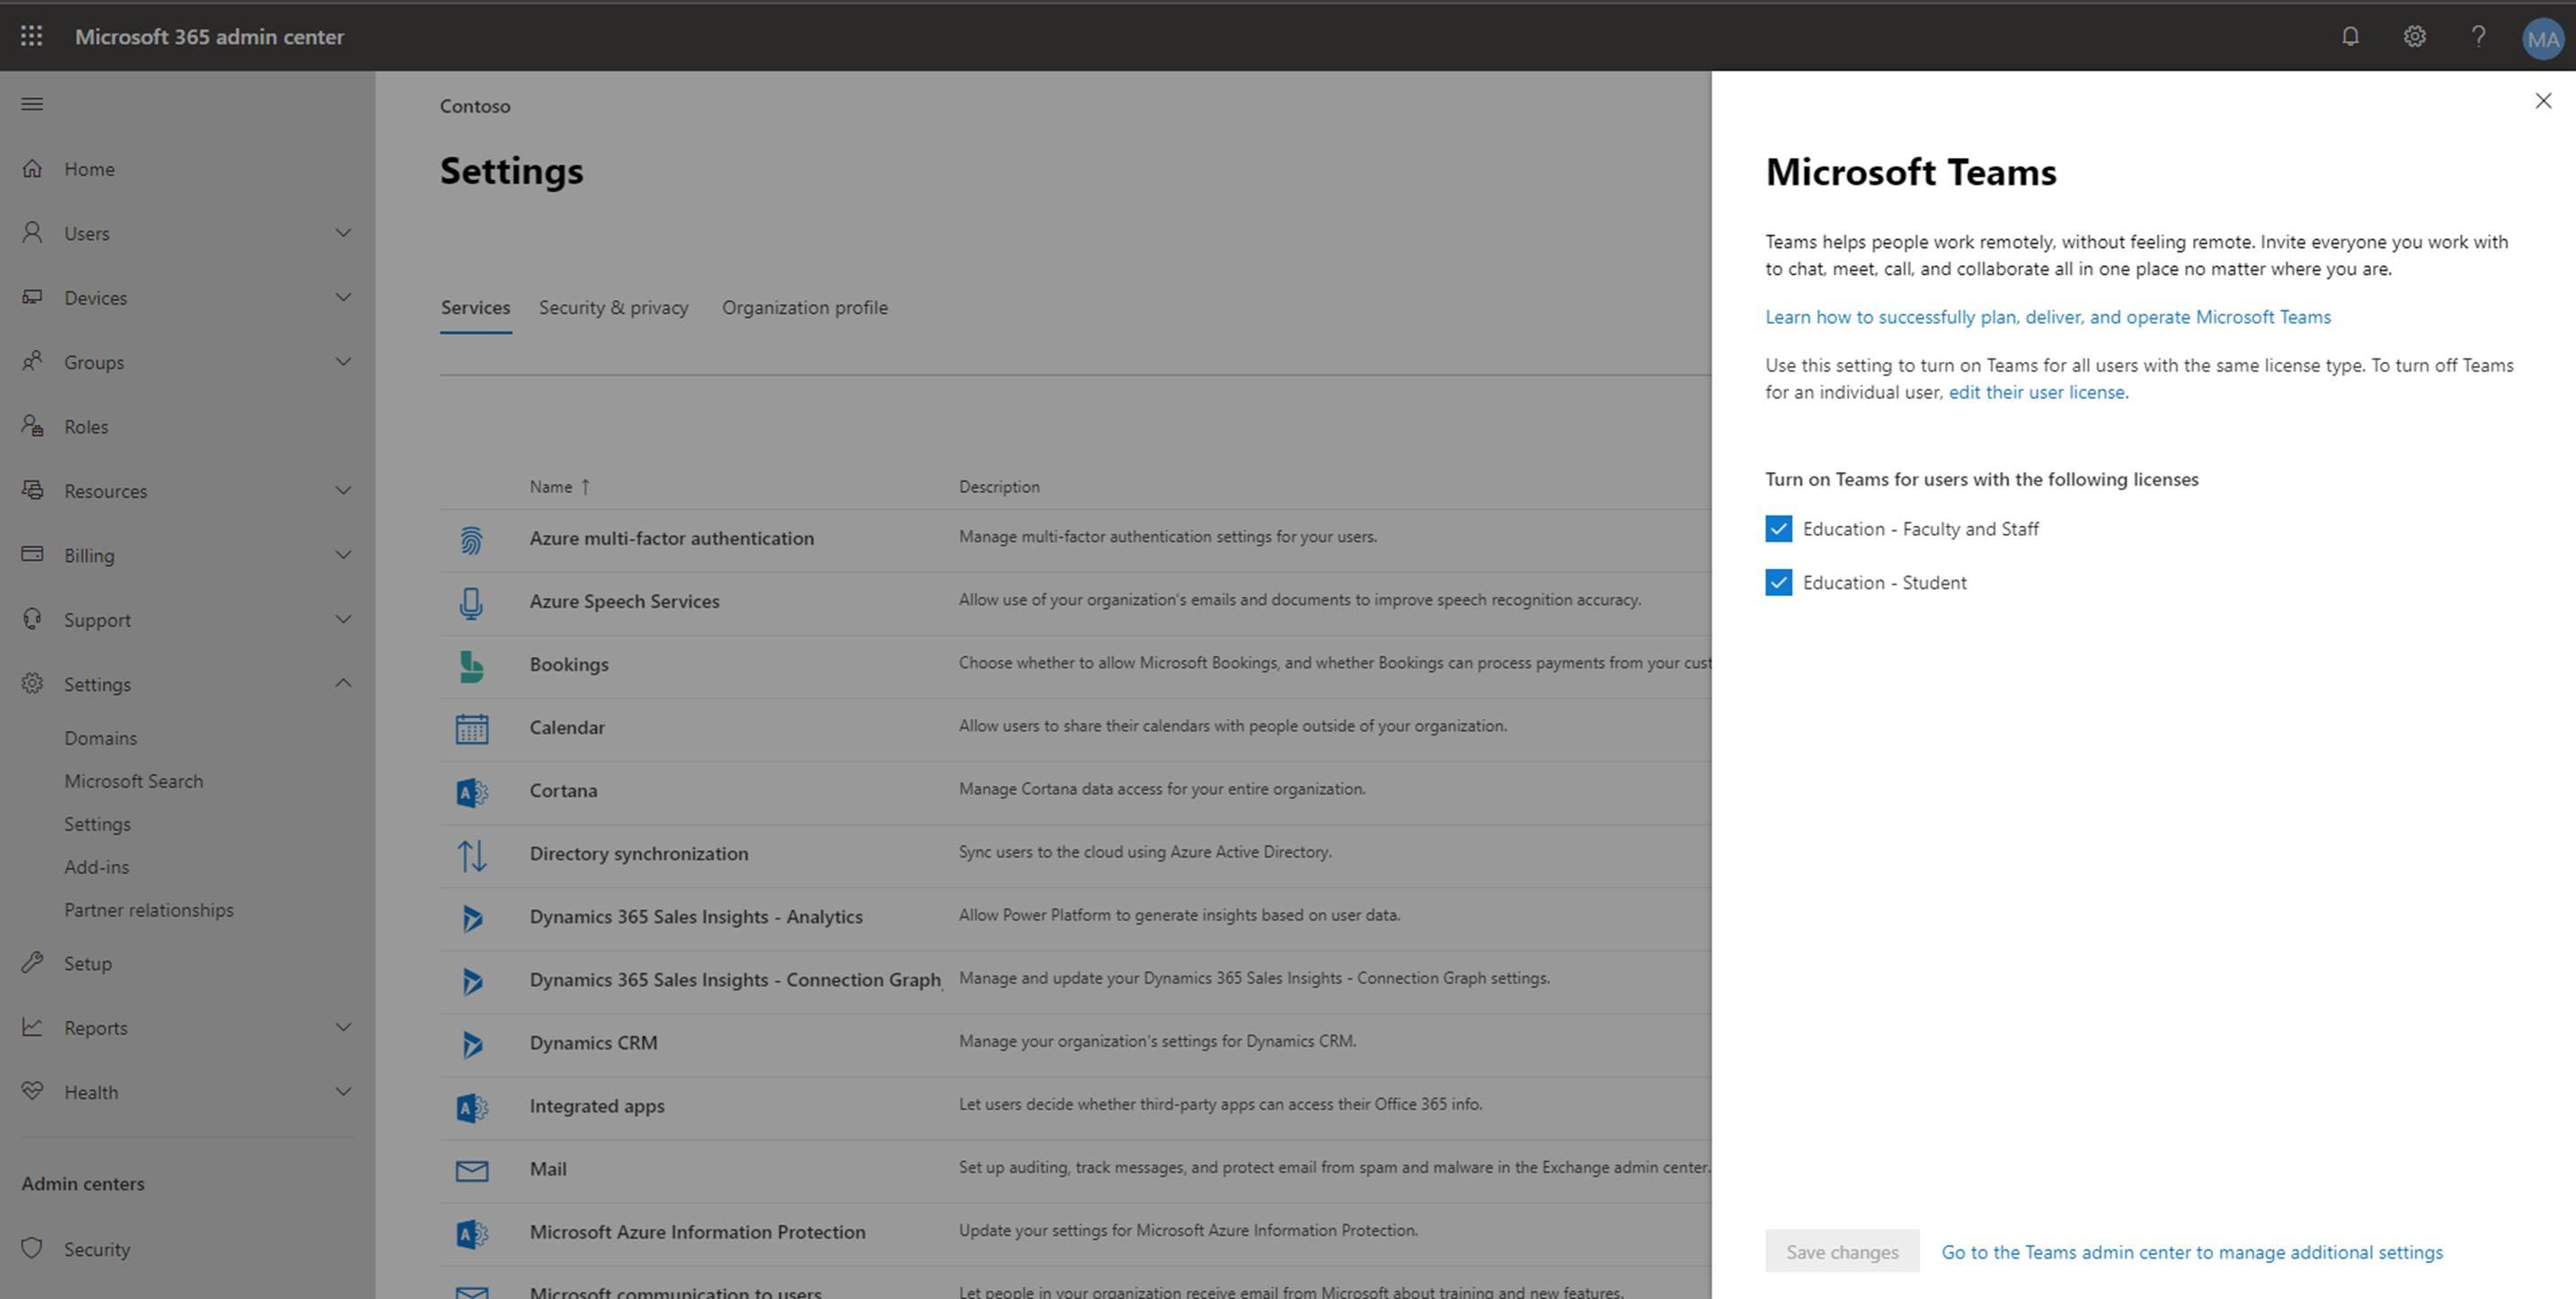
On the Microsoft Teams settings screen, select the license that you want to configure, Student or Faculty and Staff. Select Faculty and Staff.
Figure 2 - Select the license that you want to configure.

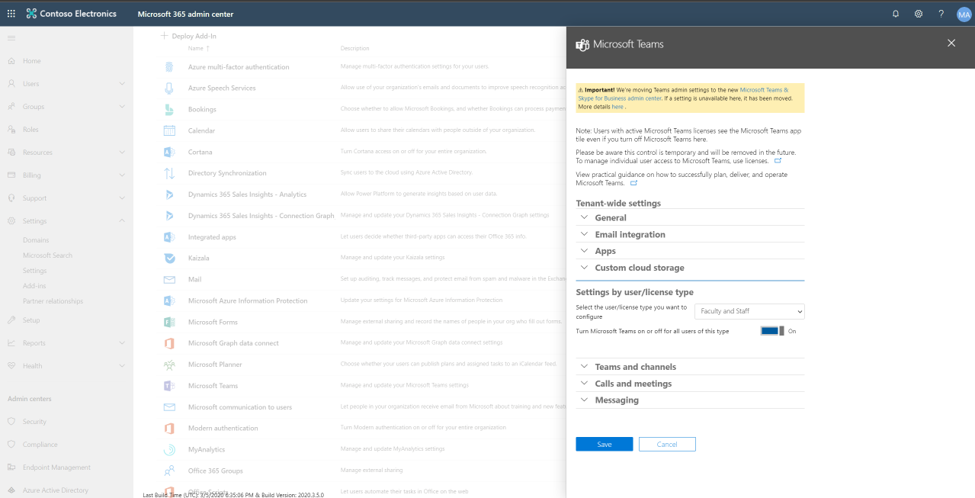
Select to turn on Microsoft Teams for each license type in your organization.
Figure 3 - Turn on Microsoft Teams for your organization.

Select Save.
You can find more info about how to control which users in your school can use Microsoft Teams, turn off group creation, configure tenant-level settings, and more by reading the Guide for IT admins getting started guide in the Get started with Microsoft Teams page.