Note
Access to this page requires authorization. You can try signing in or changing directories.
Access to this page requires authorization. You can try changing directories.
Copilot Pages, Copilot Notebooks, and Loop workspaces are stored in SharePoint Embedded containers. These containers come in three ownership types:
- User-owned: A single container per user that holds their Copilot Pages, Copilot Notebooks, and Loop My workspace content.
- Tenant-owned: Shared Loop workspaces created by users within the organization.
- Group-owned: Loop workspaces associated with a Microsoft 365 Group, such as Teams channel workspaces.
For more information on container types and how to manage them, see Manage SharePoint Embedded containers.
Unlike OneDrive, which automatically delegates access to the user's manager when a user is deleted, SharePoint Embedded user-owned containers require manual intervention. You must manually grant access to a custodian through the SharePoint admin center before the container is deleted.
Use this workflow when you need to add owners to a container, for example:
- User departure: Preserve content in a user-owned container before the departed user deletion schedule runs. The container follows the same cleanup schedule as OneDrive: 30 days active after the user account is deleted, then soft deleted, and permanently purged 93 days after soft deletion.
- Owner unavailability: Add new owners to help manage a container when the current owner is unavailable, such as during extended leave.
- Ownerless workspaces: Assign owners to tenant-owned workspaces that are ownerless after all owners left the organization.
- IT investigation or audit: Grant access to review content for compliance, legal, or security purposes.
- Data management: Allow a designated person to review and organize content as part of a governance workflow.
Important
For user departure scenarios, content must be copied to a new location before the original container is deleted. Links to the original container stop working after deletion.
Note
Some capabilities used in this article are still rolling out and might not yet be available in your organization: the Container Redirect URL field in SharePoint admin center, the Copy to workspace command in the Loop app, and the Preserve command in Copilot Notebooks. Track the rollout status on the Microsoft 365 public roadmap. All other steps in this article, including locating containers and adding owners, are available today.
Prerequisites
Locate the container
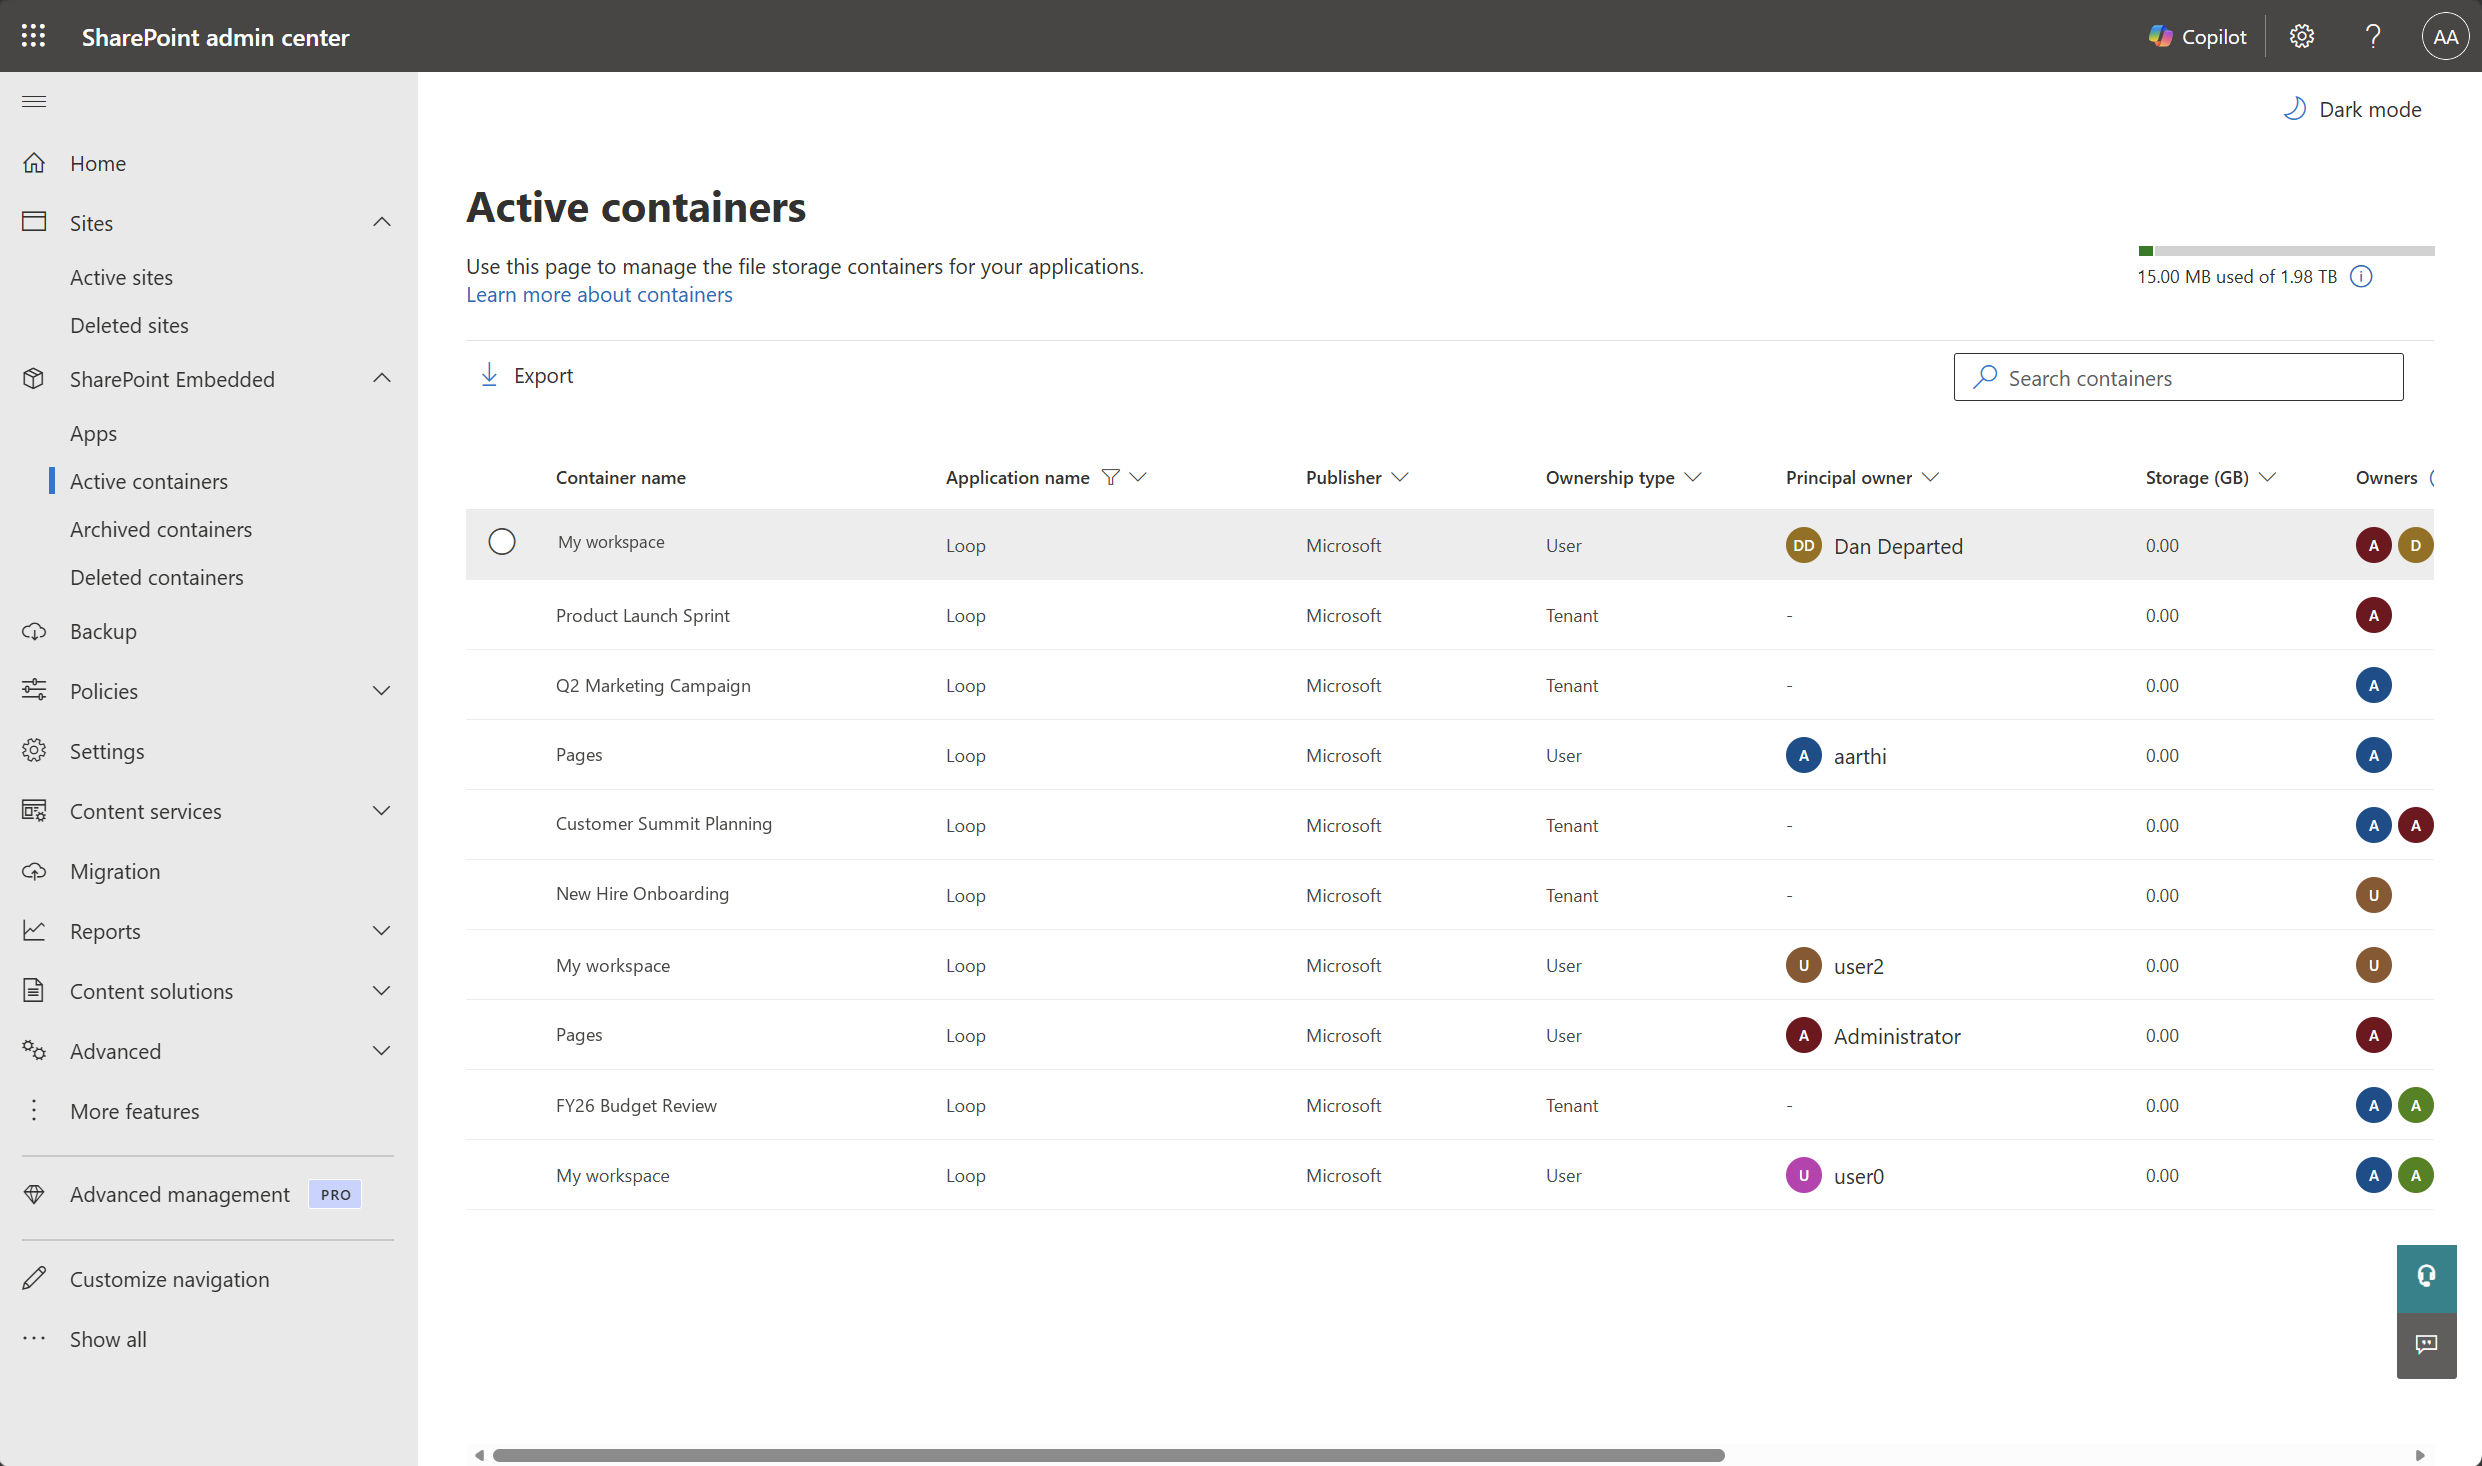
Go to the SharePoint admin center.
Select Containers > Active containers.
Filter by Application name: Loop. Optionally, filter by Ownership type (User, Tenant, or Group) to narrow the results.
Note
Copilot Pages, Copilot Notebooks, and Loop workspace containers all appear under Application name: Loop, because they share the same SharePoint Embedded application identity. There's no separate Copilot Pages or Copilot Notebooks filter.
Search for the container by name or filter by Principal owner. The user-owned container might be named "Pages" or "My workspace" depending on whether the user visited the Microsoft 365 Copilot app or the Loop app first. For more information, see container name.
Select the container.
Add a custodian as an owner
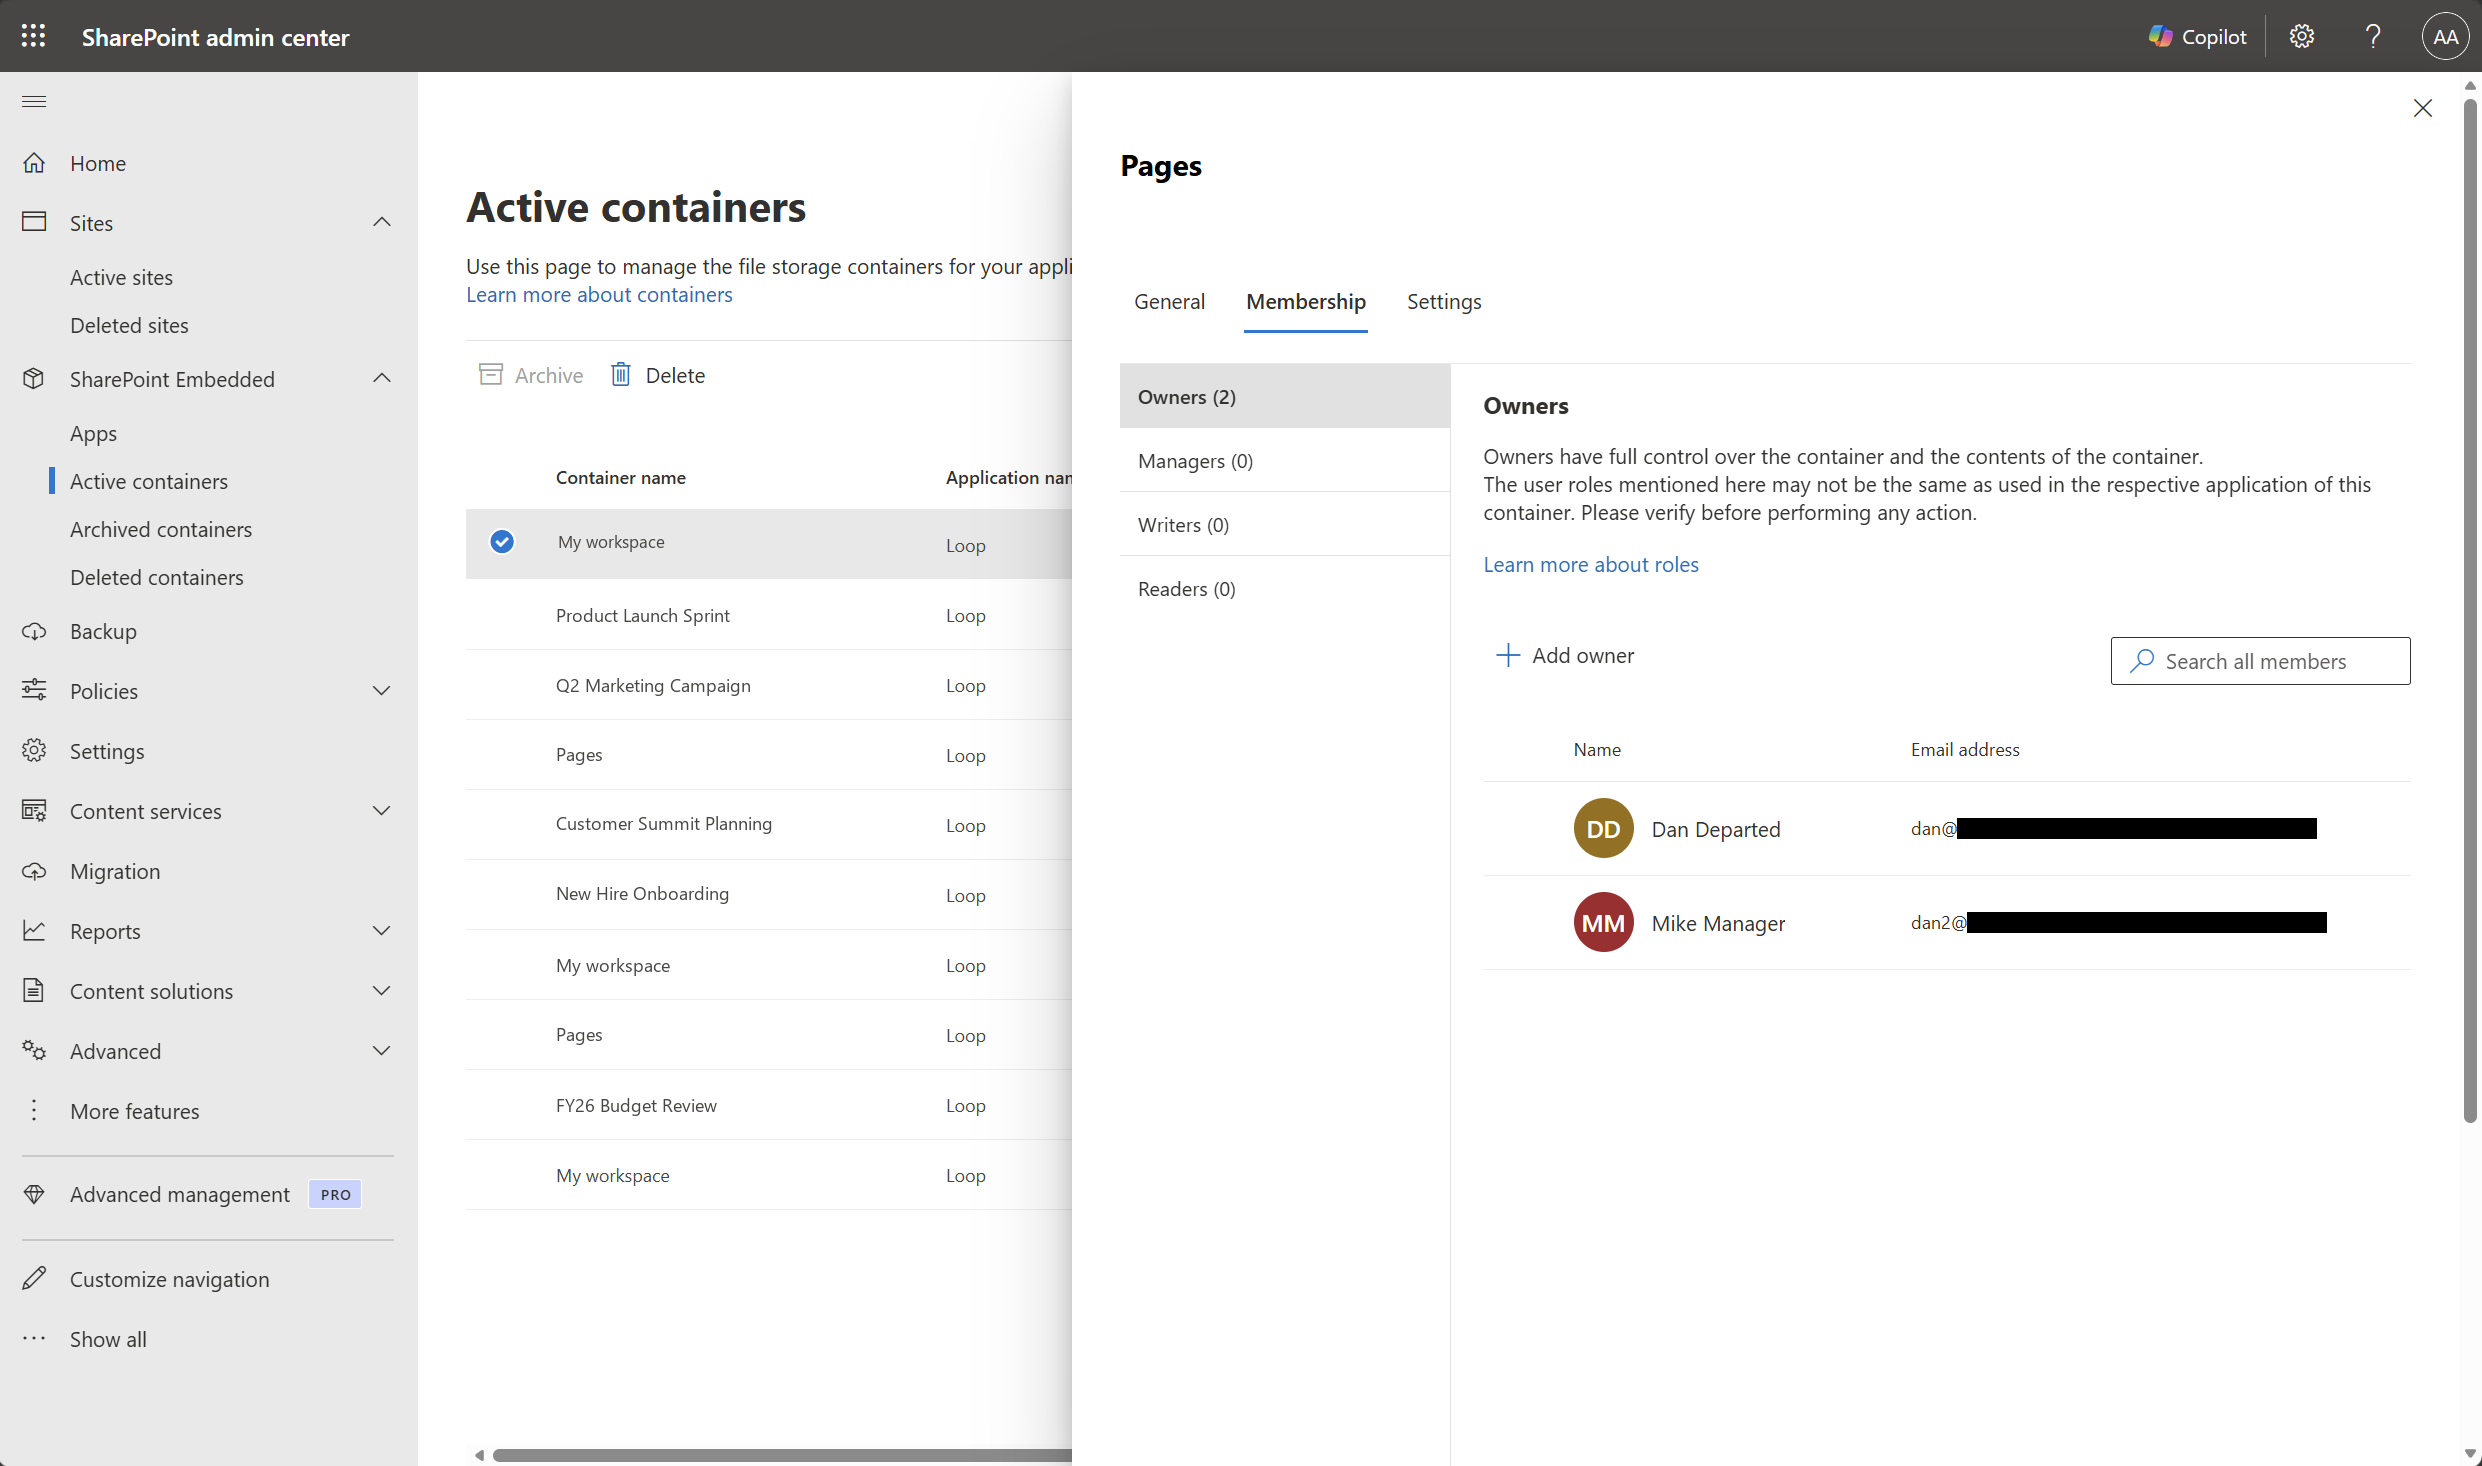
- In the container details panel, on the Membership tab, select Add owner.
- Search for the person you want to add (typically the user's manager, a designated reviewer, or a team member).
- Confirm the assignment.
Adding an owner grants access to all content in the container but doesn't change the principal owner. The principal owner is the user whose account lifecycle controls the container's lifecycle: when the principal owner's account is deleted, the container is scheduled for deletion. You can revoke access at any time by removing the additional owners.
Copy the Container Redirect URL
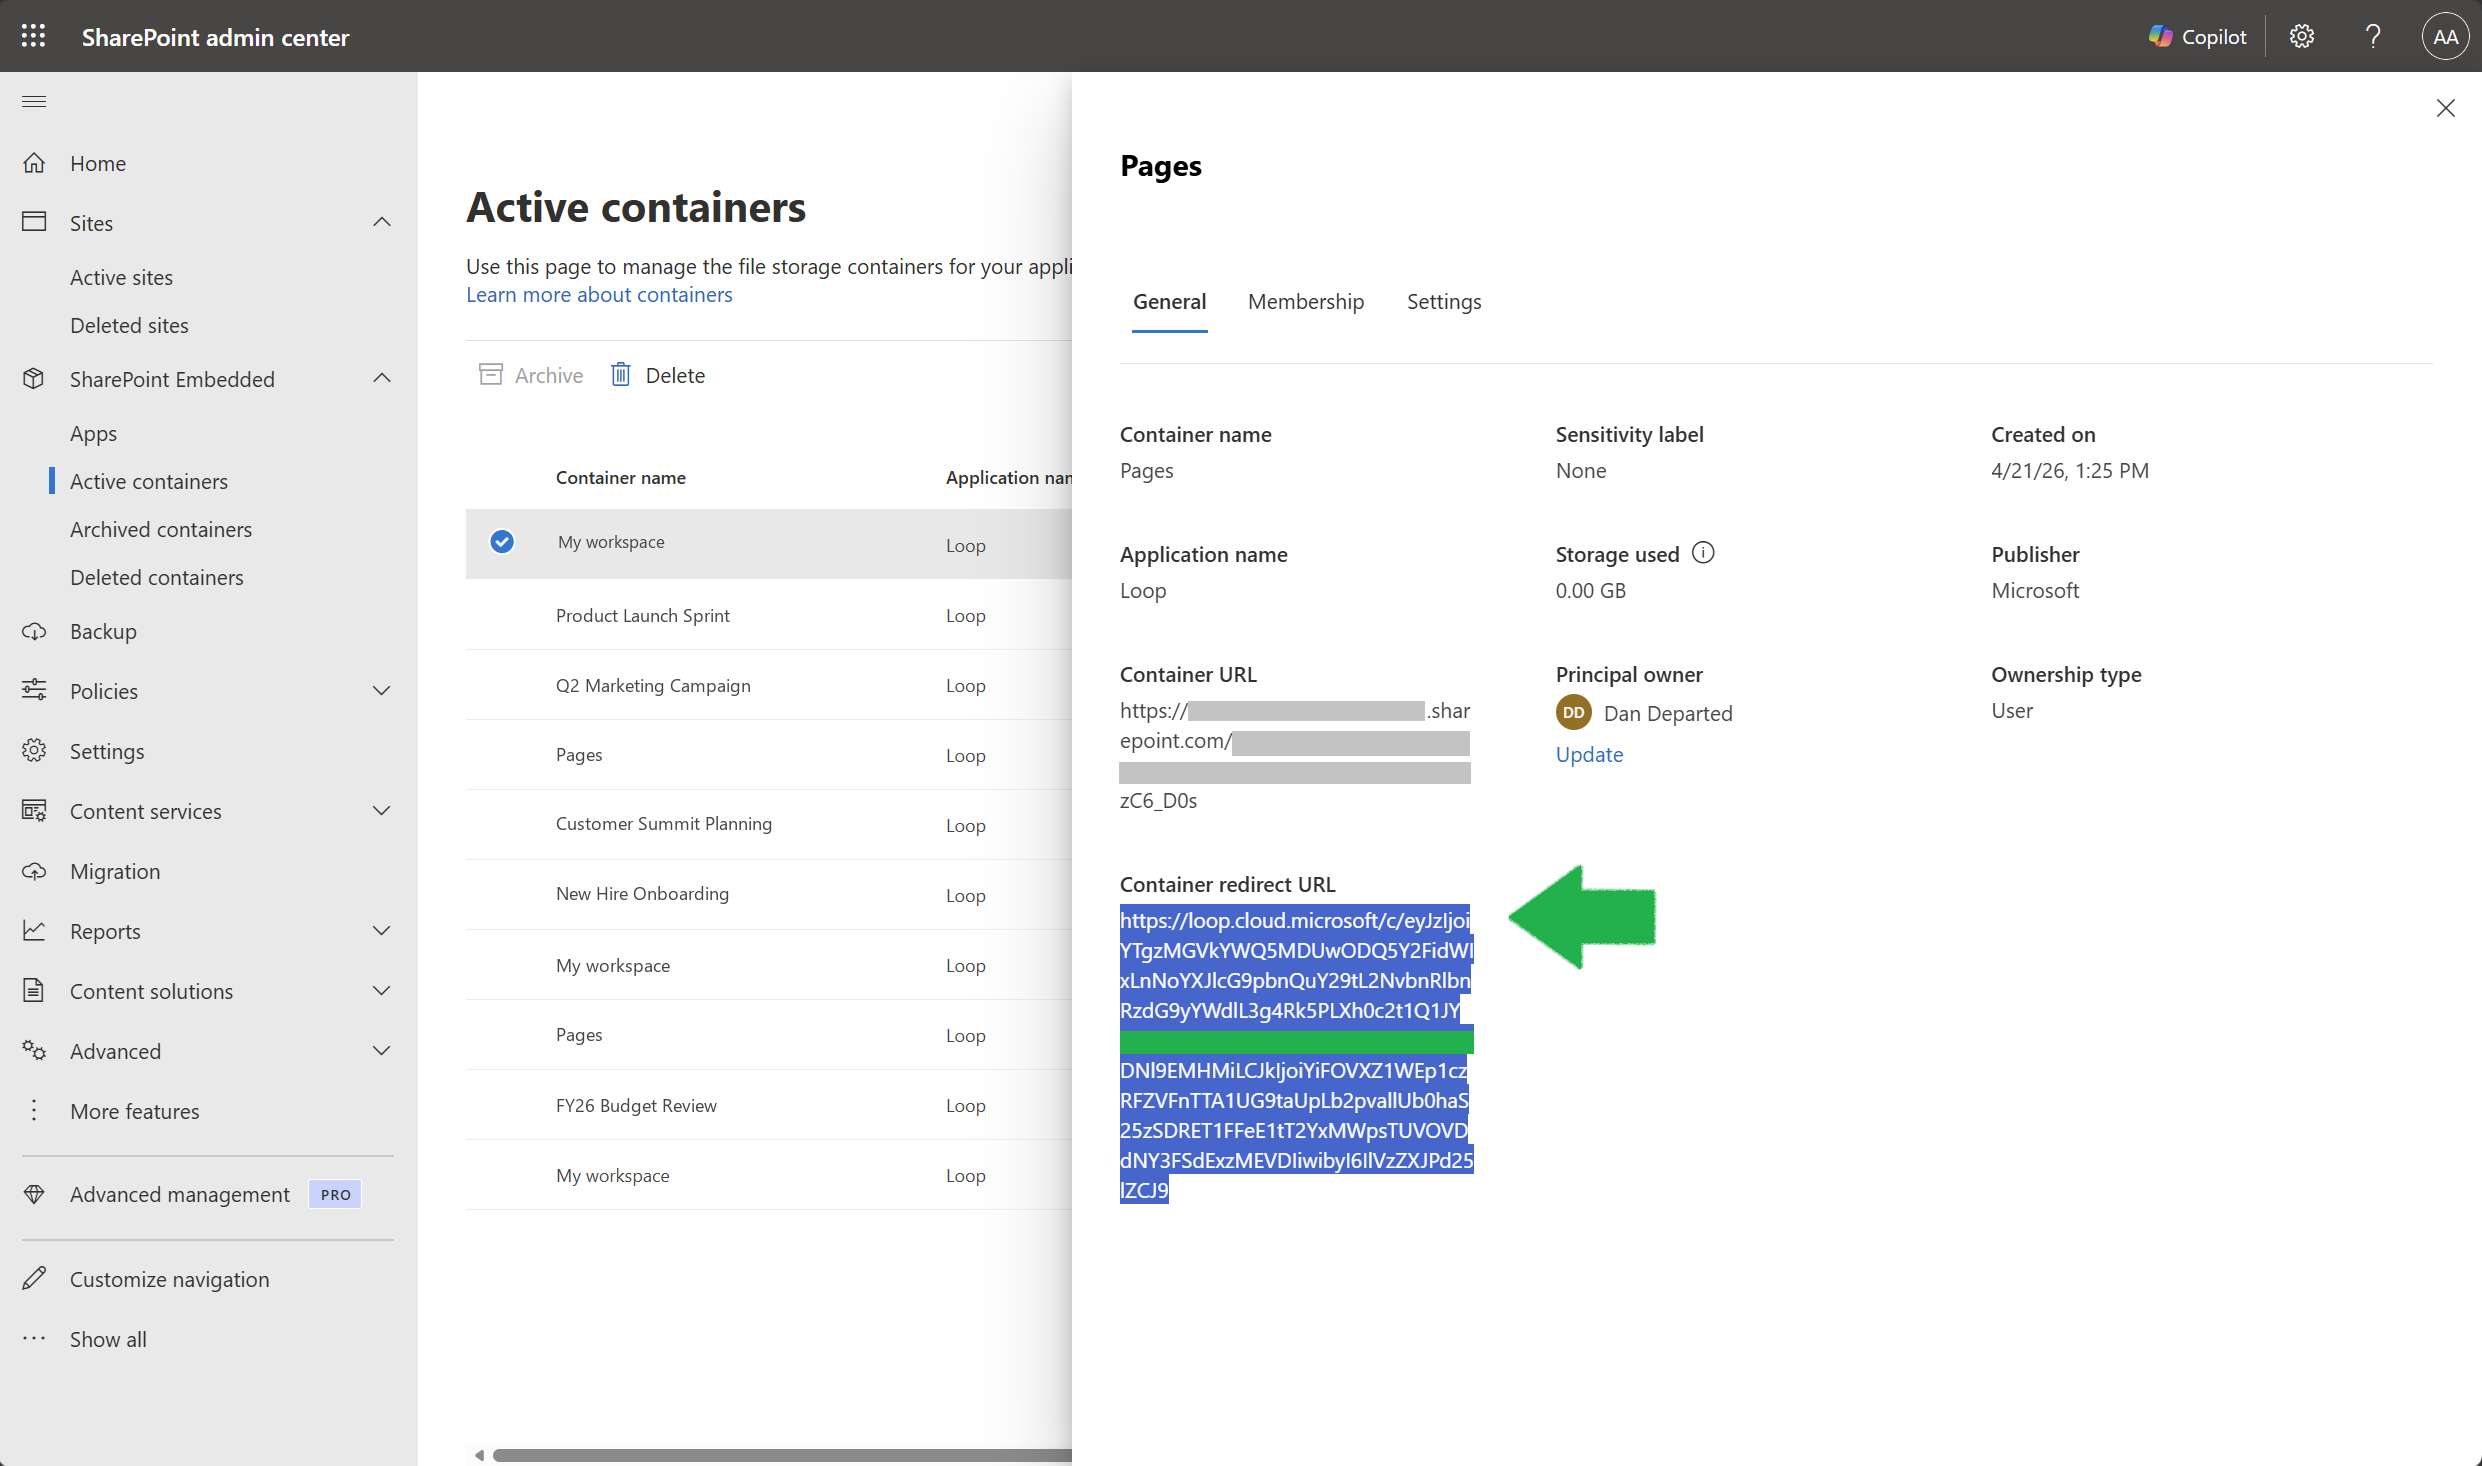
- In the container details panel, on the General tab, locate the Container Redirect URL field.
- Copy the full URL (select all the text, then press Ctrl+C or use the right-click menu).
Note
The Container Redirect URL field may not yet be available in the SharePoint admin center. This capability is still rolling out. Track the rollout status on the Microsoft 365 public roadmap.
The Container Redirect URL is a clickable link that opens the container in the Loop app for any user who has access. Send this URL to the new owner so they can access the content.
Notify the new owner
Send the new owner a message with the Container Redirect URL. Choose the appropriate template based on your scenario.
General access (tenant-owned or group-owned containers): Use this template when granting access to a shared Loop workspace:
Subject: You have access to a Loop workspace

You've been added as an owner of the [Workspace Name] Loop
workspace. Open the workspace using this link:

[Container Redirect URL]
User departure (user-owned containers): Use this template when a user left the organization and their container is scheduled for deletion:
Subject: Action required: Review and save content from [User]

You've been added as an owner of [User]'s personal container,
which holds their Copilot Pages, Copilot Notebooks, and Loop
My workspace content. This container will be deleted 30 days
after the user's account is removed from the organization.

Review and copy any content that needs to be retained before
then:

[Container Redirect URL]

Copy any required content to a new Copilot Notebook or Loop
workspace. Content that isn't copied will be permanently
deleted.
Preserve Copilot Pages and Loop content
Note
The Copy to workspace command may not yet be available in your organization. This capability is still rolling out. Track the rollout status on the Microsoft 365 public roadmap.
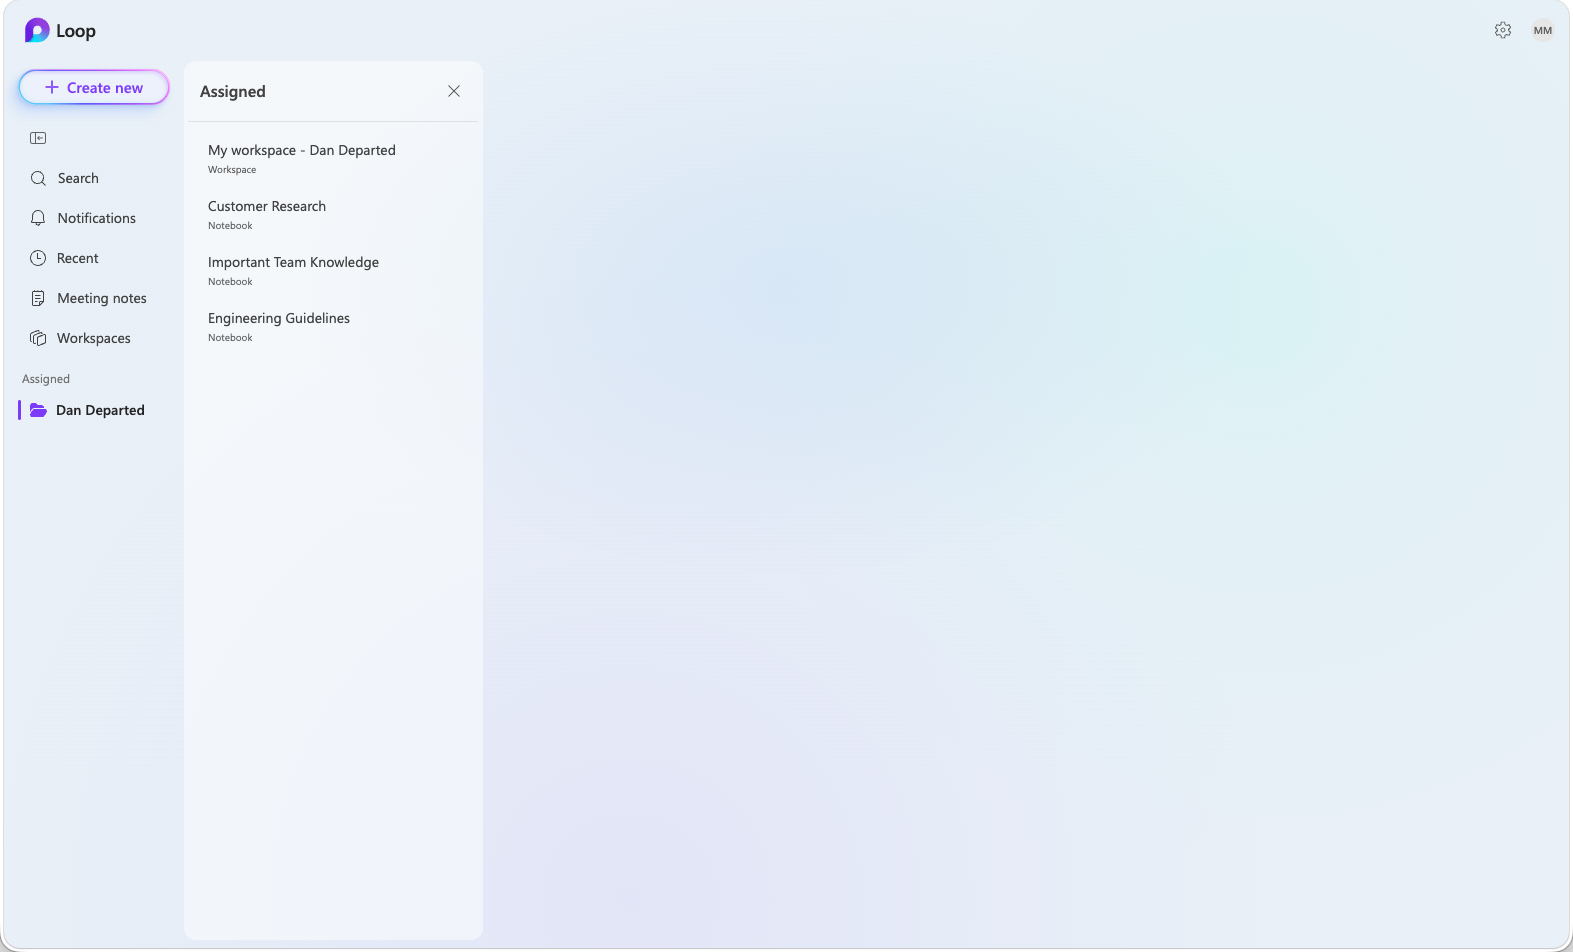
When the new owner opens the Container Redirect URL, an Assigned entry appears in the Loop navigation bar on the left. Selecting it displays a list of the user's My workspace and any Copilot Notebooks in the center pane.
To preserve Copilot Pages or Loop pages:
In the center pane, select Pages or My workspace. The list navigates in place to show the My workspace contents.
Select the page you want to preserve. The page renders in the right pane.
Right-click the page in the list and select Copy to workspace.
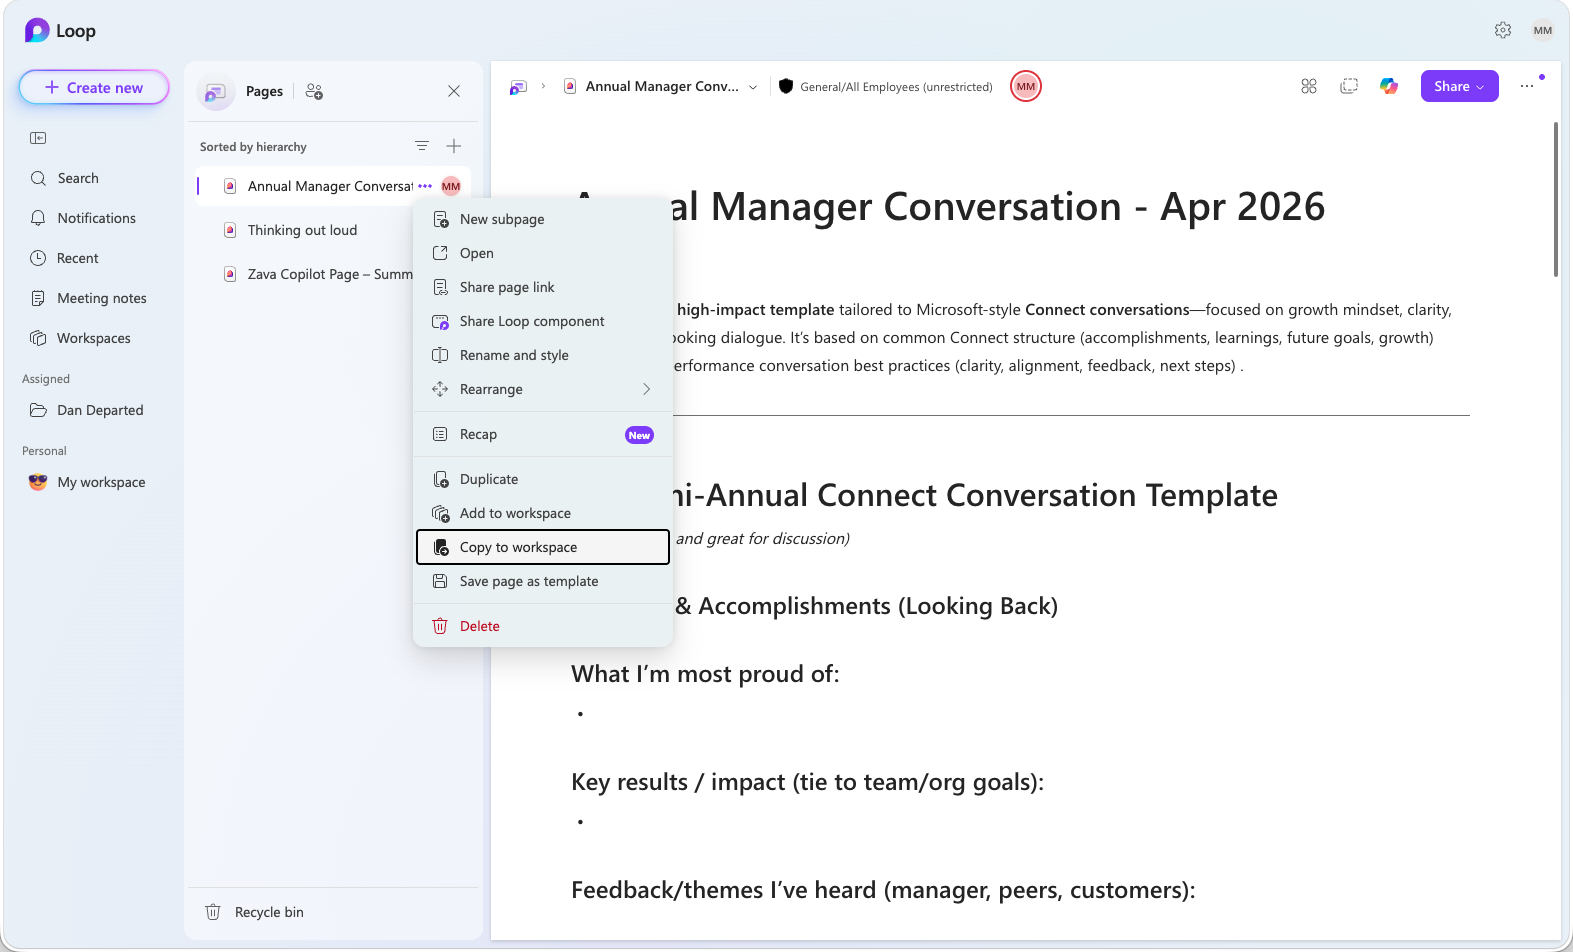
Choose a destination (another Loop workspace).
To return to the list of My workspace and Copilot Notebooks, use the back navigation, or choose the Assigned entry in the Loop navigation bar.
Preserve Copilot Notebook content
Note
The Preserve command for Copilot Pages within notebooks may not yet be available in your organization. This capability is still rolling out. Track the rollout status on the Microsoft 365 public roadmap.
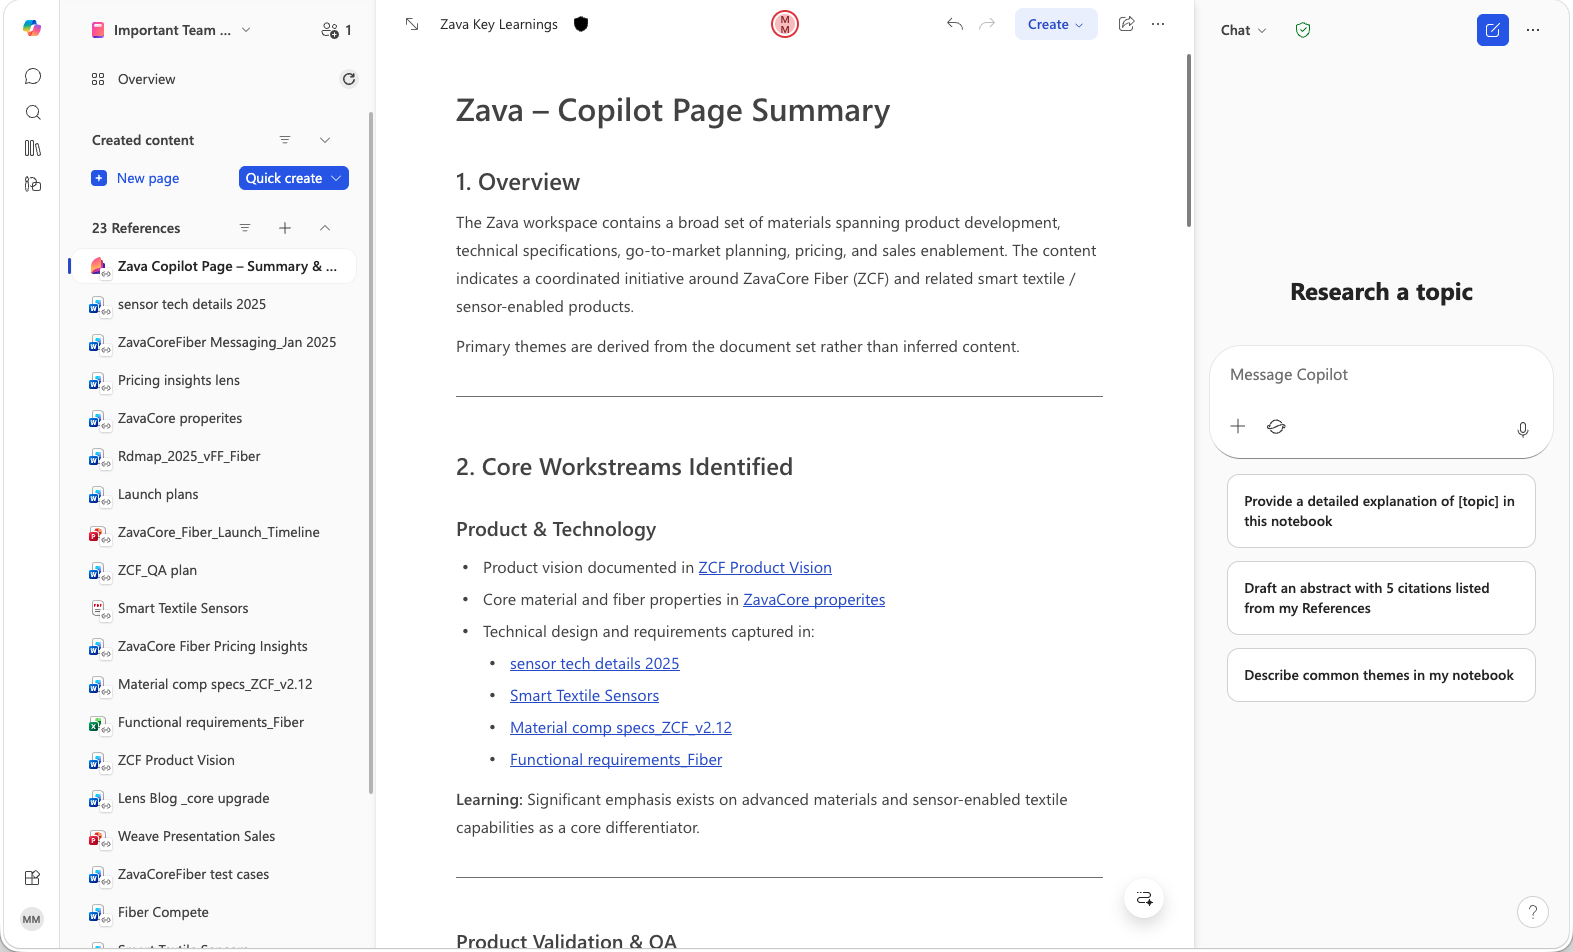
From the Assigned content list, select a Copilot Notebook. The notebook opens in a new browser tab in the Microsoft 365 Copilot app.
Copilot Notebooks contain several types of content. Before you start, review the notebook to identify what needs to be preserved:
| Content type | Where it's stored | Preservation action |
|---|---|---|
| Copilot Pages (items without a hyperlink overlay in the navigation bar) | SharePoint Embedded container | Select Preserve on each page you need to preserve |
| Overview content (Key Insights, Summary) | SharePoint Embedded container | Select and copy the text manually, then paste it into a suitable destination |
| Copilot Instructions (custom instructions) | SharePoint Embedded container | Copy the text manually and re-create in the new notebook |
| References (items with a hyperlink overlay) | Original source location (not at risk) | Open each reference, copy the URL from the browser address bar, and add it to the new notebook |
| Chat conversations | Not stored in the container | Can't be preserved or copied |
Referenced files (items with a hyperlink overlay in the References section) are stored in their original location and aren't deleted when the container is deleted. Only the organized collection of links in the notebook is lost.
Re-create a Copilot Notebook
There's no bulk workflow for transferring a Copilot Notebook to a new owner. To re-create a notebook, the new owner works through the content manually. A side-by-side window layout with the original notebook and the new one both visible can make this process easier to follow.
- Create a new Copilot Notebook.
- Share the new notebook with the same people. Open the sharing dialog of the original notebook to see who has access, then add each person to the new notebook.
- Add references from the original notebook. Open each reference to load it in a new tab, copy the URL from the browser address bar, and add it as a reference in the new notebook. Repeat for each reference.
- Preserve Copilot Pages and overview content. Open each page in the original notebook and select Preserve, then add the preserved content to the new notebook.
- Re-create custom instructions. Copy the text of the original instructions and paste it into the new notebook's custom instructions.
Important
In user departure scenarios, access alone doesn't preserve data. The new owner must copy or preserve content before the retention period expires.
How this workflow compares to OneDrive offboarding
This workflow is conceptually similar to OneDrive retention and deletion, but with key differences:
| Capability | OneDrive | Copilot Pages, Copilot Notebooks, and Loop My workspace |
|---|---|---|
| Automatic manager access | Yes, configured by default | No, requires manual custodian assignment |
| Retention period | Configurable (default 30 days) | Same schedule as OneDrive defaults, not configurable |
| Content transfer | Move or copy files | Copy files |
| Recycle bin recovery | Admin can restore deleted OneDrive during soft-delete period | Admin can recover the container during the soft-delete period using SharePoint admin center or PowerShell |
For the full offboarding process for a user, including email, OneDrive, and device management, see Remove a former user.