Deploy and manage device control in Microsoft Defender for Endpoint using Group Policy
Applies to:
- Microsoft Defender for Endpoint Plan 1
- Microsoft Defender for Endpoint Plan 2
- Microsoft Defender for Business
If you're using Group Policy to manage Defender for Endpoint settings, you can use it to deploy and manage device control.
Enable or disable removable storage access control
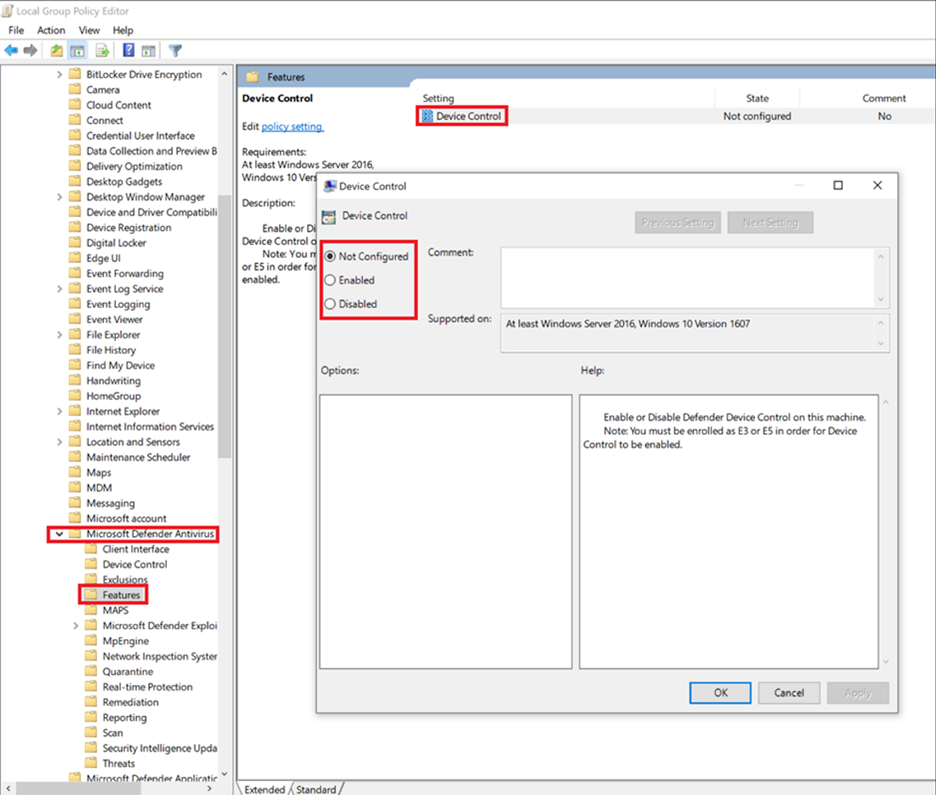
On a device running Windows, go to Computer Configuration > Administrative Templates > Windows Components > Microsoft Defender Antivirus > Features > Device Control.
In the Device Control window, select Enabled.
Note
If you don't see these Group Policy Objects, you need to add the Group Policy Administrative Templates (ADMX). You can download administrative template (WindowsDefender.adml and WindowsDefender.admx) from mdatp-devicecontrol / Windows samples in GitHub.
Set default enforcement
You can set default access such as, Deny or Allow for all device control features, such as RemovableMediaDevices, CdRomDevices, WpdDevices, and PrinterDevices.
For example, you can have either a Deny or an Allow policy for RemovableMediaDevices, but not for CdRomDevices or WpdDevices. If you set Default Deny through this policy, then Read/Write/Execute access to CdRomDevices or WpdDevices is blocked. If you only want to manage storage, make sure to create Allow policy for printers. Otherwise, default enforcement (Deny) is applied to printers, too.
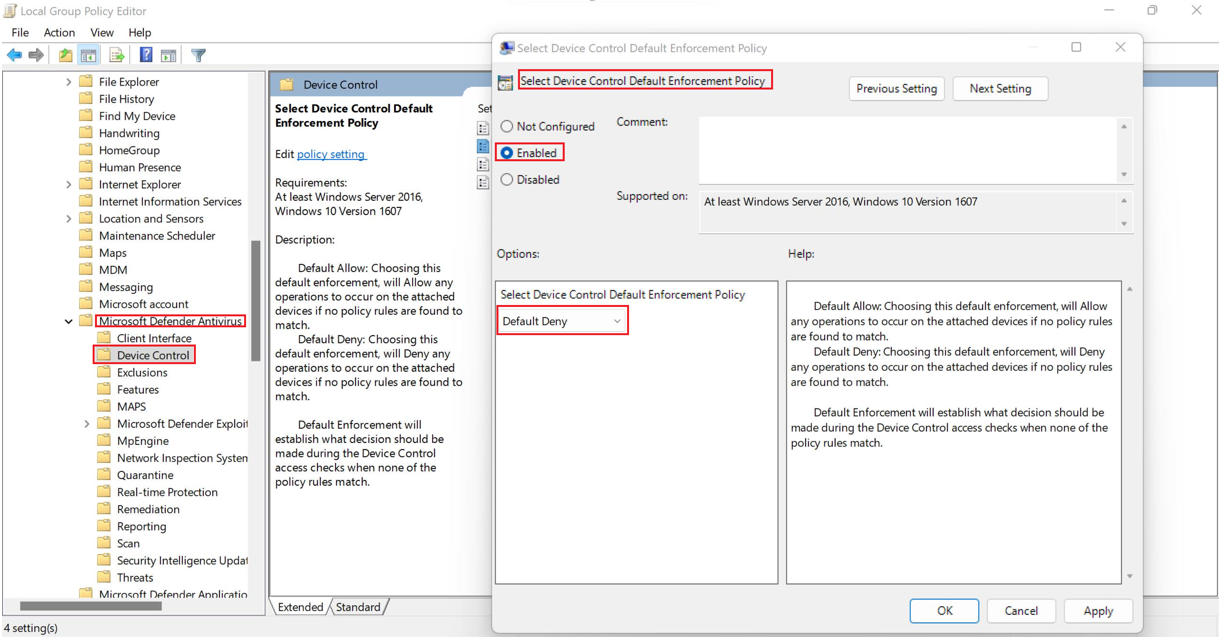
On a device running Windows, go to Computer Configuration > Administrative Templates > Windows Components > Microsoft Defender Antivirus > Features > Device Control > Select Device Control Default Enforcement Policy.
In the Select Device Control Default Enforcement Policy window, select Default Deny.
Configure device types
To configure the device types that a device control policy is applied, follow these steps:
On a computer running Windows, go to Computer Configuration > Administrative Templates > Windows Components > Microsoft Defender Antivirus > Device Control > Turn on device control for specific device types.
In the Turn on device control for specific types window, specify the product family IDs, separate by a pipe (
|). Product family IDs includeRemovableMediaDevices,CdRomDevices,WpdDevices, orPrinterDevices.
Define groups
Create one XML file for each removable storage group.
Use the properties in your removable storage group to create an XML file for each removable storage group.
Save each XML file to your network share.
Define the settings as follows:
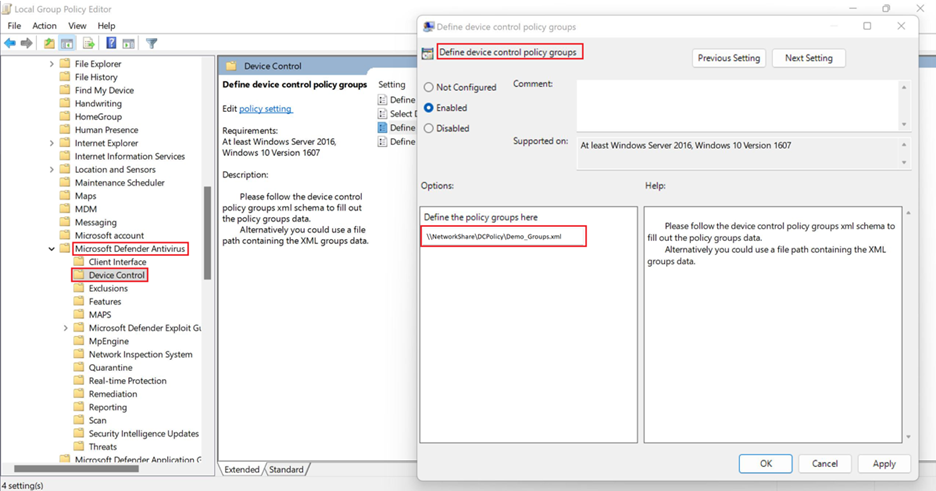
On a device running Windows, go to Computer Configuration > Administrative Templates > Windows Components > Microsoft Defender Antivirus > Device Control > Define device control policy groups.
In the Define device control policy groups window, specify the network share file path containing the XML groups data.
You can create different group types. Here's one group example XML file for any removable storage and CD-ROM, Windows portable devices, and approved USBs group: XML file
Note
Comments using XML comment notation <!--COMMENT--> can be used in the Rule and Group XML files, but they must be inside the first XML tag, not the first line of the XML file.
Define Policies
Create one XML file for access policy rule.
Use the properties in removable storage access policy rule(s) to create an XML for each group's removable storage access policy rule.
Save the XML file to network share.
Define the settings as follows:
On a device running Windows, go to Computer Configuration > Administrative Templates > Windows Components > Microsoft Defender Antivirus > Device Control > Define device control policy rules.
In the Define device control policy rules window, select Enabled, and then specify the network share file path containing the XML rules data.
Note
Comments using XML comment notation <!-- COMMENT --> can be used in the Rule and Group XML files, but they must be inside the first XML tag, not the first line of the XML file.
Set location for a copy of the file (evidence)
If you want to have a copy of the file (evidence) having Write access, set right Options in your removable storage access policy rule in the XML file, and then specify the location where system can save the copy.
On a device running Windows, go to Computer Configuration > Administrative Templates > Windows Components > Microsoft Defender Antivirus > Device Control > Define Device Control evidence data remote location.
In the Define Device Control evidence data remote location window, select Enabled, and then specify the local or network share folder path.
Retention period for local evidence cache
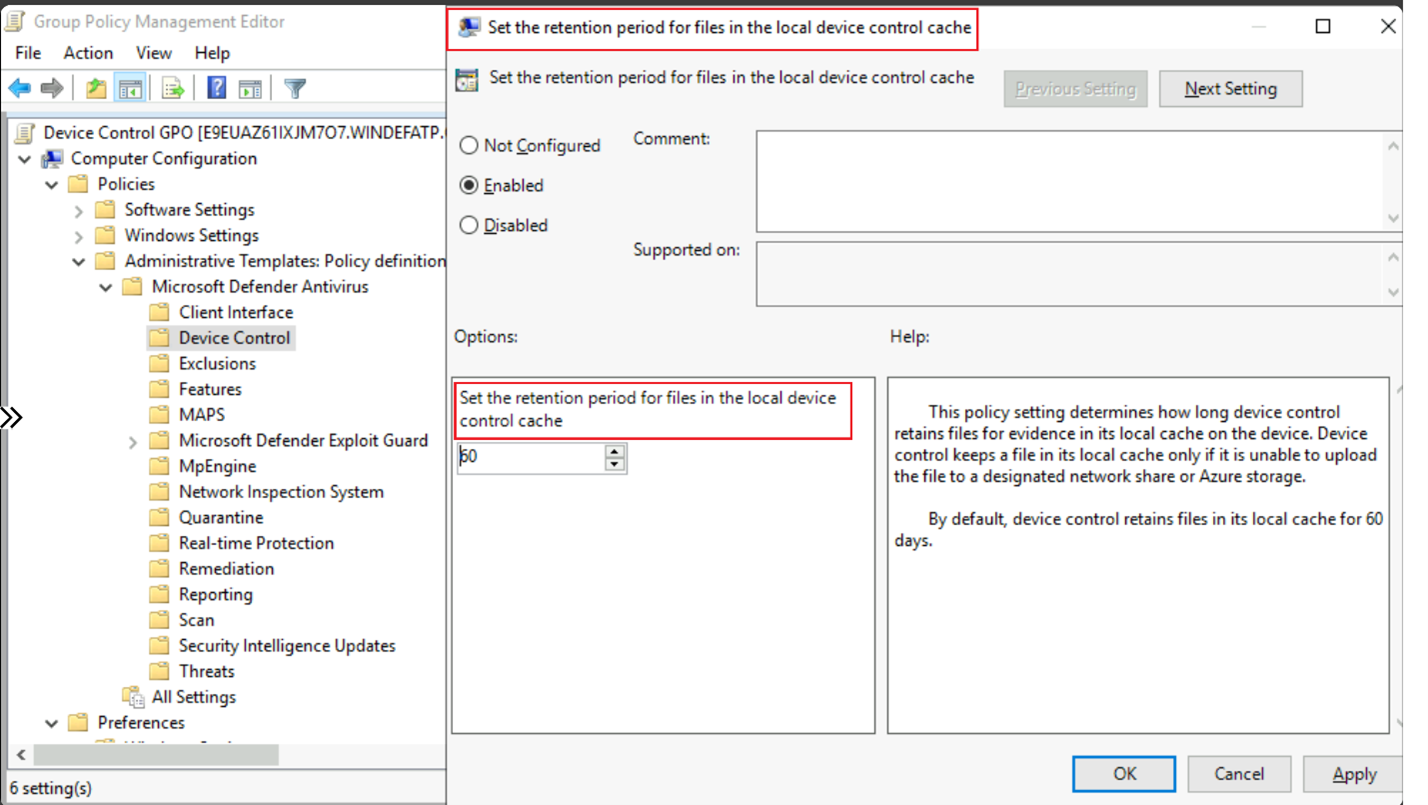
If you want to change the default value of 60 days for persisting the local cache for file evidence, follow these steps:
Go to Computer Configuration > Administrative Templates > Windows Components > Microsoft Defender Antivirus > Device Control > Set the retention period for files in the local device control cache.
In the Set the retention period for files in the local device control cache window, select Enabled, and then enter the number of days to retain the local cache (default 60).
See also
Feedback
Coming soon: Throughout 2024 we will be phasing out GitHub Issues as the feedback mechanism for content and replacing it with a new feedback system. For more information see: https://aka.ms/ContentUserFeedback.
Submit and view feedback for


