Configure Microsoft Defender for Endpoint on iOS features
Applies to:
- Microsoft Defender for Endpoint Plan 1
- Microsoft Defender for Endpoint Plan 2
- Microsoft Defender XDR
Want to experience Defender for Endpoint? Sign up for a free trial.
Note
Defender for Endpoint on iOS would use a VPN in order to provide the Web Protection feature. This is not a regular VPN and is a local/self-looping VPN that does not take traffic outside the device.
Conditional Access with Defender for Endpoint on iOS
Microsoft Defender for Endpoint on iOS along with Microsoft Intune and Microsoft Entra ID enables enforcing Device compliance and Conditional Access policies based on device risk score. Defender for Endpoint is a Mobile Threat Defense (MTD) solution that you can deploy to use this capability via Intune.
For more information about how to set up Conditional Access with Defender for Endpoint on iOS, see Defender for Endpoint and Intune.
Web Protection and VPN
By default, Defender for Endpoint on iOS includes and enables the web protection feature. Web protection helps to secure devices against web threats and protect users from phishing attacks. Anti-phishing and custom indicators (URL and Domain) are supported as part of Web Protection. IP based custom indicators are currently not supported on iOS. Web Content Filtering is currently not supported on mobile platforms (Android and iOS).
Defender for Endpoint on iOS uses a VPN in order to provide this capability. Note that the VPN is local, and unlike traditional VPN, network traffic isn't sent outside the device.
While enabled by default, there might be some cases that require you to disable VPN. For example, you want to run some apps that don't work when a VPN is configured. In such cases, you can choose to disable VPN from the app on the device by following these steps:
On your iOS device, open the Settings app, select General and then VPN.
Select the i button for Microsoft Defender for Endpoint.
Toggle off Connect On Demand to disable VPN.


Note
Web Protection isn't available when VPN is disabled. To re-enable Web Protection, open the Microsoft Defender for Endpoint app on the device and click or tap Start VPN.
Disable Web Protection
Web Protection is one of the key features of Defender for Endpoint and it requires a VPN to provide that capability. The VPN used is a local/loopback VPN and not a traditional VPN, however there are several reasons for which customers might not prefer the VPN. Customers who don't want to set up a VPN, there's an option to disable Web Protection and deploy Defender for Endpoint without that feature. Other Defender for Endpoint features continue to work.
This configuration is available for both the enrolled (MDM) devices and unenrolled (MAM) devices. For customers with MDM, admins can configure the Web Protection through Managed devices in the App Config. For customers without enrollment, using MAM, admins can configure the Web Protection through Managed apps in the App Config.
Configure Web Protection
Disable Web Protection(MDM) Use the following steps to disable Web Protection for enrolled devices.
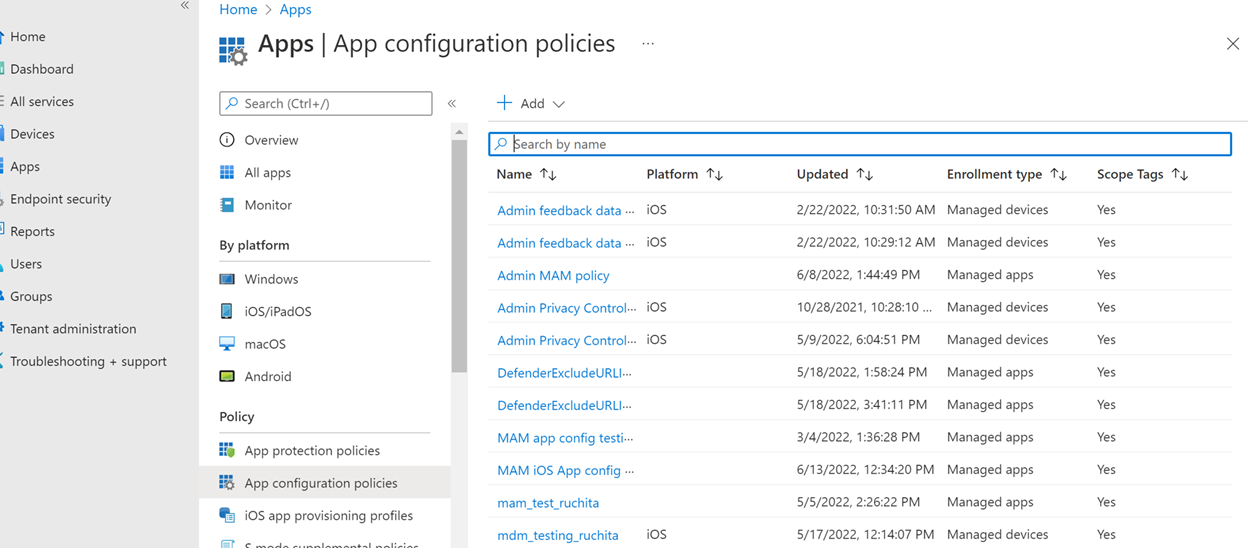
- In the Microsoft Intune admin center, go to Apps > App configuration policies > Add > Managed devices.
- Give the policy a name, Platform > iOS/iPadOS.
- Select Microsoft Defender for Endpoint as the target app.
- In Settings page, select Use configuration designer and add WebProtection as the key and value type as String.
- By default, WebProtection= true.
- Admin needs to make WebProtection = false to switch off the web protection.
- Defender sends the heartbeat to the Microsoft Defender portal whenever user opens the app.
- Select Next and assign this profile to targeted devices/users.
Disable Web Protection(MAM) Use the following steps to disable Web Protection for unenrolled devices.
- In the Microsoft Intune admin center, go to Apps > App configuration policies > Add > Managed apps.
- Give the policy a name.
- Under the Select Public Apps, choose Microsoft Defender for Endpoint as the target app.
- In Settings page, under the General Configuration Settings, add WebProtection as the key and value as false.
- By default, WebProtection= true.
- Admin needs to make WebProtection = false to switch off the web protection.
- Defender sends the heartbeat to the Microsoft Defender portal whenever user opens the app.
- Select Next and assign this profile to targeted devices/users.
Configure Network Protection
Network protection in Microsoft Defender for endpoint is disabled by default. Admins can use the following steps to configure Network Protection. This configuration is available for both enrolled devices through MDM config and unenrolled devices through MAM config.
Note
Only one policy should be created for Network Protection, either MDM or MAM.
For enrolled devices (MDM)
Follow the below steps for setting up MDM configuration for enrolled devices for Network protection.
In the Microsoft Intune admin center, navigate to Apps > App configuration policies > Add > Managed devices.
Provide name and description for the policy. Under Platform, choose iOS/iPad.
In the targeted app, choose Microsoft Defender for Endpoint.
In the Settings page, choose configuration settings format Use configuration designer.
Add 'DefenderNetworkProtectionEnable' as the configuration key, value type as 'String' and value as 'true' to enable Network Protection. (Network protection is disabled by default.)

For other configurations related to Network protection, add the following keys, choose the corresponding value type and value.
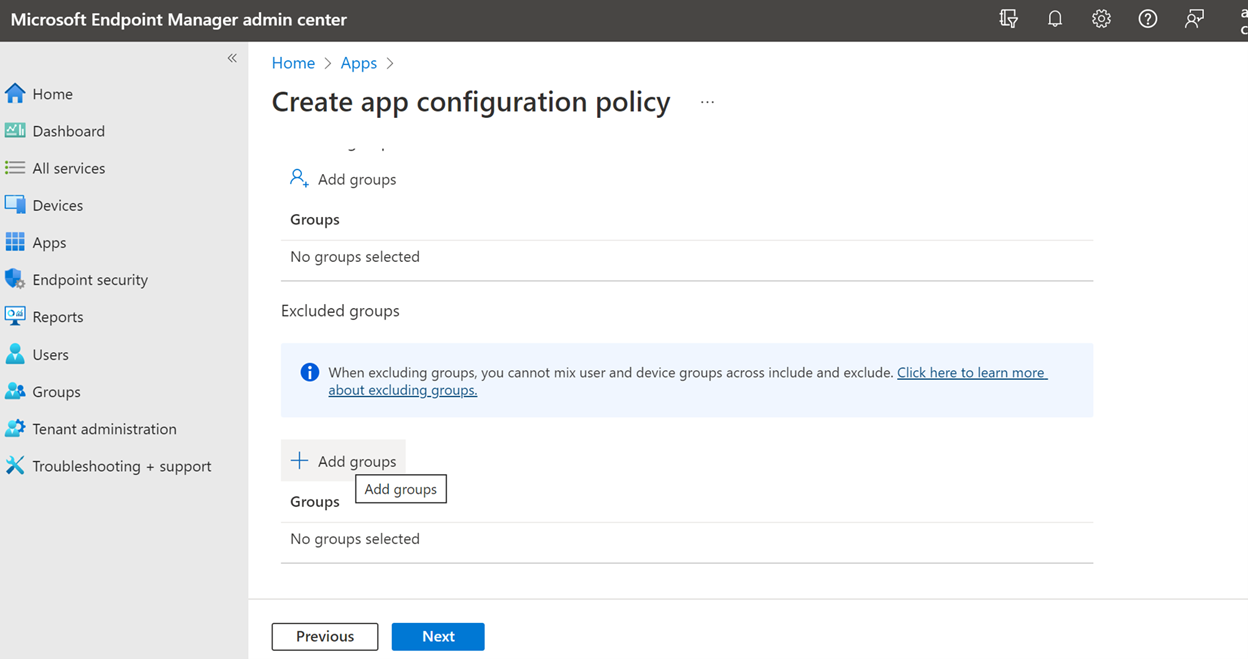
Key Value Type Default (true-enable, false-disable) Description DefenderOpenNetworkDetectionInteger 0 1 - Audit, 0 - Disable(default), 2 - Enable. This setting is managed by an IT Admin to audit, disable, or enable open network detection, respectively. In 'Audit' mode, alerts is sent only to the ATP portal with no end-user experience. For end-user experience, set the config to 'Enable' mode. DefenderEndUserTrustFlowEnableString false true - enable, false - disable; This setting is used by IT admins to enable or disable the end user in-app experience to trust and untrust the unsecure and suspicious networks. DefenderNetworkProtectionAutoRemediationString true true - enable, false - disable; This setting is used by the IT admin to enable or disable the remediation alerts that are sent when a user performs remediation activities like switching to safer WIFI access points or deleting suspicious certificates detected by Defender. DefenderNetworkProtectionPrivacyString true true - enable, false - disable; This setting is managed by IT admin to enable or disable privacy in network protection. In the Assignments section, admin can choose groups of users to include and exclude from the policy.
Review and create the configuration policy.

For unenrolled devices (MAM)
Follow the below steps for setting up MAM config for unenrolled devices for Network protection (Authenticator device registration is required for MAM configuration) in iOS devices. Network Protection initialization requires the end user to open the app once.
In the Microsoft Intune admin center, navigate to Apps > App configuration policies > Add > Managed apps > Create a new App configuration policy.
Provide a name and description to uniquely identify the policy. Then select Select Public apps, and choose Microsoft Defender for Platform iOS/iPadOS.

On the Settings page, add DefenderNetworkProtectionEnable as the key and the value as
trueto enable network protection. (Network protection is disabled by default.)
For other configurations related to network protection, add the following keys and appropriate corresponding value.
Key Default (true - enable, false - disable) Description DefenderOpenNetworkDetection0 1 - Audit, 0 - Disable (default), 2 - Enable. This setting is managed by an IT admin to enable, audit, or disable open network detection. In Audit mode, alerts are sent only to the ATP portal with no user side experience. For user experience, set the config to "Enable" mode. DefenderEndUserTrustFlowEnablefalse true - enable, false - disable; This setting is used by IT admins to enable or disable the end user in-app experience to trust and untrust the unsecure and suspicious networks. DefenderNetworkProtectionAutoRemediationtrue true - enable, false - disable; This setting is used by the IT admin to enable or disable the remediation alerts that are sent when a user performs remediation activities like switching to safer WIFI access points or deleting suspicious certificates detected by Defender. DefenderNetworkProtectionPrivacytrue true - enable, false - disable; This setting is managed by IT admin to enable or disable privacy in network protection. In the Assignments section, an admin can choose groups of users to include and exclude from the policy.
Review and create the configuration policy.


Coexistence of multiple VPN profiles
Apple iOS doesn't support multiple device-wide VPNs to be active simultaneously. While multiple VPN profiles can exist on the device, only one VPN can be active at a time.
Configure Microsoft Defender for Endpoint risk signal in app protection policy (MAM)
Microsoft Defender for Endpoint on iOS enables the App Protection Policy scenario. End-users can install the latest version of the app directly from the Apple app store. Ensure the device is registered to Authenticator with the same account being used to onboard in Defender for successful MAM registration.
Microsoft Defender for Endpoint can be configured to send threat signals to be used in App Protection Policies (APP, also known as MAM) on iOS/iPadOS. With this capability, you can use Microsoft Defender for Endpoint to protect access to corporate data from unenrolled devices as well.
Follow the steps in the following link to set up app protection policies with Microsoft Defender for Endpoint Configure Defender risk signals in app protection policy (MAM)
For more details on MAM or app protection policy, see iOS app protection policy settings.
Privacy Controls
Microsoft Defender for Endpoint on iOS enables Privacy Controls for both the Admins and the End Users. This includes the controls for enrolled (MDM) and unenrolled (MAM) devices.
For Customers with MDM, admins can configure the Privacy Controls through Managed devices in the App Config. For Customers without enrollment, using MAM, admins can configure the Privacy Controls through Managed apps in the App Config. End Users will also have the ability to configure the Privacy Settings from the Defender App settings.
Configure privacy in phish alert report
Customers can now enable privacy control for the phish report sent by Microsoft Defender for Endpoint on iOS so that the domain name isn't included as part of a phish alert whenever a phish website is detected and blocked by Microsoft Defender for Endpoint.
Admin Privacy Controls (MDM) Use the following steps to enable privacy and not collect the domain name as part of the phish alert report for enrolled devices.
In the Microsoft Intune admin center, go to Apps > App configuration policies > Add > Managed devices.
Give the policy a name, Platform > iOS/iPadOS, select the profile type.
Select Microsoft Defender for Endpoint as the target app.
On the Settings page, select Use configuration designer and add DefenderExcludeURLInReport as the key and value type as Boolean.
- To enable privacy and not collect the domain name, enter the value as
trueand assign this policy to users. By default, this value is set tofalse. - For users with key set as
true, the phish alert doesn't contain the domain name information whenever a malicious site is detected and blocked by Defender for Endpoint.
- To enable privacy and not collect the domain name, enter the value as
Select Next and assign this profile to targeted devices/users.
Admin Privacy Controls (MAM) Use the following steps to enable privacy and not collect the domain name as part of the phish alert report for unenrolled devices.
In the Microsoft Intune admin center, go to Apps > App configuration policies > Add > Managed apps.
Give the policy a name.
Under Select Public Apps, choose Microsoft Defender for Endpoint as the target app.
On the Settings page, under the General Configuration Settings, add DefenderExcludeURLInReport as the key and value as
true.- To enable privacy and not collect the domain name, enter the value as
trueand assign this policy to users. By default, this value is set tofalse. - For users with key set as
true, the phish alert doesn't contain the domain name information whenever a malicious site is detected and blocked by Defender for Endpoint.
- To enable privacy and not collect the domain name, enter the value as
Select Next and assign this profile to targeted devices/users.
End User Privacy Controls These controls help the end user to configure the information shared to their organization.
For Supervised devices, End User controls aren't visible. Your admin decides and controls the settings. However, for Unsupervised devices, the control is displayed under the Settings > Privacy.
- Users see a toggle for Unsafe Site Info.
- This toggle is only visible if Admin has set DefenderExcludeURLInReport = true.
- If enabled by an Admin, Users can decide if they want to send the unsafe site info to their Organization or not.
- By default, it's set to
false. The unsafe site information isn't sent. - If user toggles it to
true, the unsafe site details are sent.
Turning the above privacy controls on or off doesn't impact the device compliance check or conditional access.
Note
On Supervised devices with the configuration profile, Microsoft Defender for Endpoint can access the entire URL and if it is found to be phishing, it is blocked. On an Unsupervised device, Microsoft Defender for Endpoint has access to only the domain name, and if the domain is not a phishing URL, it won't be blocked.
Optional Permissions
Microsoft Defender for Endpoint on iOS enables Optional Permissions in the onboarding flow. Currently the permissions required by Defender for Endpoint are mandatory in the onboarding flow. With this feature, admins can deploy Defender for Endpoint on BYOD devices without enforcing the mandatory VPN Permission during onboarding. End users can onboard the app without the mandatory permissions and can later review these permissions. This feature is currently present only for enrolled devices (MDM).
Configure Optional Permission
Admin flow (MDM) Use the following steps to enable Optional VPN permission for enrolled devices.
In the Microsoft Intune admin center, go to Apps > App configuration policies > Add > Managed devices.
Give the policy a name, select Platform > iOS/iPadOS.
Select Microsoft Defender for Endpoint as the target app.
On the Settings page, select Use configuration designer and add DefenderOptionalVPN as the key and value type as Boolean.
- To enable optional VPN permission, enter value as
trueand assign this policy to users. By default, this value is set tofalse. - For users with key set as
true, the users are able to onboard the app without giving the VPN permission.
- To enable optional VPN permission, enter value as
Select Next and assign this profile to targeted devices/users.
End User flow - User installs and opens the app to start the onboarding.
- If an admin has set up optional permissions, then the user can Skip VPN permission and complete onboarding.
- Even if the user has skipped VPN, the device is able to onboard, and a heartbeat is sent.
- If VPN is disabled, web protection isn't active.
- Later, the user can enable web protection from within the app, which installs the VPN configuration on the device.
Note
Optional Permission is different from Disable Web Protection. Optional VPN Permission only helps to skip the permission during onboarding but its available for the end user to later review and enable it. While Disable Web Protection allows users to onboard the Defender for Endpoint app without the Web Protection. It cannot be enabled later.
Jailbreak detection
Microsoft Defender for Endpoint has the capability of detecting unmanaged and managed devices that are jailbroken. These jailbreak checks are done periodically. If a device is detected as jailbroken, these events occur:
- High-risk alert is reported to the Microsoft Defender portal. If device Compliance and Conditional Access is set up based on device risk score, then the device is blocked from accessing corporate data.
- User data on app is cleared. When user opens the app after jailbreaking the VPN profile also is deleted and no web protection is offered.
Configure compliance policy against jailbroken devices
To protect corporate data from being accessed on jailbroken iOS devices, we recommend that you set up the following compliance policy on Intune.
Note
Jailbreak detection is a capability provided by Microsoft Defender for Endpoint on iOS. However, we recommend that you setup this policy as an additional layer of defense against jailbreak scenarios.
Follow the steps below to create a compliance policy against jailbroken devices.
In the Microsoft Intune admin center, go to Devices > Compliance policies > Create Policy. Select "iOS/iPadOS" as platform and select Create.

Specify a name of the policy, such as Compliance Policy for Jailbreak.
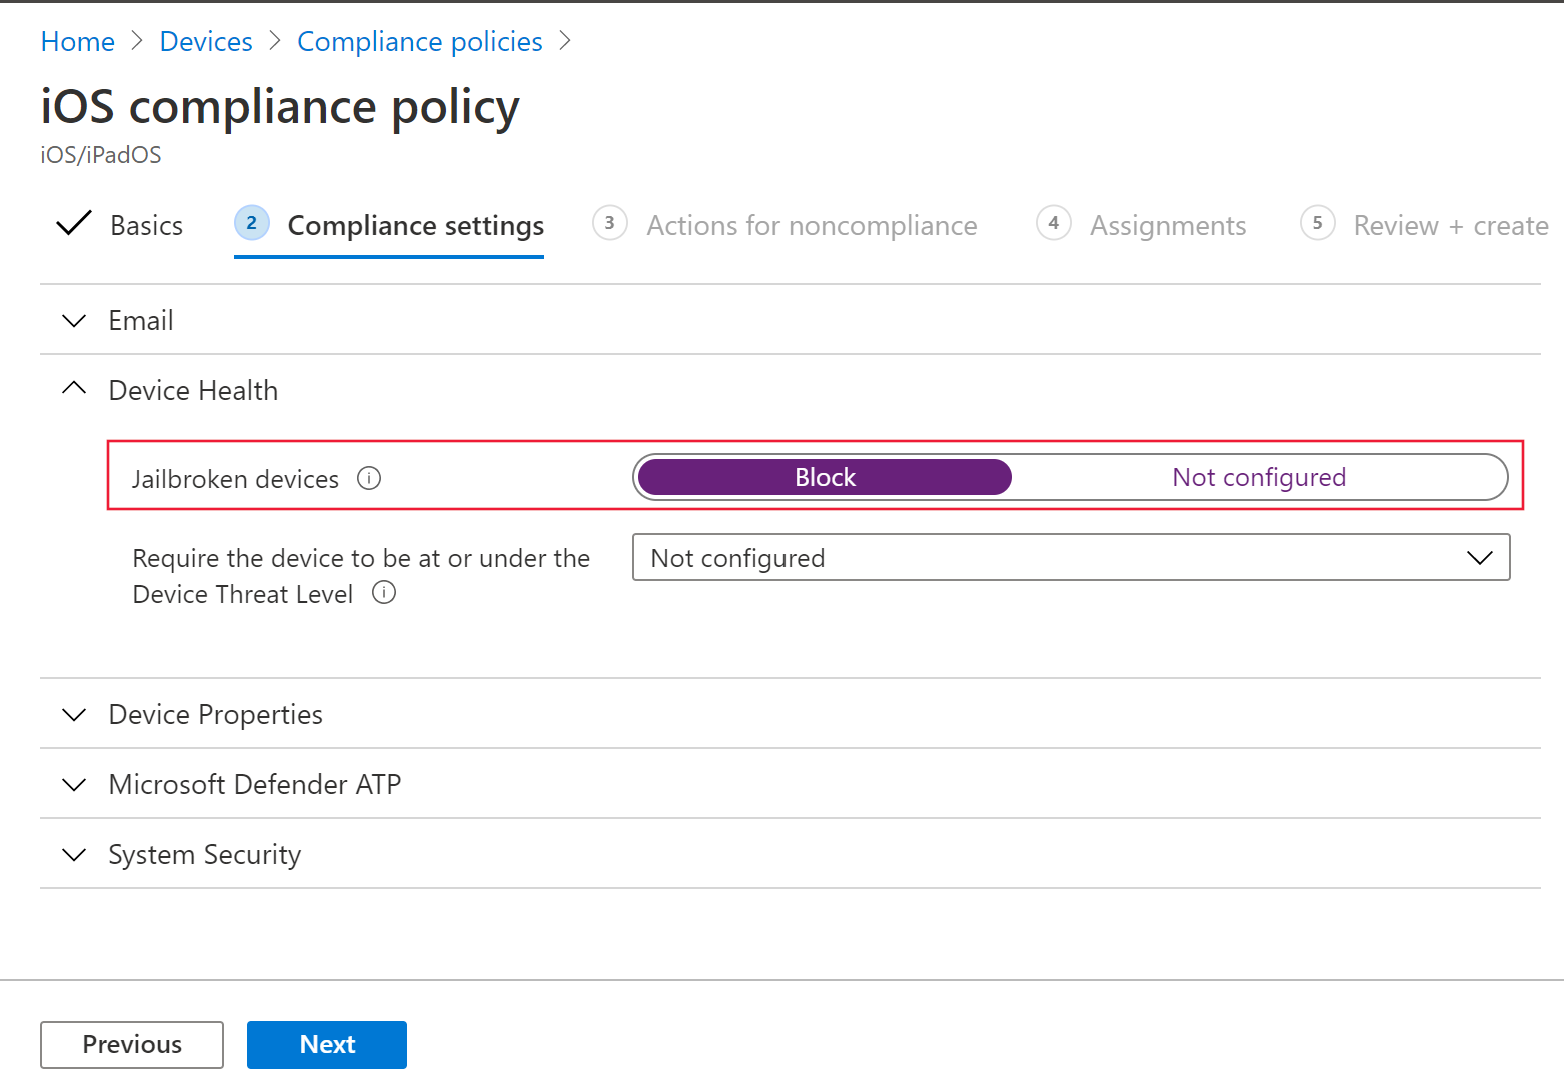
In the compliance settings page, select to expand Device Health section and select Block for Jailbroken devices field.
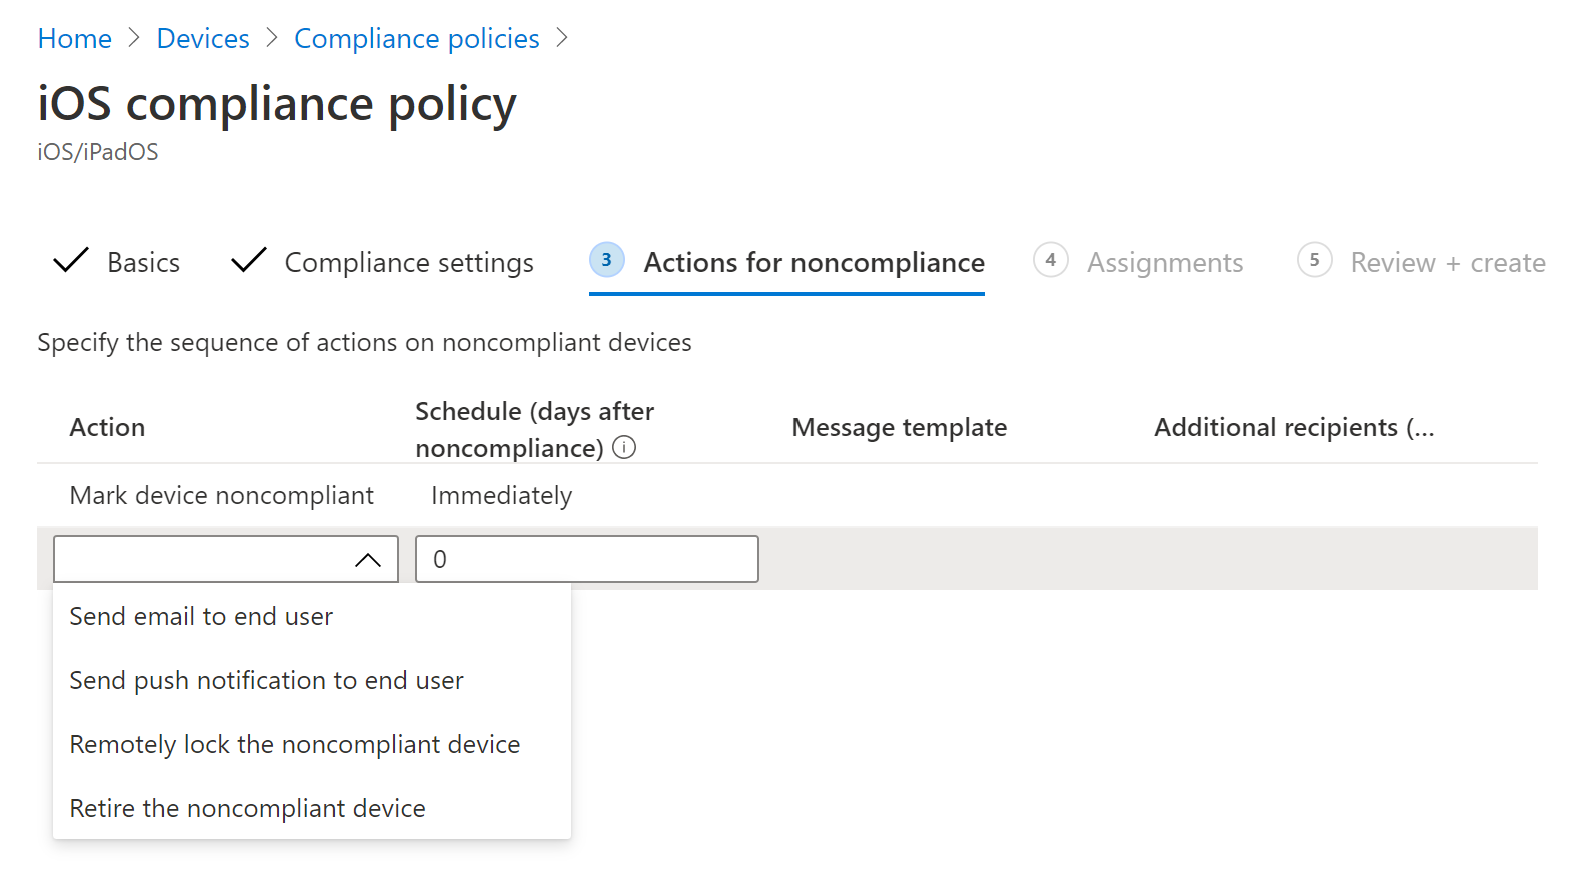
In the Actions for noncompliance section, select the actions as per your requirements and select Next.
In the Assignments section, select the user groups that you want to include for this policy and then select Next.
In the Review+Create section, verify that all the information entered is correct and then select Create.


Configure custom indicators
Defender for Endpoint on iOS enables admins to configure custom indicators on iOS devices as well. For more information on how to configure custom indicators, see Manage indicators.
Note
Defender for Endpoint on iOS supports creating custom indicators only for URLs and domains. IP based custom indicators is not supported on iOS.
For iOS, no alerts are generated on Microsoft Defender XDR when the URL or domain set in the indicator is accessed.
Configure vulnerability assessment of apps
Reducing cyber risk requires comprehensive risk-based vulnerability management to identify, assess, remediate, and track all your biggest vulnerabilities across your most critical assets, all in a single solution. Visit this page to learn more about Microsoft Defender Vulnerability Management in Microsoft Defender for Endpoint.
Defender for Endpoint on iOS supports vulnerability assessments of OS and apps. Vulnerability assessment of iOS versions is available for both enrolled (MDM) and unenrolled (MAM) devices. Vulnerability assessment of apps is only for enrolled (MDM) devices. Admins can use the following steps to configure the vulnerability assessment of apps.
On a Supervised Device
Ensure the device is configured in the Supervised mode.
To enable the feature in the Microsoft Intune admin center, go to Endpoint Security > Microsoft Defender for Endpoint > Enable App sync for iOS/iPadOS devices.


Note
To get the list of all the apps including unmanaged apps, the admin has to enable Send full application inventory data on personally owned iOS/iPadOS devices in the Intune Admin Portal for the supervised devices marked as "Personal". For the supervised devices marked as "Corporate" in the Intune Admin Portal, the admin need not enable Send full application inventory data on personally owned iOS/iPadOS devices.
On an Unsupervised Device
To enable the feature in the Microsoft Intune admin center, go to Endpoint Security > Microsoft Defender for Endpoint > Enable App sync for iOS/iPadOS devices.
To get the list of all the apps including unmanaged apps, enable the toggle Send full application inventory data on personally owned iOS/iPadOS devices.

Use the following steps to configure the privacy setting.
- Go to Apps > App configuration policies > Add > Managed devices.
- Give the policy a name, Platform > iOS/iPadOS.
- Select Microsoft Defender for Endpoint as the target app.
- In Settings page, select Use configuration designer and add DefenderTVMPrivacyMode as the key and value type as String.
- To disable privacy and collect the list of apps installed, enter value as
Falseand assign this policy to users. - By default, this value is set to
Truefor unsupervised devices. - For users with key set as
False, Defender for Endpoint will send the list of apps installed on the device for vulnerability assessment.
- To disable privacy and collect the list of apps installed, enter value as
- Click Next and assign this profile to targeted devices/users.
- Turning the above privacy controls on or off will not impact the device compliance check or conditional access.
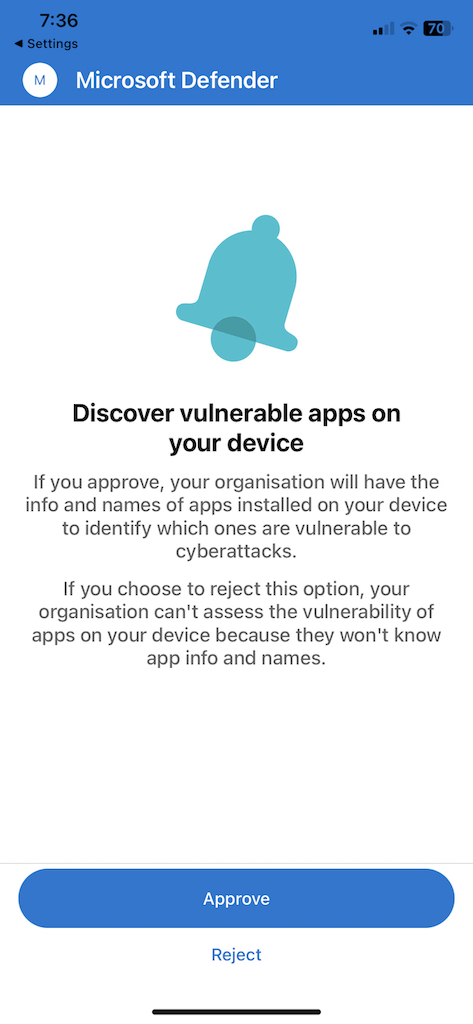
Once the config is applied, end-user will need to open the app to Approve the privacy setting.
Privacy approval screen will come only for unsupervised devices.
Only if end-user approves the privacy, the app information is sent to the Defender for Endpoint console.


Once the client versions are deployed to target iOS devices, the processing will start. Vulnerabilities found on those devices will start showing up in the Defender Vulnerability Management dashboard. The processing might take few hours (max 24 hours) to complete. Especially for the entire list of apps to show up in the software inventory.
Note
If you're using SSL inspection solution within your iOS device, please allow list these domain names securitycenter.windows.com (in commercial environment) and securitycenter.windows.us (in GCC environment) for TVM feature to work.
Disable sign out
Defender for Endpoint on iOS supports deployment without sign out button in the app to prevent users from signing out of the Defender app. This is important to prevent users from tampering the device.
This configuration is available for both the enrolled (MDM) devices as well as unenrolled (MAM) devices. Admins can use the following steps to configure the Disable sign out
Configure Disable sign out
For enrolled devices(MDM)
- In the Microsoft Intune admin center, navigate to Apps > App configuration policies > Add > Managed devices.
- Give the policy a name, select Platform > iOS/iPadOS
- Select Microsoft Defender for Endpoint as the target app.
- In Settings page, select Use configuration designer and add DisableSignOut as the key and value type as String.
- By default, DisableSignOut = false.
- Admin needs to make DisableSignOut = true to disable the sign-out button in the app. Users will not see the sign out button once the policy is pushed.
- Click Next and assign this policy to targeted devices/users.
For unenrolled devices(MAM)
- In the Microsoft Intune admin center, navigate to Apps > App configuration policies > Add > Managed apps.
- Give the policy a name.
- Under the Select Public Apps, choose Microsoft Defender for Endpoint as the target app.
- In Settings page, add DisableSignOut as the key and value as true, under the General Configuration Settings.
- By default, DisableSignOut = false.
- Admin needs to make DisableSignOut = true to disable the sign-out button in the app. Users will not see the sign out button once the policy is pushed.
- Click Next and assign this policy to targeted devices/users.
Important
This feature is in Public Preview. The following information relates to prereleased product which may be substantially modified before it's commercially released. Microsoft makes no warranties, express or implied, with respect to the information provided here.
Device Tagging
Defender for Endpoint on iOS enables bulk tagging the mobile devices during onboarding by allowing the admins to set up tags via Intune. Admin can configure the device tags through Intune via configuration policies and push them to user's devices. Once the User installs and activates Defender, the client app passes the device tags to the Security Portal. The Device tags appear against the devices in the Device Inventory.
This configuration is available for both the enrolled (MDM) devices as well as unenrolled (MAM) devices. Admins can use the following steps to configure the Device tags.
Configure Device tags
For enrolled devices(MDM)
In the Microsoft Intune admin center, navigate to Apps > App configuration policies > Add > Managed devices.
Give the policy a name, select Platform > iOS/iPadOS
Select Microsoft Defender for Endpoint as the target app.
In Settings page, select Use configuration designer and add DefenderDeviceTag as the key and value type as String.
- Admin can assign a new tag by adding the key DefenderDeviceTag and setting a value for device tag.
- Admin can edit an existing tag by modifying the value of the key DefenderDeviceTag.
- Admin can delete an existing tag by removing the key DefenderDeviceTag.
Click Next and assign this policy to targeted devices/users.
For unenrolled devices(MAM)
- In the Microsoft Intune admin center, navigate to Apps > App configuration policies > Add > Managed apps.
- Give the policy a name.
- Under the Select Public Apps, choose Microsoft Defender for Endpoint as the target app.
- In Settings page, add DefenderDeviceTag as the key under the General Configuration Settings.
- Admin can assign a new tag by adding the key DefenderDeviceTag and setting a value for device tag.
- Admin can edit an existing tag by modifying the value of the key DefenderDeviceTag.
- Admin can delete an existing tag by removing the key DefenderDeviceTag.
- Click Next and assign this policy to targeted devices/users.
Note
The Defender app needs to be opened for tags to be synced with Intune and passed to Security Portal. It may take up to 18 hours for tags to reflect in the portal.
Configure option to send in-app feedback
Customers now have the option to configure the ability to send feedback data to Microsoft within the Defender for Endpoint app. Feedback data helps Microsoft improve products and troubleshoot issues.
Note
For US Government cloud customers, feedback data collection is disabled by default.
Use the following steps to configure the option to send feedback data to Microsoft:
In the Microsoft Intune admin center, go to Apps > App configuration policies > Add > Managed devices.
Give the policy a name, and select Platform > iOS/iPadOS as the profile type.
Select Microsoft Defender for Endpoint as the target app.
On the Settings page, select Use configuration designer and add DefenderFeedbackData as the key and value type as Boolean.
To remove the ability of end-users to provide feedback, set the value as
falseand assign this policy to users. By default, this value is set totrue. For US Government customers, the default value is set to 'false'.For users with key set as
true, there is an option to send Feedback data to Microsoft within the app (Menu > Help & Feedback > Send Feedback to Microsoft).
Select Next and assign this profile to targeted devices/users.
Report unsafe site
Phishing websites impersonate trustworthy websites for the purpose of obtaining your personal or financial information. Visit the Provide feedback about network protection page to report a website that could be a phishing site.
Tip
Do you want to learn more? Engage with the Microsoft Security community in our Tech Community: Microsoft Defender for Endpoint Tech Community.
Feedback
Coming soon: Throughout 2024 we will be phasing out GitHub Issues as the feedback mechanism for content and replacing it with a new feedback system. For more information see: https://aka.ms/ContentUserFeedback.
Submit and view feedback for