Microsoft Defender Antivirus ring deployment using System Center Configuration Manager and Windows Server Update Services
Applies to:
- Microsoft Defender for Endpoint Plan 2
- Microsoft Defender XDR
- Microsoft Defender Antivirus
Platforms
- Windows
- Windows Server
Want to experience Microsoft Defender for Endpoint? Sign up for a free trial.
Microsoft Defender for Endpoint is an enterprise endpoint security platform designed to help enterprise networks prevent, detect, investigate, and respond to advanced threats.
Tip
Microsoft Defender for Endpoint is available in two plans, Defender for Endpoint Plan 1 and Plan 2. A new Microsoft Defender Vulnerability Management add-on is now available for Plan 2.
Setting up the pilot environment
This section describes the process for setting up the pilot UAT / Test / QA environment.

Note
Security intelligence update (SIU) is equivalent to signature updates, which is the same as definition updates.
On about 10-500 Windows and/or Windows Server systems, depending on how many total systems that you all have.
Note
If you have a Citrix environment, include at least 1 Citrix VM (non-persistent) and/or (persistent)
In System Center Configuration Manager > Create Automatic Deployment Rule Wizard > General page, in Specify the setting for this automatic deployment rule, make the following settings:
In: Change: Name Type a name for your deployment rule. For example, type MDE-MDAV_Security_Intelligence_Update_Pilot Description Type a brief description for your pilot Template Select SCEP and Windows Defender Antivirus Updates Collection Type Windows_Security_Intelligence_Pilot Each time the rule runs and finds new updates. Select Create a new Software Update Group Each time the rule runs and finds new updates Select Enable the deployment after this rule is run Select Next. On the Deployment Settings page, under Specify the settings for this Automatic Deployment Rule, then do the following:
In: Change: Type of deployment Select Required Detail level Select Only error messages Some software updates include a license agreement Select Automatically deploy all software updates found by this rule, and approve any license agreements. Select Next. On the Software Updates page, under Select the property filters and search criteria, make the following settings:
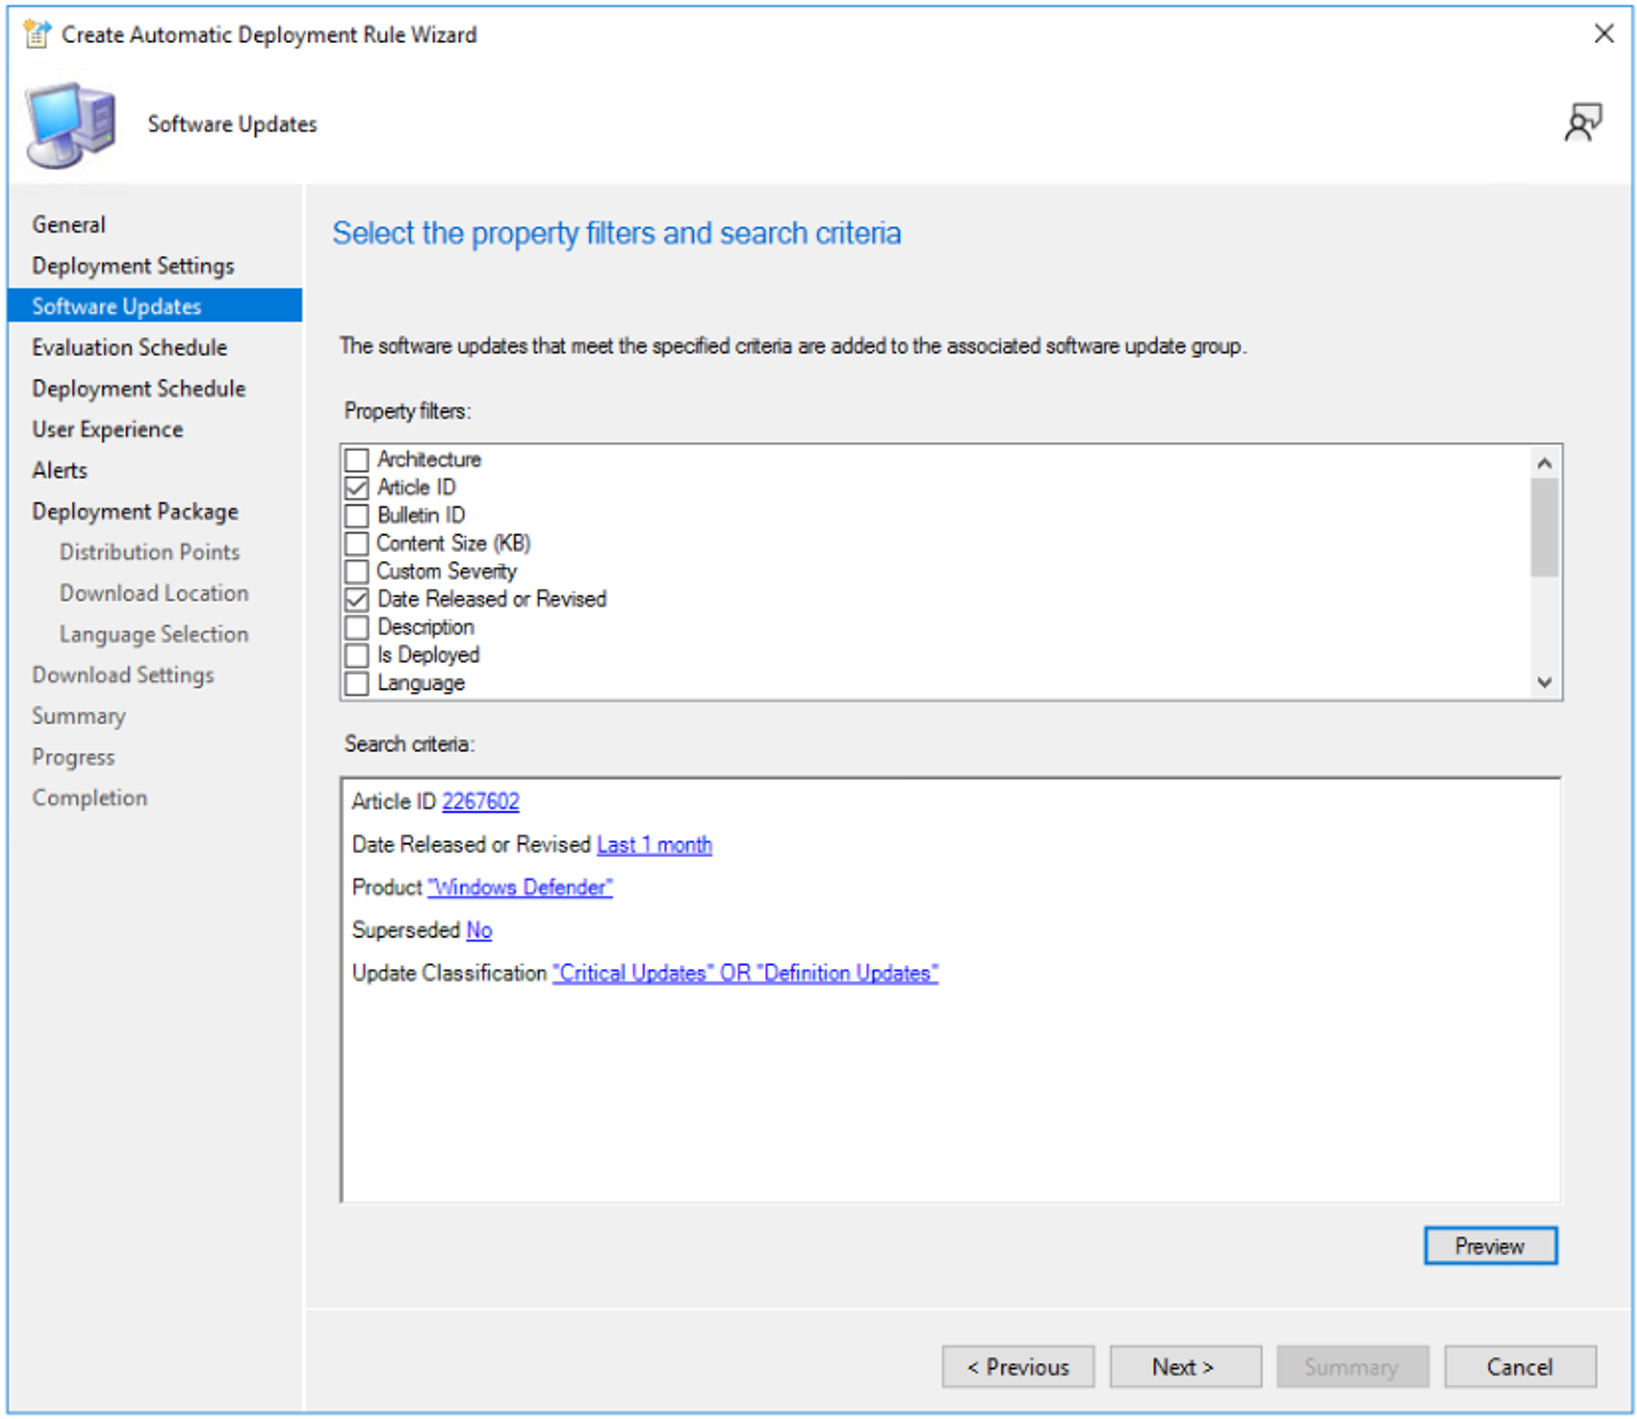
In: Change: Property filters Select Article ID and Date Released or Revised Search Criteria Enter the following
Article ID = 2267602
Date Released or Revised = Last 1 month
Product = Windows Defender
Superseded = No
Update Classification = "Critical Updates" OR "Definition Updates"These settings are shown in the following image:
Tip
Click Preview - to make sure "Security Intelligence Update for Windows Defender Antivirus" is listed. You should see KB2267602.
Note
Date Released or Revised: Last 1 month - If your WSUS/SUP have been healthy, you may want to set this to "Last 1 week".
Product: "Windows Defender" - We are removing "System Center Endpoint Protection", because we want to target this to only the operating systems that have Microsoft Defender Antivirus.
Update Classification: "Critical Updates" and "Definition Updates"
Select Next. On the Evaluation Schedule page, under Specify the recurring schedule for this rule, select Run the rule on a schedule, and then select Customize.
On the Deployment Schedule page, under Configure schedule details for this deployment, do the following:
In: Change: Schedule evaluation > Time based on Select UTC Software available time Select As soon as possible Installation deadline Select As soon as possible Select Next. On the User Experience page, under Specify the user experience for this deployment, ensure the following are selected:
In: Change: User visual experience > User notifications Select Hide in Software center and all notifications Deadline behavior Select Software Update Installation Device restart behavior Select Servers Write filter handling for Windows Embedded devices Select Commit changes at deadline or during a maintenance windows (requires restarts) Select Next. On the Alerts page, under Specify software update alert options for this deployment, select Generate an alert when this Rule fails, and then select Next.
On the top-level Deployment Package page, under Select deployment package for this automatic deployment rule, select Create a new deployment package, and then do the following:
In: Change: Name Type a name for your new deployment package. For example, type MDE-MDAV Security Intelligence Update. Description Type a brief description for your new deployment package Package Source (Example): \server_name_folder path_ Type the path to your package source. For example, type \sccm\deployment\MDE-MDAV_Security_Intelligence_Updates_Pilot
or select Browse to navigate to - and select - your package source.Sending priority: Select High and select Enable binary differential replication Select Next. On the Distribution point page, under Specify the distribution points or distribution point groups to host the content, select Add and then specify your distribution point or distribution point groups.
Select Next. On the Distribution location page, under Specify download location for this Automatic Deployment Rule, select Download software updates from the Internet, and then select Next.
On the Distribution location page, under Specify the update languages for product, under product, select Windows Update.
Select Next. On the Download Settings page, under Specify the software updates download behavior for clients on slow site boundaries, select the following:
In: Change: Name In Deployment options select Download software updates from distribution point and install Deployment options Select Download and install software updates from the distribution points in site default boundary group Deployment options Select "Prefer cloud based sources over on-premises sources" is configures in the boundary group settings, Microsoft update will be the preferred source. Select Next. On the Summary page, under Confirm the settings, review the settings. Example settings are shown in the following figure.
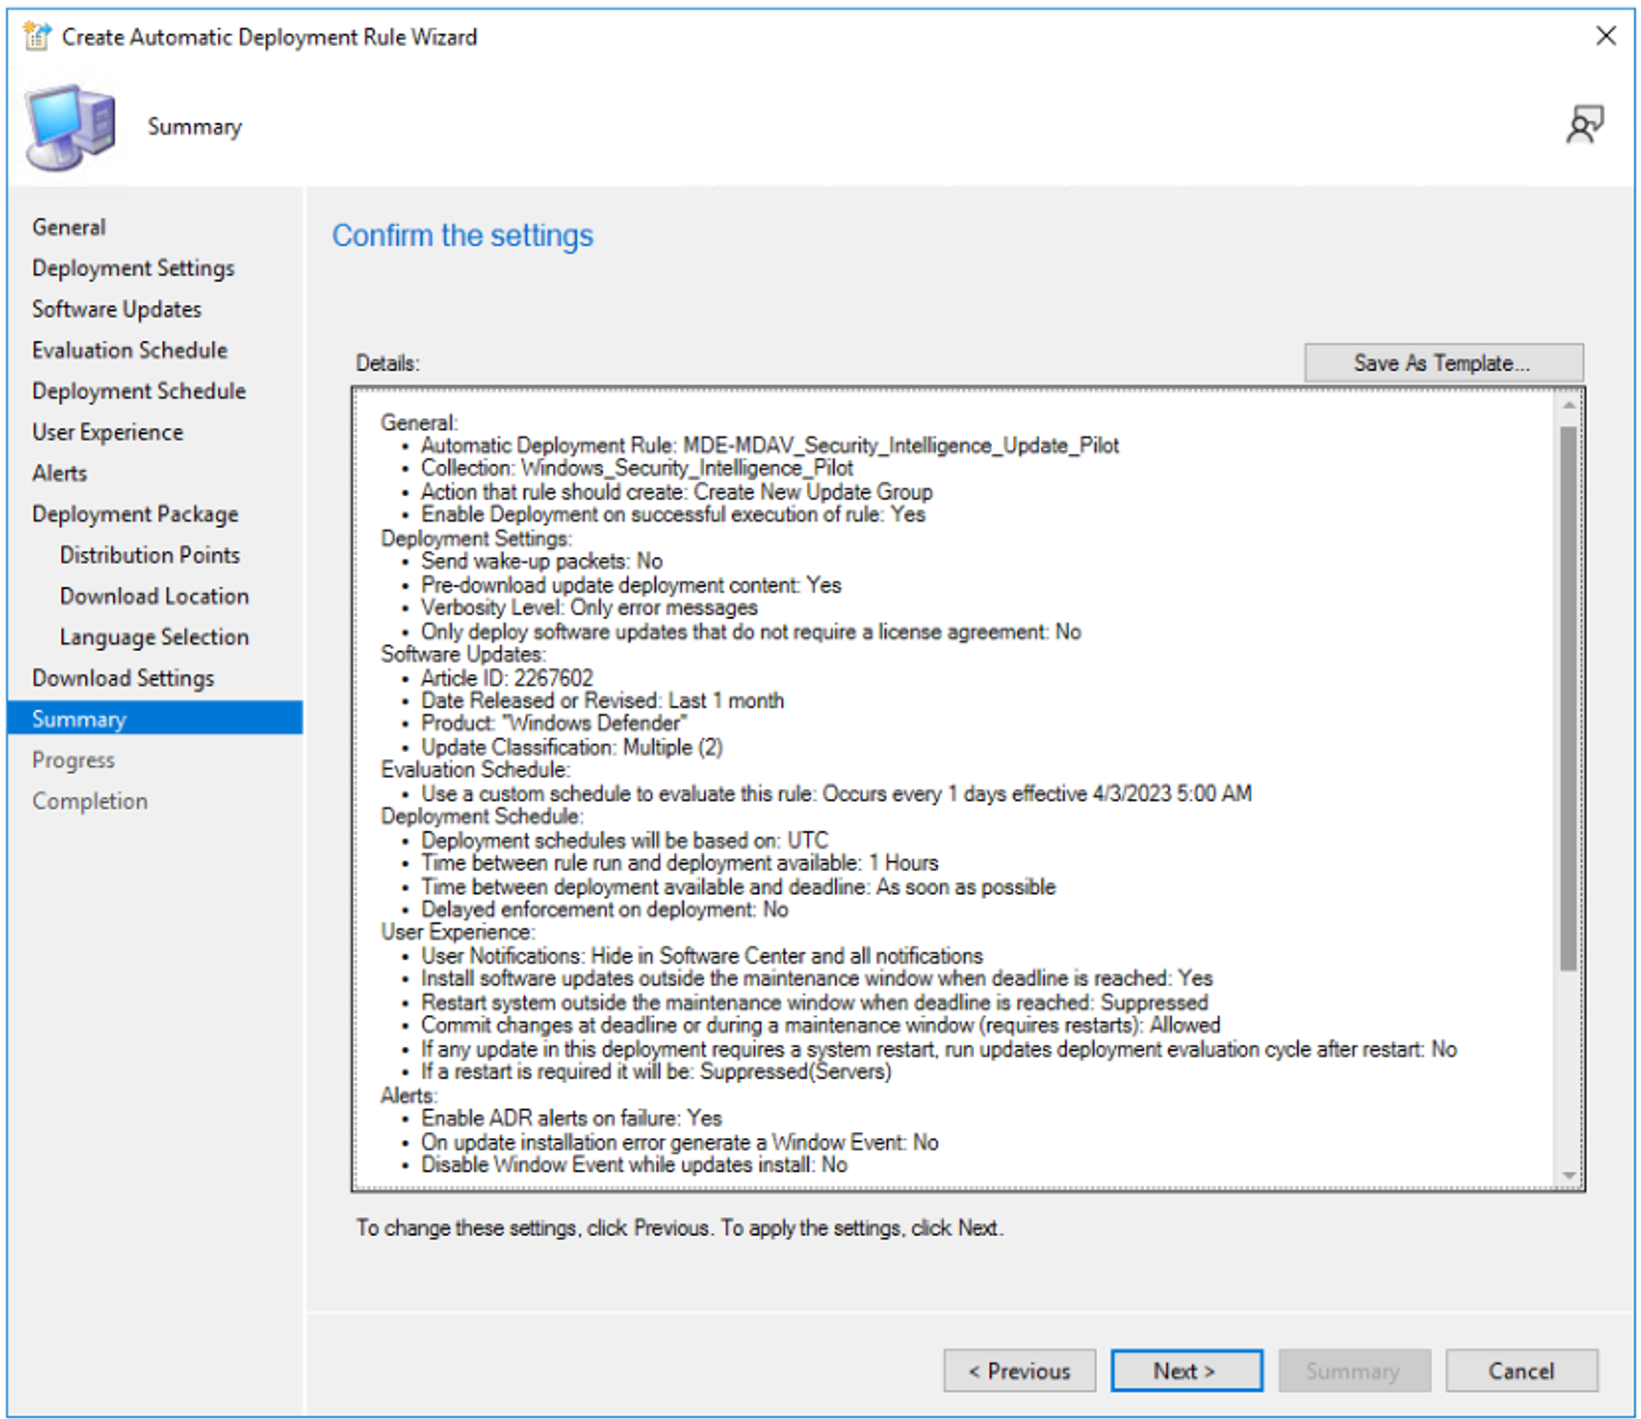
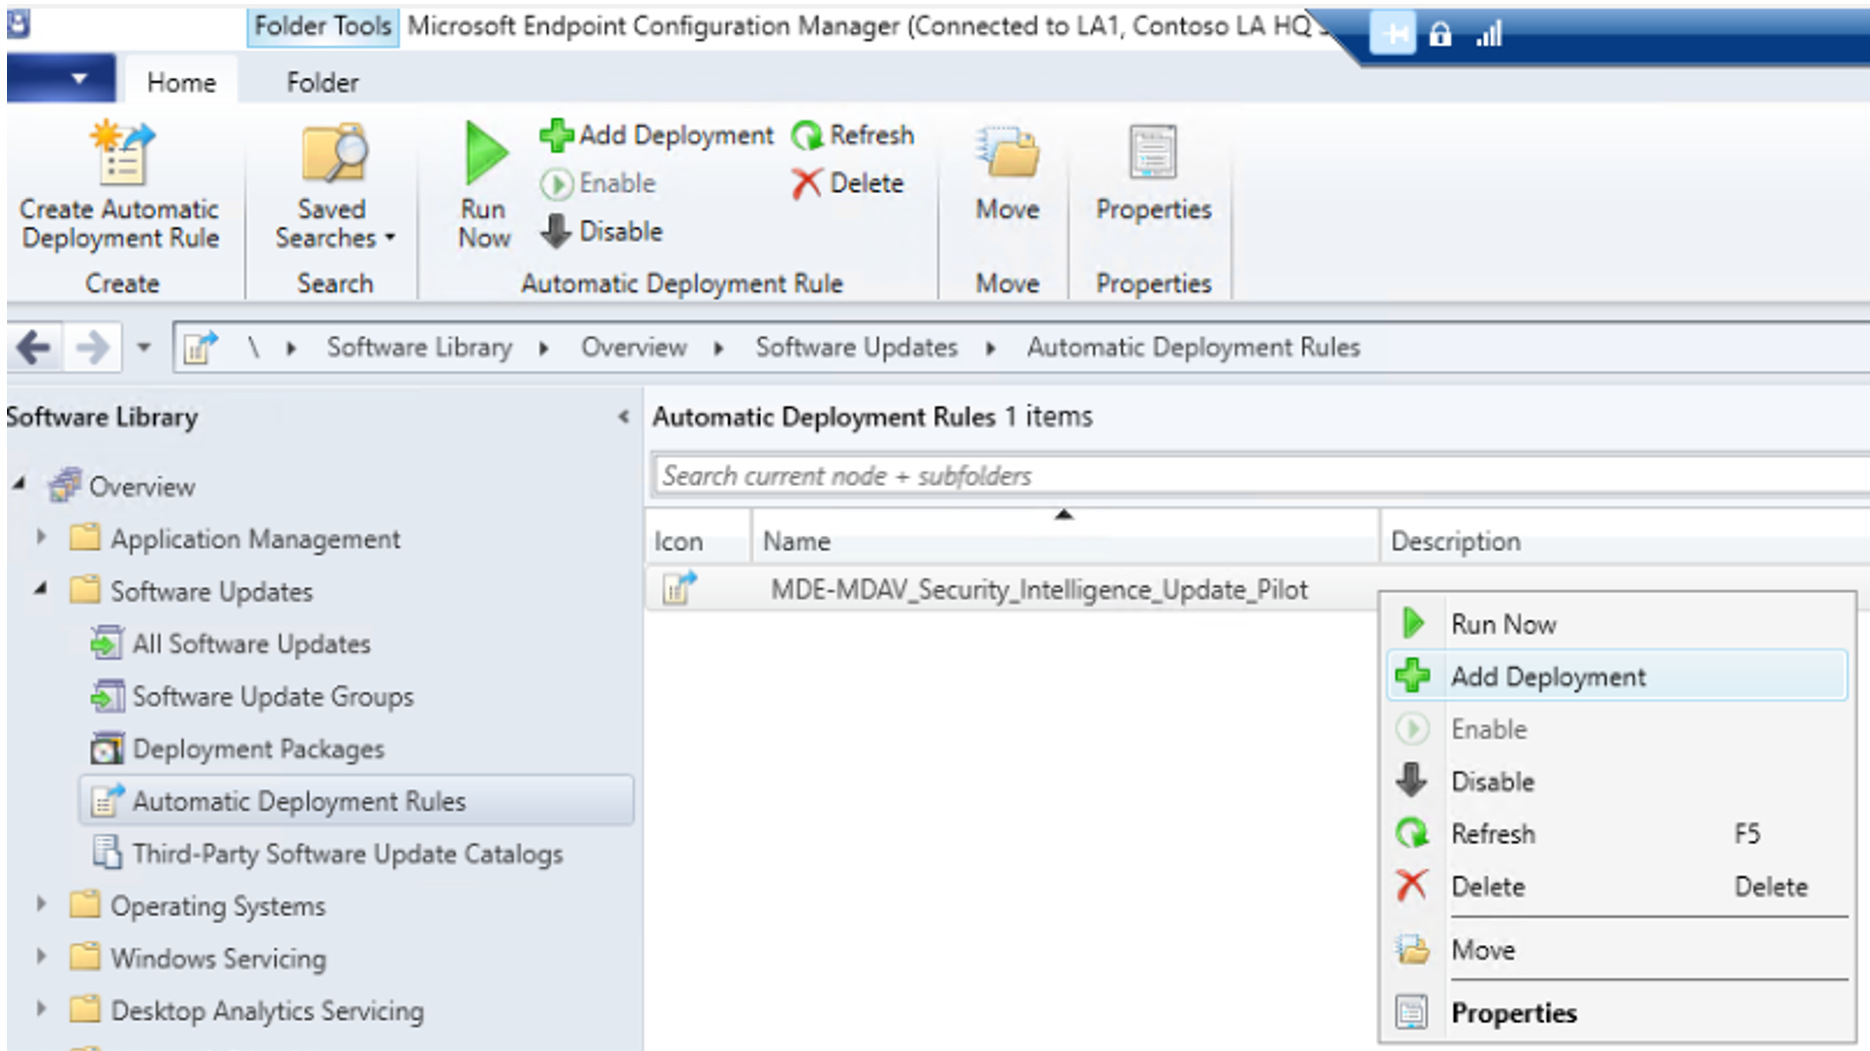
Select Next. Wait until the process completes and the Completion page opens. Select Close to finish the process. Automatic Deployment rules are saved, and can be managed from the location shown in the following figure:


Setting up the production environment
In the System Center Configuration Manager > Create Automatic Deployment Rule Wizard > General page, in Specify the setting for this automatic deployment rule, make the following settings:
In: Change: Name Type a name for your deployment rule. For example, type MDE-MDAV_Security_Intelligence_Update_Production Description Type a brief description for your pilot Template Select SCEP and Windows Defender Antivirus Updates Collection Type Windows_Security_Intelligence_Production Each time the rule runs and finds new updates. Select Add to an existing Software Update Group Each time the rule runs and finds new updates Select Enable the deployment after this rule is run Select Next. On the Deployment Settings page, under Specify the settings for this Automatic Deployment Rule, then do the following:
In: Change: Type of deployment Select Required Detail level Select Only error messages Some software updates include a license agreement Select Automatically deploy all software updates found by this rule, and approve any license agreements. Select Next. On the Software Updates page, under Select the property filters and search criteria, enter the following:
In: Change: Property filters Select Product and Update Classification Search Criteria Enter the following product and update classifications:
Article ID = 2267602
Date Released or Revised = Last 1 month
Product = Windows Defender
Superseded = No
Update Classification = Critical Updates OR Definition UpdatesTip
Click Preview - to make sure "Security Intelligence Update for Windows Defender Antivirus" is listed. You should see KB2267602.
Note
Date Released or Revised: Last 1 month - If your WSUS/SUP have been healthy, you may want to set this to Last 1 week.
Product: "Windows Defender" - We are removing "System Center Endpoint Protection", because we want to target this to only the operating systems that have Microsoft Defender Antivirus.
Update Classification: "Critical Updates" and "Definition Updates"
Select Next. On the Evaluation Schedule page, under Specify the recurring schedule for this rule, select Run the rule on a schedule, and then select Customize.
On the Deployment Schedule page, under **Configure schedule details for this deployment, do the following:
In: Change: Schedule evaluation > Time based on Select UTC Software available time Select As soon as possible Installation deadline Select As soon as possible Select Next. On the User Experience page, under Specify the user experience for this deployment, ensure the following are selected:
In: Change: User visual experience > User notifications Select Hide in Software center and all notifications Deadline behavior Select Software Update Installation Device restart behavior Select Servers Write filter handling for Windows Embedded devices Select Commit changes at deadline or during a maintenance windows (requires restarts) Select Next. On the Alerts page, under Specify software update alert options for this deployment, select Generate an alert when this Rule fails, select Browse, navigate to, and select the deployment package and then select Next.
On the top-level Deployment Package page, under Select deployment package for this automatic deployment rule, select Select a deployment package.
On the Download Location page, under Specify download location for this Automatic Deployment Rule, select Download software updates from the Internet, and then select Next.
On the Language Selection page, under Specify the update languages for product, under Product, specify the necessary Product and Update languages.
Select Next. On the Download Settings page, under Specify the software updates download behavior for clients on slow site boundaries, select the following:
In: Change: Deployment options Select Download and install software updates from the distribution points and install Deployment options Select Download and install software updates from the distribution points site default boundary group Deployment options Select "Prefer cloud based sources over on-premises sources" is configures in the boundary group settings, Microsoft update will be the preferred source. Select Next. On the Summary page, under Confirm the settings, review the settings. Example settings are shown in the following figure:

Select Next. Wait until the process completes and the Completion page opens. Select Close to finish the process.

If you encounter problems
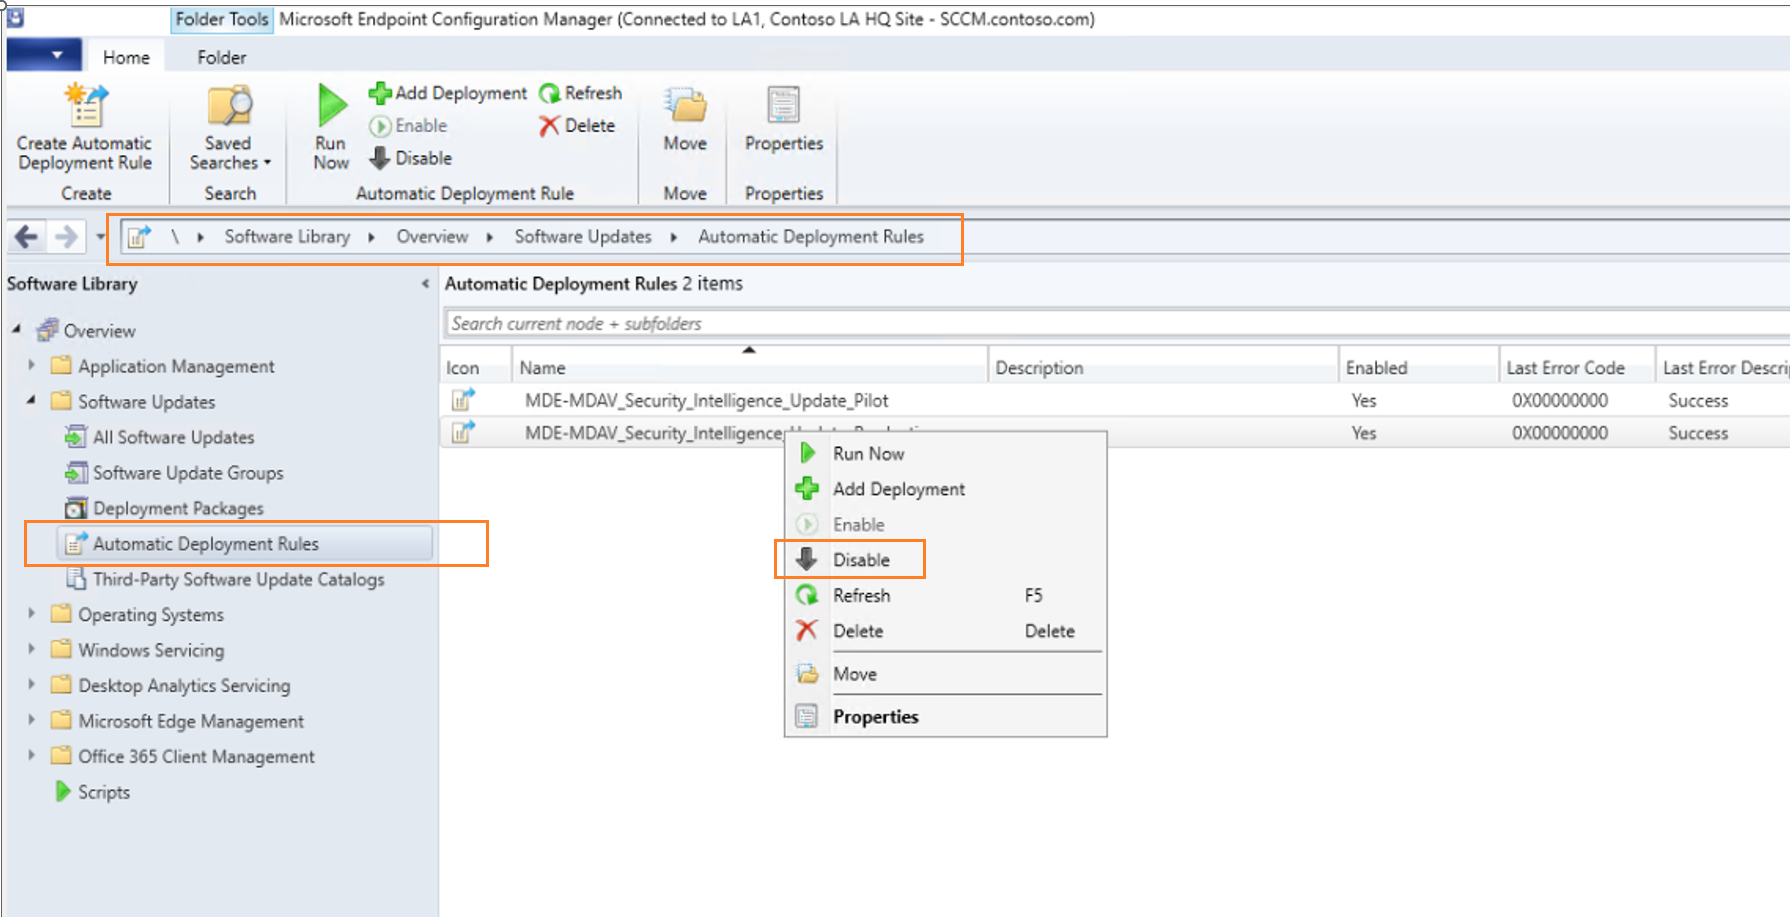
Navigate to Software Library
Under Software Updates, select on Automatic Deployment Rules, right-click on MDE-MDAV_Security_Intelligence_Update_Production, and then select Disable. This setting is shown in the following figure:

See also
Feedback
Coming soon: Throughout 2024 we will be phasing out GitHub Issues as the feedback mechanism for content and replacing it with a new feedback system. For more information see: https://aka.ms/ContentUserFeedback.
Submit and view feedback for