Note
Access to this page requires authorization. You can try signing in or changing directories.
Access to this page requires authorization. You can try changing directories.
Symptoms
When you use Group Policy to administer the default email client, you cannot locate a setting to make this configuration.
Cause
The default Group Policy templates for Microsoft Outlook do not include a setting to configure the default email client.
Resolution
Note
Follow the steps in this section carefully. Serious problems might occur if you modify the registry incorrectly. Before you modify it, back up the registry for restoration in case problems occur.
To set the default email client, follow the instructions for your version of Windows.
Windows 10 and Windows 8
Both Windows 10 and Windows 8 protect the part of the registry that stores the default application settings. You must use an XML-based policy in Group Policy to define the set of default apps. Follow these steps to create the policy and deploy it.
Step 1. Create an app associations XML file
In Windows, type Default apps (or open Default apps in Settings).
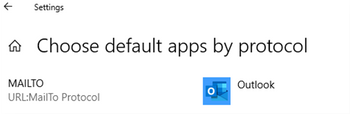
Select Choose default apps by protocol.
Scroll to locate MAILTO in the list, and then set Outlook as the default app.
After the default is set, use DISM to export these values to XML.
Note
Make a note of the file name and location of the file that you create.
At an elevated command prompt, type the following command.
Dism /Online /Export-DefaultAppAssociations:"F:\AppAssociations.xml"Note
- The XML file will be based on the defaults that are set for the user account that is used to run DISM.
- To verify that Outlook is set as the default app for opening MailTo links, look for a line that is returned in the XML that resembles the following:
<Association Identifier="mailto" ProgId="Outlook.URL.mailto.15" ApplicationName="Outlook 2016" />
Step 2. Deploy your app associations XML file through GPO
In Windows, type gpedit.msc to open the Local Group Policy Editor.
Open Computer Configuration > Administrative Templates > Windows Components > File Explorer.
Double-click the Set a default associations configuration file policy, and set it to Enabled.
Specify the path to the app associations XML file that you created earlier.
Note
This can be a local path or a network location that all clients can access.
This policy should create the following key in the registry:
Subkey: HKEY_LOCAL_MACHINE\SOFTWARE\Policies\Microsoft\Windows\System
String value: DefaultAssociationsConfiguration
Value data: \ServerPath\AppAssociations.xml
Note
This policy works only for domain-joined clients.
After this policy is set, the default application associations will be applied after the user signs in again. MailTo links will now open an Outlook email message.
Windows 7
To configure the default email client by using Group Policy, create a custom .adm template. Then, add this template to the Local Group Policy Editor so that you can configure the policy setting. To do this, follow these steps:
Create a text file in Notepad.
Copy and paste the following text into the text file:
CLASS MACHINE
CATEGORY !!Default_E-mail_Client
 POLICY !!Default_Client
 KEYNAME "SOFTWARE\Clients\Mail"
 EXPLAIN !!Explain_Default_Client
  PART !!labeltext_Default_Client EDITTEXT
   VALUENAME ""
 DEFAULT "Microsoft Outlook"
   END PART
  END POLICY
END CATEGORY

[strings]
Default_E-mail_Client="Default e-mail client policy"
Default_Client="Default e-mail client"
Explain_Default_Client="This policy configures Outlook as the default e-mail client"
labeltext_Default_Client="Default E-mail Client:"
Microsoft_Outlook="Microsoft Outlook"
Save the file as DefaultEmailClient.adm.
Close the file.
Add the file to the Local Group Policy Editor.
Note The steps to add the DefaultEmailClient.adm file in the Local Group Policy Editor vary. For more information, consult your Windows documentation.
Under Computer Configuration, expand Administrative Templates.
In the policy tree, select the Default e-mail client policy node.
In the details pane, double-click the Default e-mail client setting.
Note If you do not see the Default e-mail client policy setting in the details pane of the Local Group Policy Editor, make sure your Group Policy editor filtering settings are not hiding unmanaged policies. For example, in Windows Server 2003, select Filtering on the View menu. Then, clear the Only show policy settings that can be fully managed check box.
Select Enabled.
Specify the default email client to be configured by this policy. (The default selection is Microsoft Outlook.)
Note If you are unsure about which email clients are registered on a workstation, examine the keys under the following subkey in the registry.
HKEY_LOCAL_MACHINE\SOFTWARE\Clients\Mail
The name of each key is the name of an installed email client on the workstation.
Select OK.
More information
- In Windows 10 and Windows 8, users can manually set this option in Windows Settings > Choose a default app for each protocol.
- In Windows 7, the default email client is typically configured on the Programs tab in the Internet Properties dialog box. However, if you are not a member of the local administrators group, you may not have the appropriate permission to make this change. This is because the setting is stored in the HKEY_LOCAL_MACHINE subtree in the registry.