Note
Access to this page requires authorization. You can try signing in or changing directories.
Access to this page requires authorization. You can try changing directories.
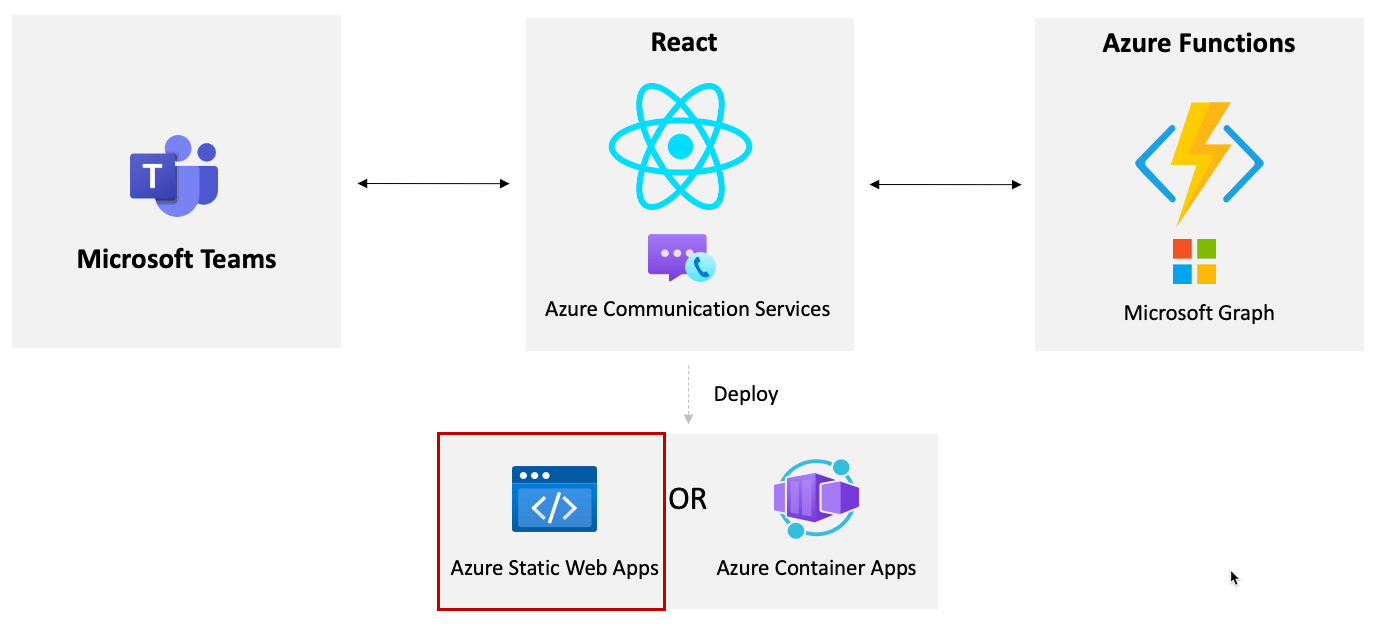
In this exercise you'll learn how to deploy the ACS React app and the Azure Functions to the cloud using Azure Static Web Apps.
Visit the Azure portal in your browser and sign in.
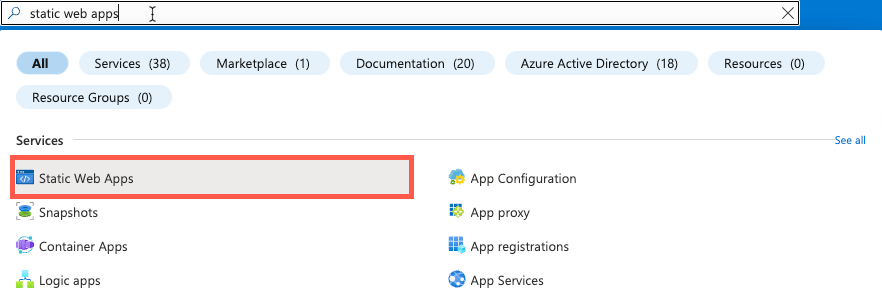
Type static web apps in the top search bar and select Static Web Apps from the options that appear.
Select Create in the toolbar.
Perform the following tasks:
- Select your subscription.
- Select the resource group to use (create a new one if needed). You can use the same resource group that you used for ACS if you'd like.
- Enter an Azure Static Web Apps name of acs-to-teams-meeting.
- Select the Free plan type.
- Select a region.
Select the GitHub radio button and sign in to your GitHub account.
After signing in, select your GitHub:
- Organization
- Repository: Select the MicrosoftCloud repository you forked earlier in this tutorial
- Branch: Select main
In the Build Details section perform the following tasks:
- Build Presets: React
- App location: /samples/acs-to-teams-meeting/client/react
- Api location:
/samples/acs-to-teams-meeting/server/typescript
- Output location: build
Select Review + create.
Review the details and select Create.
Notice the URL that is created for your static web app. Copy the URL shown on the Overview screen to a file. You'll need it later in this exercise.
Select Settings --> Configuration for your new static web app.
Add all of the following key/value pairs into the Application settings by selecting the + Add button. Get the values from your local.settings.json in the server/typescript folder.
# Get the values from your local.settings.json file
TENANT_ID: <YOUR_VALUE>
CLIENT_ID: <YOUR_VALUE>
CLIENT_SECRET: <YOUR_VALUE>
USER_ID: <YOUR_VALUE>
ACS_CONNECTION_STRING: <YOUR_VALUE>
Select the Save button at the top of the Configuration screen in the Azure portal.
Now that you've finished setting up the Azure Static Web App, go back to your GitHub repository (the one you forked earlier) in the browser and notice a .yml file has been added into the .github/workflows folder.
Pull the latest changes from your GitHub repository to your machine by running the following command from the root of your local MicrosoftCloud repository:
git pullOpen the .yml file in the .github/workflows folder in VS Code and add the following YAML immediately after the
###### End of Repository/Build Configurations ######comment. Replace the <YOUR_AZURE_SWA_DOMAIN> placeholders with your Azure Static Web Apps URL value.IMPORTANT: Ensure that the
env:property is indented properly. It should match up with the indentation of thewith:property above it.env: # Add environment variables here REACT_APP_ACS_USER_FUNCTION: https://<YOUR_AZURE_SWA_DOMAIN>/api/httpTriggerAcsToken REACT_APP_TEAMS_MEETING_FUNCTION: https://<YOUR_AZURE_SWA_DOMAIN>/api/httpTriggerTeamsUrlNote
This will add environment variables into the build process for the React app so that it knows what APIs to call to get the ACS user token as well as to create a Teams meeting.
Save the .yml file and push the changes up to your GitHub repository. This will trigger a new build of the React application and then deploy it to your Azure Static Web App.
Once the build process completes, visit the URL for your Azure Static Web App and you should see the application running.
You've successfully deployed your application using Azure Static Web Apps!