Note
Access to this page requires authorization. You can try signing in or changing directories.
Access to this page requires authorization. You can try changing directories.
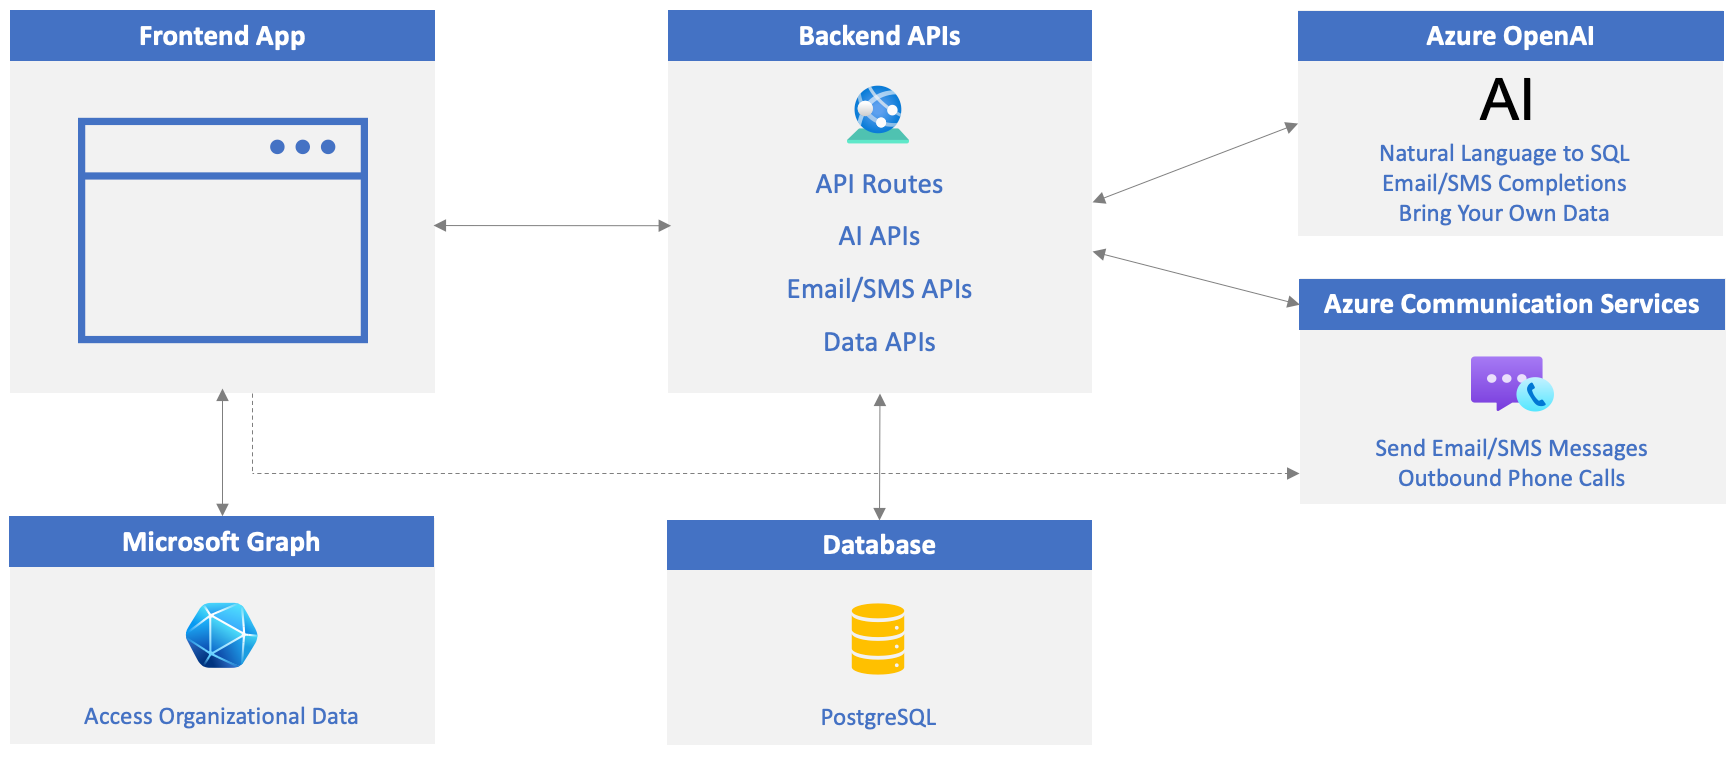
Enhance user productivity by integrating organizational data (emails, files, chats, and calendar events) directly into your custom applications. By using Microsoft Graph APIs and Microsoft Entra ID, you can seamlessly retrieve and display relevant data within your apps, reducing the need for users to switch context. Whether it's referencing an email sent to a customer, reviewing a Teams message, or accessing a file, users can quickly find the information they need without leaving your app, streamlining their decision-making process.
In this exercise, you will:
- Create a Microsoft Entra ID app registration so that Microsoft Graph can access organizational data and bring it into the app.
- Locate
teamandchannelIds from Microsoft Teams that are needed to send chat messages to a specific channel. - Update the project's .env file with values from your Microsoft Entra ID app registration.
Create a Microsoft Entra ID App Registration
Go to Azure portal and select Microsoft Entra ID.
Select Manage --> App registrations followed by + New registration.
Fill in the new app registration form details as shown below and select Register:
- Name: microsoft-graph-app
- Supported account types: Accounts in any organizational directory (Any Microsoft Entra ID tenant - Multitenant)
- Redirect URI:
- Select Single-page application (SPA) and enter
http://localhost:4200in the Redirect URI field.
- Select Single-page application (SPA) and enter
- Select Register to create the app registration.

Select Overview in the resource menu and copy the
Application (client) IDvalue to your clipboard.
Update the Project's .env File
Open the .env file in your editor and assign the
Application (client) IDvalue toENTRAID_CLIENT_ID.ENTRAID_CLIENT_ID=<APPLICATION_CLIENT_ID_VALUE>If you'd like to enable the ability to send a message from the app into a Teams Channel, sign in to Microsoft Teams using your Microsoft 365 dev tenant account (this is mentioned in the pre-reqs for the tutorial).
Once you're signed in, expand a team, and find a channel that you want to send messages to from the app. For example, you might select the Company team and the General channel (or whatever team/channel you'd like to use).

In the team header, click on the three dots (...) and select Get link to team.
In the link that appears in the popup window, the team ID is the string of letters and numbers after
team/. For example, in the link "https://teams.microsoft.com/l/team/19%3ae9b9.../", the team ID is 19%3ae9b9... up to the following/character.Copy the team ID and assign it to
TEAM_IDin the .env file.In the channel header, click on the three dots (...) and select Get link to channel.
In the link that appears in the popup window, the channel ID is the string of letters and numbers after
channel/. For example, in the link "https://teams.microsoft.com/l/channel/19%3aQK02.../", the channel ID is 19%3aQK02... up to the following/character.Copy the channel ID and assign it to
CHANNEL_IDin the .env file.Save the env file before continuing.
Start/Restart the Application and API Servers
Perform one of the following steps based on the exercises you completed up to this point:
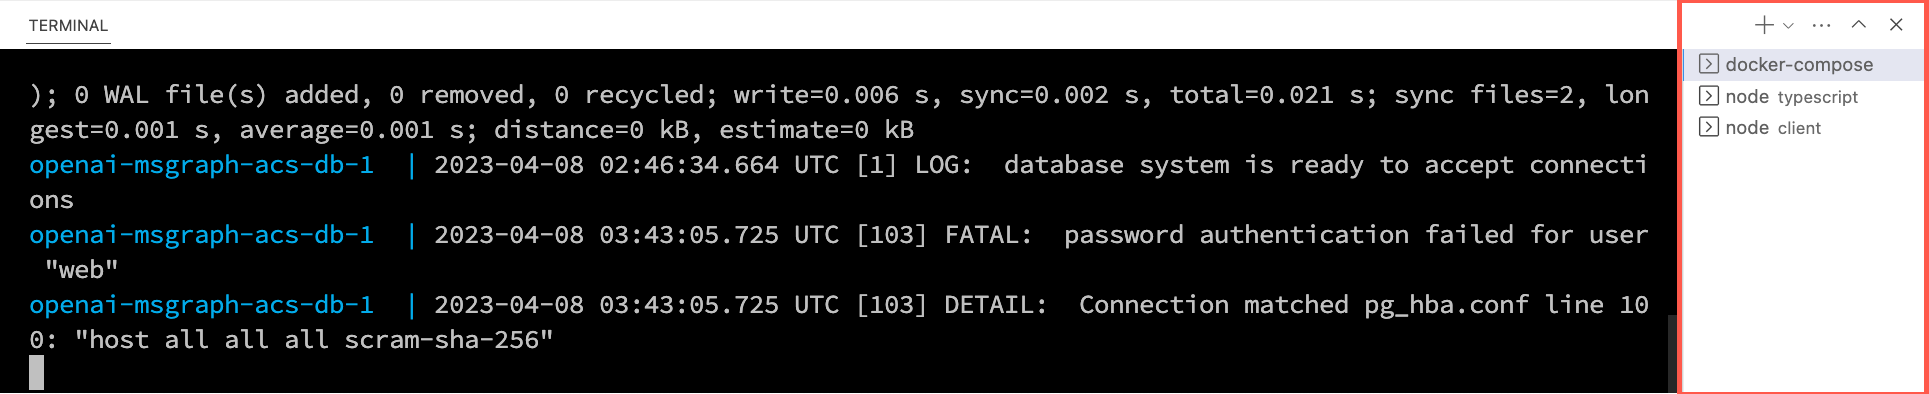
If you started the database, API server, and web server in an earlier exercise, you need to stop the API server and web server and restart them to pick up the .env file changes. You can leave the database running.
Locate the terminal windows running the API server and web server and press CTRL + C to stop them. Start them again by typing
npm startin each terminal window and pressing Enter. Continue to the next exercise.If you haven't started the database, API server, and web server yet, complete the following steps:
In the following steps you'll create three terminal windows in Visual Studio Code.
Right-click on the .env file in the Visual Studio Code file list and select Open in Integrated Terminal. Ensure that your terminal is at the root of the project - openai-acs-msgraph - before continuing.
Choose from one of the following options to start the PostgreSQL database:
If you have Docker Desktop installed and running, run
docker-compose upin the terminal window and press Enter.If you have Podman with podman-compose installed and running, run
podman-compose upin the terminal window and press Enter.To run the PostgreSQL container directly using either Docker Desktop, Podman, nerdctl, or another container runtime you have installed, run the following command in the terminal window:
Mac, Linux, or Windows Subsystem for Linux (WSL):
[docker | podman | nerdctl] run --name postgresDb -e POSTGRES_USER=web -e POSTGRES_PASSWORD=web-password -e POSTGRES_DB=CustomersDB -v $(pwd)/data:/var/lib/postgresql/data -p 5432:5432 postgresWindows with PowerShell:
[docker | podman] run --name postgresDb -e POSTGRES_USER=web -e POSTGRES_PASSWORD=web-password -e POSTGRES_DB=CustomersDB -v ${PWD}/data:/var/lib/postgresql/data -p 5432:5432 postgres
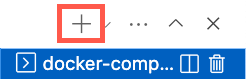
Once the database container starts, press the + icon in the Visual Studio Code Terminal toolbar to create a second terminal window.
cdinto the server/typescript folder and run the following commands to install the dependencies and start the API server.npm installnpm start
Press the + icon again in the Visual Studio Code Terminal toolbar to create a third terminal window.
cdinto the client folder and run the following commands to install the dependencies and start the web server.npm installnpm start
A browser will launch and you'll be taken to http://localhost:4200.