Note
Access to this page requires authorization. You can try signing in or changing directories.
Access to this page requires authorization. You can try changing directories.
Agent Library provides a centralized location for the reusable components that you can add to your agents.
The following table lists the available components of the Component collection type:
| Component | Description | Connections |
|---|---|---|
| Document Extraction | Transforms uploaded documents into structured data using AI Builder. | Dataverse |
| Content Synthesizer | Shared AI Builder prompt that synthesizes research content into evidence-based sections with citations. | Dataverse |
| Research Component | Three-stage AI pipeline that synthesizes web sources into a comprehensive research report. | Dataverse |
| Executive Brief Component | Three-stage AI pipeline that produces decision-oriented executive summaries. | Dataverse |
| Log Chain of Thoughts | Captures and logs the agent's reasoning chain for debugging and transparency. | Dataverse |
| Save Conversation History | Persists conversation transcripts for auditing, review, and analytics. | Dataverse |
| ServiceNow Ticket Assistant | End-to-end ServiceNow incident management using adaptive cards. | Dataverse, ServiceNow |
For detailed per-component reference—including how each component works, inputs and outputs, and ServiceNow Ticket Assistant setup—see the Component reference in Agent Library in Copilot Agent Kit.
Prerequisites
Before you begin, make sure the following prerequisites are met:
- Install and configure Copilot Agent Kit in your Power Platform environment.
- The signed-in user has the CSK - Maker security role assigned in Copilot Agent Kit to browse and install components.
- The Power Platform environment has Copilot Studio enabled.
Install a component
You can install a component either directly from Copilot Agent Kit or by importing a component manually.
Install a component from Copilot Agent Kit
Install a component directly from Copilot Agent Kit. This method is the recommended way to install a component.
In Copilot Agent Kit, go to Agent Library in the left pane. The Agent library page opens.
Select the Components tab.
Browse or search for the component you want to use.
Select a component card to open the component details panel.
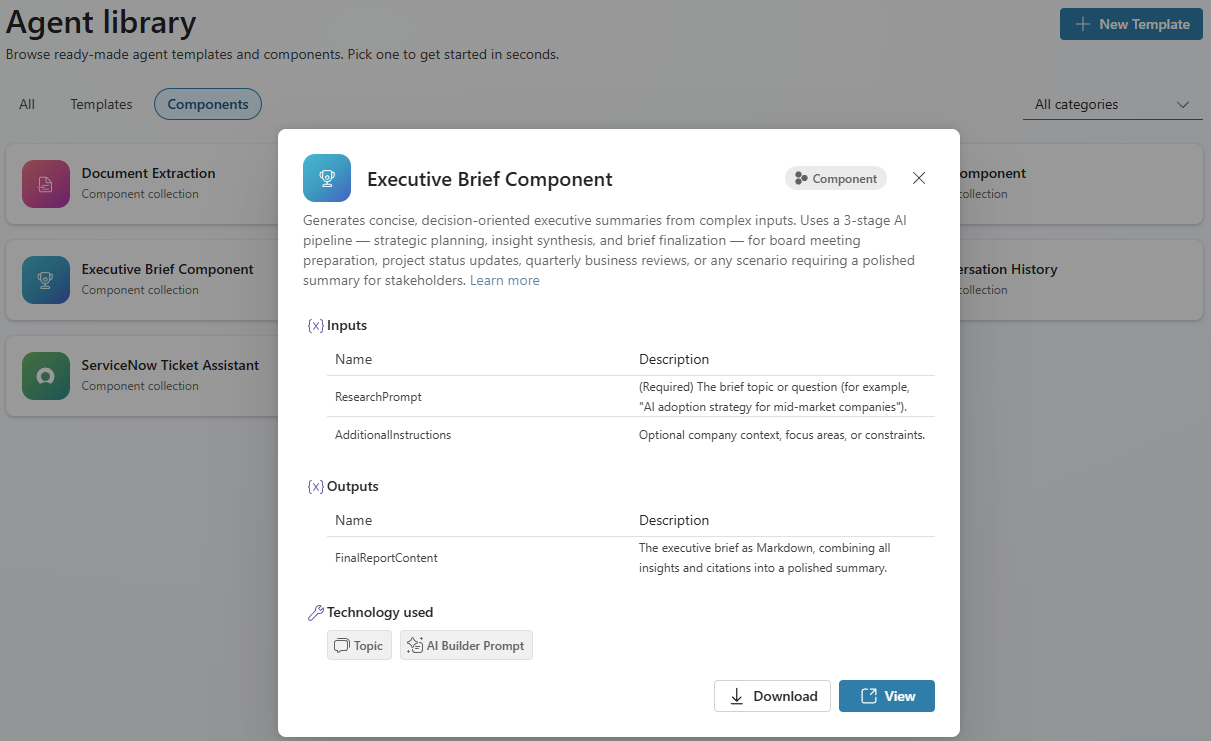
Review the component description, inputs, outputs, and technology used.
Select Import to import the component solution directly into your environment, or select Download to save the
.zipfile for manual import.
The action buttons depend on the component install status and your permissions:
| Scenario | Buttons shown | What happens |
|---|---|---|
| Component isn't installed and you have install privileges. | Import + Download | Import imports the component solution directly into your environment. |
| Component isn't installed and you don't have install privileges. | Download only | Download saves a .zip file that contains the component solution. |
| Component is already installed. | View + Download | View deep-links to the component collection in the Copilot Studio portal. |
Import a component manually
Use this option to import the component into another environment where Copilot Agent Kit isn't installed. Or, if you downloaded the .zip file, use this option to import it manually.
In Copilot Agent Kit, go to Agent Library in the left pane. The Agent library page opens.
Select the Components tab.
Browse or search for the component you want to use.
Select a component card to open the component details panel.
Select Download to save the
.zipfile that contains the component solution for manual import.Go to Power Apps.
On the top bar, verify you're in the correct environment. Select Environment to switch if needed.
In the left pane, select Solutions.
Select Import solution from the top menu bar.
Select Browse, and then choose the
.zipfile you downloaded.Select Next, review the solution details, and select Next again.
If the solution requires connection references (for example, Dataverse), configure any required connection references when prompted.
Select Import and wait for the import to complete.
Important
Import the Content Synthesizer solution first. The Research Component and Executive Brief Component depend on it. Import the ServiceNow Ticket Assistant solution only if you have a ServiceNow instance.
Add a component to your agent
After you install a component, connect it to your agent.
In Copilot Agent Kit, go to Agent Library in the left pane. The Agent library page opens.
Select the Components tab.
Browse or search for the component you want to use.
Select a component card to open the component details panel.
Select View. The component collection page in Copilot Studio opens in a new browser tab.
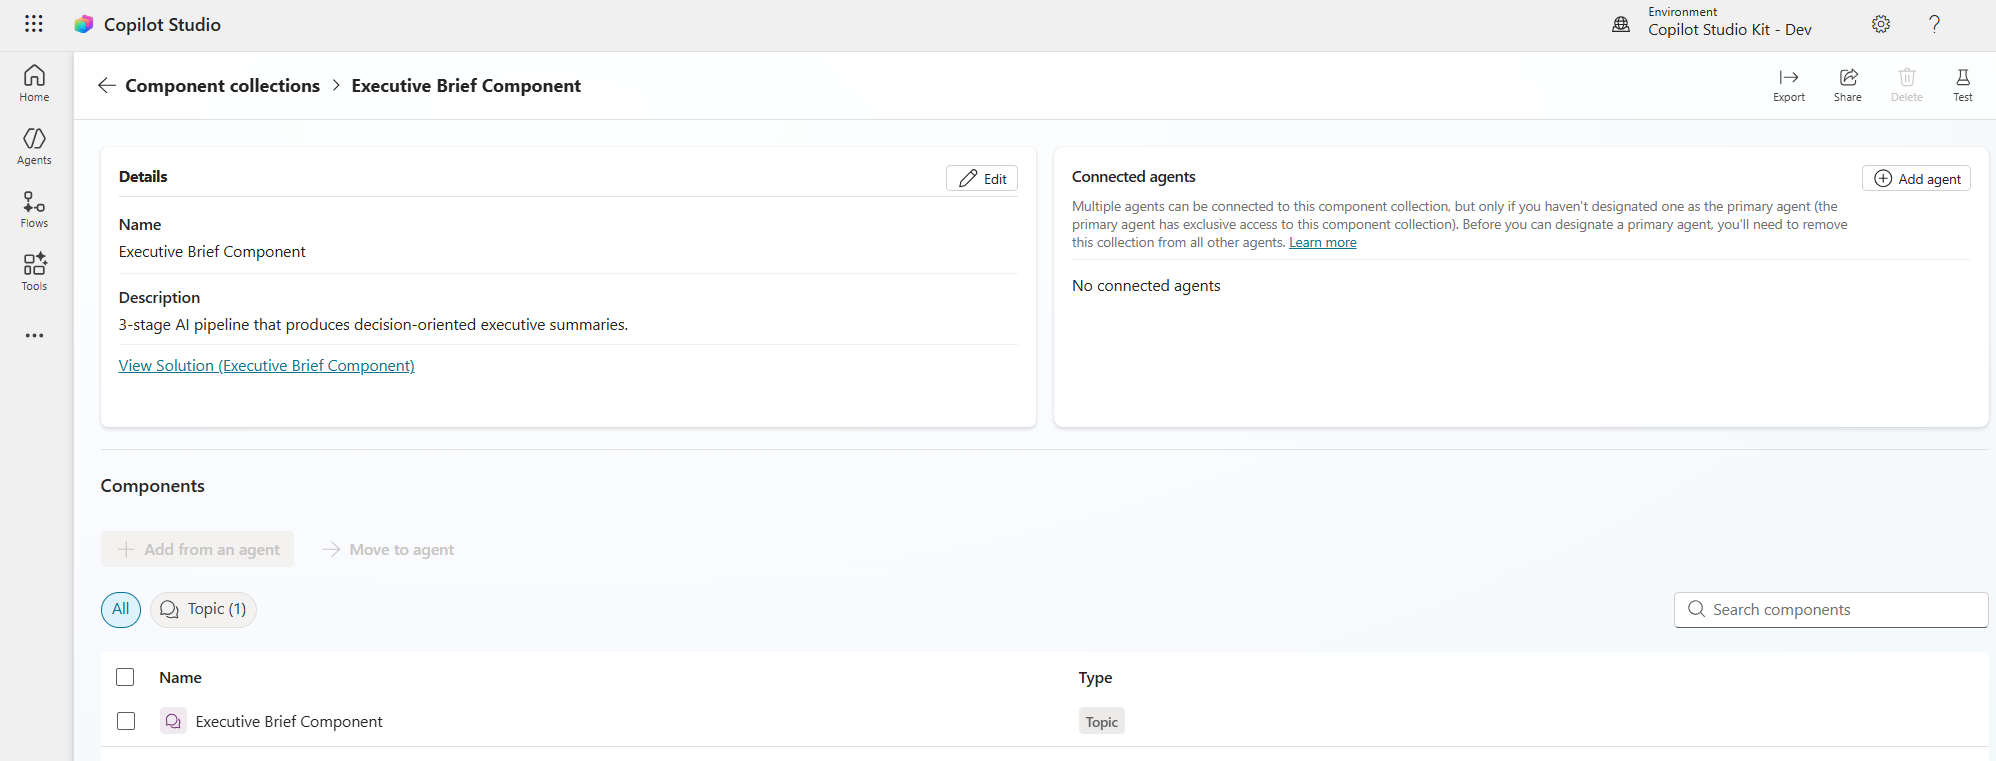
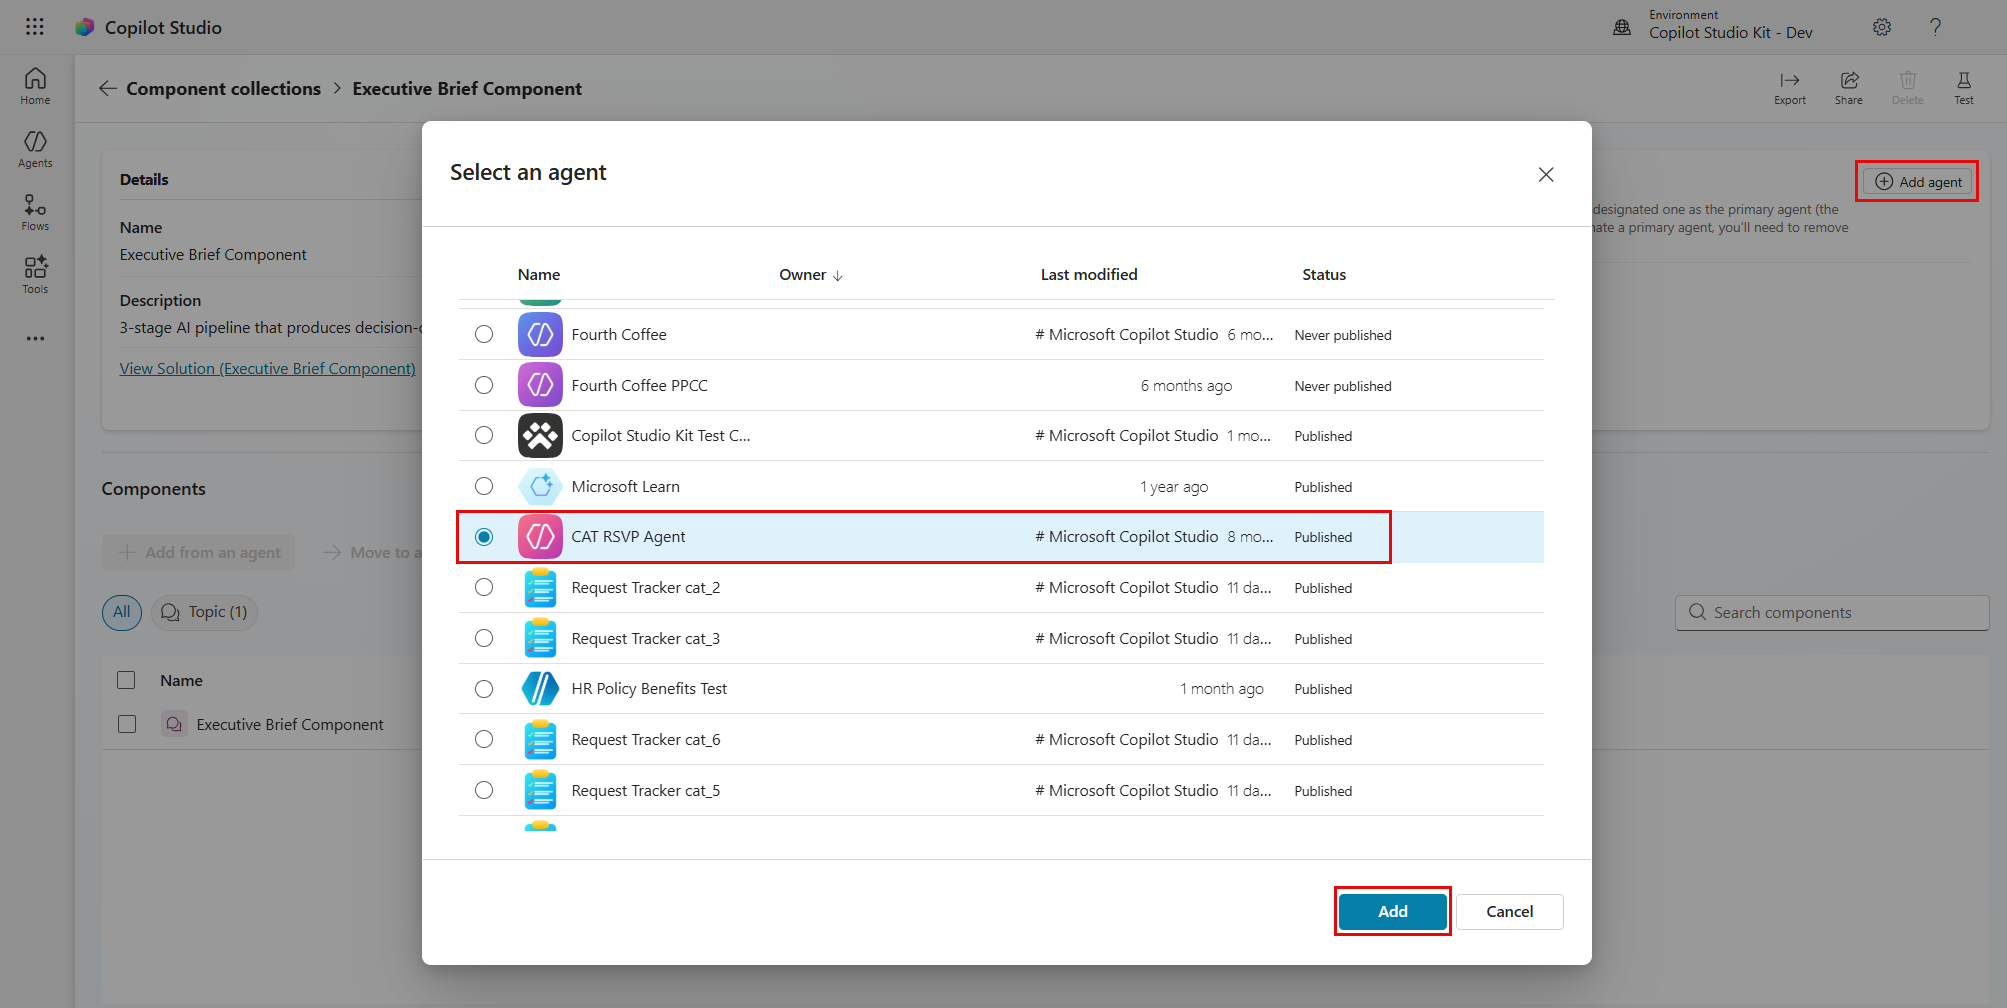
On the component collection page, select Add agent. The Select an agent panel opens.
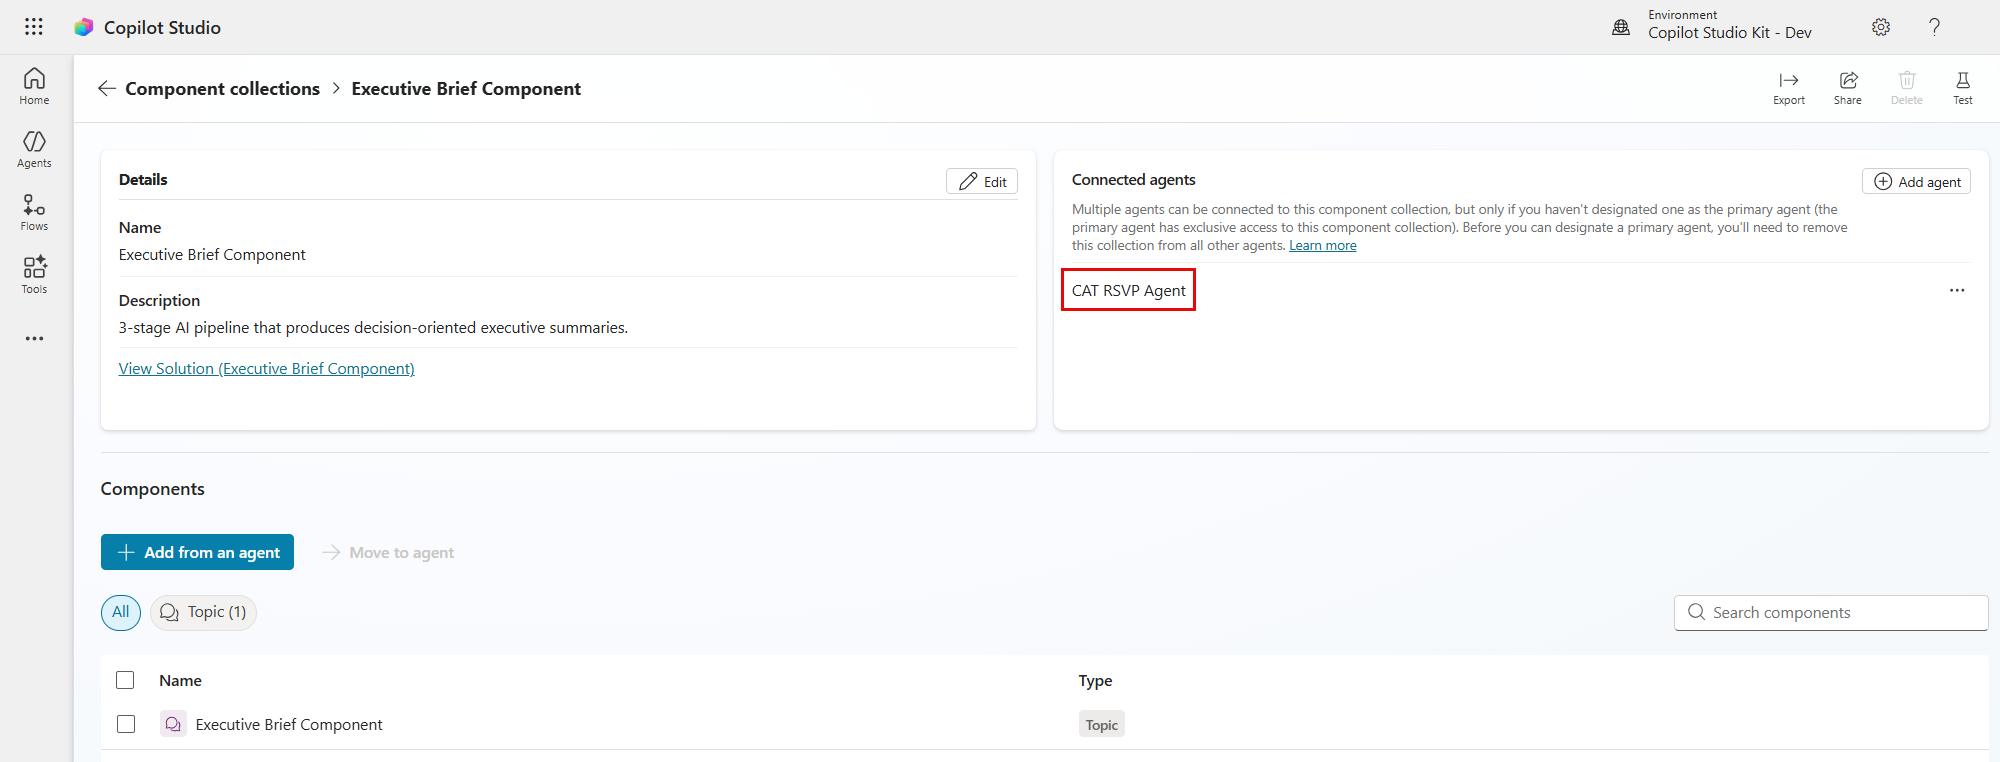
Select the agent you want to connect the component to, and then select Add.
Verify the component is connected to your agent.
Alternatively, you can add component collections from within any agent in Copilot Studio:
- Open your agent in Copilot Studio.
- Select Settings. The Settings page opens.
- In the settings menu, select Component collections. The Manage component collections page opens.
- Select the Available tab.
- Find the component collection, select the three dots (…), and then select Add to agent.
- Select Add to agent to confirm. The component collection is added to your agent and is listed in the Installed tab.
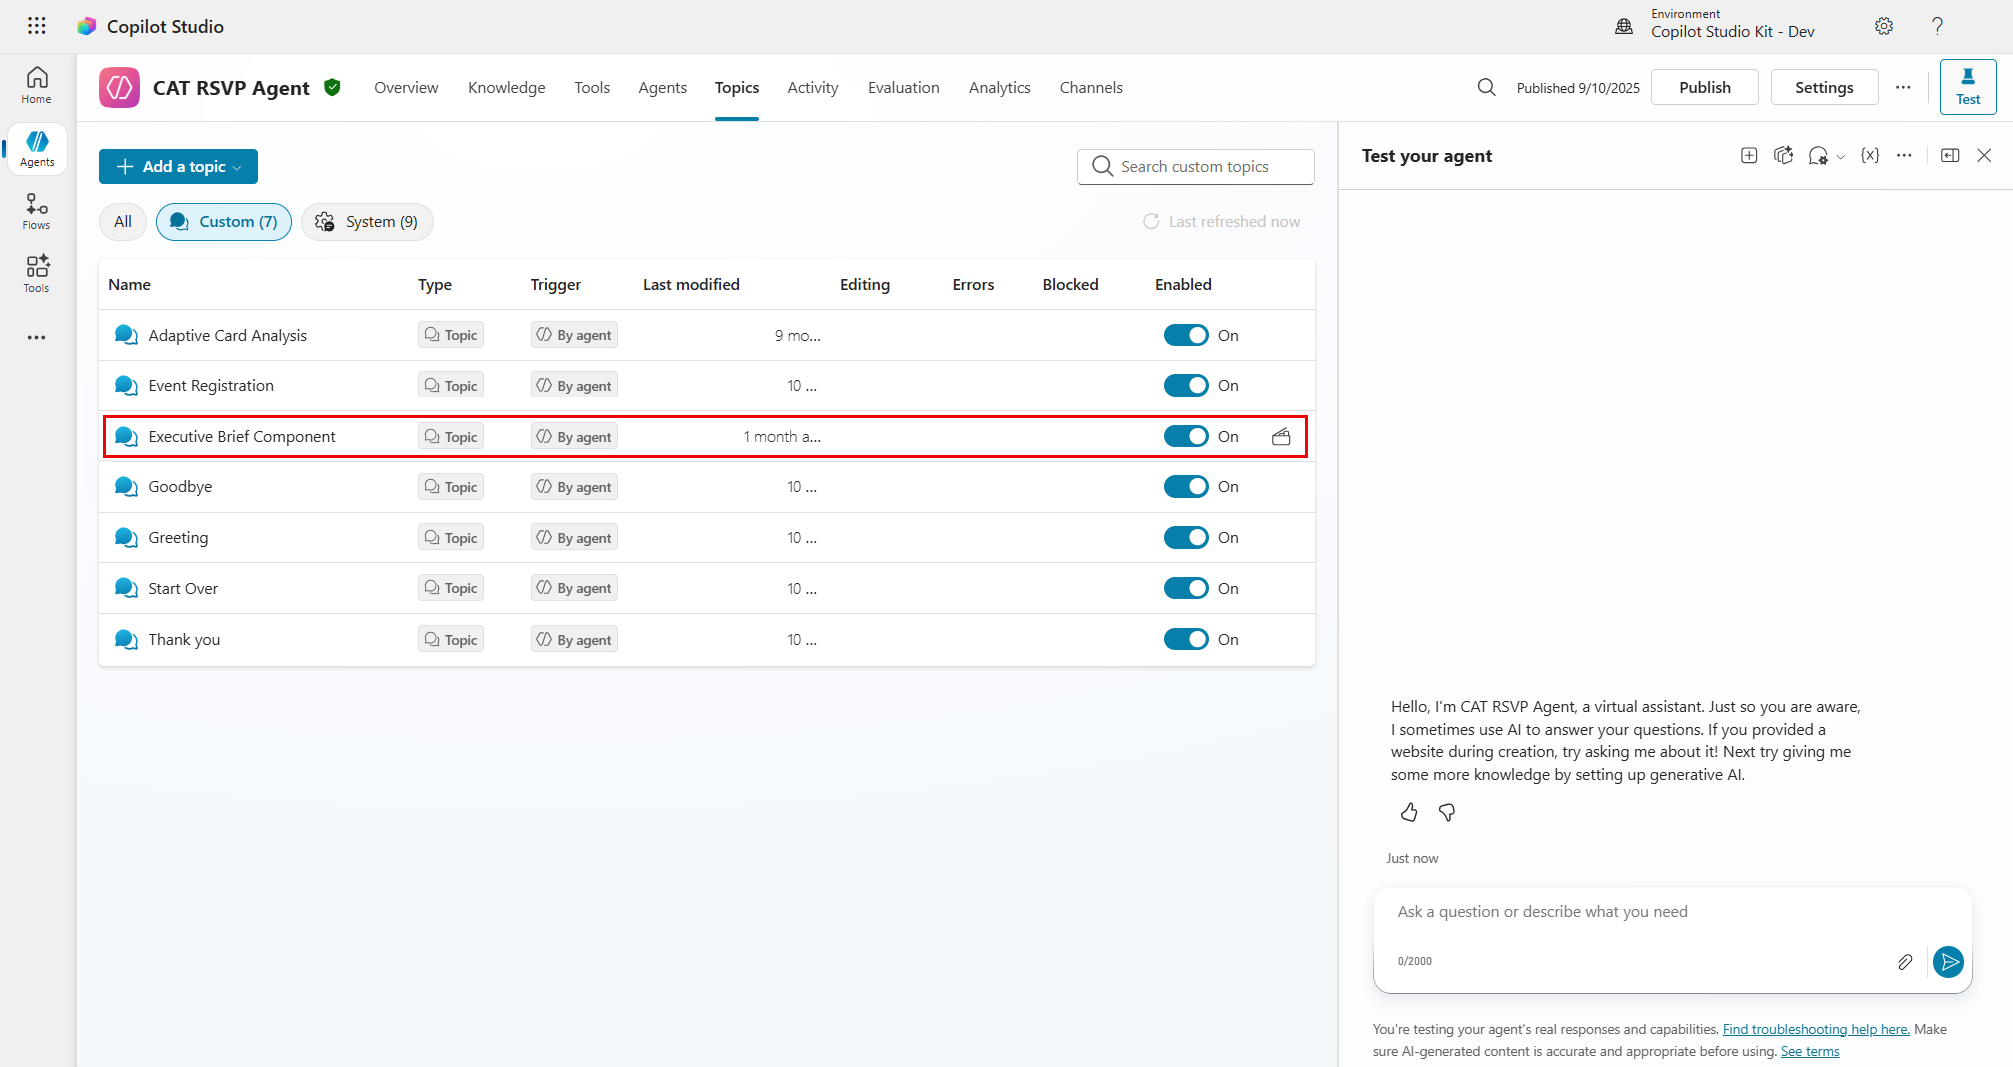
After you connect the component, its topics and tools are available inside your agent.
Tip
You can control how components are used through your agent's Instructions field. Use natural-language instructions to define when each component is invoked, what data to pass, and how results are presented.