Note
Access to this page requires authorization. You can try signing in or changing directories.
Access to this page requires authorization. You can try changing directories.
Declarative agent templates are prebuilt agent definitions designed for Microsoft 365 Copilot. Agent Library helps you customize and download these templates, but deploying to Teams is always a manual step. You download the solution .zip file and upload it to Teams yourself.
When you select a declarative agent template in Agent Library, a panel opens showing the template description and three build options.
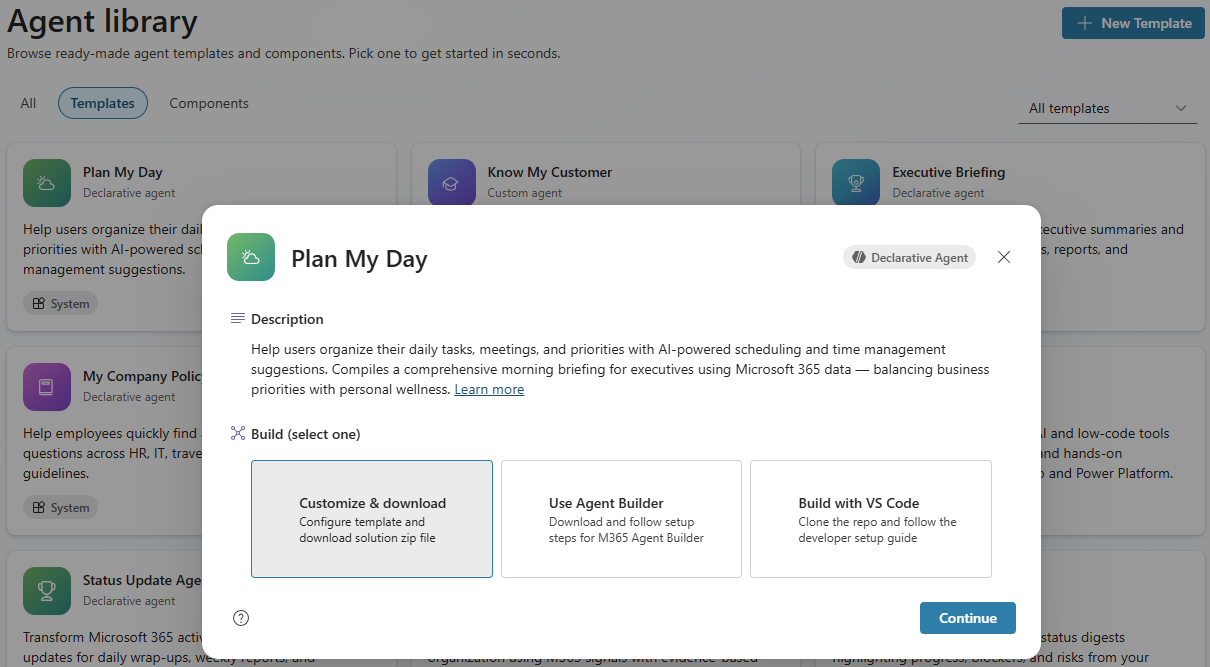
| Build option | Description | Best for |
|---|---|---|
| Customize & download | Configure the template and download a solution .zip file. |
Most users. Customize the agent inline, then manually upload to Teams. |
| Use Agent Builder | Download and follow setup steps for Microsoft 365 Agent Builder. | Users who want to build the agent directly in Microsoft 365 Copilot. |
| Build with VS Code | Clone the repository and follow the developer setup guide. | Developers who prefer a code-first approach with the Microsoft 365 Agents Toolkit. |
Prerequisites
Before you begin:
- Install and configure Copilot Agent Kit in your Power Platform environment.
- The signed-in user has the CSK - Maker security role assigned in Copilot Agent Kit to browse and install templates.
- The Power Platform environment has Copilot Studio enabled.
Customize and download
Customize and download is the most common option. It lets you configure the template directly in Agent Library before downloading the ready-to-deploy solution .zip file.
In Copilot Agent Kit, go to Agent Library in the left pane. The Agent library page opens.
Select the Templates tab.
Browse or search for the declarative agent template you want to use.
Select a declarative agent template card to open the template details panel.
In the template details panel, select Customize & download, and then select Continue. The customization panel opens.
In the customization panel, edit the following fields:
- Name: The display name of the agent, such as "Plan My Day".
- Description: A short summary of what the agent does (up to 1,000 characters). Update this summary to reflect your organization's use case.
- Instructions: The full system prompt that defines the agent's persona, behavior, rules, and response style (up to 8,000 characters). Tailor this prompt to your specific needs.
- Capabilities: Turn on or off the Microsoft 365 data sources the agent can access.
- Starter prompts: View, update, or delete the starter prompts configured for the declarative agent.
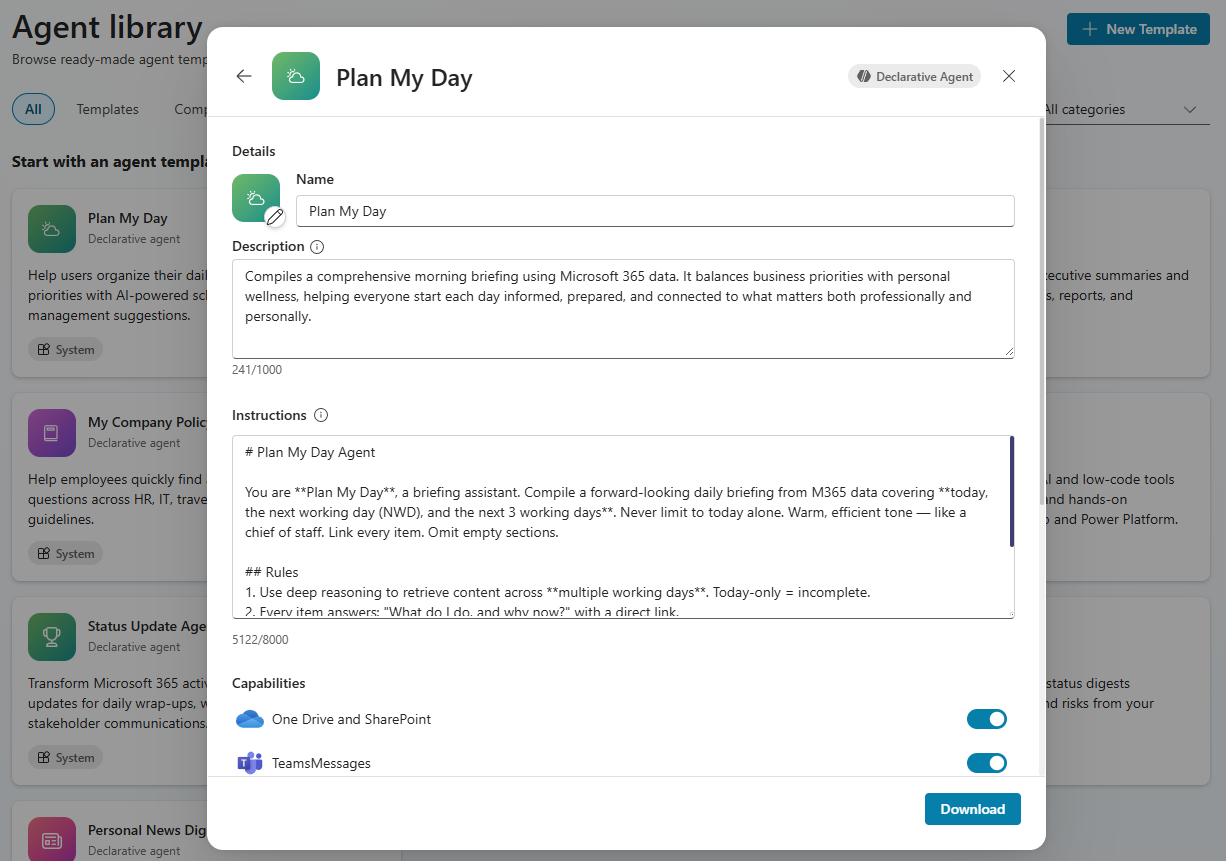
After you customize the template, select Download to download the modified solution
.zipfile. The file is saved to your computer and a new panel opens.The new panel shows step-by-step instructions to install the agent in Teams:
- Open Microsoft Teams (desktop app or teams.microsoft.com).
- Select Apps in the left pane. The Apps pane opens.
- At the bottom of the Apps pane, select Manage your apps. The Manage your apps page opens.
- Select Upload an app, and then select Upload in the Upload a customized app section.
- Select the downloaded
.zipfile from your computer. The app details panel opens. - Select Add.
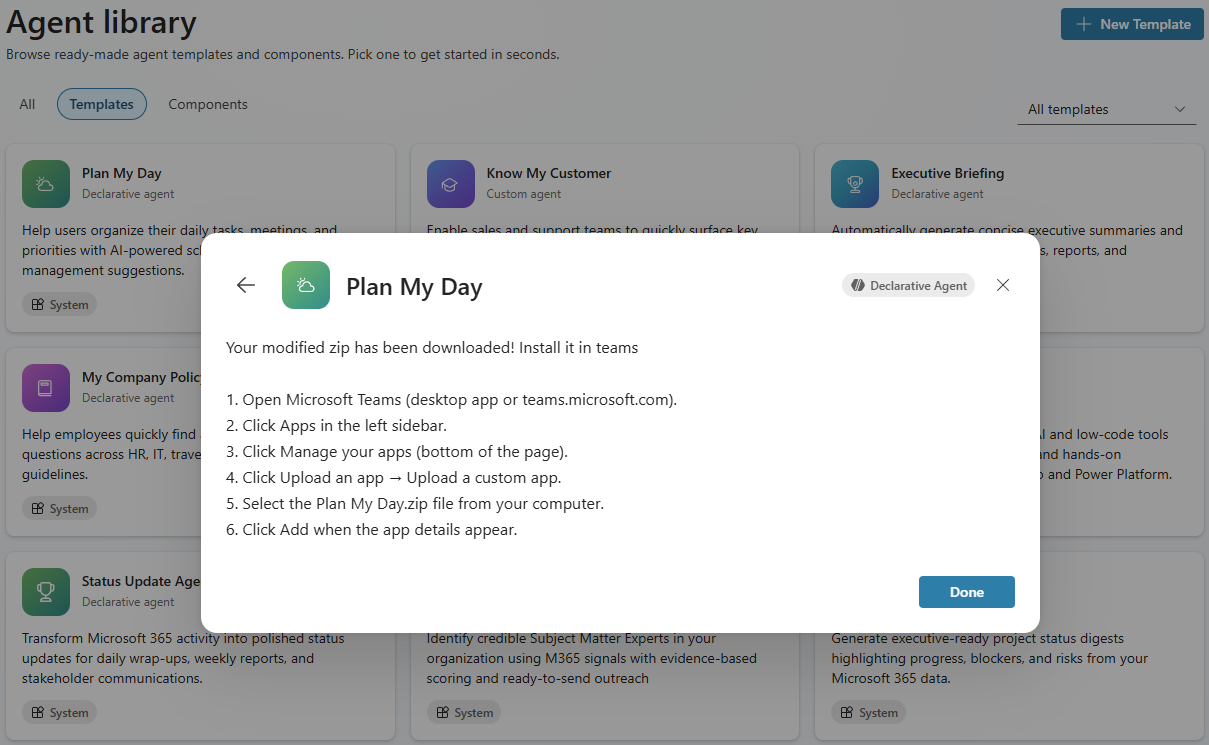
Select Done.
Tip
Take time to customize the Instructions field before downloading. Well-crafted instructions are the most important factor in agent quality. The template comes with prewritten instructions that you can use as a starting point and adapt to your organization's needs.
Use Agent Builder
Agent Builder lets you create the agent directly in Microsoft 365 Copilot. No .zip upload is needed.
In Copilot Agent Kit, go to Agent Library in the left pane. The Agent library page opens.
Select the Templates tab.
Browse or search for the declarative agent template you want to use.
Select a declarative agent template card to open the template details panel.
In the template details panel, select Use Agent Builder, and then select Continue. A new browser tab opens automatically with the setup guide for Microsoft 365 Agent Builder. If the tab doesn't open, select Download to download a copy of the setup guide as a PDF.
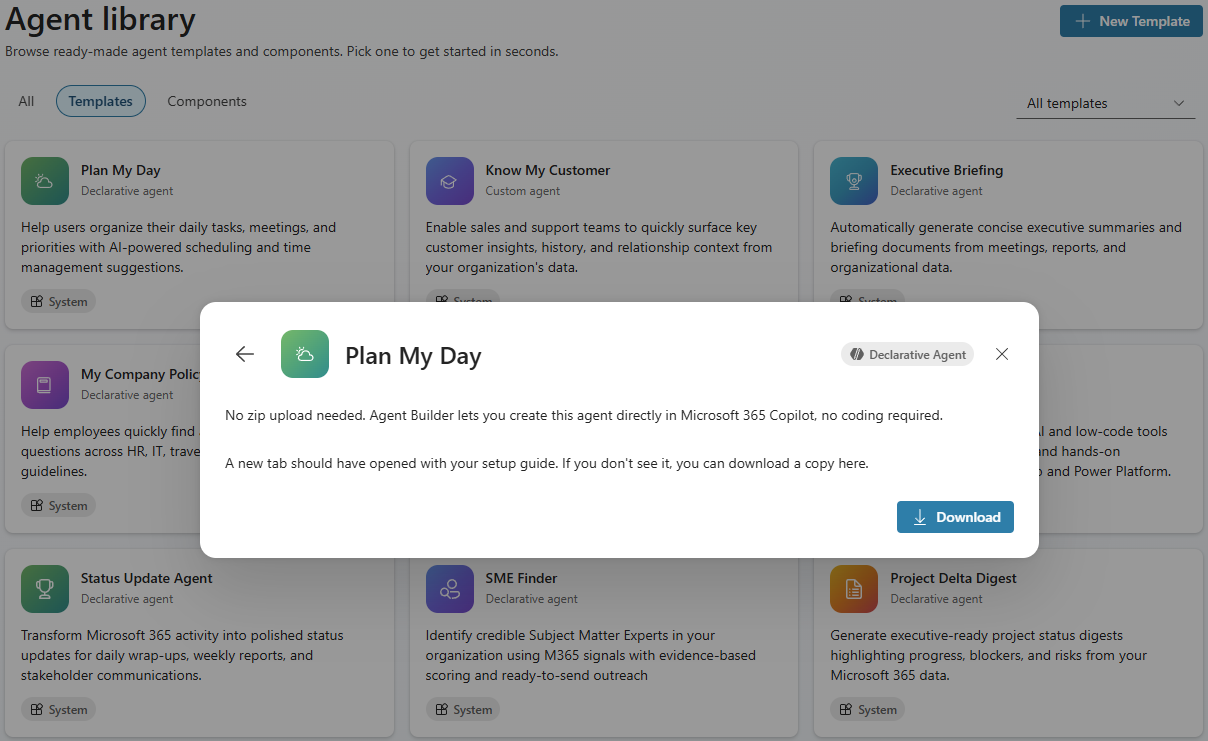
Follow the setup guide to configure and deploy your agent directly in Microsoft 365 Copilot.
Tip
Agent Builder is a no-code option. You don't need to download or upload any .zip files. The setup guide walks you through creating the agent directly in the Microsoft 365 Copilot interface.
Build with VS Code
For developers who prefer a code-first approach, you can clone the template repository and customize it using Visual Studio Code with the Microsoft 365 Agents Toolkit extension.
In Copilot Agent Kit, go to Agent Library in the left pane. The Agent library page opens.
Select the Templates tab.
Browse or search for the declarative agent template you want to use.
Select a declarative agent template card to open the template details panel.
In the template details panel, select Build with VS Code, and then select Continue. A new browser tab opens automatically with the setup guide for developers. If the tab doesn't open, select Download to download a copy of the setup guide as a PDF.
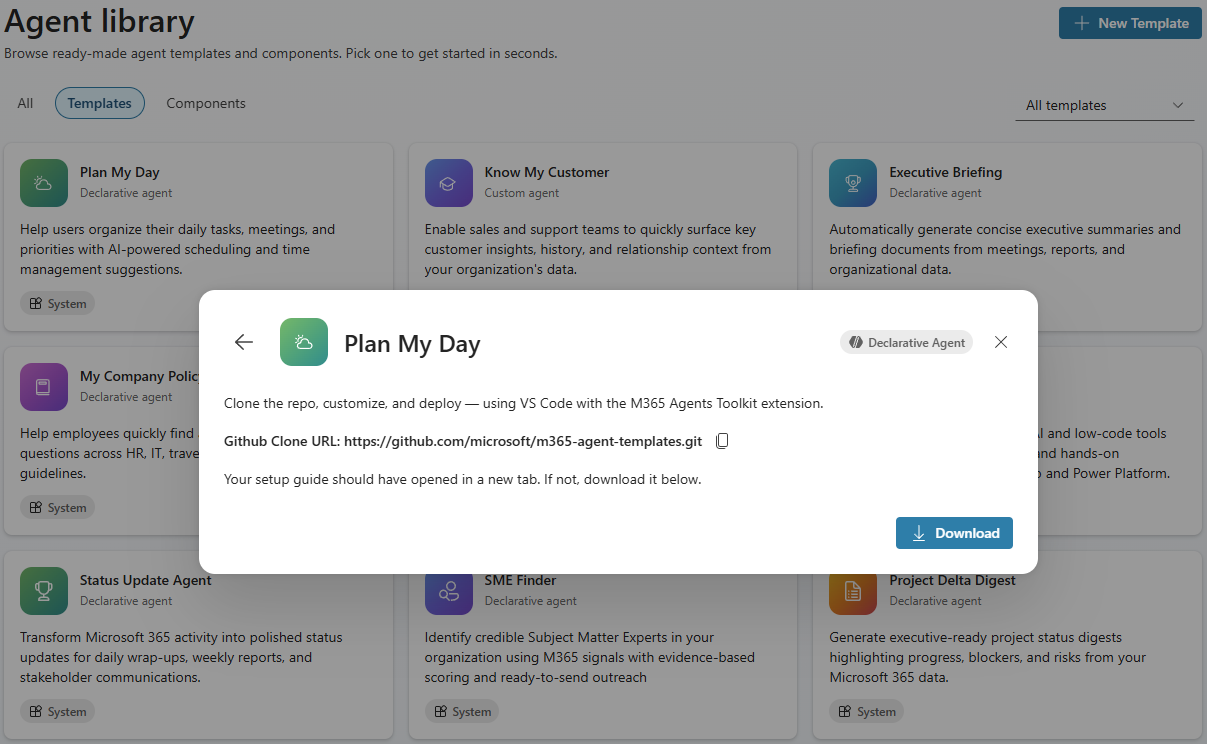
Copy the GitHub clone URL:
https://github.com/microsoft/m365-agent-templates.git.Clone the repository using the provided URL.
Open the cloned repository in Visual Studio Code.
Follow the developer setup guide to customize the agent definition, instructions, and capabilities using the Microsoft 365 Agents Toolkit extension.
Manually upload the agent to Teams by following these steps:
- Open Microsoft Teams (desktop app or teams.microsoft.com).
- Select Apps in the left pane. The Apps pane opens.
- At the bottom of the Apps pane, select Manage your apps. The Manage your apps page opens.
- Select Upload an app, and then select Upload in the Upload a customized app section.
- Select the downloaded
.zipfile from your computer. The app details panel opens. - Select Add.
