Note
Access to this page requires authorization. You can try signing in or changing directories.
Access to this page requires authorization. You can try changing directories.
To learn the basics of using DevTools to view and change the CSS for a page, follow the interactive tutorial sections in this article.
View the CSS for an element
Open the CSS Examples demo page in a new window or tab. (To open a link in a new window or tab, right-click the link. Or, press and hold Ctrl (for Windows, Linux) or Command (for macOS) and then click the link.)
Right-click the
Inspect Me!text, and then select Inspect.In the DOM Tree panel under the Elements tool, the
Inspect Me!element is highlighted: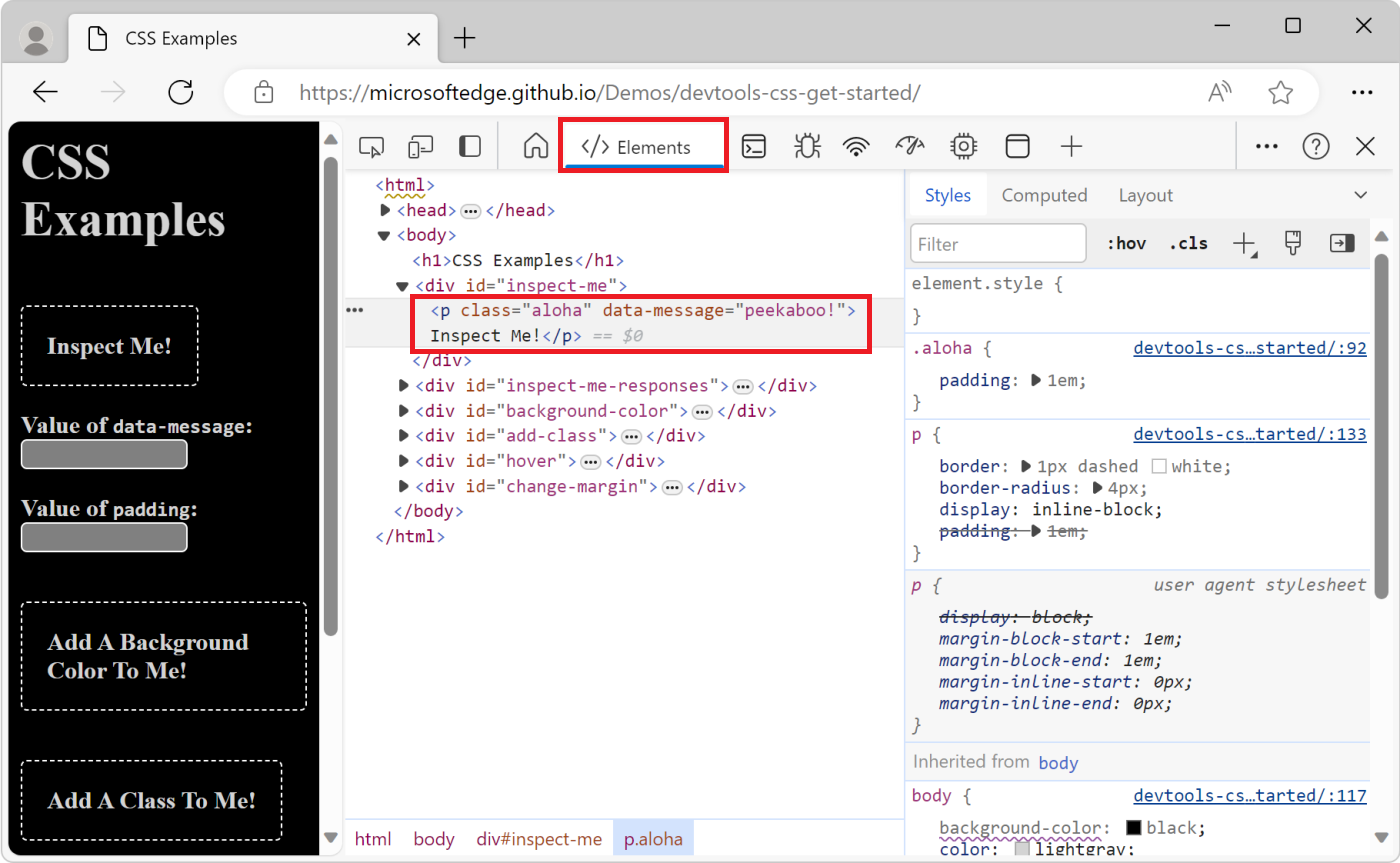
In the
Inspect Me!element, find the value of thedata-messageattribute and copy it.On the page view, enter the
data-messagevalue that you copied in the Value of data-message text box.Right-click the
Inspect Me!text, and then select Inspect.In DevTools, on the Elements tool, select the Styles panel. The
Inspect Me!element is highlighted in the Styles panel.In the
Inspect Me!element, find thealohaclass rule. This rule is displayed, because it's being applied to theInspect Me!element.In the
alohaclass, find the value for thepaddingstyle and copy it: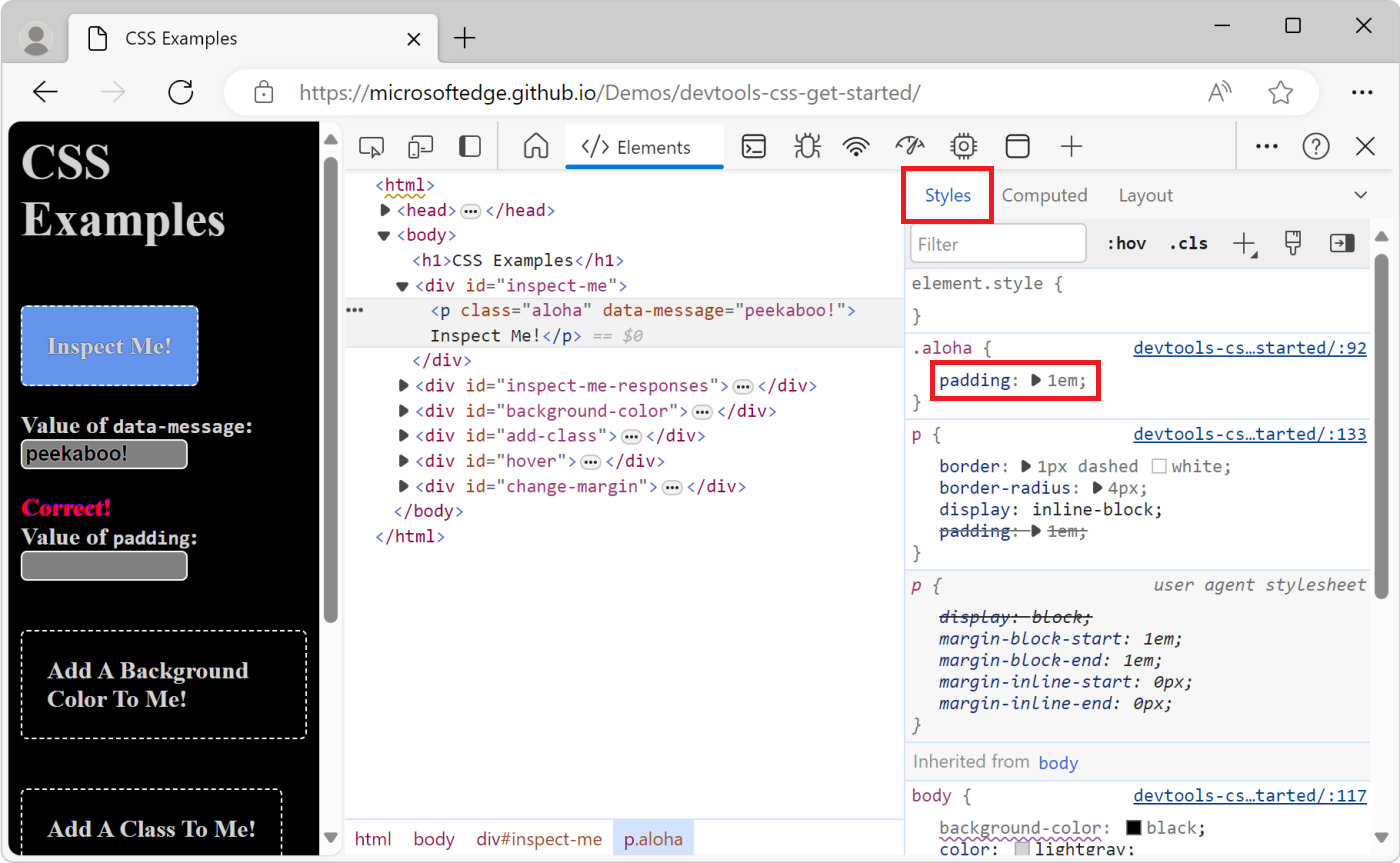
On the page view, paste the
paddingvalue in the Value of padding text box.
Add a CSS declaration to an element
Use the Styles panel when you want to change or add CSS declarations to an element.
First, we recommend doing the preceding View the CSS for an element tutorial.
Open the CSS Examples demo page in a new window or tab.
Right-click the
Add A Background Color To Me!text, and then select Inspect.Click
element.stylenear the top of the Styles panel.Type
background-coloror select it from the dropdown list and then press Enter.Type
honeydewor select it from the dropdown list of colors, and then press Enter. After you pick a color, an inline style declaration that's applied to the element is displayed in the DOM Tree.The
background-color:honeydewdeclaration is applied to the element using theelement.stylesection of the Styles panel: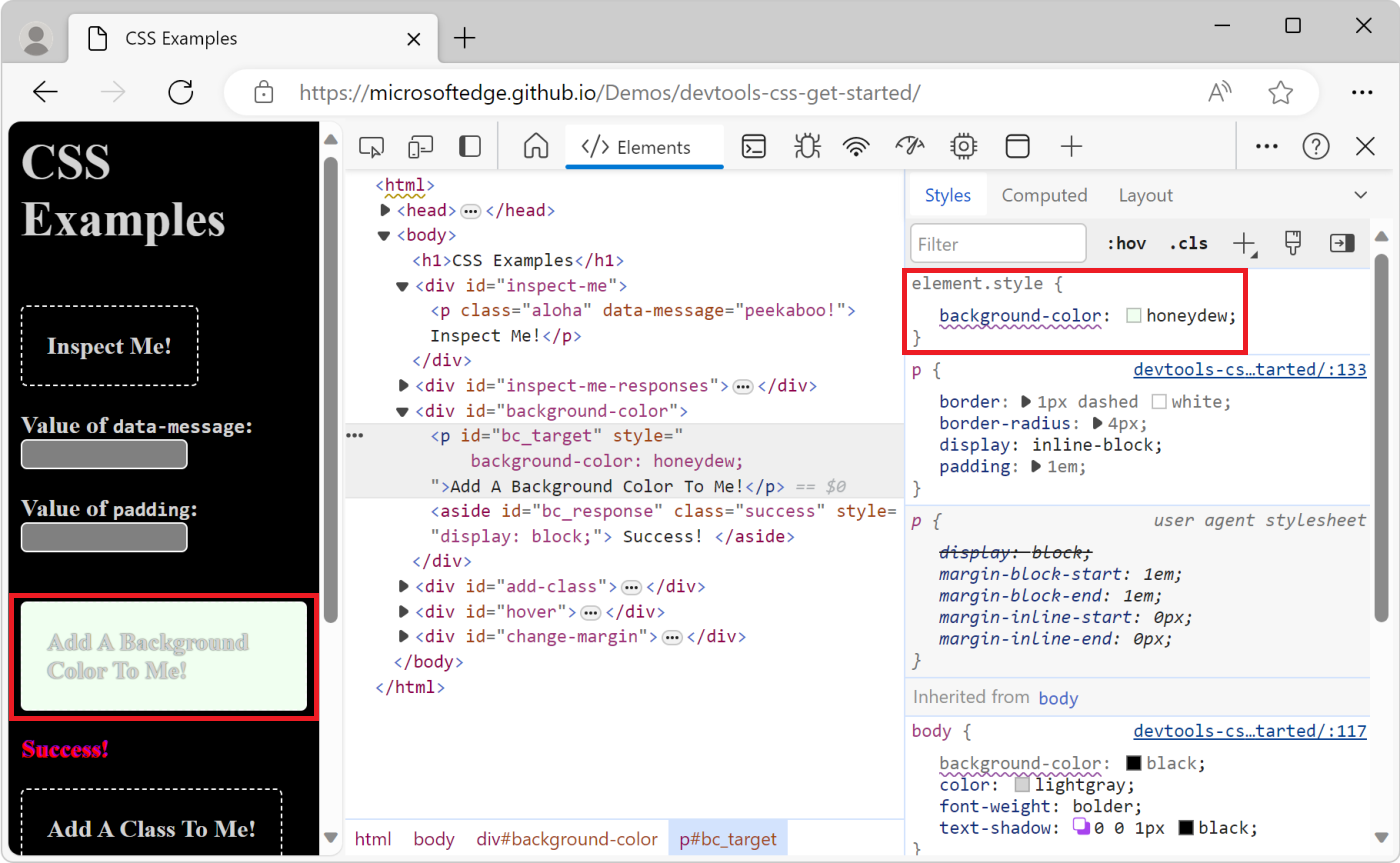
Add a CSS class to an element
To display how an element looks when a CSS class is applied to or removed from an element, see the Styles panel.
First, we recommend doing the preceding View the CSS for an element tutorial.
Open the CSS Examples demo page in a new window or tab.
Right-click the
Add A Class To Me!text, and then select Inspect.Click the Element Classes (.cls) button. DevTools shows a text box where you can add CSS classes to the page element that you're inspecting.
Type
color_mein the Add new class text box, and then press Enter. A checkbox appears below the Add new class text box, where you can toggle the class on and off. If theAdd A Class To Me!element has any other classes applied to it, you can also toggle each class from here.The
color_meclass is applied to the element using the .cls section of the Styles panel: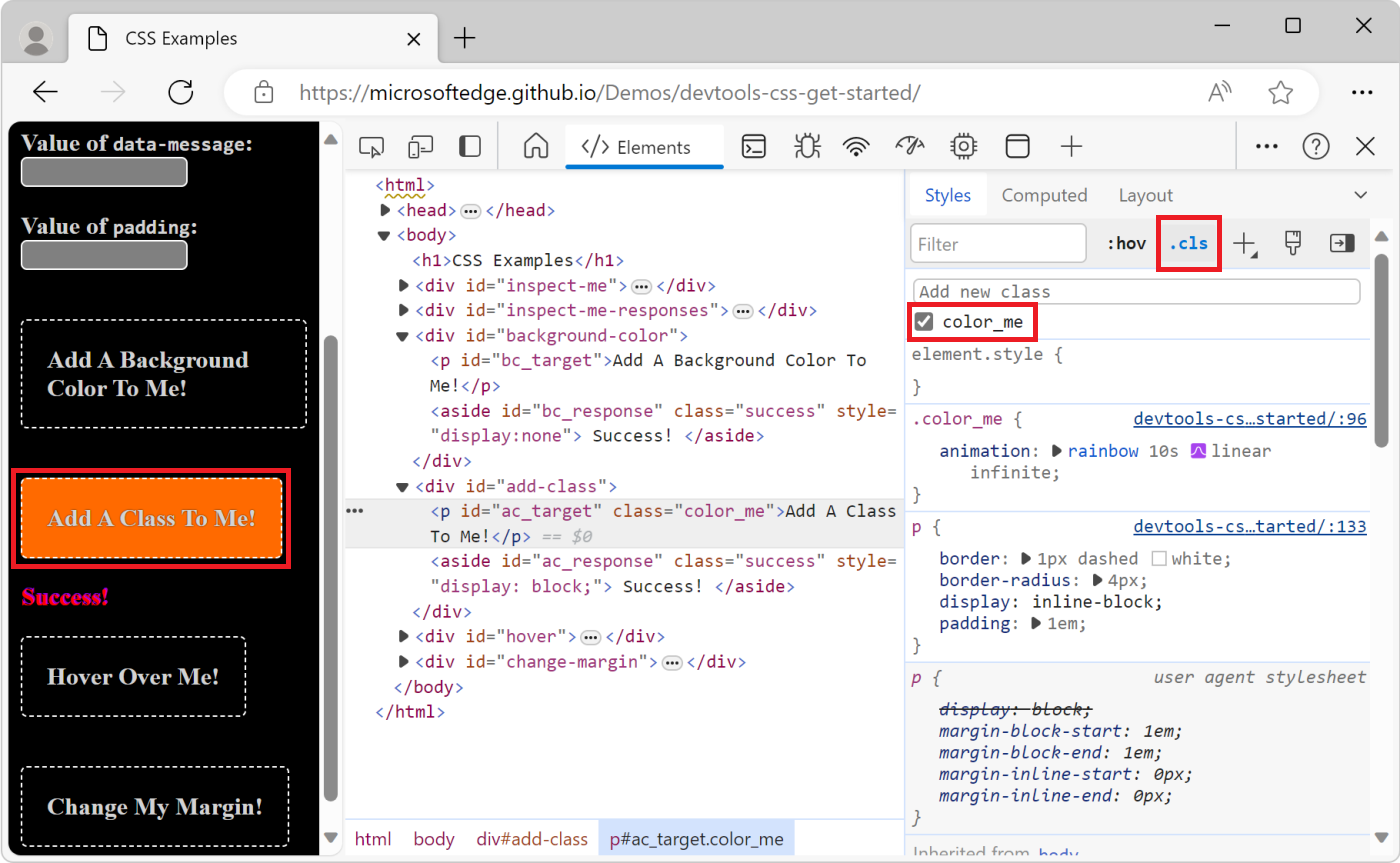
Add a pseudostate to a class
Use the Styles panel to permanently apply a CSS pseudostate to an element. DevTools supports :active, :focus, :hover, and :visited.
First, we recommend doing the preceding View the CSS for an element tutorial.
Open the CSS Examples demo page in a new window or tab.
Hover over the
Hover Over Me!text. The background color changes.Right-click the
Hover Over Me!text, and then select Inspect.In the Styles panel, click the Toggle Element State (:hov) button.
Select the :hover checkbox. The background color changes like it did in the first step, even though you aren't actually hovering over the element.
The next screenshot shows the result of toggling the
:hoverpseudostate on an element.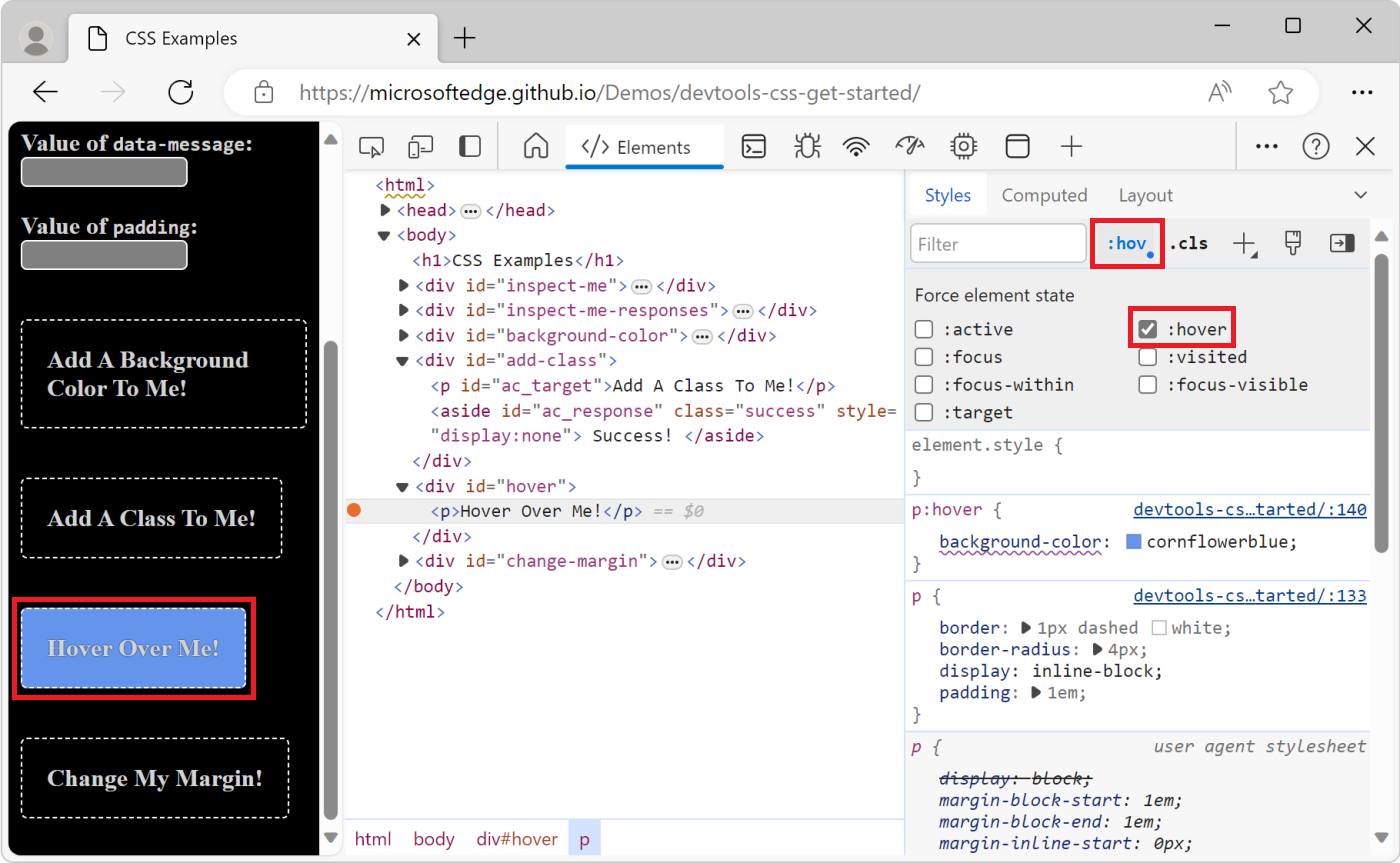
Change the dimensions of an element
Use the Box Model interactive diagram in the Styles panel to change the width, height, padding, margin, or border length of an element.
First, we recommend doing the preceding View the CSS for an element tutorial.
Open the CSS Examples demo page in a new window or tab.
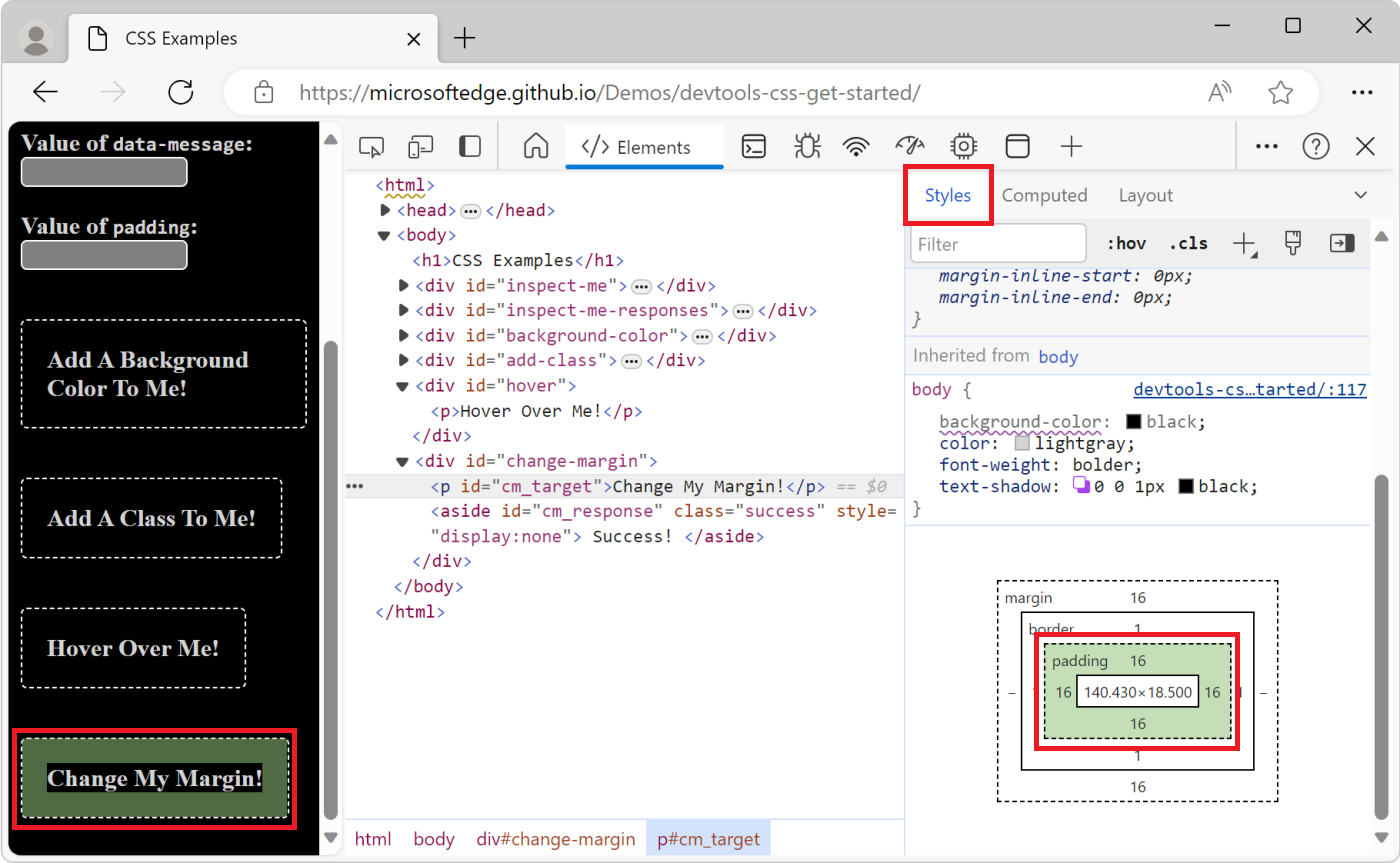
Right-click the
Change My Margin!text, and then select Inspect.In the Box Model diagram in the Styles panel, hover over padding. The element's padding is highlighted in the viewport.
Depending on the size of your DevTools window, you may need to scroll to the bottom of the Styles panel to display the Box Model.
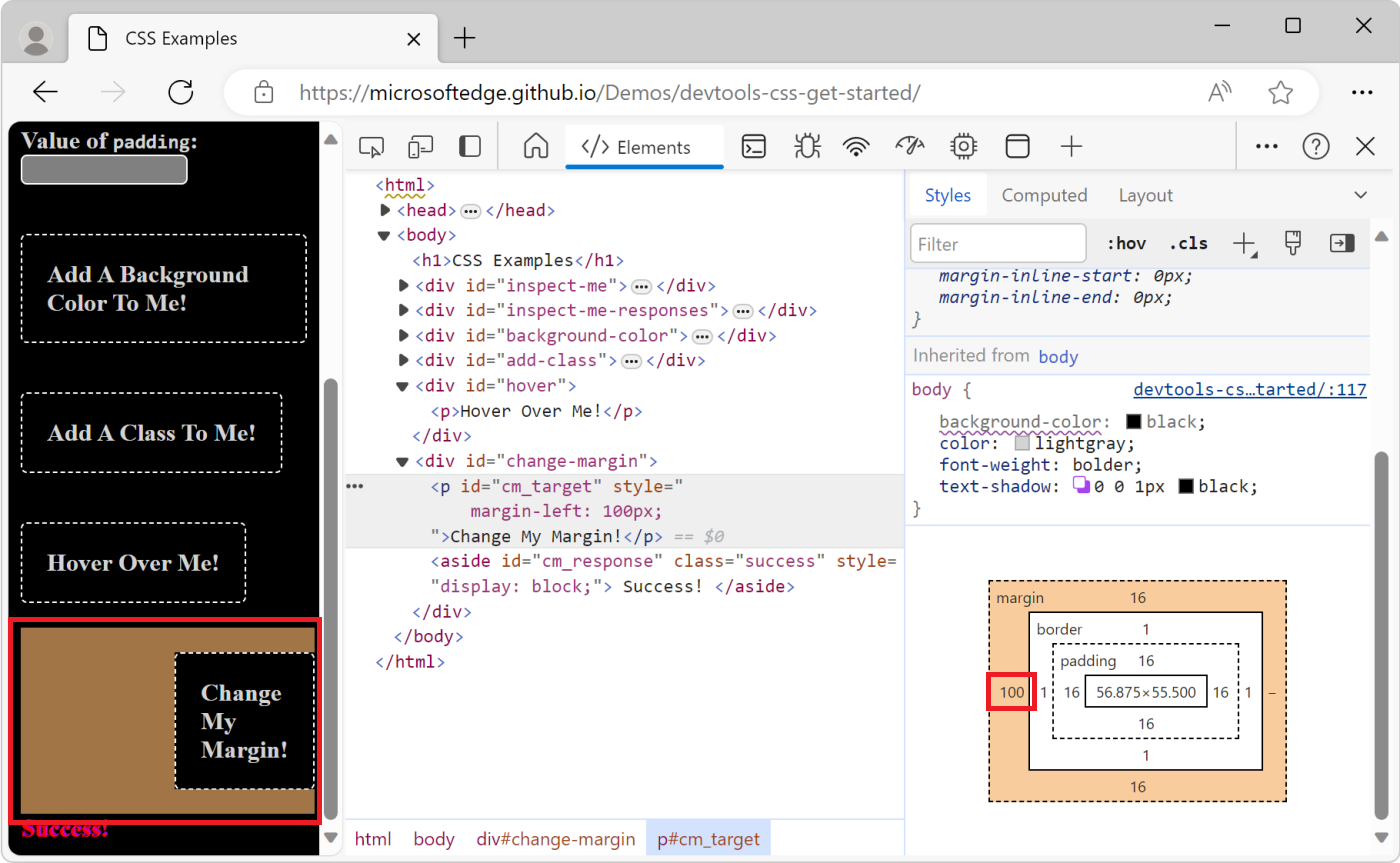
Double-click the left margin in the Box Model, which currently has a value of
-. The-means that the element doesn't have a value formargin-left.Type
100pxand press Enter. The Box Model defaults to pixels, but it also accepts other values, such as25%, or10vw.Hovering over the element's padding:
Changing the element's left margin:
Debug media queries
CSS media queries are a way to make your website react to changes in the configuration settings for each user. The most common use case is to give your page a different CSS layout depending on the dimensions of the viewport.
Using separate layouts allows for a one-column layout for mobile devices and multi-column layouts when there's more screen real estate available.
To debug or test the media queries that you defined in your CSS:
Open the CSS Examples demo page in a new window or tab.
To open DevTools, right-click in the webpage and then select Inspect.
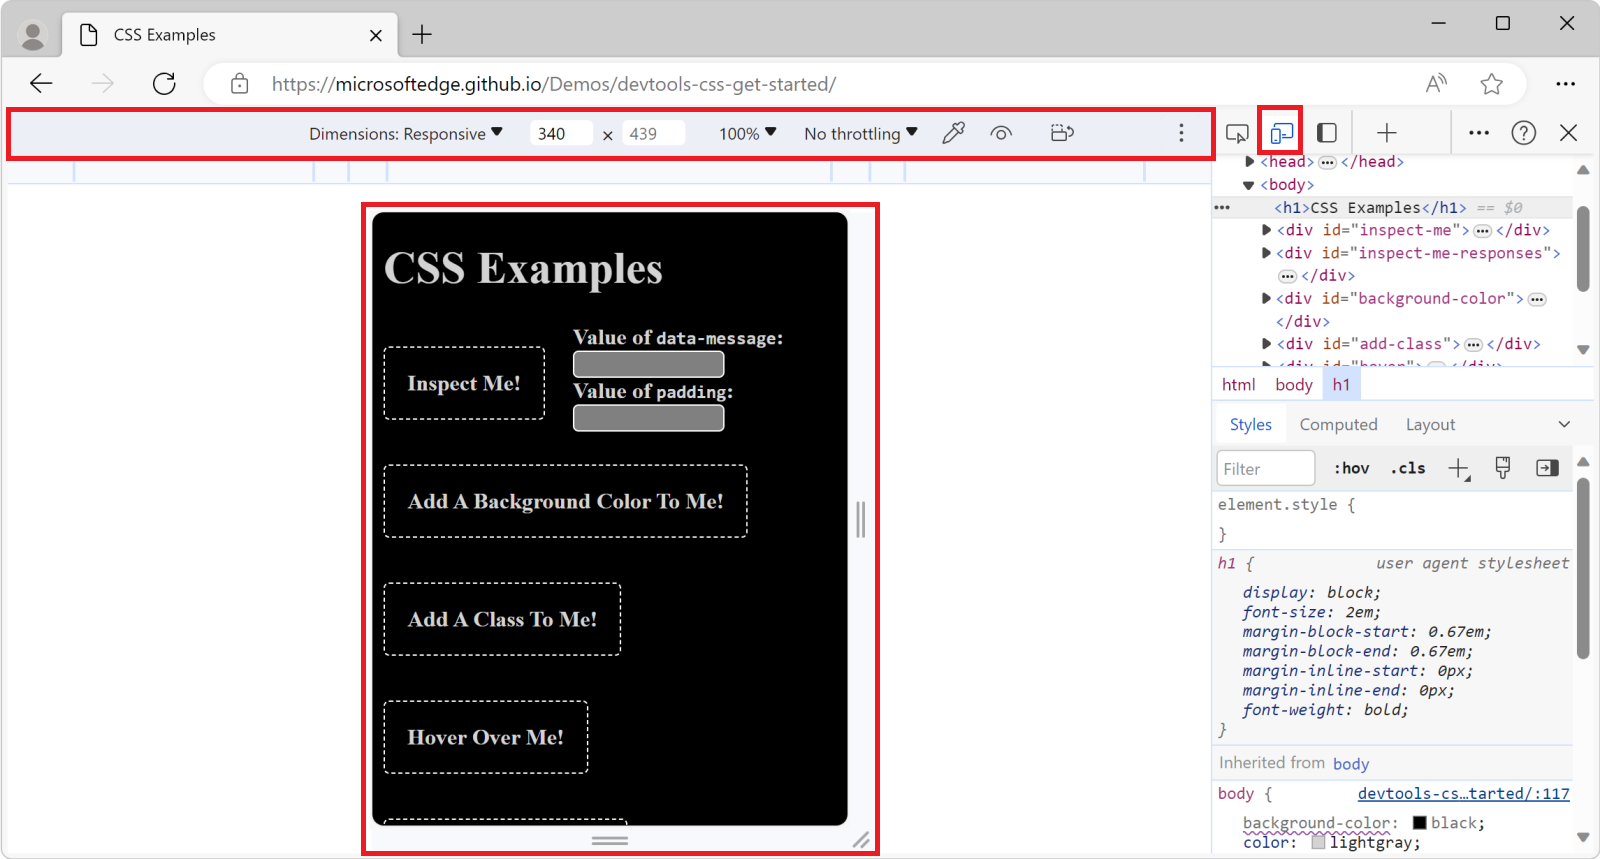
Click the Toggle device emulation (
 ) button. Or, when DevTools has focus, press Ctrl+Shift+M (Windows, Linux) or Command+Shift+M (macOS).
The device toolbar opens in the webpage, and the webpage is now rendered within the Device Emulation pane:
With the device toolbar open, click the More options (
 ) button on the top-right, and then select Show media queries:
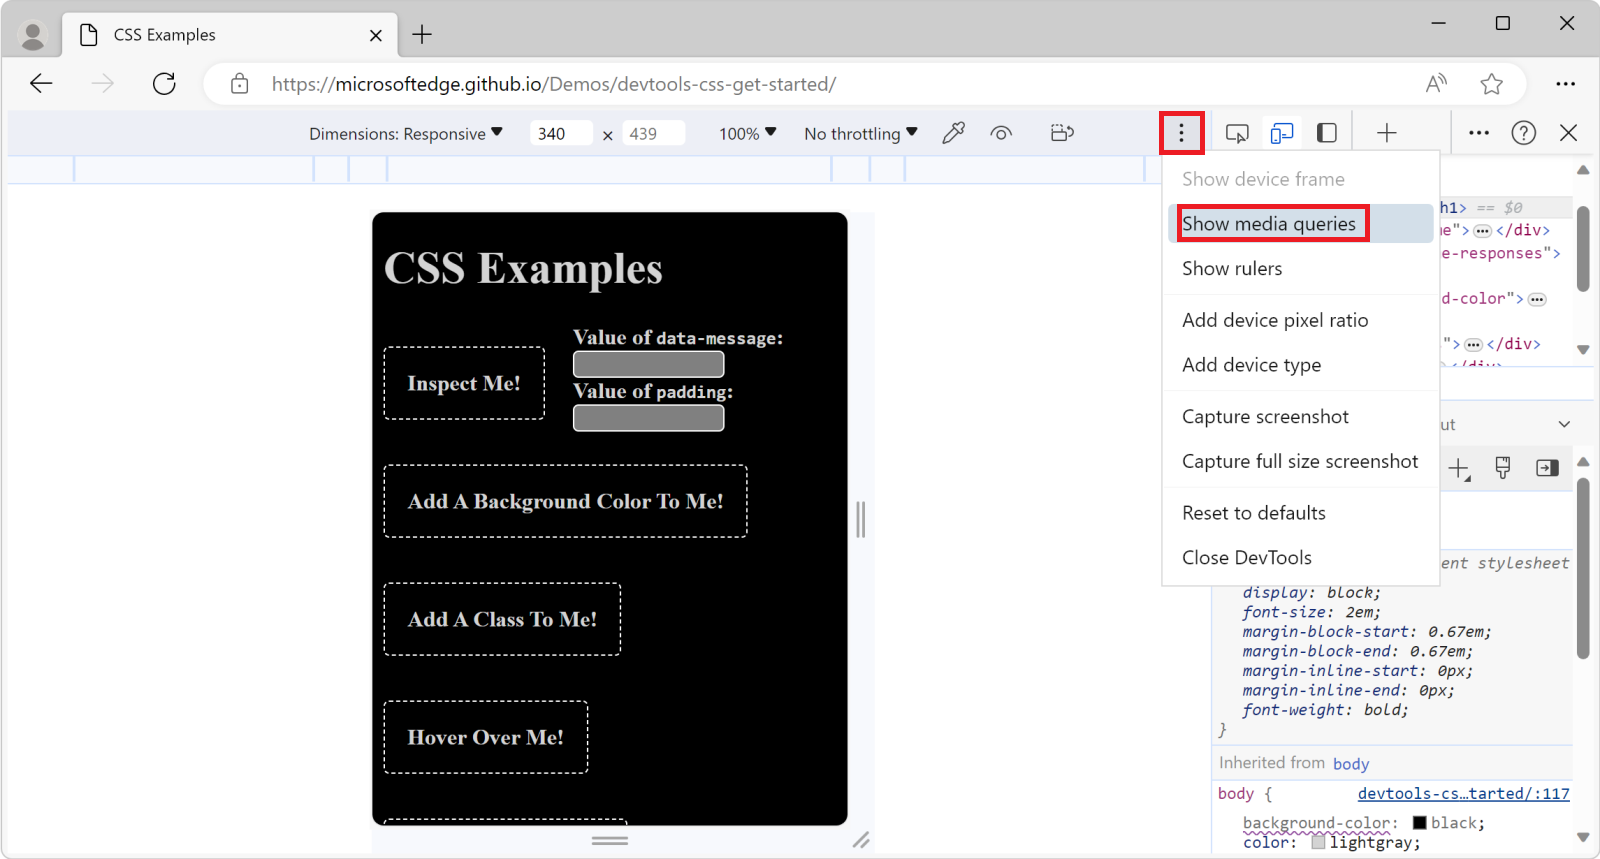
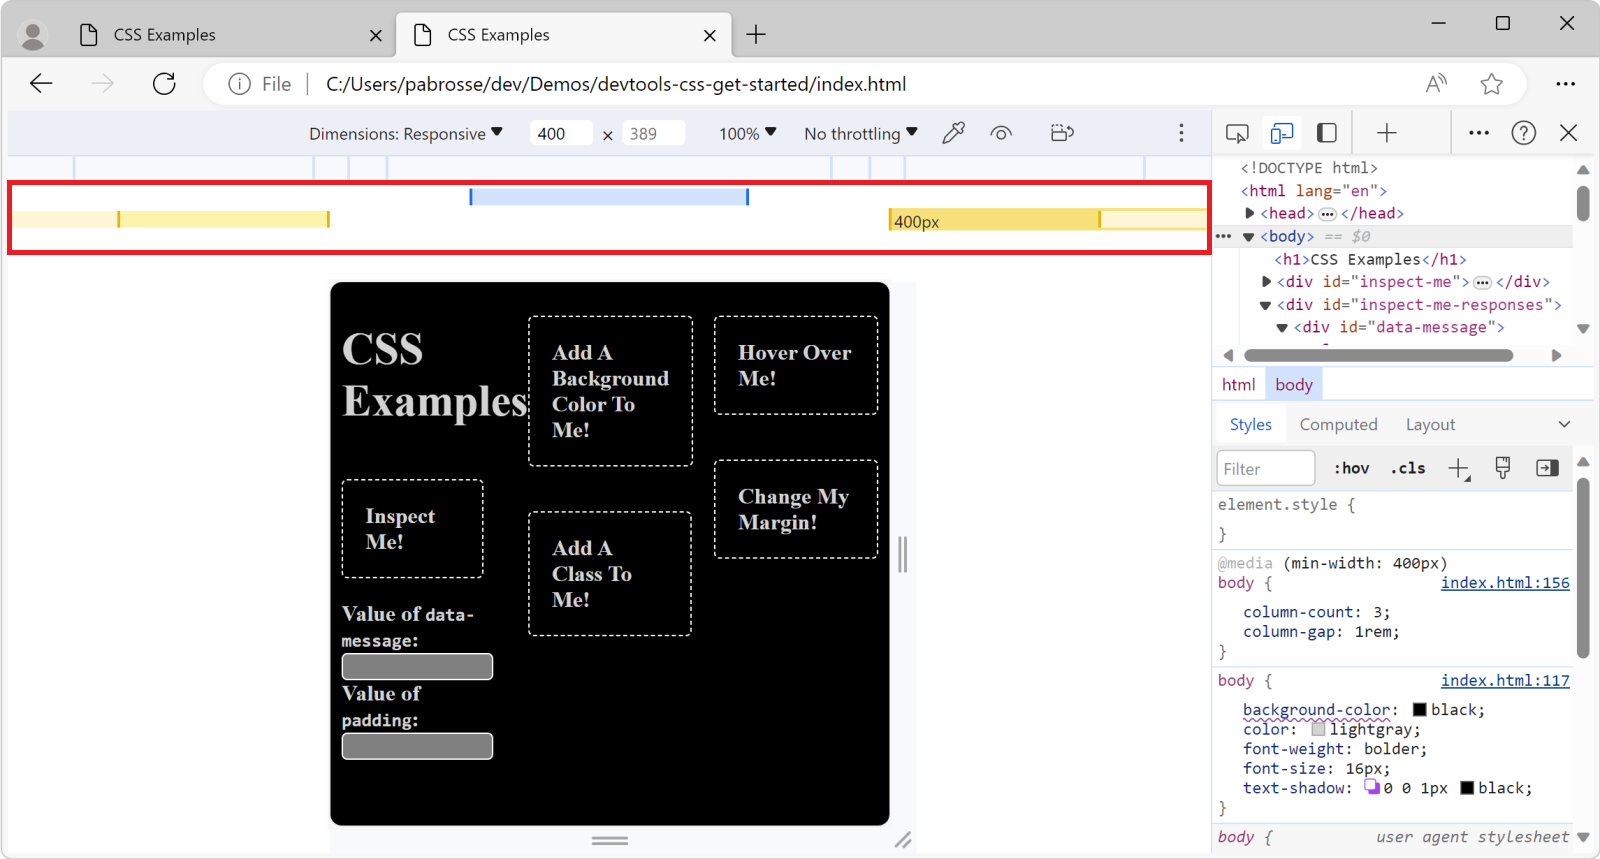
The colored bars above the webpage represent the different media queries.
Hover over the boundaries in the bars to display the values of the different media queries. Click each media query value to resize the webpage to match.
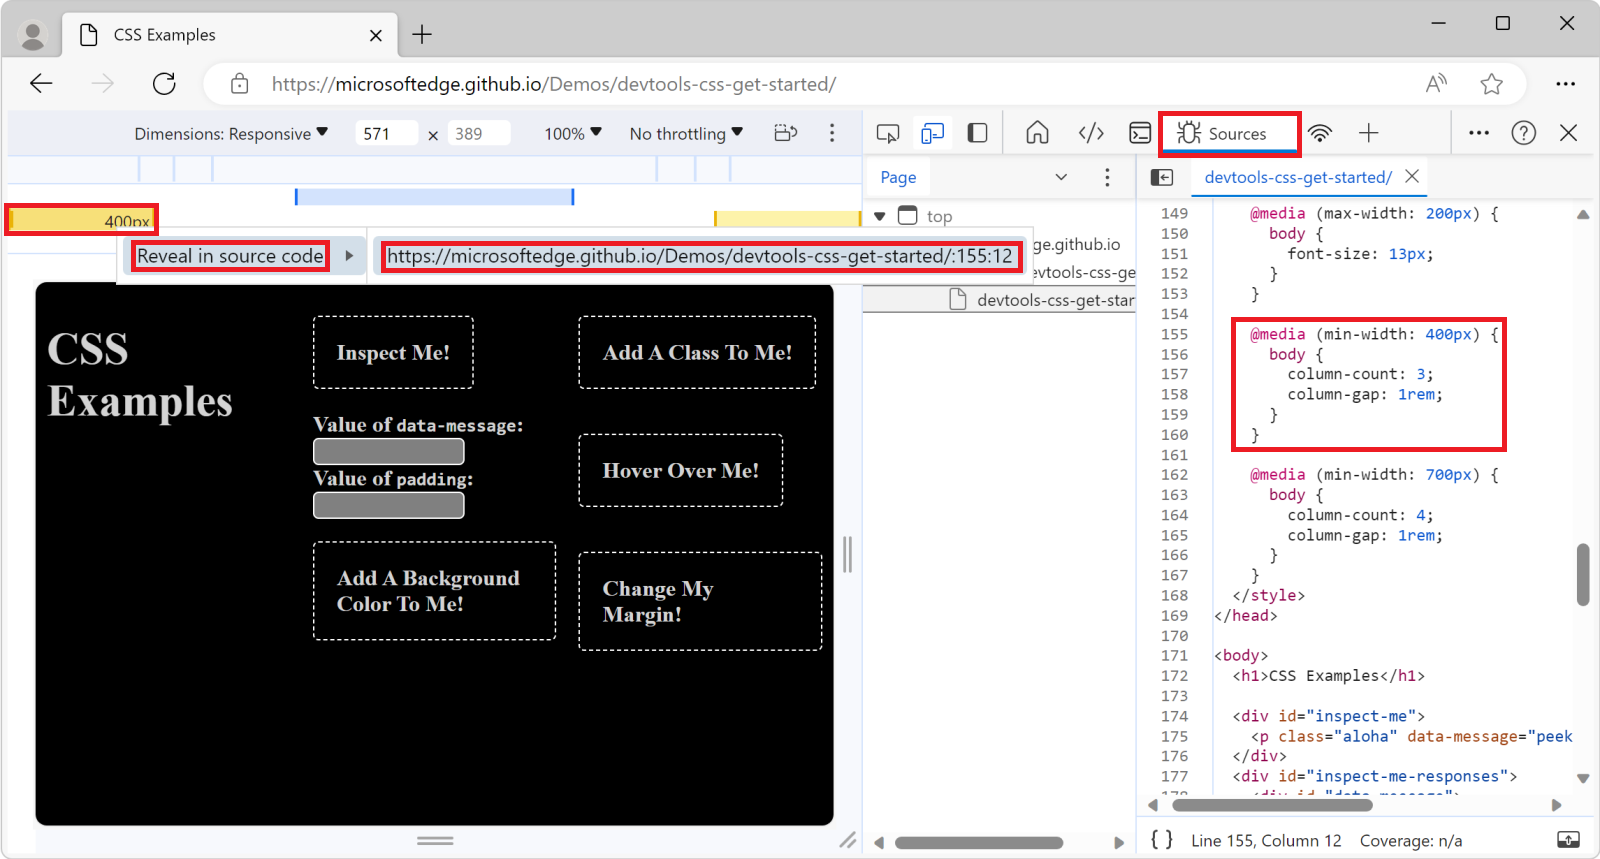
To open the CSS file that contains your media queries and edit their source code, right-click one of the colored bars and then select Reveal in source code. The Sources tool appears, and the corresponding media query is highlighted in the CSS file:
Note
Portions of this page are modifications based on work created and shared by Google and used according to terms described in the Creative Commons Attribution 4.0 International License. The original page is found here and is authored by Kayce Basques.
![]() This work is licensed under a Creative Commons Attribution 4.0 International License.
This work is licensed under a Creative Commons Attribution 4.0 International License.