Note
Access to this page requires authorization. You can try signing in or changing directories.
Access to this page requires authorization. You can try changing directories.
Use Memory inspector to view and interact with the following types of objects:
Using Memory inspector you can view the different types of memory objects, navigate, and select the types to be used to interpret the values. It shows the ASCII values directly next to the bytes, and lets you select different endianness.
The Memory inspector tool provides greater ability than the Sources tool to inspect ArrayBuffers when debugging. The Scope view in the Sources tool displays a list of single values within the array buffer, which makes it difficult to see all the data. Additionally, navigating to a certain range within the buffer requires you to scroll to a specific index and the values are always displayed as a single byte, even if you wanted to see them in another format, such as 32-bit integers.
Open Memory inspector while debugging
Start Microsoft Edge.
Open the test site Inspect ArrayBuffers in JS (Memory in JS).
Open DevTools by pressing F12 or Ctrl+Shift+I (Windows, Linux) or Command+Option+I (macOS).
Click Sources and open the
demo-js.jsfile.Set a breakpoint at line 18 as shown in the following image.
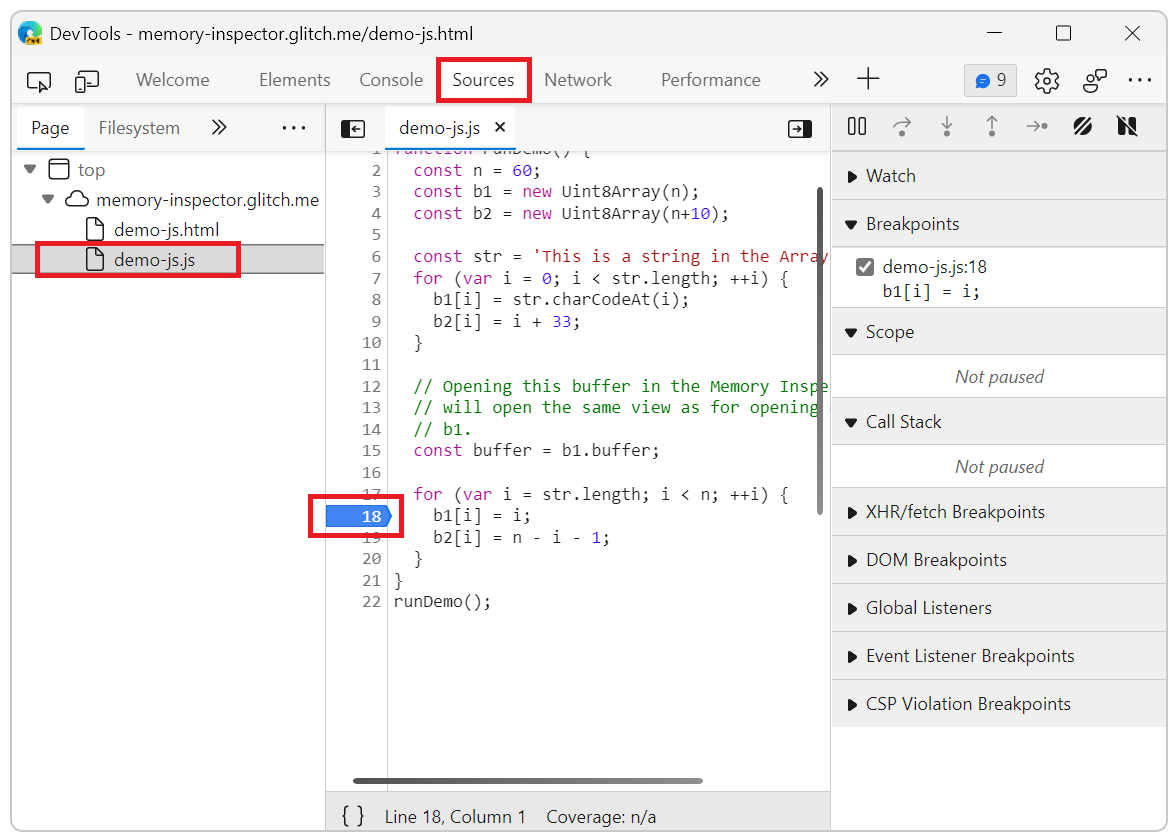
Refresh the webpage. It fails to display because the JavaScript pauses at the breakpoint.
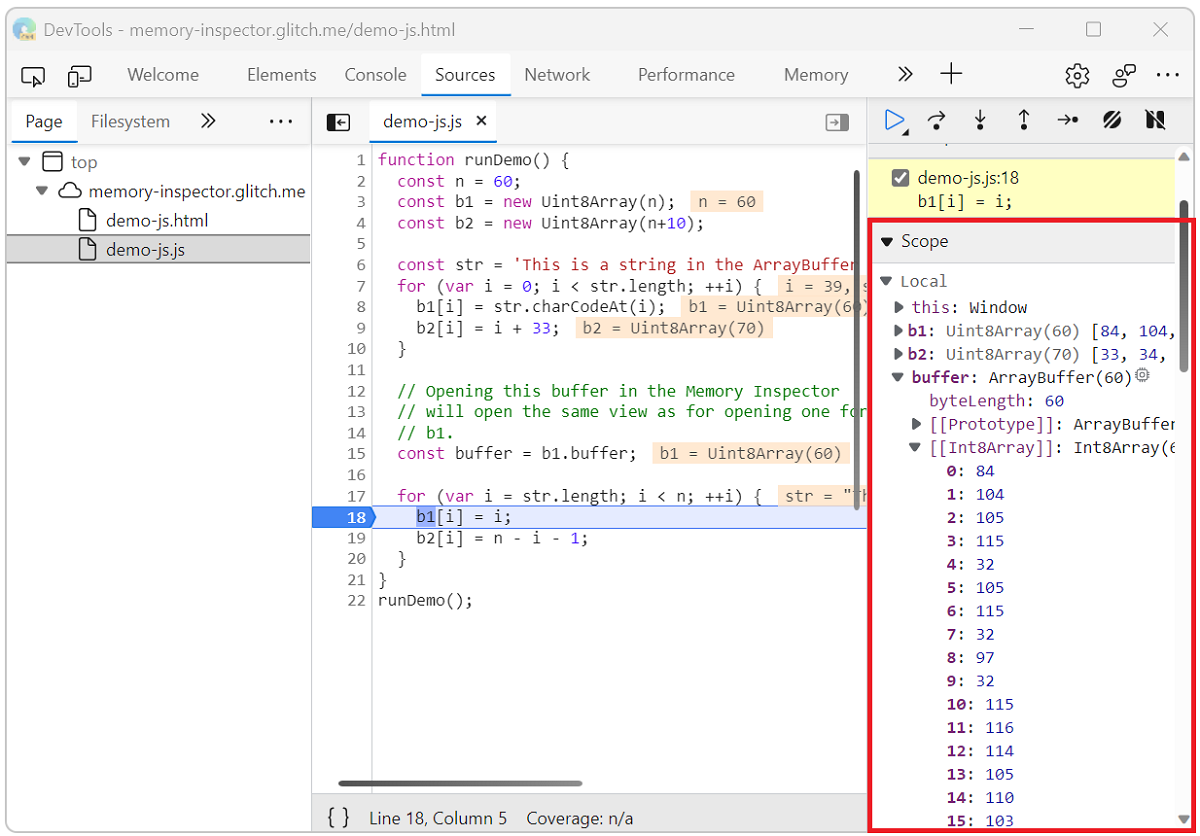
In the right Debugger pane under Scope, find the
bufferline.From the
bufferline you can open Memory inspector using one of the following methods:Click on the Reveal in Memory inspector panel icon (
 ) at the end of the
 bufferproperty line, orFrom the context menu. Right click the
bufferproperty and select Reveal in Memory inspector panel.

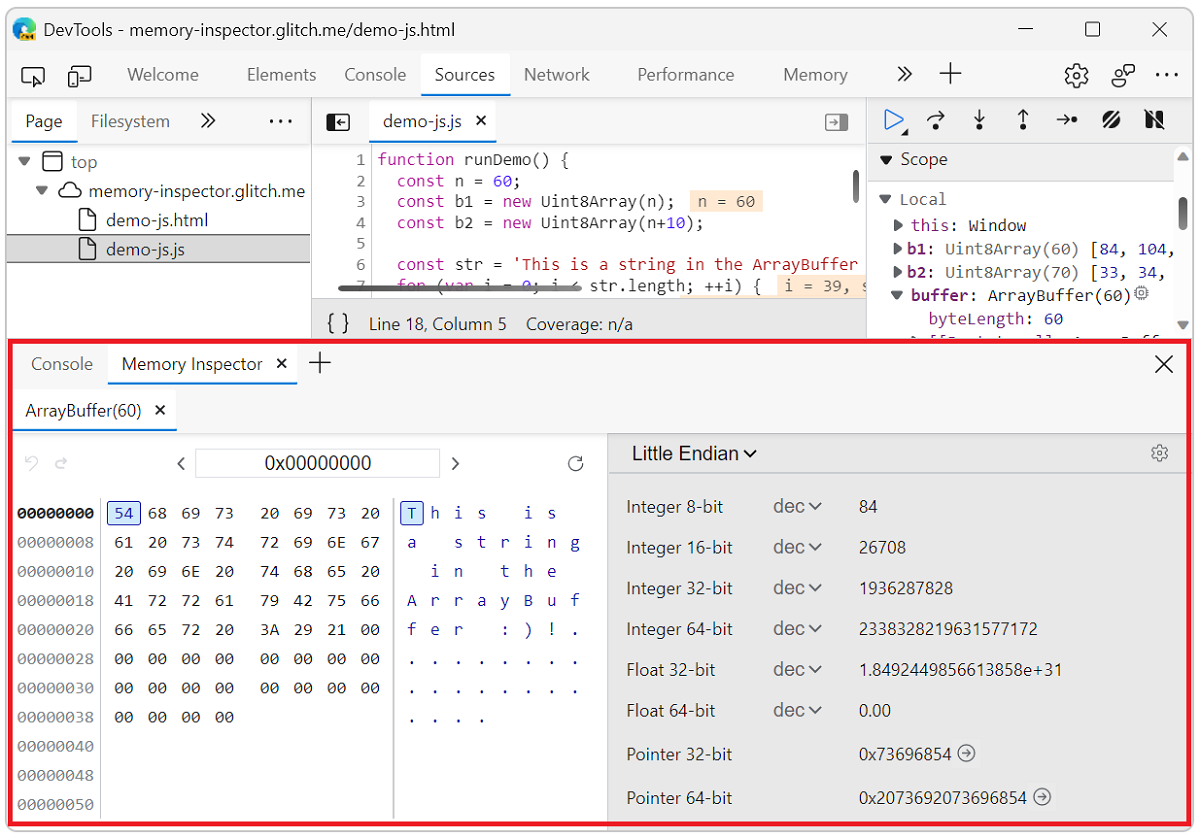
The JavaScript ArrayBuffer opens in Memory inspector.
Inspect multiple objects
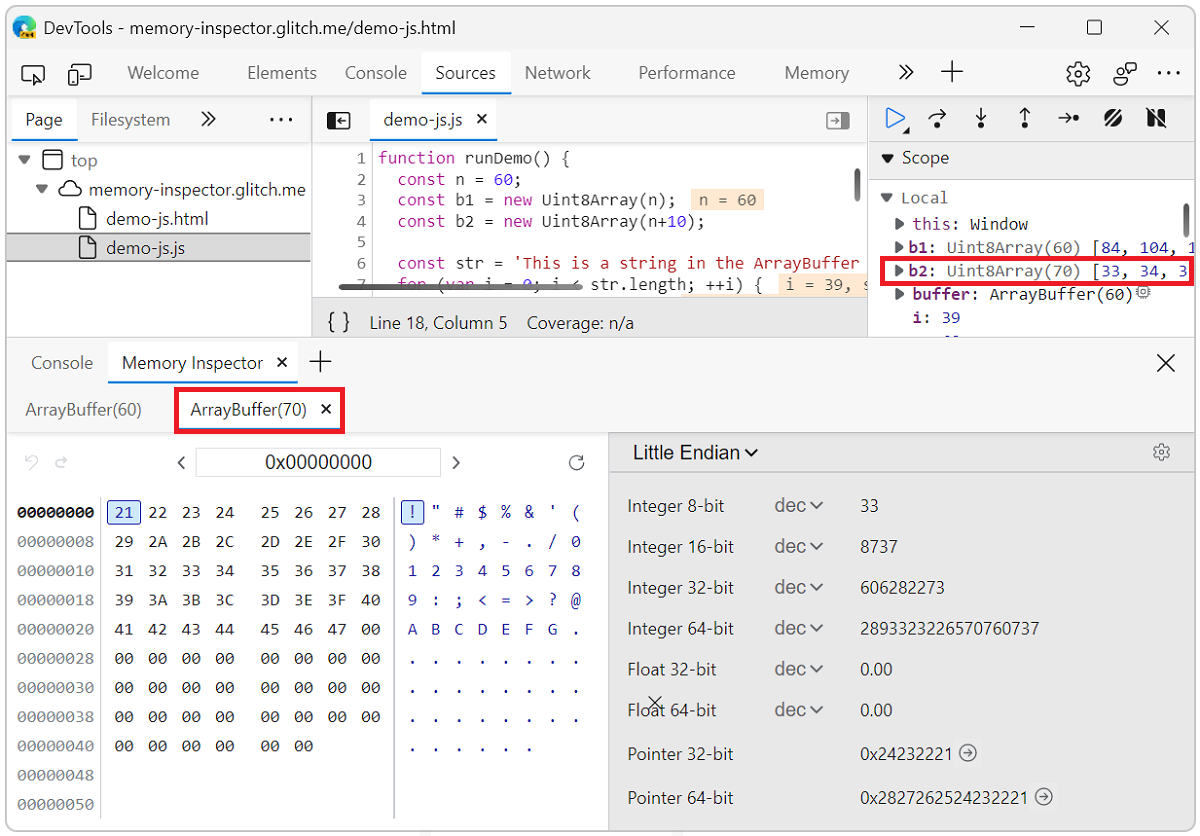
You can inspect multiple objects at the same time such as DataView and TypedArray.
With the demo webpage paused at the breakpoint, object b2 in the Scope view is a TypedArray. Right click the b2 object and select Reveal in Memory inspector panel
A new tab for the b2 object opens next to the first tab, which represents the buffer object in Memory inspector.
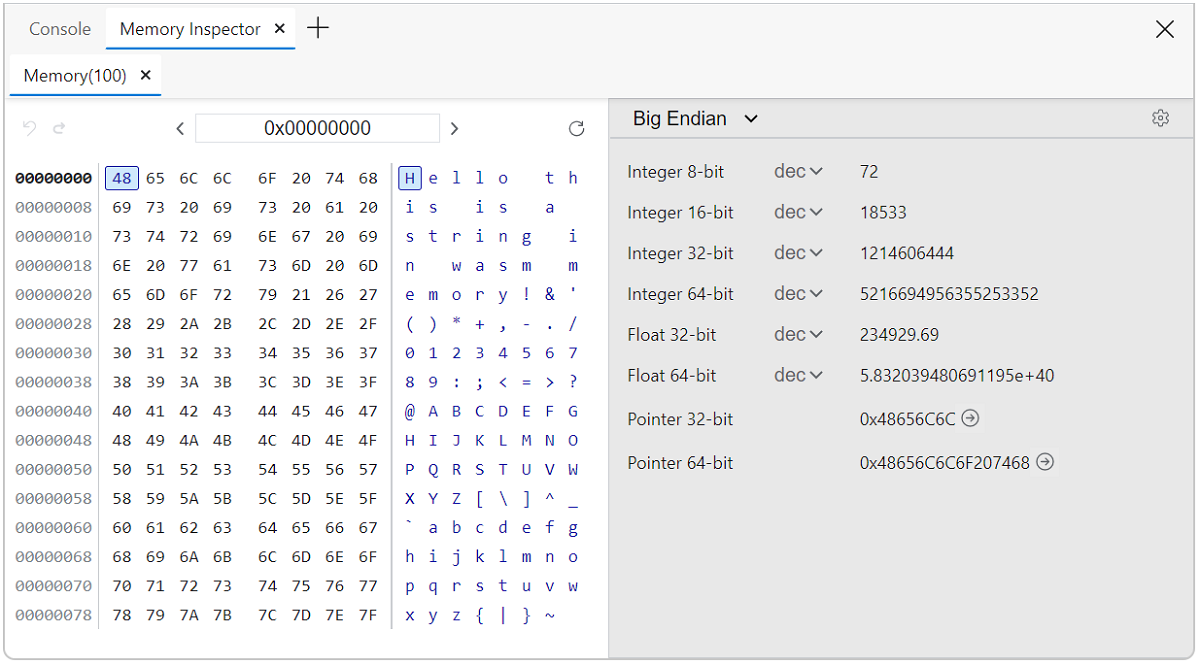
Navigating in Memory inspector
The Memory inspector panel includes three types of content:
Navigation bar
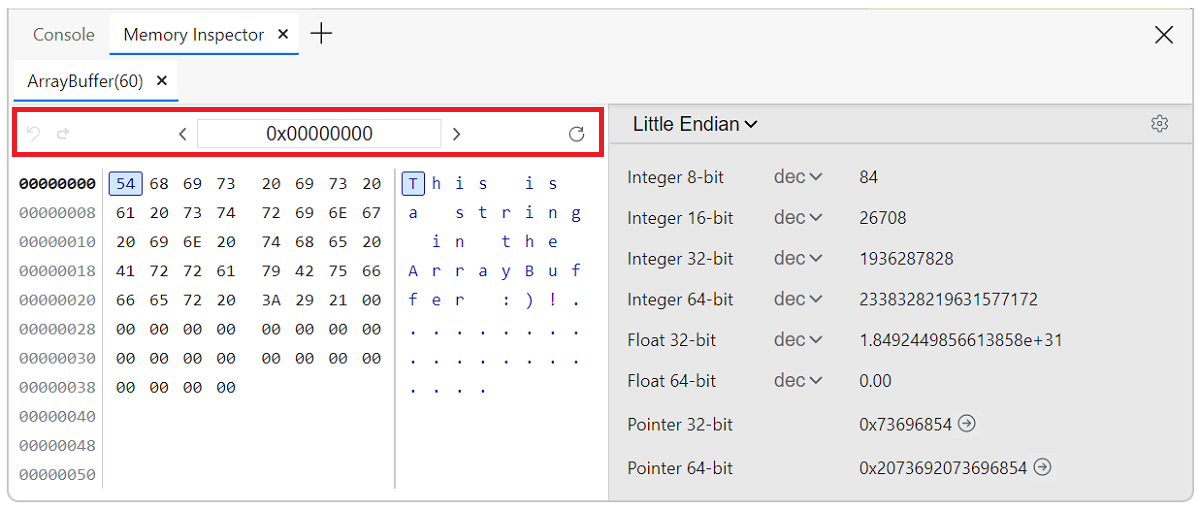
The Enter address text box shows the current byte address in hex format. You can change the value to jump to a new location in the memory buffer. Click in the text box and change the value to 0x00000008. The Memory buffer immediately jumps to that byte address.
Memory buffers may be longer than one page. Use the left and right arrow buttons to navigate Previous page (<) and Next page (>), respectively. If there is only one page of memory buffer data, the arrows take you to the beginning and ending of the page.
Use the far-left history arrows to Go back in address history ( ) and Go forward in address history (
 ).
).
If the Memory buffer does not automatically update when stepping through values, click Refresh ( ).
).
Memory buffer
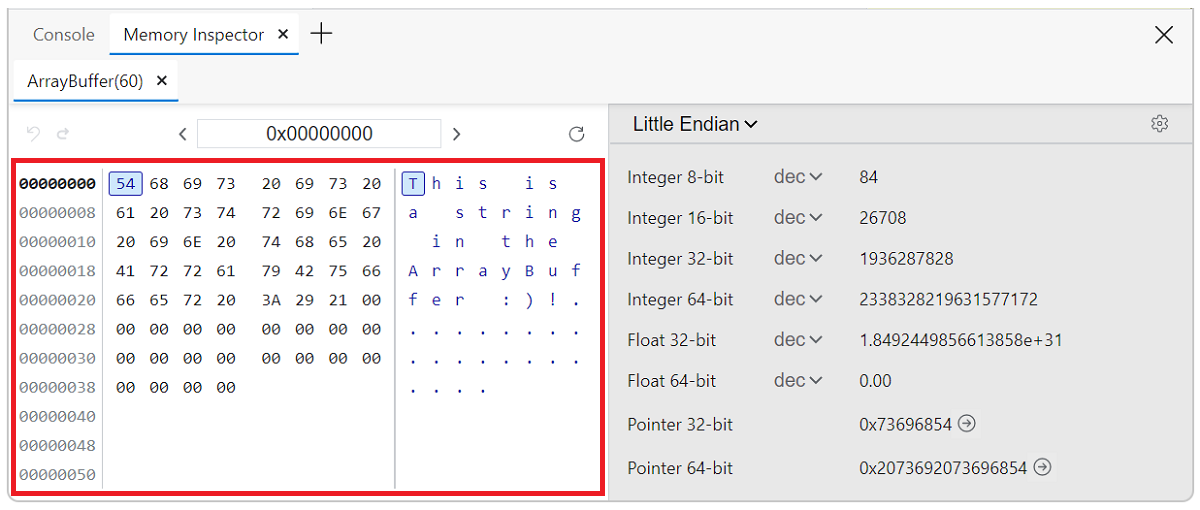
Reading from the left side of the panel, the address is displayed in hex format. The currently selected address is bold.
The memory is also shown in hex format, each byte separated by a space. The currently selected byte is highlighted. You can click on any byte or navigate using the arrow keys (left, right, up, and down).
The ASCII representation of the memory is shown on the right side of the panel. The highlighted character corresponds to the selected byte. You can click on any character or navigate using the arrow keys (left, right, up, and down).
Value inspector
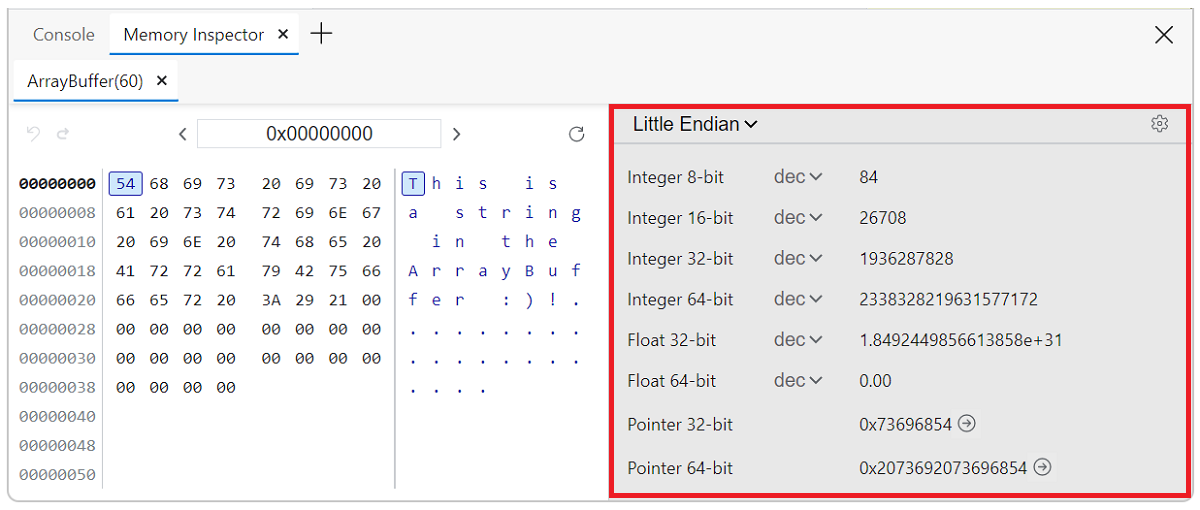
Click the current Endian type to switch between Big endian and Little endian.
The main area shows each value and interpretation based on the settings. By default, all values are shown.
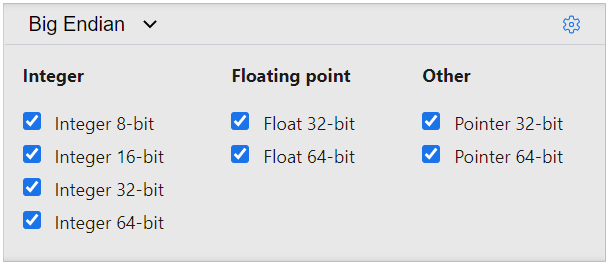
Click Toggle value type settings ( ) to select which value types to see in the inspector. This becomes the new default value type setting.
You can change the encoding view using the dropdown list. For integers you can choose from decimal dec, hexadecimal hex, and octal oct. For floats you can choose between decimal notation dec and scientific notation sci.
Inspecting memory
Complete the following steps to debug a webpage in Memory inspector.
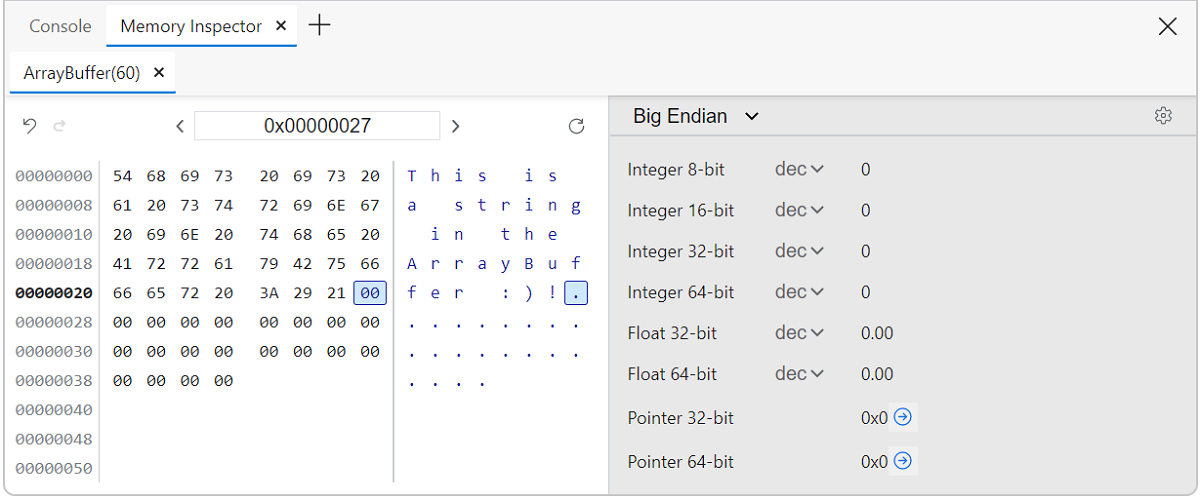
In the Navigation bar change the address to
0x00000027.View the ASCII representation and the value interpretations. All values should be zero or empty.
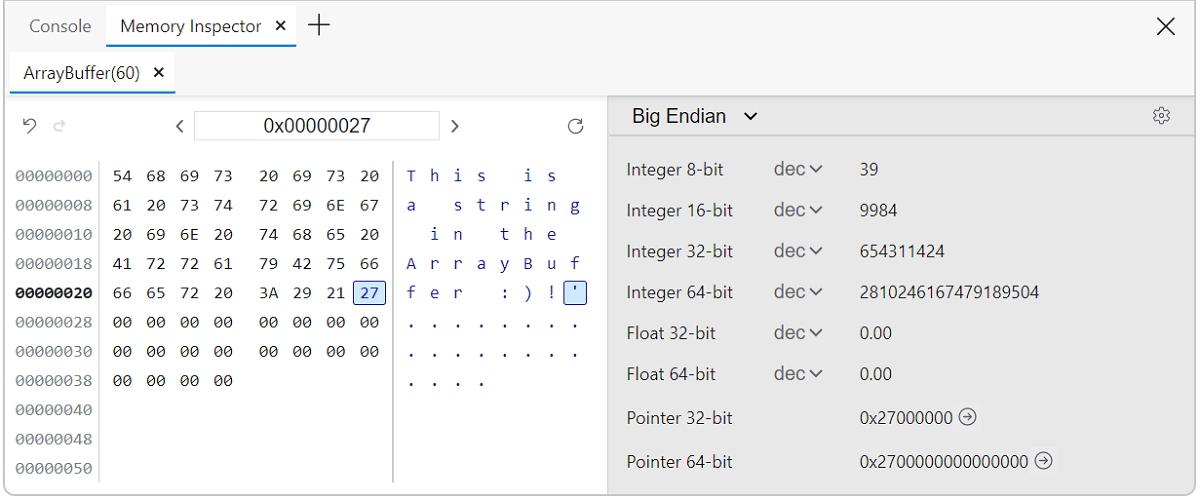
Click Resume script execution (
 ) or press F8 or Ctrl +\ to step through the code.
The ASCII representation and the value interpretations are updated.
Click the Jump to address button (
 ) for Pointer 32-bit or Pointer 64-bit as needed to jump to the next active memory address. If next memory address is not available, the button is turned off (
 ) with the tooltip Address out of memory range.
Customize the Value inspector to show only floating point values. Click Toggle value type settings (
) and clear all checkboxes except the two Floating point values.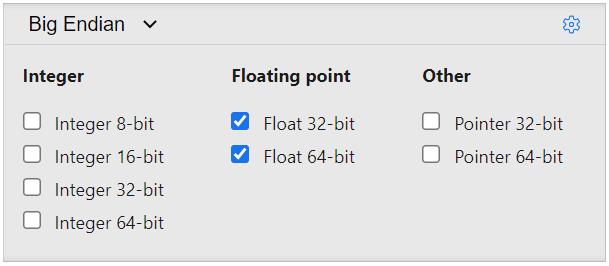
Click Toggle value type settings (
 ) to close the value type settings.
Use the dropdown lists to change the encoding from
dectosci. The value representations are updated.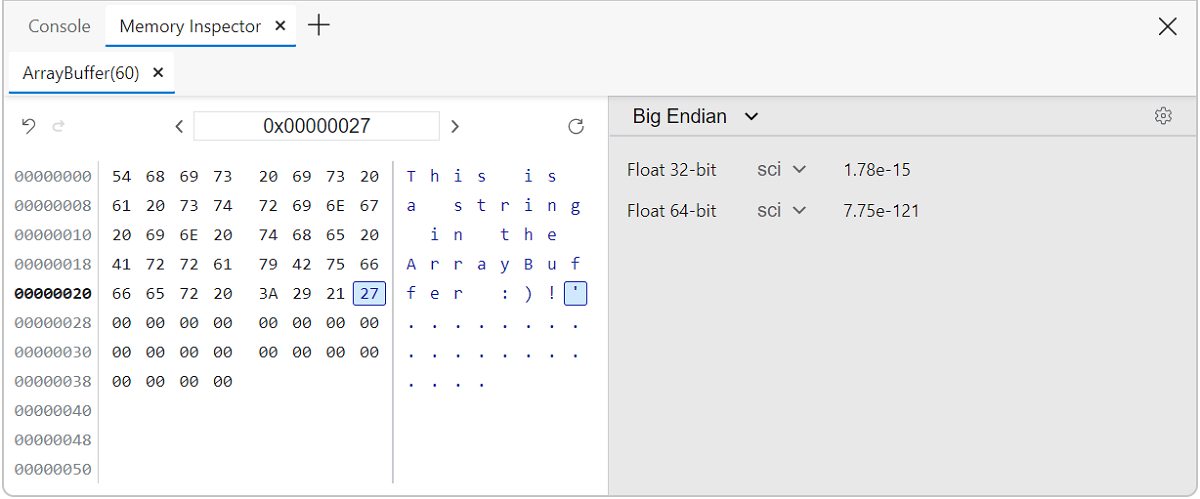
Explore the memory buffer using the keyboard or navigation bar.
Repeat steps 3 and 4 to observe value changes.
WebAssembly memory inspection
For WebAssembly (Wasm) memory inspection, the process is similar to inspecting JavaScript memory.
Open the Wasm test site Inspect Wasm memories (Memory in Wasm).
Open DevTools by pressing F12 or Ctrl+Shift+I (Windows, Linux) or Command+Option+I (macOS).
Click Sources and open the
memory-write.wasmfile.Set a breakpoint at the first line in the loop, hexadecimal value 0x03c.
Refresh the page.
In the debugger pane under Scope, expand the Module.
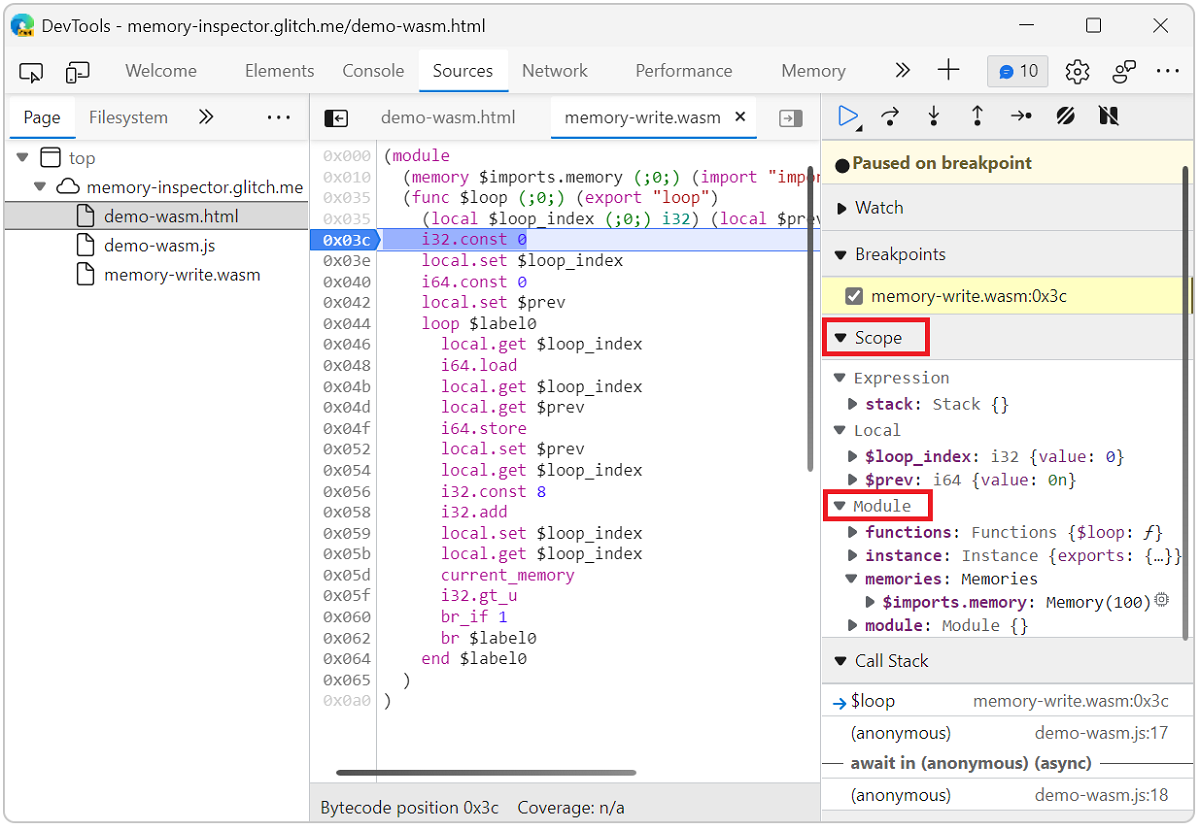
Click on the Reveal in Memory inspector panel icon (
) at the end of the $imports.memoryproperty line.The Wasm ArrayBuffer opens in Memory inspector.
Note
Portions of this page are modifications based on work created and shared by Google and used according to terms described in the Creative Commons Attribution 4.0 International License. The original page is found here and is authored by Kim-Anh Tran.
![]() This work is licensed under a Creative Commons Attribution 4.0 International License.
This work is licensed under a Creative Commons Attribution 4.0 International License.