Create an extension tutorial, part 1
The goal for this tutorial is to build a Microsoft Edge extension, starting with an empty directory. You are building an extension that pops up the NASA picture of the day. In this tutorial, you'll learn how to create an extension by:
- Creating a
manifest.jsonfile. - Adding icons.
- Opening a default pop-up dialog.
Before you begin
To test out the completed extension that you are building in this tutorial, download the source code from MicrosoftEdge-Extensions repo > extension-getting-started-part1. The source code has been updated from Manifest V2 to Manifest V3.
Step 1: Create a manifest.json file
Every extension package must have a manifest.json file at the root. The manifest provides details of your extension, the extension package version, the extension name and description, and so on.
The following code outlines the basic information needed in your manifest.json file:
{
    "name": "NASA picture of the day viewer",
    "version": "0.0.0.1",
    "manifest_version": 3,
    "description": "An extension to display the NASA picture of the day."
}
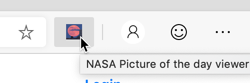
Step 2: Add icons
Start by creating the icons directory in your project to store the icon image files. The icons are used for the background image of the button that users select to launch the extension.
For icons:
- We recommend using
PNGformat, but you can also useBMP,GIF,ICOorJPEGformats. - We recommend using images that are 128 x 128 px, which are resized by the browser if necessary.
The directories of your project should be similar to the following structure:
└── part1
    ├── manifest.json
    └── icons
        ├── nasapod16x16.png
        ├── nasapod32x32.png
        ├── nasapod48x48.png
        └── nasapod128x128.png
Next, add the icons to the manifest.json file. Update your manifest.json file with the icons information so that it matches the following code. The png files listed in the following code are available in the download file mentioned earlier in this article.
{
    "name": "NASA picture of the day viewer",
    "version": "0.0.0.1",
    "manifest_version": 3,
    "description": "An extension to display the NASA picture of the day.",
    "icons": {
        "16": "icons/nasapod16x16.png",
        "32": "icons/nasapod32x32.png",
        "48": "icons/nasapod48x48.png",
        "128": "icons/nasapod128x128.png"
    }
}
Step 3: Open a default pop-up dialog
Now, create a HTML file to run when the user launches your extension. Create the HTML file named popup.html in a directory named popup. When users select the icon to launch the extension, popup/popup.html is displayed as a modal dialog.
Add the code from the following listing to popup.html to display the stars image:
<html lang="en">
    <head>
        <meta charset="UTF-8" />
        <title>NASA picture of the day</title>
    </head>
    <body>
        <div>
            <img src="/images/stars.jpeg" alt="Display the stars image" />
        </div>
    </body>
</html>
Ensure that you add the image file images/stars.jpeg to the images folder. The directories of your project should be similar to the following structure:
└── part1
    ├── manifest.json
    ├── icons
    │   ├── nasapod16x16.png
    │   ├── nasapod32x32.png
    │   ├── nasapod48x48.png
    │   └── nasapod128x128.png
    ├── images
    │   └── stars.jpeg
    └── popup
        └── popup.html
Finally, register the pop-up in manifest.json under browser_action (in Manifest V2) or under action (in Manifest V3), as shown in the following code:
{
    "name": "NASA picture of the day viewer",
    "version": "0.0.0.1",
    "manifest_version": 3,
    "description": "An extension to display the NASA picture of the day.",
    "icons": {
        "16": "icons/nasapod16x16.png",
        "32": "icons/nasapod32x32.png",
        "48": "icons/nasapod48x48.png",
        "128": "icons/nasapod128x128.png"
    },
    "action": {
        "default_popup": "popup/popup.html"
    }
}
Next steps
That's everything you need to develop a working extension. Now, continue on to sideload and test your extension. For more information, see Sideload an extension.
Feedback
Coming soon: Throughout 2024 we will be phasing out GitHub Issues as the feedback mechanism for content and replacing it with a new feedback system. For more information see: https://aka.ms/ContentUserFeedback.
Submit and view feedback for