Note
Access to this page requires authorization. You can try signing in or changing directories.
Access to this page requires authorization. You can try changing directories.
This article walks you through the initial setup of the DevTools extension. After installing DevTools, you'll be ready to follow the steps in Get started using the DevTools extension for Visual Studio Code.
This article helps you:
Install the DevTools extension.
Clone the Demos repo, which includes the demo-to-do web app.
Start a web server so you can use localhost URLs in the DevTools extension in Visual Studio Code.
Step 1: Install Visual Studio Code
- If not done already, in a separate window or tab, go to Download Visual Studio Code and download and install Visual Studio Code.
Step 2: Install Microsoft Edge
Microsoft Edge is required, for the DevTools extension for Visual Studio Code.
On Windows, Microsoft Edge is installed. On macOS or Linux, install Microsoft Edge as follows:
- Go to the Edge page at Microsoft.com.
Step 3: Install the Microsoft Edge DevTools extension
Install the Microsoft Edge DevTools extension for Visual Studio Code, as follows:
Open Visual Studio Code.
In the Activity Bar on the left, click the Extensions (
 ) button. Or, press Ctrl+Shift+X on Windows/Linux or Command+Shift+X on macOS. The Extensions Marketplace pane opens.
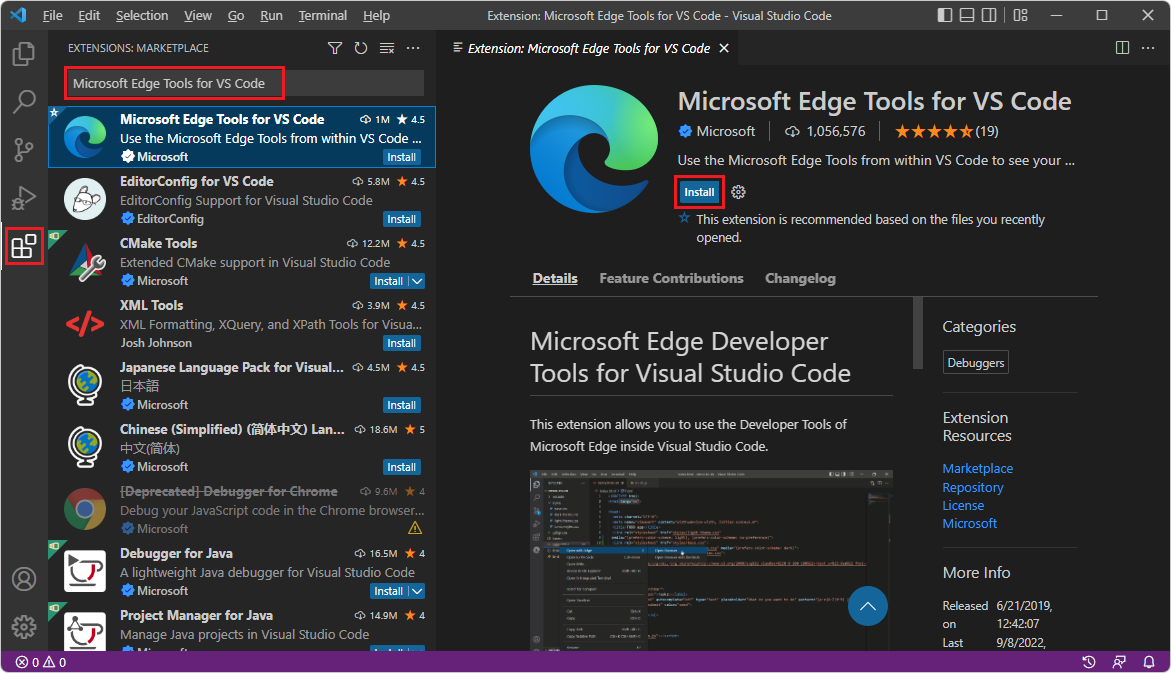
In the Search Extensions in Marketplace text box, enter Microsoft Edge Tools for VS Code.
Select the Microsoft Edge Tools for VS Code, and then click the Install button:
As an alternative approach, you can use the browser to download the Microsoft Edge DevTools extension from the Visual Studio Marketplace website. Go to Microsoft Edge Developer Tools for Visual Studio Code.
Step 4: Install Node.js and Node Package Manager (npm)
To get live (realtime) analysis of your code to indicate issues, such as with wavy underlines, and to offer Quick Fixes, you must install Node.js and Node Package Manager (npm).
The DevTools extension shows a popup suggestion to install Node.js and npm. The suggestion text is similar to: "Install Node.js & npm? (suggested because you installed this extension)".
Click the link in the popup, if it opens.
Install Node.js and npm from Node.js > Downloads > LTS (long-term stable) (or, Current).
On Windows, a
.msifile is downloaded, such as:node-v18.17.1-x64.msiIn the browser's Downloads pane, click Show in folder, and then run the downloaded file. The Node.js Setup Wizard opens. Click the Next button, and then follow the prompts. You can use the default options.
Confirm that Node.js and npm are installed, as follows: in Visual Studio Code, select View > Terminal. Or, run the git bash app.
At the command prompt, enter
npm version. Version numbers are displayed fornpmand fornode, indicating that Node Package Manager and Node.js are installed, to support inline and live issue analysis. For example:$ npm version { npm: '10.9.2', node: '22.14.0', ... }
See also:
Step 5: Clone the Demos repo
Cloning the Demos repo is optional. The Demos repo is useful for following the various DevTools documentation. If you want, instead of cloning the repo, you can open an existing project directory if you have one.
As another alternative, instead of cloning the entire directory, you can download only the demo-to-do directory. For example, go to https://download-directory.github.io/ and then paste the URL https://github.com/MicrosoftEdge/Demos/tree/main/demo-to-do. The .zip file is placed in your download directory. Unzip these webpage source files into a suitable location. The tutorial Get started using the DevTools extension for Visual Studio Code uses the example location:
C:\Users\username\Documents\GitHub\Demos\demo-to-do\
To clone the Demos repo to use the demo-to-do sample for this tutorial:
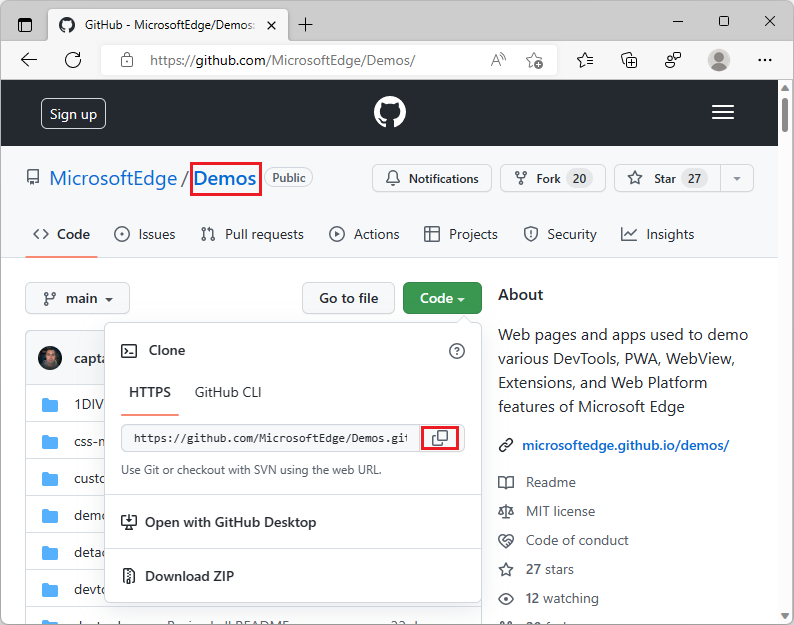
Go to the MicrosoftEdge / Demos repo.
If the green Code button isn't shown, click Demos in the path Microsoft Edge / Demos in the upper left to go to the main page of the repo.
Click the green Code button, and then select the Copy button. This article assumes you're using the Source Control features within Visual Studio Code. Or, you can use one of the other methods that are provided, if you know that you want to use that approach instead:
- Open with GitHub Desktop
- Open with Visual Studio
- Download ZIP
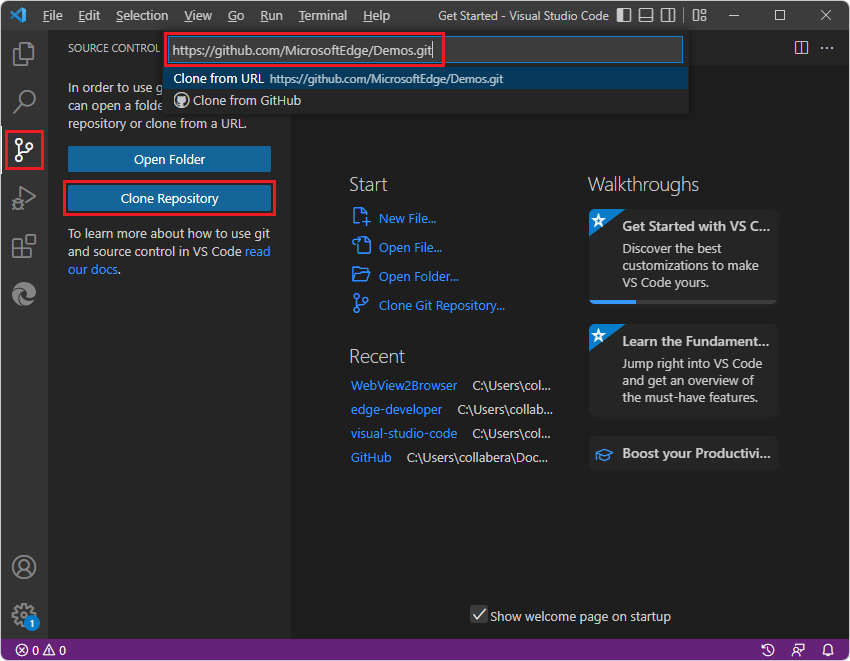
In Visual Studio Code, in the Activity Bar, click the Source Control (
 ) button, and then click the Clone Repository button.
In the Provide repository URL text box, paste the copied URL: https://github.com/MicrosoftEdge/Demos.git and then press Enter. A folder selection dialog opens.
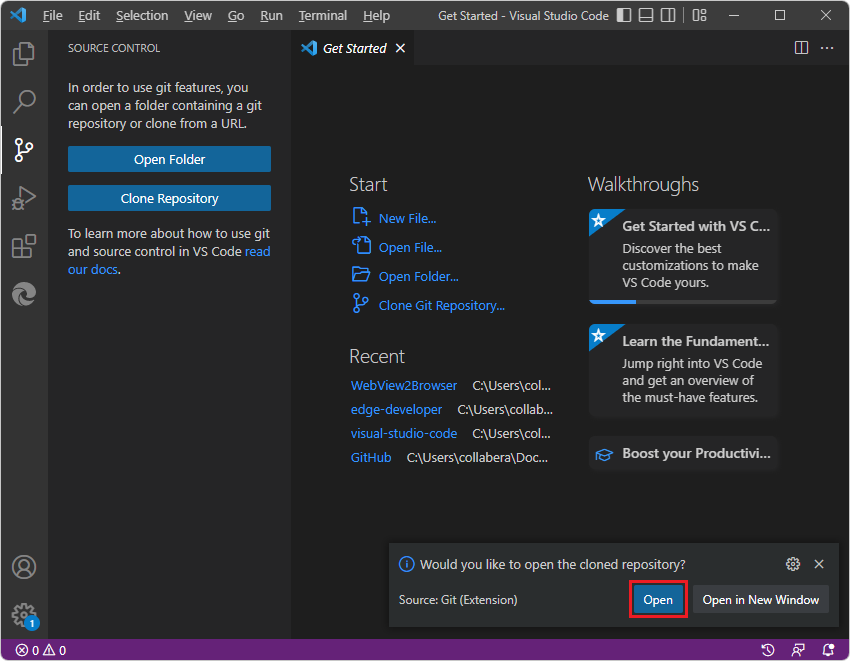
Navigate to your desired path, such as
C:\Users\username\Documents\GitHuborUsers/username/GitHub, and then click the Select Repository Location button.The message Cloning git repository appears, then you're prompted to open the cloned repository. Click the Open button:
If prompted Do you trust..., click the Yes button. Or, click the No button and continue with most parts of this walkthrough.
The Explorer tree lists many demos, including demo-to-do.
In Visual Studio Code, select File > Close Folder.
In the Activity Bar, click the Microsoft Edge Tools (
 ) button. The Microsoft Edge Tools pane opens.
In the Microsoft Edge Tools > Targets pane, click the Open Folder button. The Open Folder dialog opens. Navigate to the
demo-to-dofolder in the Demo repo that you cloned, select the folder or go into it, and then click the Select Folder button: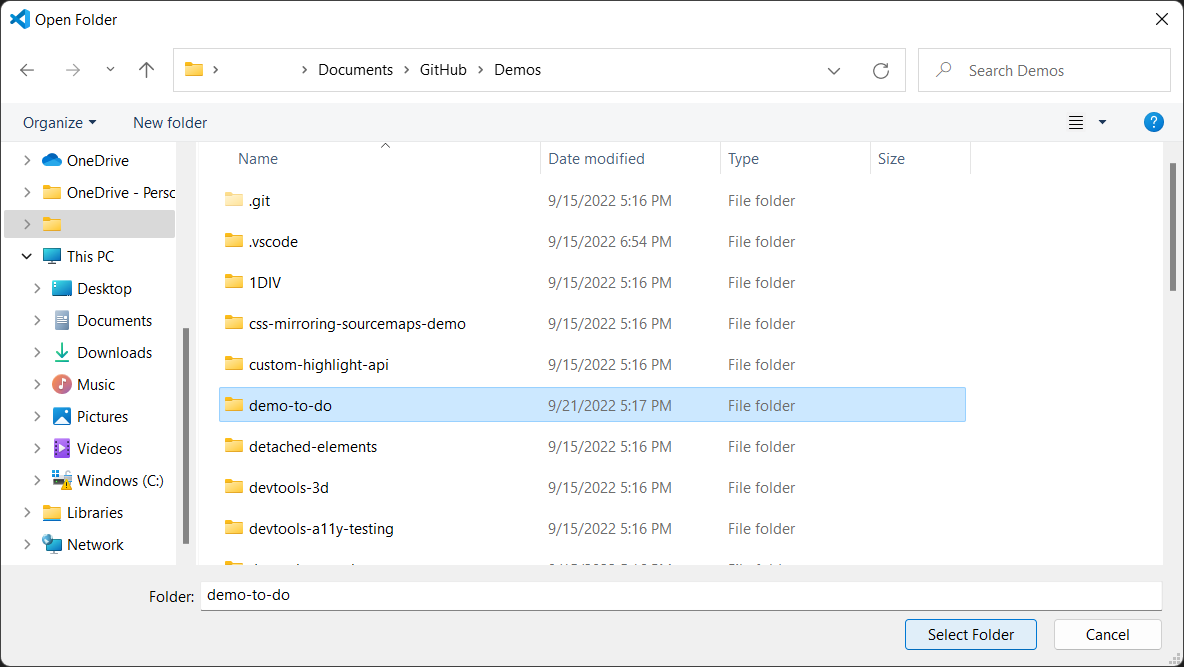
An example of a repo location where the Demos repo has been cloned is shown above. The
demo-to-dofolder of the cloned Demos repo opens in the Explorer of Visual Studio Code, and nolaunch.jsonfile exists yet: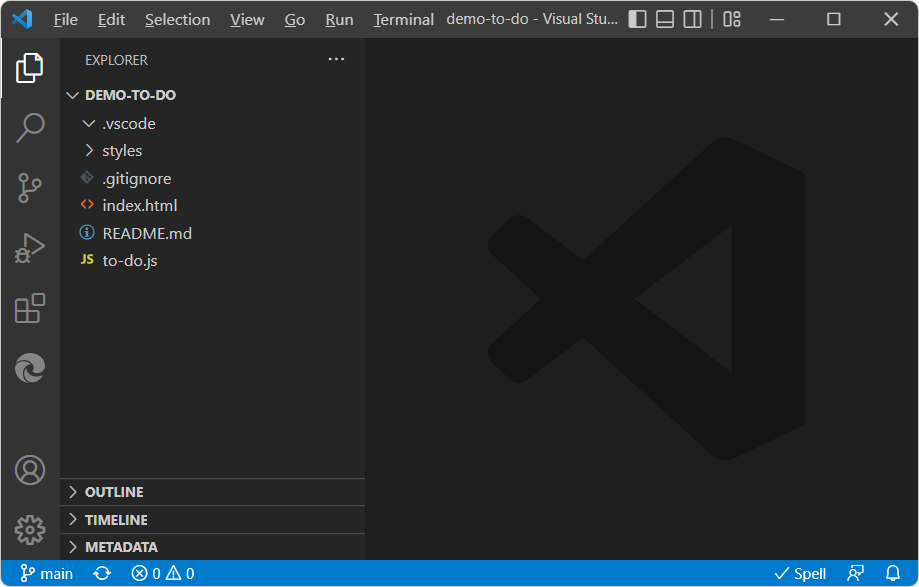
Step 6: Set up a localhost server
If you installed Node.js and npm, as described above, npx http-server is a simple way to start a local web server. You can skip to the steps below, or read this background information first.
In many cases, you don't need to enter a URL or run a localhost server. For example, you can:
- Open a folder that contains webpage source files, and then right-click an
.htmlfile. - Enter a local file path in the Address bar, such as
C:/Users/username/.vscode/extensions/ms-edgedevtools.vscode-edge-devtools-2.1.1/out/startpage/index.html(the default, Success page). - Enter a remote server URL in the Address bar of the Edge DevTools: Browser tab, such as https://microsoftedge.github.io/Demos/demo-to-do/.
If your webpage uses certain APIs that require the webpage to be running on a web server, to use DevTools, you must start a local web server for testing. If you don't serve out your project on a webserver, but only instead, you use local files, you can still use DevTools, with debugging ability, by right-clicking a local .html file. Functionality of your app which specifically requires your app to be on a server won't work, and DevTools will have limited utility.
For information about http-server, see http-server: a simple static HTTP server.
Set up http-server
In Visual Studio Code, select File > Open Folder > open the directory that contains the
.html,.css, and.jsfiles for a webpage, such asC:\Users\username\Documents\GitHub\Demos\demo-to-do\.In the above example path:
\Documents\GitHub\is where theDemosrepo was cloned to.\Demos\is the GitHub repo that's used for examples in the Microsoft Edge Developer documentation.\demo-to-do\is one of the sample directories in the repo.
In Visual Studio Code, select View > Terminal. Or, to keep the web server running regardless of Visual Studio's state, open a command prompt outside of Visual Studio Code, such as
git bash.cdinto the folder that you want to serve via http.In the git bash shell, use forward slashes, such as:
cd C:/Users/username/Documents/GitHub/Demos/demo-to-do/Or, if you are using a different command prompt on Windows, use backslashes, such as:
cd C:\Users\username\Documents\GitHub\Demos\demo-to-do\
Continue below.
Start the server (npx http-server)
These steps start the server for the first time.
Enter the command
npx http-server:npx http-serverA local webserver starts on port 8080.
You might receive a message like:
Need to install the following packages:
  http-server@14.1.1
Ok to proceed? (y)
Or, if you get no such file or directory, you can run:
npm install --global http-serverand then run:http-serverEnter y.
Windows prompts whether to allow Node to communicate on the network:
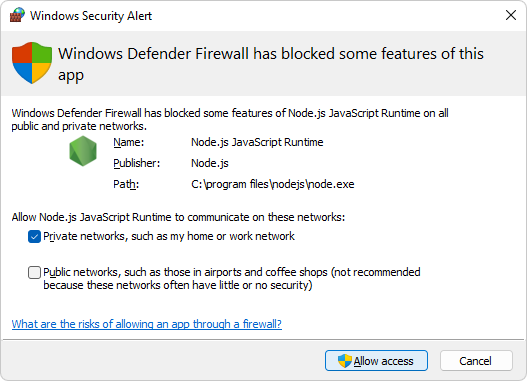
Select the Private networks checkbox, and then click the Allow access button.
Information about the server and localhost URL is displayed, such as:
Starting up http-server, serving ./

Available on:
http://10.0.1.8:8080
http://127.0.0.1:8080
Hit CTRL-C to stop the server
The displayed URLs are usually equivalent to the common standard URL,
http://localhost:8080.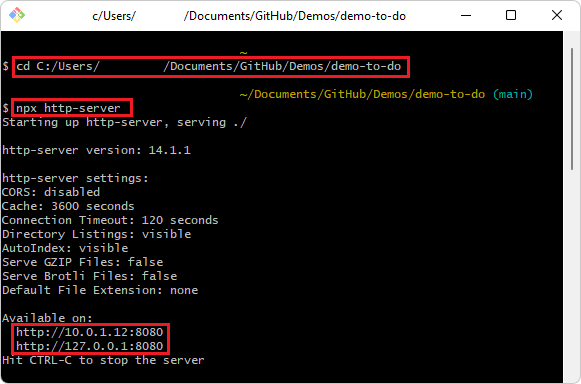
Next, see Get started using the DevTools extension for Visual Studio Code.