Note
Access to this page requires authorization. You can try signing in or changing directories.
Access to this page requires authorization. You can try changing directories.
The GitHub Server Knowledge Microsoft 365 Copilot connector enables organizations to index Markdown and text-based knowledge from GitHub Enterprise repositories into Microsoft 365 Copilot and Microsoft Search experiences. This article provides information about the configuration steps that GitHub admins need to complete before your organization deploys the GitHub Server Knowledge connector.
For information about how to deploy the connector, see Deploy the GitHub Server Knowledge connector.
Setup checklist
The following checklist lists the steps involved in configuring the environment and setting up the connector prerequisites.
| Task | Role |
|---|---|
| Identify the organization name | GitHub admin |
| Ensure API access to the target GitHub instance | GitHub admin |
| Define Microsoft Entra ID identity mapping rules | GitHub admin |
| Sign in to the GitHub account | GitHub admin |
| Configure a custom GitHub app for authentication | GitHub admin |
| Adjust GitHub Server API rate limit | GitHub admin |
Identify the organization name
Determine which GitHub organization to use for the connector setup.
Ensure API access to the target GitHub instance
Confirm that your GitHub Enterprise instance is accessible via API.
Define Microsoft Entra ID mapping rules
Make sure that users who access indexed GitHub data have corresponding Microsoft Entra ID identities to enable accurate permission mapping. Mapping options include email, login, and name attributes.
Sign in to the GitHub account
Important
Before you start the GitHub authentication flow, make sure your browser session is signed in to the correct GitHub account. The account needs access to the organizations and repositories you intend to index. OAuth (the recommended authentication method) authorizes whichever GitHub account is currently active in your browser, so signing in with the wrong account can grant the connector access to the wrong set of repositories.
If you have multiple GitHub accounts, sign out of the others first, or use a separate browser profile or an InPrivate/incognito window to start the OAuth flow with the intended account.
For enterprise-managed users who authenticate via single sign-on (SSO), make sure the account is signed in before you set up the connector. The GitHub authentication flow doesn't currently support SSO-based sign-in during configuration.
Use a custom GitHub app for authentication
For the most streamlined setup experience, use the GitHub app managed by Microsoft.
You can also choose to use your own GitHub app for authentication. If you choose this option, follow the steps in the following checklist to complete the setup.
| Task | Role |
|---|---|
| Create and configure the GitHub app | GitHub admin |
| Create credentials for the GitHub app | GitHub admin |
| Install the GitHub app | GitHub admin |
Create and configure the GitHub app
Verify that you have the right permissions assigned to configure the GitHub service. For more information, see Roles in an organization.
To create a GitHub app for use with the GitHub Server Knowledge connector:
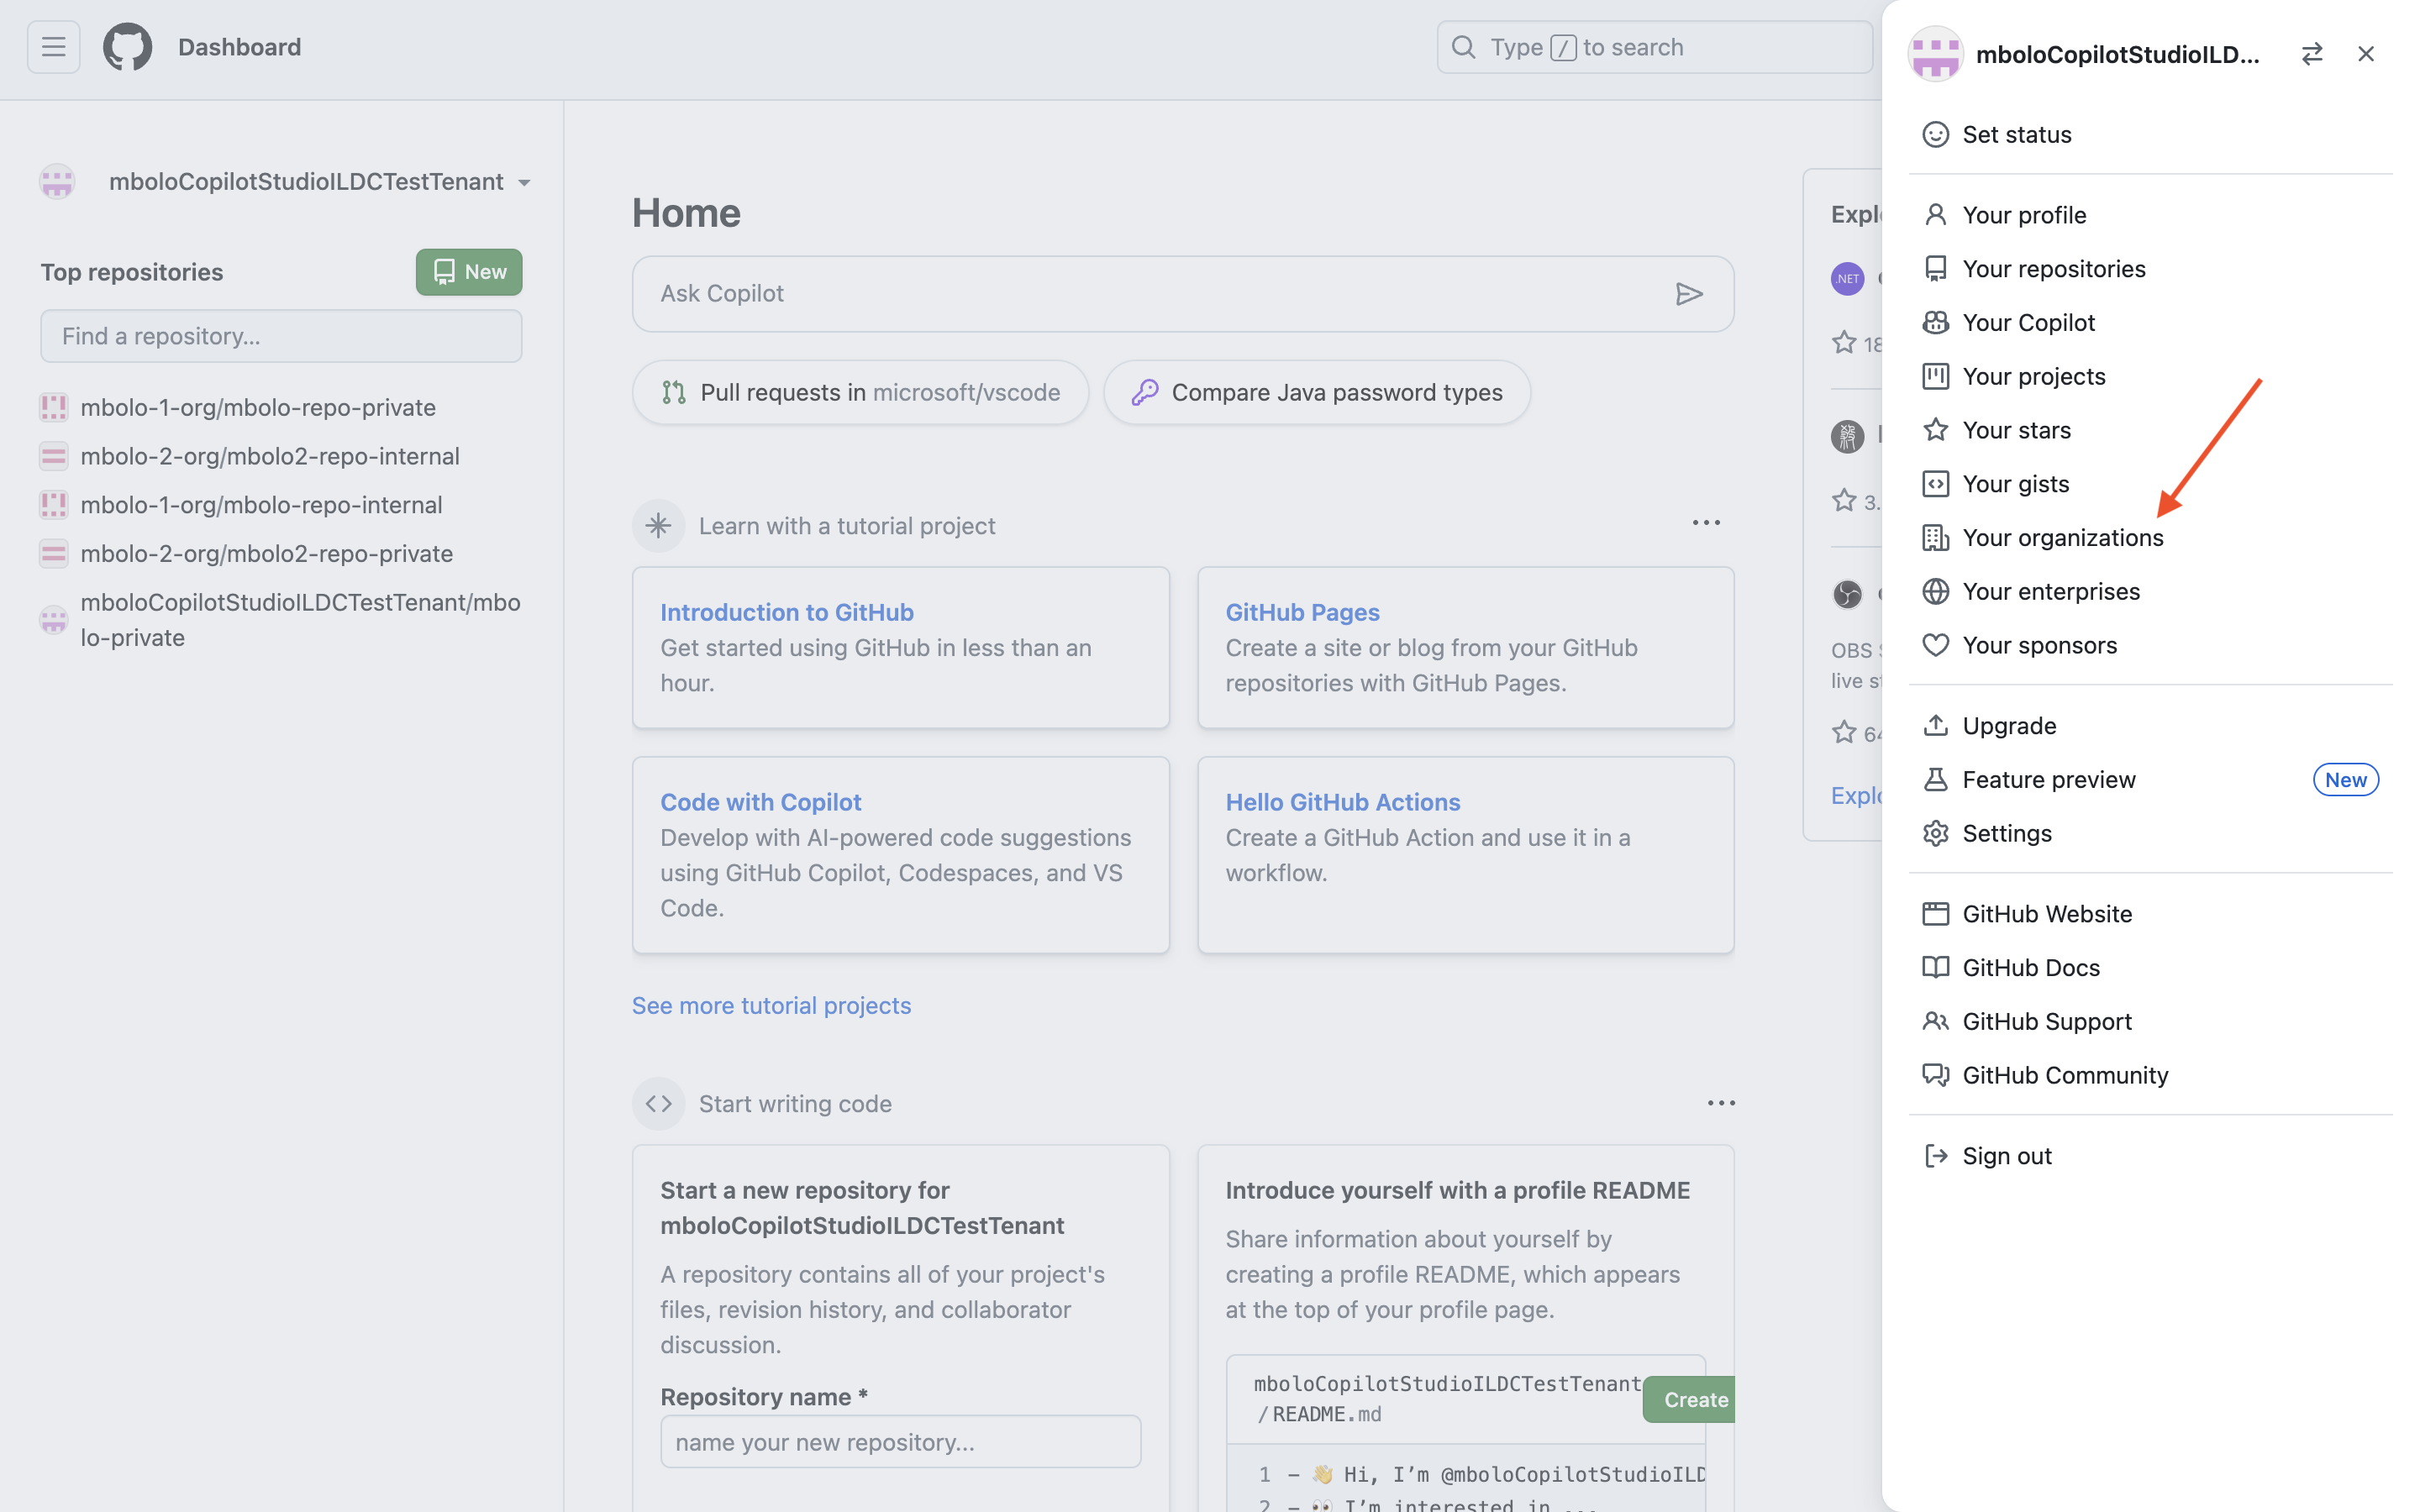
In GitHub, select your profile photo on the top right, select Organizations, and choose the organization the connector should pull data from.
On the organization overview page, select Settings.
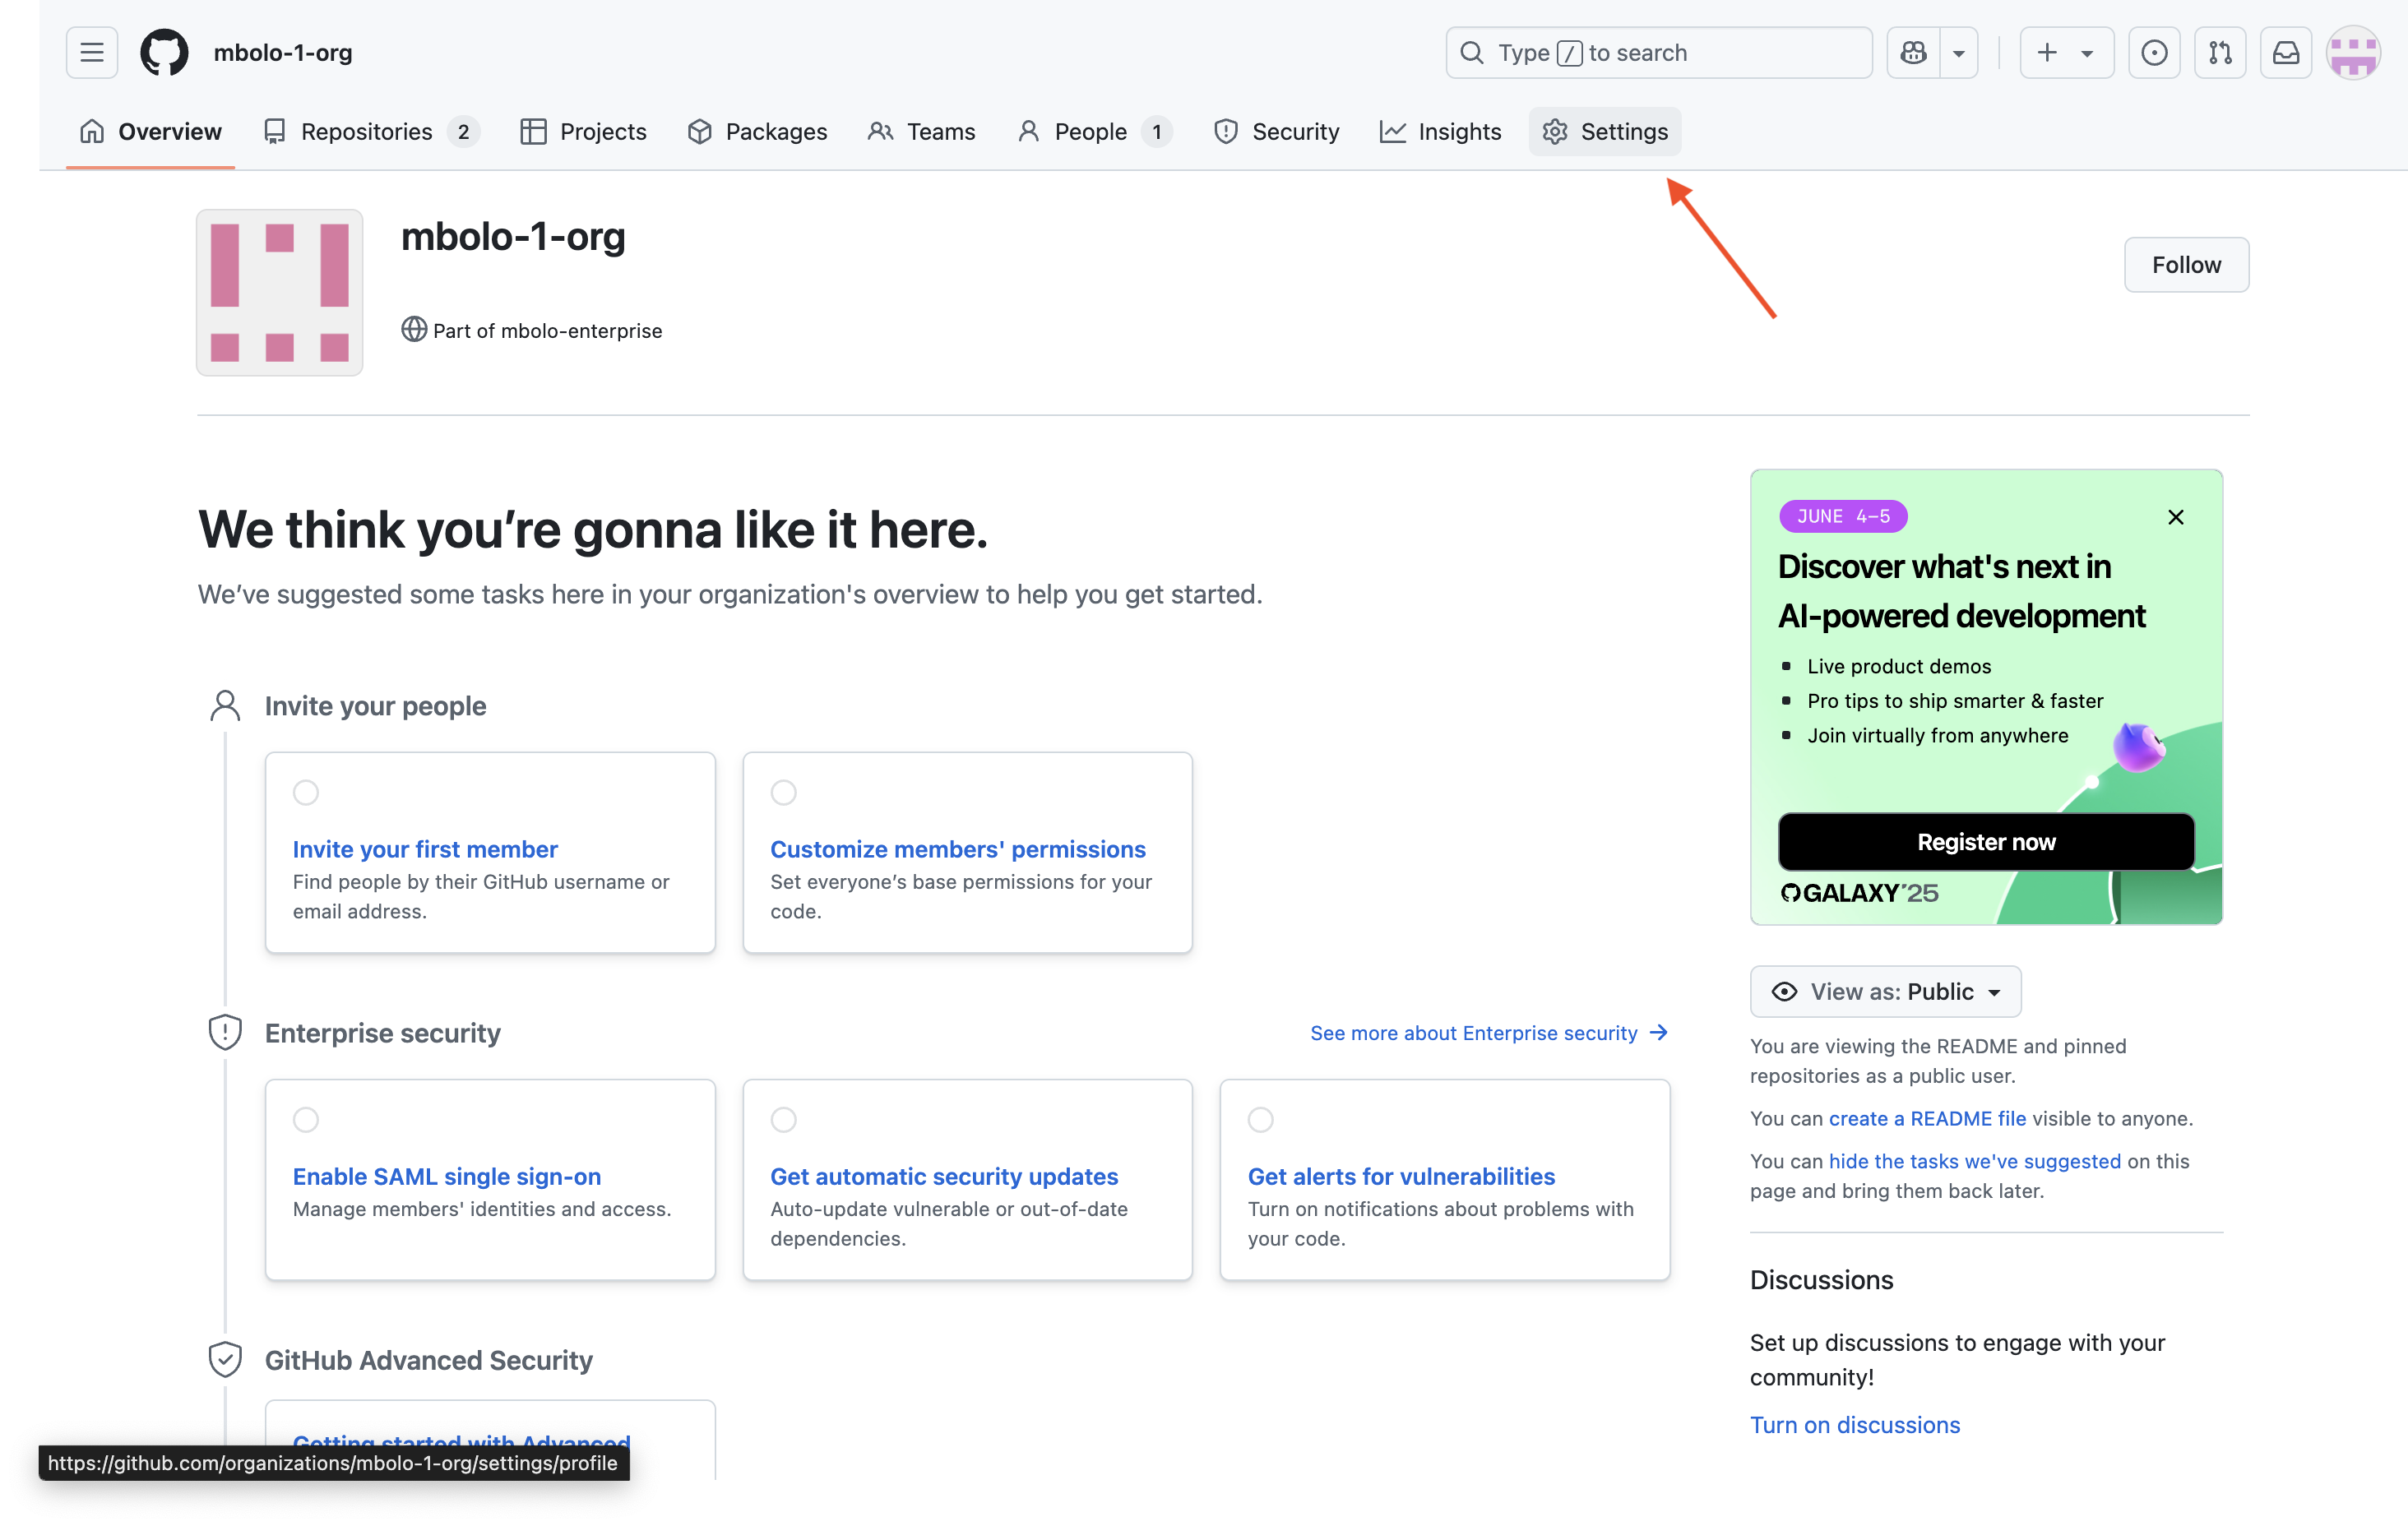
In the left sidebar, scroll down to Developer settings and select GitHub Apps.

Select New GitHub App.

Configure the app:
- GitHub App name: Enter the name of your choice.
- Homepage URL: Copy the URL from your browser's address bar.
- Callback URL:
- For Microsoft 365 for enterprise:
https://gcs.office.com/v1.0/admin/oauth/callback - For Microsoft 365 Government:
https://gcsgcc.office.com/v1.0/admin/oauth/callback
- For Microsoft 365 for enterprise:
Uncheck the Webhook option.
Set the following permissions:
Repository permissions
- Contents - Read-only
- Metadata - Read-only
- Administration - Read-only
Organization permissions
- Members - Read-only
- Administration - Read-only
Account permissions
- Email addresses - Read-only
Under Where can this GitHub App be installed, select Any account, and then select Create GitHub App.
Create credentials for the GitHub app
Depending on the authentication method you plan to use, generate either a client secret or a private key. You don't need both.
For custom GitHub app (on behalf of user) authentication: On the General page of the GitHub app, select Generate a new client secret to generate and copy the client secret.

For custom GitHub app (installation) authentication: On the General page of the GitHub app, scroll down to the Private keys section and select Generate a private key. Save the downloaded
.pemfile securely.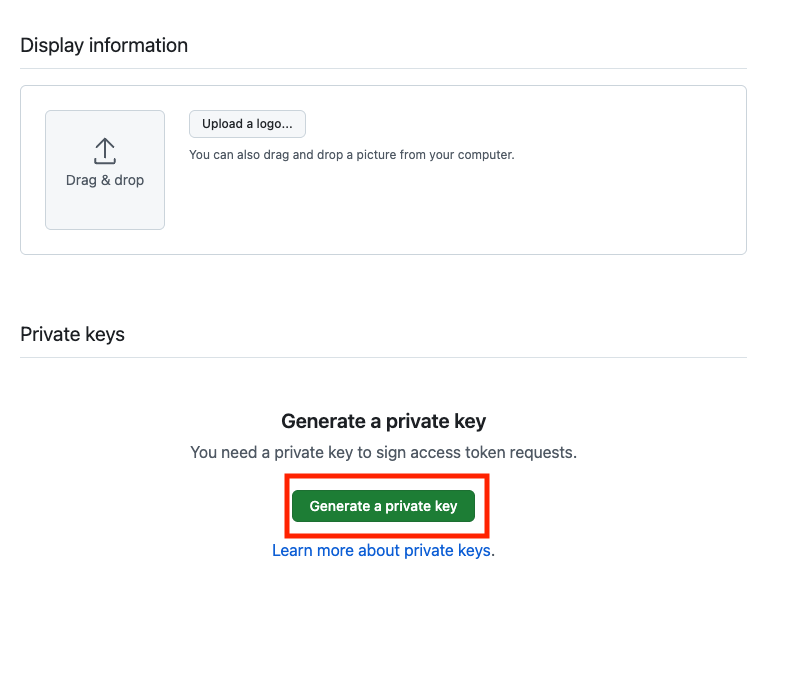


Install the GitHub app
On the General page of the GitHub app, select Install App.
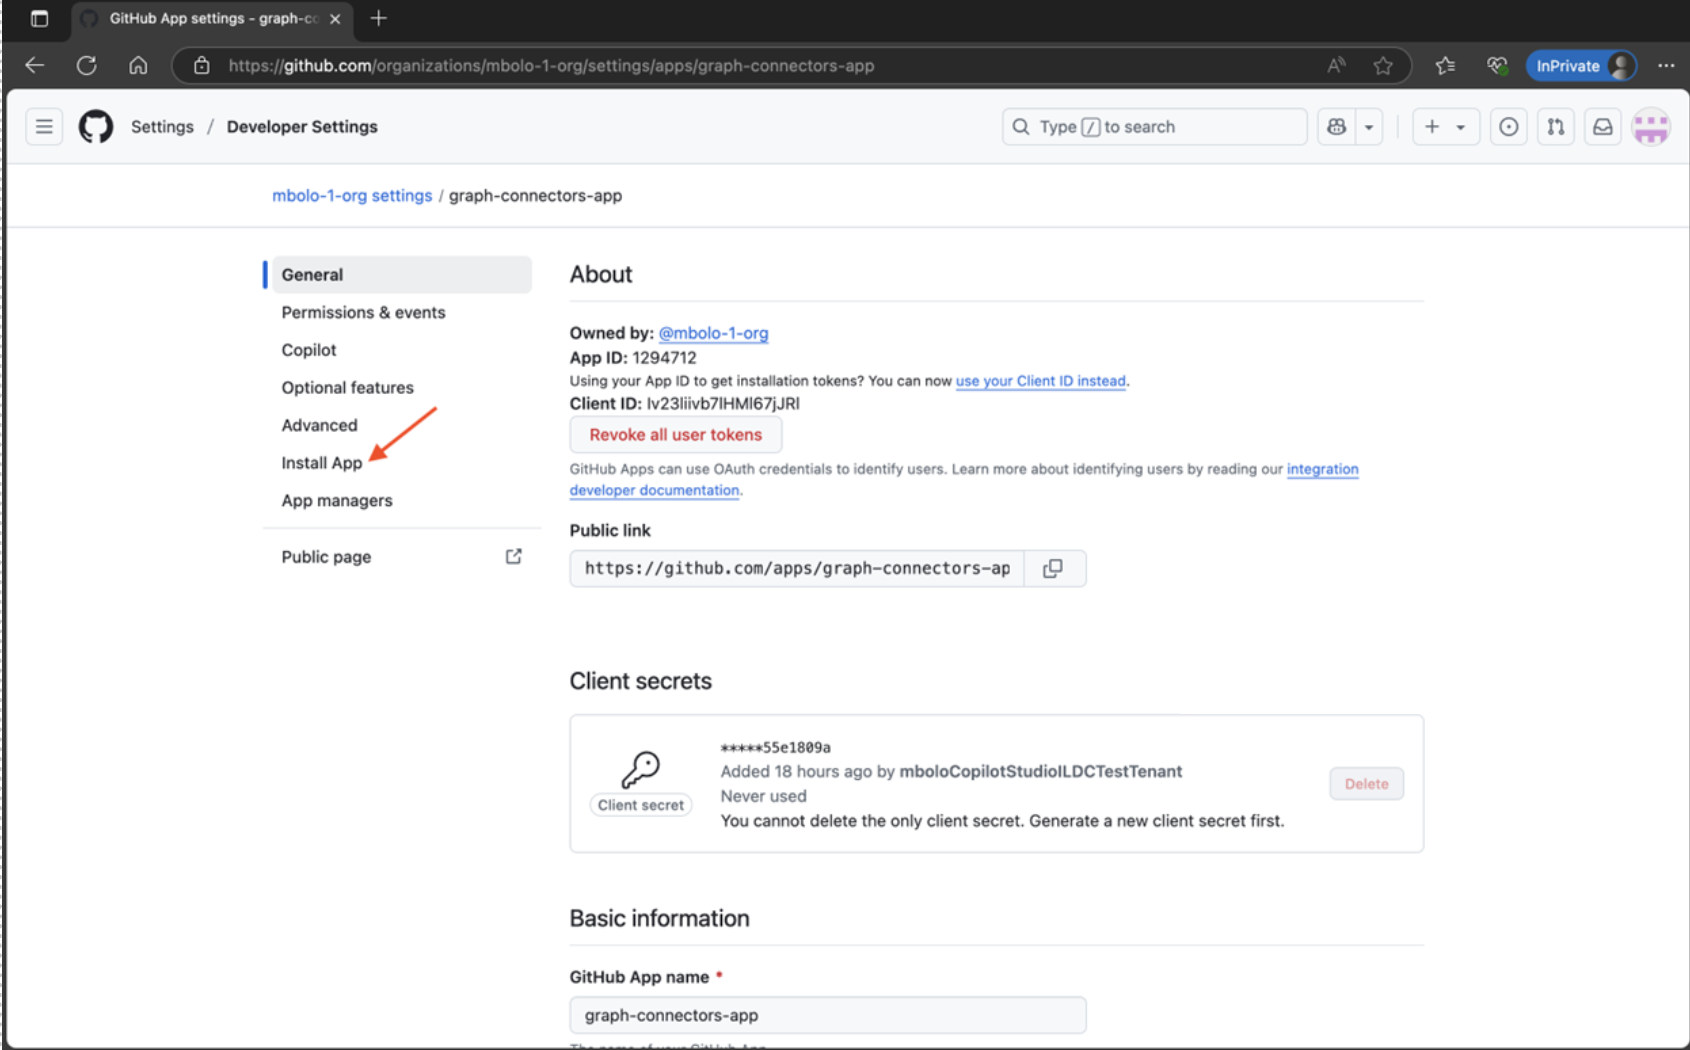
Select the organization where you want the app to be installed.
Adjust GitHub Server API rate limit
When you ingest large volumes of GitHub data—such as pull requests, issues, or knowledge files—the API rate‑limit configuration in your GitHub Server environment directly affects how quickly the ingestion process is completed. GitHub Server applies a default API limit of 15,000 authenticated requests per hour per user or token. This limit supports smaller datasets, but can slow ingestion when hundreds of thousands or millions of items are processed.
If your organization needs to increase throughput, you can raise the API rate limit. Higher limits allow the connector to retrieve items more quickly, but they also increase load on your GitHub Server infrastructure. Before you update rate‑limit settings, verify that your environment has adequate CPU capacity, storage I/O, and network bandwidth to support the increased request volume. After you update the limit, monitor system performance to ensure stable ingestion at higher throughput.
Rate-limit setting recommendations
Use the guidance in the following table to help you choose an appropriate rate‑limit setting based on the approximate number of pull requests in your GitHub environment.
| Approximate number of items | Recommended rate-limit setting | Approximate time to complete ingestion |
|---|---|---|
| Up to 100,000 | Use default rate‑limit settings (normal ingestion speed) | NA |
| 100,000 to 1,000,000 | Increase rate limit to 30,000 requests/hour | 2 days to 1 week |
| 1,000,000 or more | Use 30,000 requests/hour or higher (depending on server capacity) | 1–2 weeks (varies by environment load) |
Update the API rate-limit setting
To increase the API request limit:
- Sign in to your GitHub Server instance with an admin account.
- In the upper‑right corner, select Site admin to enter administration mode. For more information, see Configuring rate limits.
- In the left pane, select Management Console (or Admin Console, depending on your version).
- Open the Rate limiting tab.
- Confirm that Enable HTTP API rate limiting is selected.
- Under API requests (per hour) – Authenticated, enter the rate‑limit value (for example, 30000).
- Select Save settings.

Note
When you save your changes, certain GitHub Server services might restart and cause a brief service interruption. After you save, allow time for the configuration to propagate across the instance.