Note
Access to this page requires authorization. You can try signing in or changing directories.
Access to this page requires authorization. You can try changing directories.


The devices you choose for your traditional Microsoft Teams Rooms or Signature Microsoft Teams Rooms space depend on your room's design and budget. This article helps you understand what devices you need to create your Teams Rooms space, considerations to help you choose what's right for you, and example devices so you can see what options are available.
At minimum, you need each of the following:
- A touchscreen console and compute module - These devices lets you and participants control the Teams Room.
- A display - The display shows participant and meeting content to in-room participants.
- A sound bar with integrated camera and microphone - A sound bar is an all-in-one solution to get your space up and running with little effort.
If you want more flexibility than a sound bar provides, you can choose cameras, microphones, and speakers, independently.
Note
The devices and manufacturers listed in this article are examples of available products only and don't represent specific recommendations. To see a broader list of available devices and manufacturers, see https://aka.ms/teamsdevices.
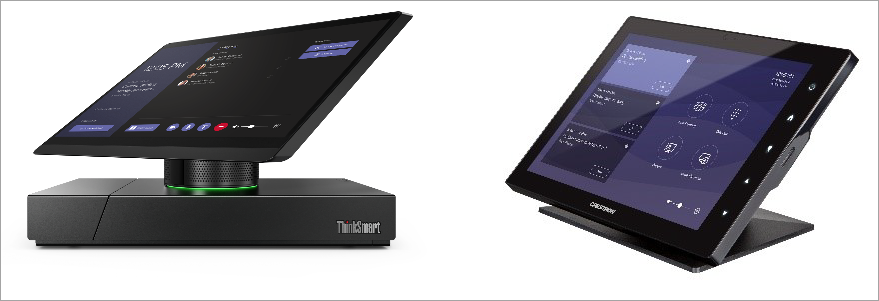
Touchscreen console and compute module
The touchscreen console is the device that users interact with when joining and managing a meeting. The compute module is the brains of Teams Rooms and runs Windows 10 Enterprise IoT.
Most consoles and compute modules are bundled into a single product. Some manufacturers combine the console and compute module into a single unit that sits on the conference table. Other manufacturers have a smaller console that sits on the conference table while the compute module is hidden away.
Whether you choose a single unit or split console and compute units up depends on your room design. For example, where do you want to route power and audio-visual cables? Are there network ports accessible from the conference table or only in a nearby wall? It's also important to think about what peripherals you need to connect to the compute module. Does it have enough USB, HDMI, and other ports?
Review the design requirements list for your space and which devices and peripherals you want to add to the room (cameras, microphone arrays, and so on). Then select a console and compute module that meet all the needs of your space.
The following are examples of touchscreen console and compute module bundles for Teams Rooms:
Displays
Displays bring your content to life and can be a large flat screen TV or a projector that projects onto a screen. You can have a single display that has your content and video feeds combined, or you can set up dual displays with content on one display and video feeds on the other. One of the displays can even be touch-enabled for interactive inking.
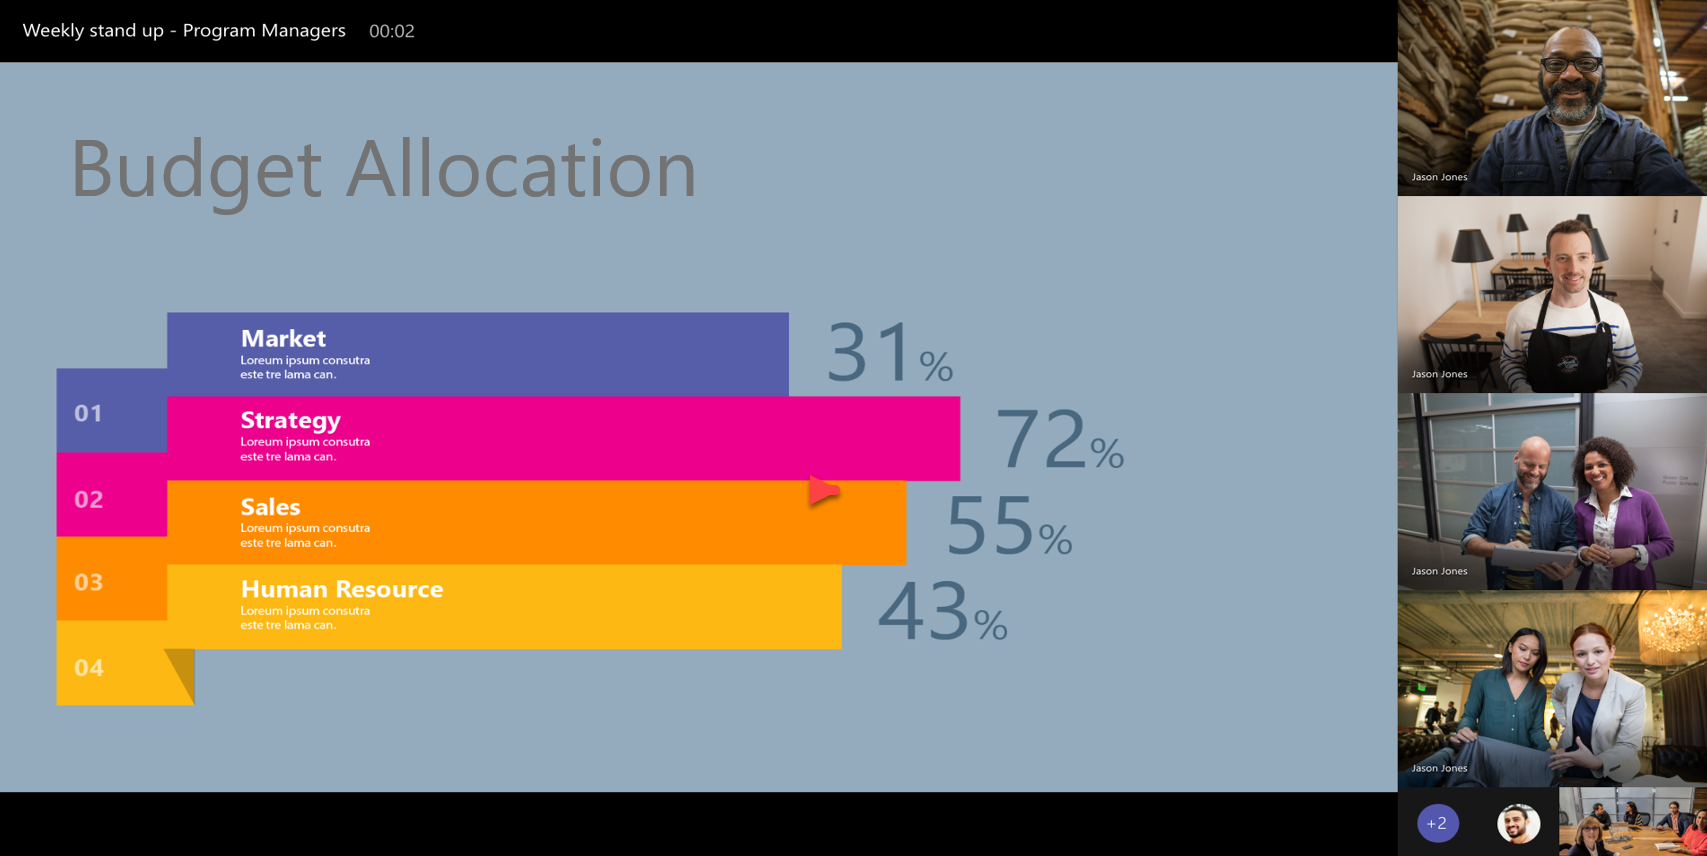
Make sure the display you choose is sized properly for the space it's in. A 55-inch display can seem large but when used to display content such as Word documents or Excel spreadsheets, on-screen text can end up being too small for those furthest from the display.
When considering a display, look at its specifications to find out what size room it's best suited for. Also keep in mind that while 4K displays are supported, Teams provides a maximum resolution of 1080p.
The following are examples of displays for Teams Rooms:
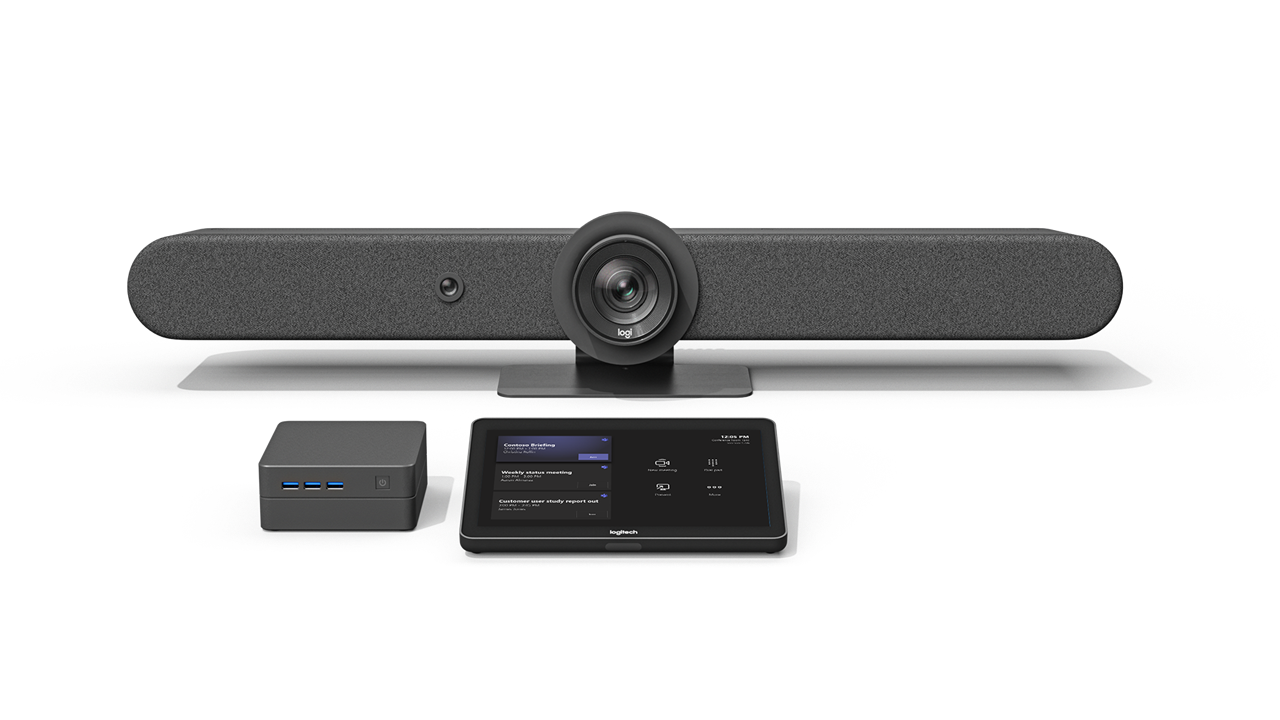
Sound bars
Do you have a smaller meeting space that you want to quickly turn into a Teams Rooms-enabled space? If yes, all you might need is a soundbar with an integrated camera.
Several manufacturers make soundbars with integrated cameras, microphones, and speakers. Some even bundle soundbars with a touchscreen console and compute module bundle. This can be a great, cost effective, option if you have a smaller space that you want to enable for Teams Rooms quickly.
Soundbars are typically set up at the front of the room directly under the display. From here, the camera should have a view of all the in-room participants and the microphones should be able to hear their voices.
Keep in mind that the same considerations for cameras, speakers, and microphones apply when thinking about using a soundbar:
- The camera needs to have a field of view that will capture all participants in the room.
- The speakers need to be loud enough for all participants to hear conversations and media.
- In-room participants need to be within the microphones' pickup distance.
The following are examples of sound bars for Teams Rooms:
To see all the available options for Teams Rooms soundbars, see Teams Rooms soundbars.
If you choose to use a soundbar, the remaining sections in the article are optional and for information only.
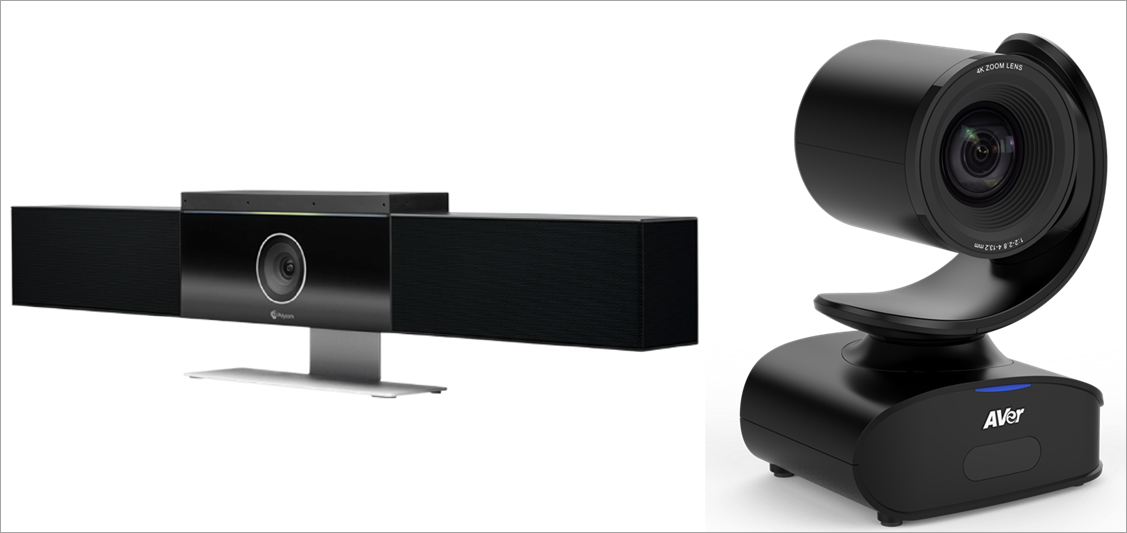
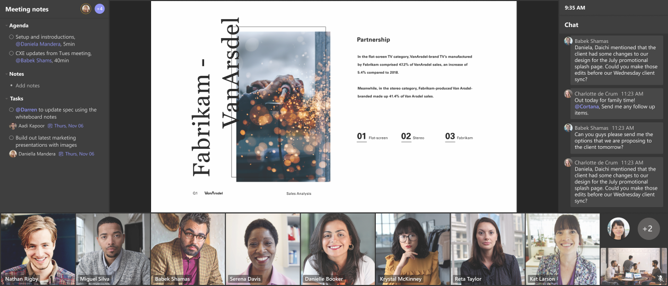
Primary camera
The primary camera brings together in-room and remote participants. This is the camera that captures the room and who's in it. It's important for remote participants to see who's talking, reactions of those in the room, their body language, and so on.
When deciding on a camera, you need to consider a few factors:
- How well the camera you choose can handle the lighting in the room.
- Do you need pan, tilt, and zoom, or can it be a static camera?
- What the camera's field of view should be.
- Do you want a soundbar with an integrated camera?
The camera's field of view particularly is important. The wider the field of view, the less depth the camera can focus on accurately. The narrower the field of view, the deeper into the room the camera can look. You need to choose a camera that will capture all the attendees in the room while ensuring the camera's field of view isn't so wide that participants become nothing more than tiny specks. For this reason, we recommend placing cameras as near to eye-level as possible and as centered as possible under the display.
The following are examples of primary cameras for Teams Rooms:
To see all the available options for Teams Rooms cameras, see Teams Rooms cameras.
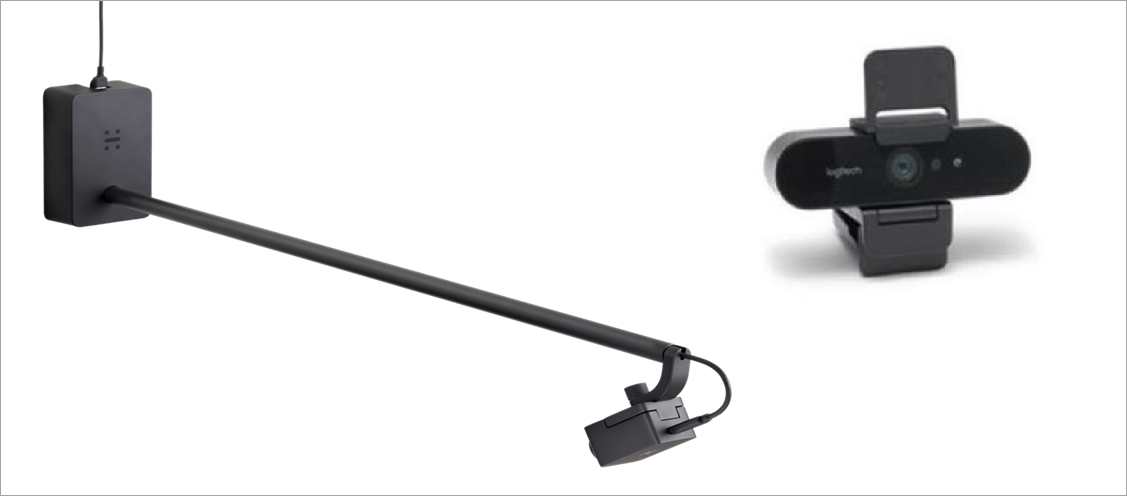
Content camera
Content cameras make it easier for remote participants to see what's on an analog whiteboard. When pointed at a whiteboard, the content camera superimposes the whiteboard drawings over the person using the whiteboard so the drawings are never obscured.
The recommended whiteboard width for use with a content camera is between 6 and 9 feet (1.7 to 2.7 meters). Whiteboards as small as 3 feet (0.9 meters) wide and as wide as 12 feet (3.6 meters) are also supported. Drawings outside the 12 foot area aren't captured by the camera.
If your whiteboard is wider than 12 feet, we recommend using colored tape to mark out a 12 foot area. This helps meeting participants stay within the capture area of the camera and helps the camera see where participants will place their drawings.
The following are examples of content cameras for Teams Rooms:
To see all the available options for Teams Rooms content cameras, see Teams Rooms content cameras.
For more information about content camera placement, see Content cameras.
Microphones and speakers
Most manufacturers have created solutions that bundle microphones and speakers together into an audio system. These audio systems include everything you need to integrate with the Teams Rooms compute module, ensure high quality audio for in-room and remote participants, and reduce noise interference.
There are a wide variety of audio systems available. When choosing an audio system, consider the various aspects of your space's use and design. For example:
- Size and design of the room - A larger room will require more microphones and speakers. Rooms with glass walls or other similar materials might require in-ceiling speakers.
- Seating locations - All participants need to be within range of at least one microphone. A room with a central conference table and secondary seating might require microphones both at on the table and in-ceiling for those not at the table.
- Conference table size - A large conference table might require two or more microphones to provide proper coverage to everyone seated at it.
In addition to space use and design, keep the following technical considerations in mind:
- Microphone spacing - At least one microphone should be within 7.5 feet (2.3 meters) of each participant (some microphones may have more specific requirements; see manufacturer's documentation for details).
- Microphone coverage - If multiple microphones are needed to cover all participants, make sure their coverage areas overlap to ensure complete coverage.
- In-ceiling devices - In-ceiling microphones and speakers are a great option to remove clutter from the table and provide better room coverage.

The following are examples of audio systems for Teams Rooms:
Cables
Keep the following in mind when selecting cables to use with your Teams Rooms devices:
- If the room already has displays, make note of the make and model and make sure the connectors on the existing displays will work with Teams Rooms.
- Use cables and extenders that work to the vendor's specifications. If the vendor dictates a category 6 cable should be used to connect components, use only category 6 cabling. If you use something like category 5 or 5E, you can expect that there will be issues with the system. The OEM manufacturers have specified the cabling requirements, and it is in your best interest to match the requirements.
- Make sure that the cable lengths needed for a room are within specifications of a given cable type. If not, you'll have to use an extender. Not all technologies support extenders, such as USB 3.0.
- When buying cables, make sure that the connector will fit into the compute module or the console display. Some cables have large connectors and putting two connectors next to each other won't physically fit.
- Connection locking capabilities are a nice feature. First, it can help prevent cable theft. But more importantly, it'll help cables from accidentally being pulled loose. Some HDMI cables have been engineered to require extra force to pull the cable loose.