Note
Access to this page requires authorization. You can try signing in or changing directories.
Access to this page requires authorization. You can try changing directories.
After you upload your app in Microsoft Teams, you can manage your app in Developer Portal. The article provides comprehensive guidance on app configuration, analytics, and validation to enhance the Teams app experience.
In addition, you learn about Agent Identity Blueprint to create and manage agent identities for your agent.
Overview
In the Overview section, you can see the following components to manage your app:
Dashboard
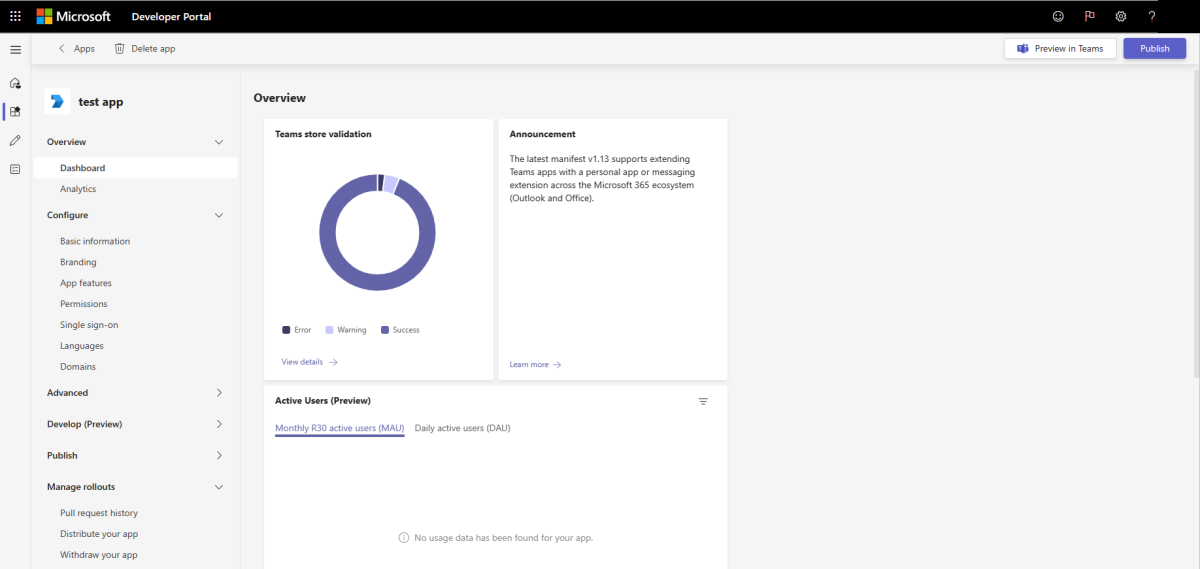
In the Dashboard under Overview section, you can see the following components for your app:
- Recommendation: App validation tool checks your app package against the test cases Microsoft uses when reviewing your app.
- Announcement: Latest updates of your apps on Developer Portal.
- Active users (Preview): Shows you the active user count.
- Basic information: Shows you the App ID, Version, Manifest version, and other basic information.
Analytics
In the Analytics under Overview section, you can get an overview of your app's usage, engagement, and other insights. For more information, see how to analyze your app's usage.

Configure
To install and render your app in Teams, you must include a set of configurations that Teams recognizes. To upload your apps in Teams, you need to have app manifest, which contains all the app details to display your app in Teams. This can be achieved with the help of components and tools that are available in Developer Portal.
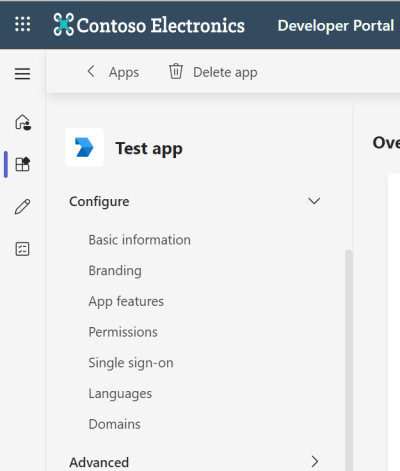
In the Configure section, you can see the following components to manage and access your app:
Basic information: This section shows and allows you to edit the App names, App ID, Descriptions, Version, Developer information, App URLs, Application (client) ID, and Microsoft Partner Network ID (CCP ID).
Branding: This section allows you to add Color icon and Outline icon in
.pngformat.App features: This section allows you to add the following features to your app:
- Personal app
- Bot
- Connector
- Scene
- Group and channel app
- Messaging extension
- Meeting extension
- Activity feed notification
Note
Connector is available in Government Community Cloud (GCC) but isn't available in GCC High, Department of Defense (DoD), and Teams operated by 21Vianet environments.
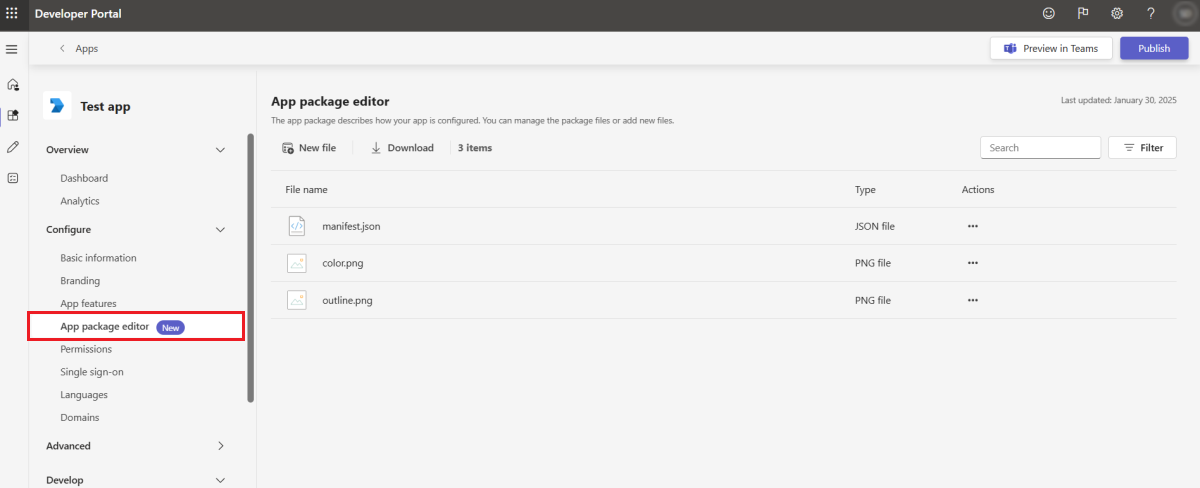
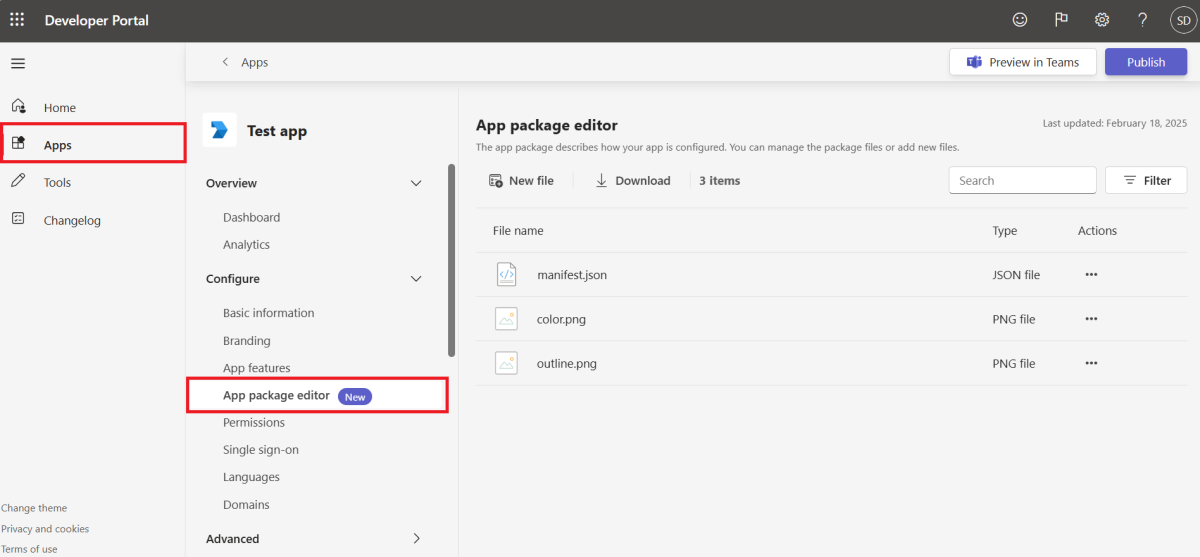
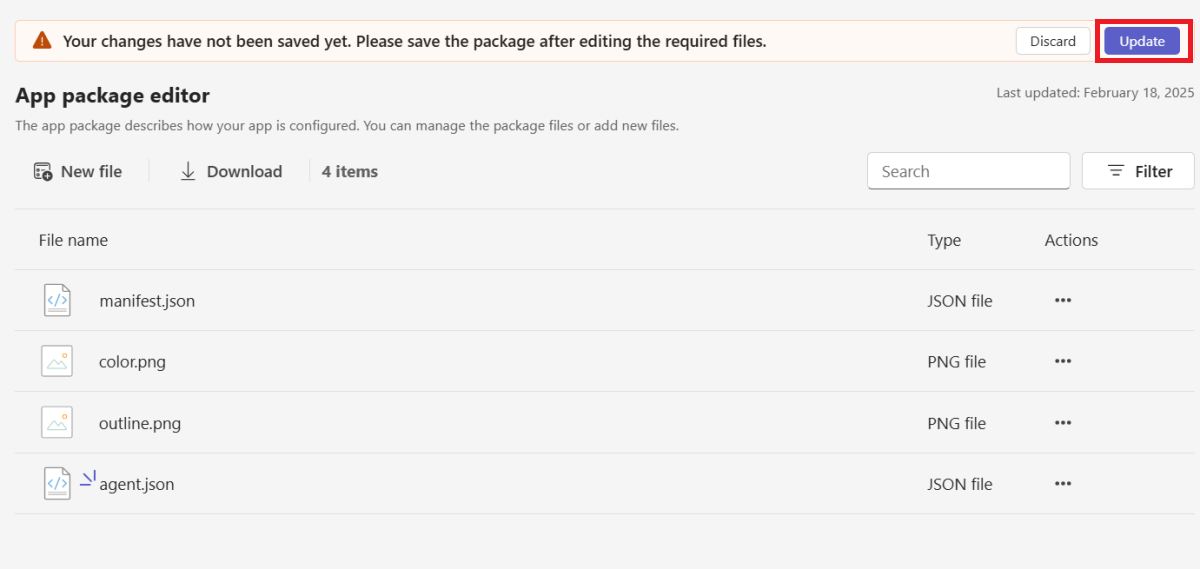
App package editor: This section allows you to create, manage, and customize app packages for Teams. Similar to Visual Studio Code, it enables you to seamlessly edit your app’s components, including the manifest, icons, Copilot agent files, scenes, JSON, and YAML files. You can also add a declarative agent and its related files into your app package.
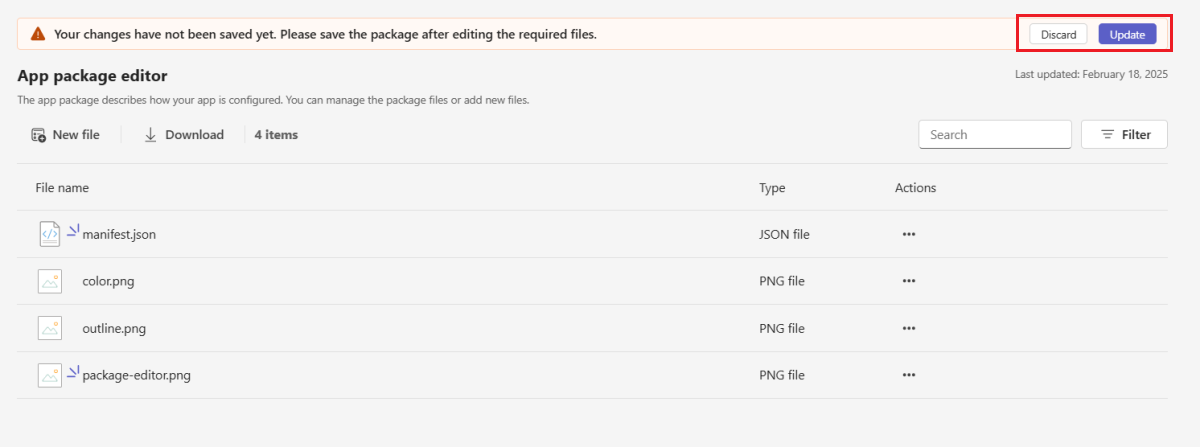
After you edit or add new files to your app package, you can either discard or update the package. If you select Update, the Developer Portal reviews the files and identifies errors. You can save the package with errors, but you must resolve them before you publish.
Note
If your app manifest version is v1.19, you can add a declarative agent through this app package editor. To create a declarative agent, add a JSON file that defines the agent's behavior. You can also create a YAML file to define custom APIs and connect them to the declarative agent.
Add a declarative agent to your app package using Developer Portal
Before you add a declarative agent to your app package, ensure your app package is updated to the latest version v1.19.
In Teams Developer Portal, select Apps from the left pane and select your app.
Go to Configure > App package editor.
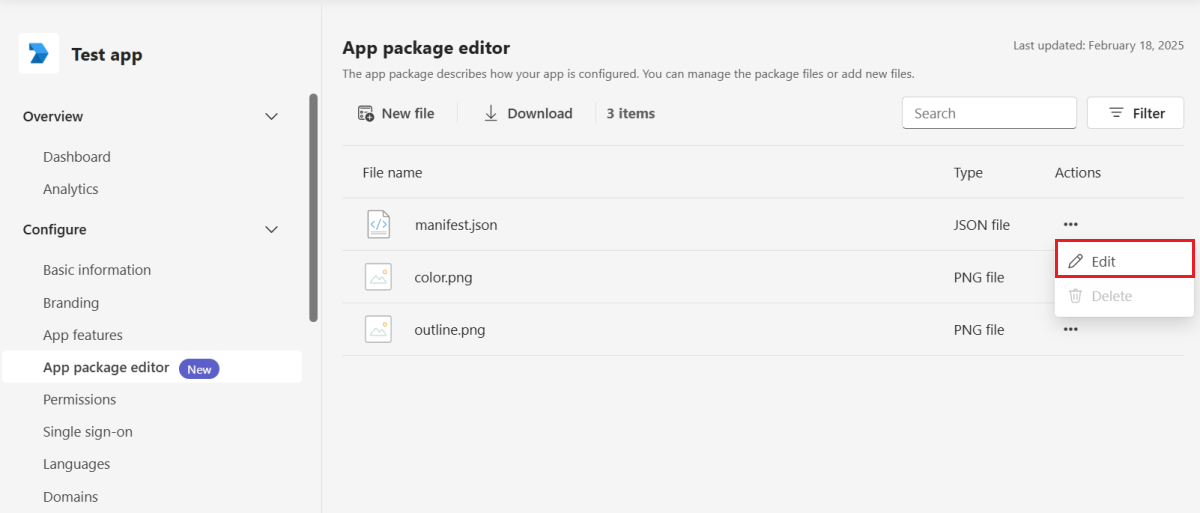
Select the ellipses (...) under Actions of manifest.json file and select Edit.
Add the manifest property
copilotAgentsand the sub propertydeclarativeAgents, and define required details. Select Save.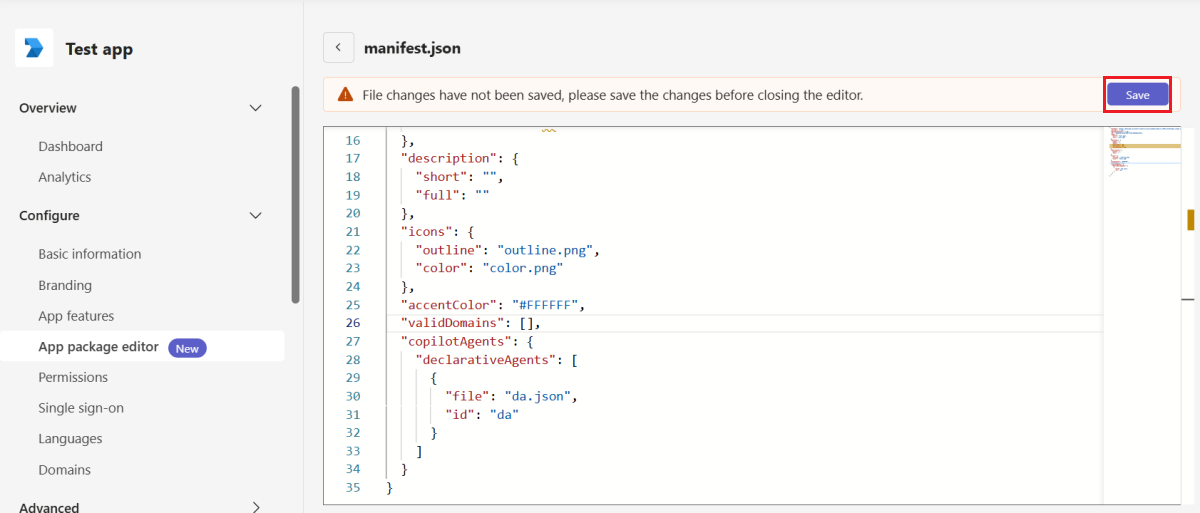
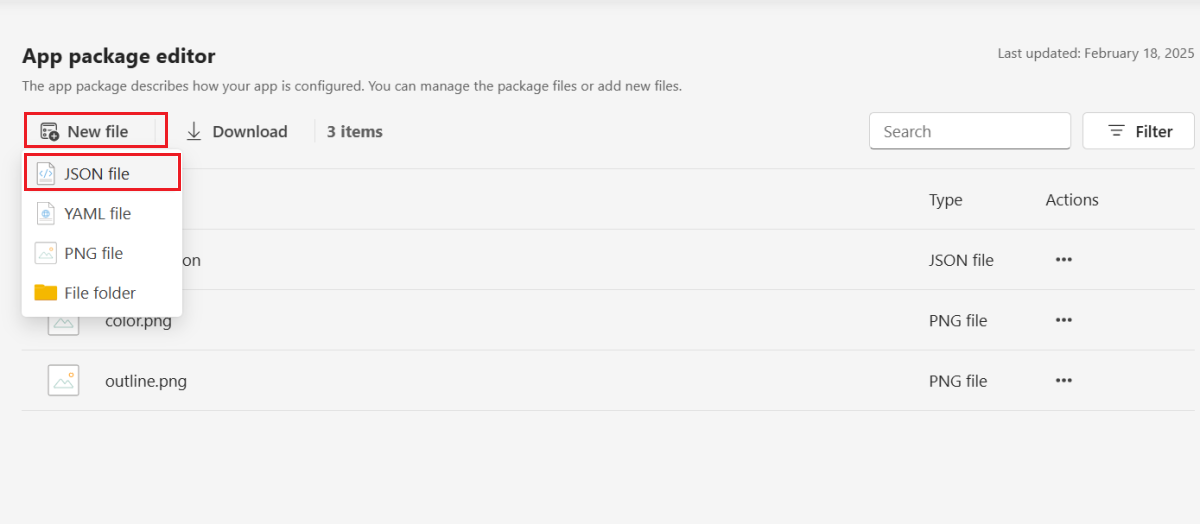
Select New file > JSON file and define your agent's behavior.
Select Update.
Now, the Developer Portal reviews the files and identifies any errors, which you must resolve before you publish.
Permissions: This section allows you to give Device permissions, Team Permissions, Chat/Meeting permissions, and User Permissions for your app.
Note
The maximum limit for RSC permissions is 16.
Single sign-on: Bot registered on Microsoft Entra ID supports single sign-on (SSO). If a bot is registered on Bot Framework portal (or within the Developer Portal under Bot management), then a bot doesn't support SSO, and you have to register your bot on Microsoft Entra ID to support SSO. For a bot registered on Microsoft Entra ID, add the Application ID URI. To get Application ID URI from Microsoft Entra ID, see how to use SSO authentication for bots.
Languages: This section allows you to set up or change the language of your app.
Domain: This section allows you to add the domains to load your apps in the Teams client, such as *.example.com.


Advanced
In the Advanced section, you can see the following components to manage your app in Developer Portal:
Owners
Each app includes an Owners page, where you can share your app registration with others in your org. You can add Administrator and Operative role to manage who can change the settings of your app. The Operative role has a permission, such as updating an app's configuration. The Administrator role has the permissions, such as updating an app's configuration, adding or removing owners, and deleting an app. If there are no active owners for an app, admins can own the apps by entering the app ID in Teams Developer Portal.
To add an owner:
- In the Advanced section, select Owners.
- Select Add owners.
- Enter a name and select a user ID from the dropdown list.
- Under Role, select Operative or Administrator.
- Select Add.
App content: You can configure your app with the following features:
- Loading indicator: Displays an indicator to let users know your hosted app content (for example, Tabs and Dialogs (referred as task modules in TeamsJS v1.x)) is loading.
- Full-screen mode: Displays a personal app without an app header. It's supported for the published apps to your org.
- Supported channel types: Lists the non-standard channel types that the app supports.
- Default group capability: For apps that support multiple group capabilities, such as teams, group chat, or meetings, select the default capability to navigate users when you add your app from the Microsoft Teams Store.
Environments
You can configure environments and global variables to help transition your app from your local runtime to production. Global variables are used across all environments.
To set up an environment, follow these steps:
- In the Developer Portal, select the Apps that you're working.
- Go to Environments under Advanced section.
- Select + Add an environment>Add.
Global variables
- Select Add a global variable to create configuration variables for your environment.
To use global variables:
Use the variable names instead of hard-coded values to set your app configurations.
- Enter
{{in any field in the Developer Portal. A dropdown with all the variables you've created for the chosen environment along with the global variables appears. - Before downloading your app package (for example, when getting ready to publish to the Teams Store), select the environment you want to use. Your app configurations update automatically based on the environment.
Plan and pricing: You can link a Software-as-a-Services (SaaS) offer that you've created in the Partner center for your app.
Admin settings:
- App Customization: You can customize your app by selecting different properties, such as Name, Short description, Small icon, and other properties.
- Block app by default: You can block your app by default for users until a Teams Administrator selects to enable it.
Develop
In the Develop section, you can open and develop your app in Microsoft 365 Agents Toolkit (previously known as Teams Toolkit) in the Visual Studio Code and Visual Studio. For more information, see develop your app with Microsoft 365 Agents Toolkit.
Publish
In the Publish section, you can publish your app to your org or to the Teams Store.
App package: The app package describes how your app is configured that includes app features, required resources, and other important attributes in manifest. The app definition refers to the configuration and settings associated with the application. The Icon tab shows the icon used for your app.
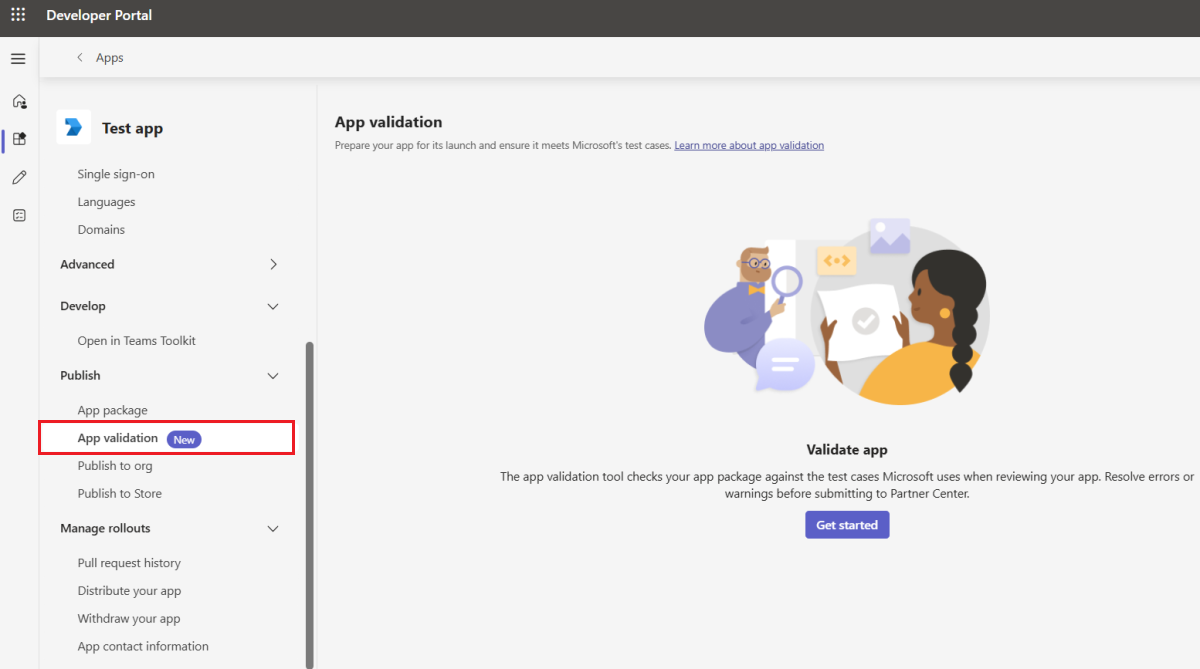
App validation: Evaluate your app package based on the test cases that Microsoft uses to review your app, app manifest, basic information of your app, and bot capability. The App validation tool identifies any errors or warnings in your app package and provides guidelines for resolution.
If your app fails any test case, you can review the guidelines and make necessary updates to your app package based on the Microsoft test case results. You can also download your app package and validation report. For more information on Microsoft test cases, see Teams Store validation guidelines and Commercial marketplace certification policies.
Validate your app package
To ensure that your app functions as expected in Teams, use the App validation tool to check your app package against Microsoft's test cases:
In Teams Developer Portal, select Apps from the left pane and select your app.
Go to Publish > App validation > Get Started.

Select all the checkboxes under Validation Acknowledgment and select the Start Validation.

Note
- Before you start validation, resolve any app manifest errors.
- You can submit only one validation request for a particular app at any given time. After the current validation completes, you can initiate a subsequent request.
Teams Developer Portal now starts to validate your app package:

The app validation status is updated as follows:
- Created: After you select Start Validation.
- In progress: App validation is initiated.
- Completed: App validation is completed.
You can select Refresh Status to retrieve latest validation status when the validation is In progress status.

After validation, it shows a list of test cases your app has passed or failed. The following are the app validation test result status available:
Status Validation Result Description Success Complete Pass No issues. Warning Complete Pass Fixing this issue is optional but recommended. Error Complete Fail Fixing the issue is required to successfully publish the app. Skipped Incomplete NA We weren't able to continue the validation check. This may be a temporary issue. We recommend you rerun the test later. 
Note
- App validation is supported only for the apps with bot capability.
- The app validation tool evaluates your app package based on the test cases Microsoft uses for app review prior to submission to the Microsoft Teams Store. Resolve errors or warnings and read the App submission checklist before submitting your app.
Publish to org:
- In the Developer Portal, select the Apps that you're working.
- Go to Publish to org under Publish.
- Select Publish your App.
Publish to Store:
- In the Developer Portal, select the Apps that you're working.
- Go to Publish to Store under Publish.
- Select Publish.
You can download the app package by selecting the Download app package button from the Publish to store page.


Test your app directly in Teams
The Developer Portal provides options for testing and debugging your app:
- On the Overview page, you can see a snapshot whether your app is configured and is validated against Teams Store test cases.
- The Preview in Teams button launches your app quickly in the Teams client for debugging.
Use tools to create app features
The Developer Portal also includes tools to help you build key features of Teams apps. The following are the tools:
- Scene studio: Design custom Together Mode scenes in Teams for Teams meetings.
- Adaptive Cards editor (Preview): Create and preview Adaptive Cards to include with your apps.
- Identity platform management (Preview): Register your apps with Microsoft Entra ID to help users sign in and provide access to APIs.
- Teams Store app validation: Check your app package against the test cases that Microsoft uses to review your app. We recommend you to use latest app validation tool in your app under Publish section.
- Agent Identity Blueprint: Create, configure, and manage reusable blueprints that define an Agent 365 and its back-end connection details. For more information, see Agent Identity Blueprint.
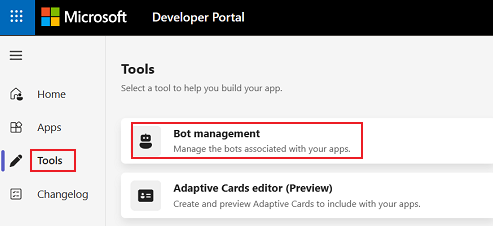
- Bot management: Add conversational bots to your app that communicate with users, respond to their questions, and proactively notify them about changes and other events.
To add a bot:
In the Developer Portal, select Tools in the left pane.
Select the Bot management.
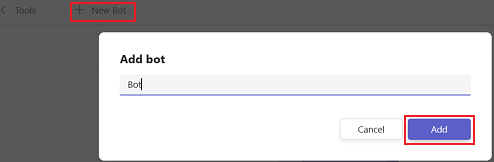
In the Bot management page, select + New Bot.
Enter the name and select Add.


Note
Bots created using the Microsoft Teams Developer Portal are single tenant by default.
Multi tenant bots are deprecated, but bots that were already created as Multi tenant continue to work as expected.
When you create a bot using the Developer Portal, a corresponding servicePrincipal is automatically created in your Microsoft Entra ID tenant.
In delegated scenarios with work or school accounts, the admin must be assigned a supported Microsoft Entra role or a custom role with a supported role permission. The following least privileged roles are supported for this operation.
For multitenant apps:
- Application Administrator
- Cloud Application Administrator
For single-tenant apps where the calling user is a nonadmin user but is the owner of the backing application, the user must have the Application Developer role.
From the Developer Portal, you can go to Bot Framework portal and configure your bot to update icon and other properties.
Note
Bot ID doesn't support environment variables.
Agent Identity Blueprint
An Agent Identity Blueprint provides a reusable configurations for agents in Agent 365 that can perform tasks and interact with users or Microsoft 365 services. Each blueprint acts as a template that specifies how an agent is configured and connected to a back-end service.
Agent Identity Blueprints are created and managed in Developer Portal, while the agent identities derived from them are managed in the Microsoft 365 Admin Center. To get started and for complete end-to-end guidance on extending your agent to Agent 365, use the Microsoft Agent 365 SDK.
View and use existing Agent Identity Blueprints
The Agent Identity Blueprint tool in the Developer Portal displays a list of existing blueprints available in your tenant.

You can use Agent Identity Blueprint to:
- View configuration details for an existing blueprint, including its type and blueprint ID.
- Edit or update configuration for a blueprint.
If a suitable blueprint doesn’t already exist, you can create a new one.
Create a new agent identity blueprint
In Teams Developer Portal, go to the Tools section and select Agent Identity Blueprint.

Select + New blueprint.

Enter the name and select Create.

A unique Agent Blueprint ID is automatically generated. This ID is used when you create agent identities based on this blueprint.


Configure the agent identity blueprint
Each blueprint includes two key configuration areas:
Basic information: You can view the following basic configuration for your blueprint:
- Agent Blueprint ID: A system-generated unique identifier for the blueprint.
- Name: The name assigned when the blueprint was created.

Configuration: In this tab, you can specify how the agent communicates with its service.
In the Configuration tab, go to Agent Type.
Choose how the agent connects to a back-end service.
Select one of the following options:
Agent Type Description none No bot or API association (default). Bot Based Use an existing bot registered in Teams. API Based Use a custom API endpoint to define agent behaviour.
Based on the selected agent type, enter one of the following:
- Bot ID: If you selected Bot-based, provide the ID of your registered Teams bot.
- Backend URL: If you selected API-based, provide the URL of your back-end service endpoint.
Select Save to apply your configuration.
Select Revert to discard the changes.


See also
Collaborate with us on GitHub
The source for this content can be found on GitHub, where you can also create and review issues and pull requests. For more information, see our contributor guide.
Platform Docs