You've designed, built, and tested your Microsoft Teams app. Now you're ready to list it so people can discover and start using your app.
See the following video to learn more about publishing your app to the Microsoft Teams Store:
Before you submit your app to Partner Center, ensure you've done the following.
Validate your app package
While your app may be working in a test environment, you should check your app package to avoid running into issues during the submission process.
The Teams app validation tool helps you identify and fix issues before submitting to Partner Center. The tool automatically checks your app's configurations against the same test cases used during Teams Store validation.
Upload your app package to run the automated tests.
Go to the Preliminary checklist and review the test cases that are difficult to automate.
Fix issues with your configurations or app in general. These issues occur if the automated tests give you errors or you haven't met all the criteria in the checklist.
Compile testing instructions
Depending on your app functionality, you're required to provide Teams tenant configurations, a set of test accounts, and test notes. Ensure that you meet all requirements listed in this section to avoid app testability failures and delay in the app publishing process.
Tenant configurations: You must configure a Teams tenant to test your app and provide test accounts. This section shares the details for configuring a tenant for your app's testing. For more information about creating a demo tenant, see Prepare your Microsoft 365 tenant. Ensure your app is configured for this demo tenant. If applicable, safe-listing or connection to external services for this tenant should be done before submission of the app.
Test Accounts: Depending on your app's features, you need to provide the following accounts:
Admin account (required)
Non-admin accounts (required)
Ensure that test accounts are safe-listed or configured with license keys, if applicable.
If your app requires users to log in or connect to external services, provide the required credentials to complete the login or connection with the external service.
Ensure that phone-based two-way authentication is disabled for test accounts.
If the app provides a collaborative experience, provide a non-admin account for each user persona. For example, if your app is used by teachers and students, provide credentials for both user personas.
Ensure that at least one account has access to premium or upgraded features, if applicable.
All accounts you provide must include pre-populated data to help in testing. For example, if your app helps to provide market insights based on the user profile, ensure that market data is pre-populated along with a few user profiles.
Provide at least one account that isn't pre-configured to test the first-run sign-in experience properly.
Note
These accounts must be utilized only for validation requirements. The validation team tests your app fully, including first-run user experience.
If your app is free for all users and anyone who intends to use your app can sign up to use it, indicate the same in the test notes. The validation team uses the sign up process as described.
Test Notes: The notes provide details about your app's capabilities in Teams and the steps for testing each one. It helps the validation team to understand your app better and complete the testing for all functionalities in your app. If your app functionality includes event-based notifications, list the instructions to trigger these events. For time-based notifications, indicate the expected time for receiving these notifications.
Note
The functional testing of the app is initiated based on the test notes you provide. However, the validation team won't restrict the testing only to the test instructions.
Demo Video: Provide a recording of your app so that Microsoft can fully understand its functionality.
The information that you submit to Partner Center—including your name, descriptions, icons, and images—becomes the Teams Store and Microsoft AppSource listing for your app.
A Teams Store listing may be someone's first impression of your app. Increase installations with a listing that effectively conveys your app's benefits, functionality, and brand.
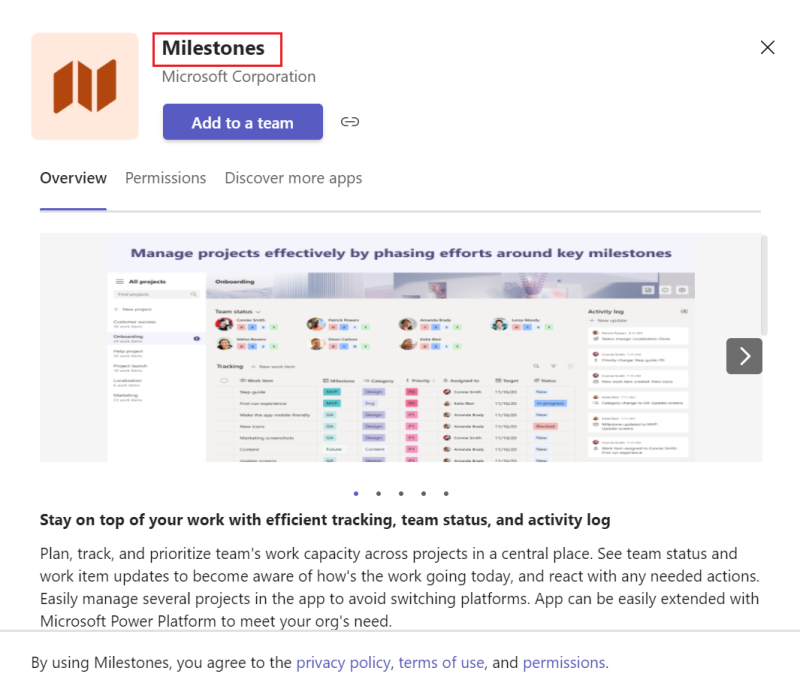
Specify a short name
Your app's name (specifically, its short name) plays a crucial role in how users discover it in the Teams Store.
You must have a short and long description of your app. App description helps improve app discoverability in the Teams Store.
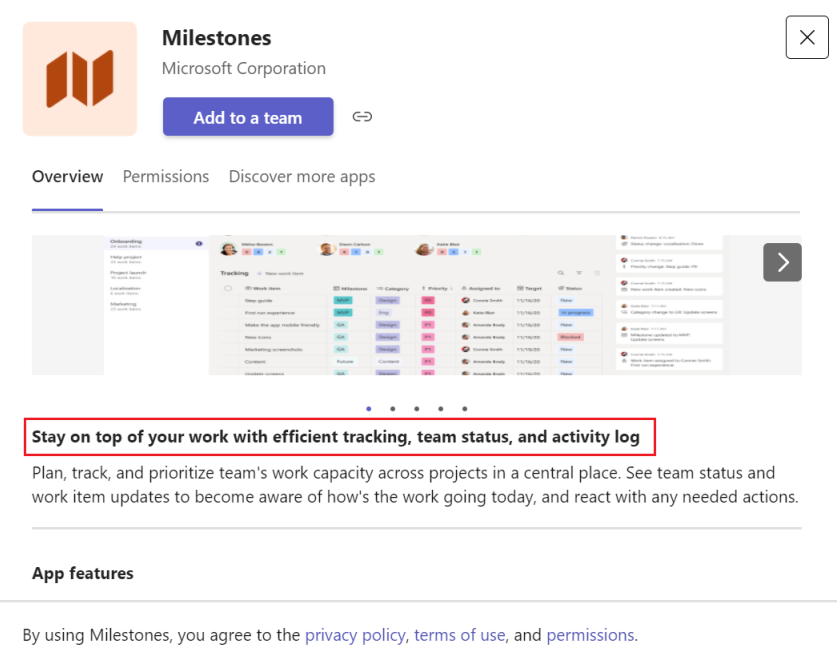
Short description
A concise summary of your app that is original, engaging, and directed at your target audience. Keep the short description to one sentence that focuses on the key value of your app.
The long description must provide information that highlights your app's key features, user benefits, and unique value proposition in Teams.
Ensure that you provide the following information in your app's long description:
Define your product, state its primary features, and its target audience.
Describe the unique value proposition of your app within Teams.
Describe your app's capabilities and scenarios in Teams.
Highlight how your app contributes to resolving customer problems and assists them in their everyday work.
List the key benefits that your app provides to customers. We recommend that you add up to three benefits.
If there are specific requirements to use your app, mention them clearly in the description for the benefit of users and admins looking to install and use your app.
Your Partner Center account allows you to add a long description of up to 4000 characters. However, for better readability, we recommended to keep your app's long description concise.
Icons are one of the main elements users see when browsing the Teams Store. Your icons should communicate your app's brand and purpose while also adhering to Teams requirements.
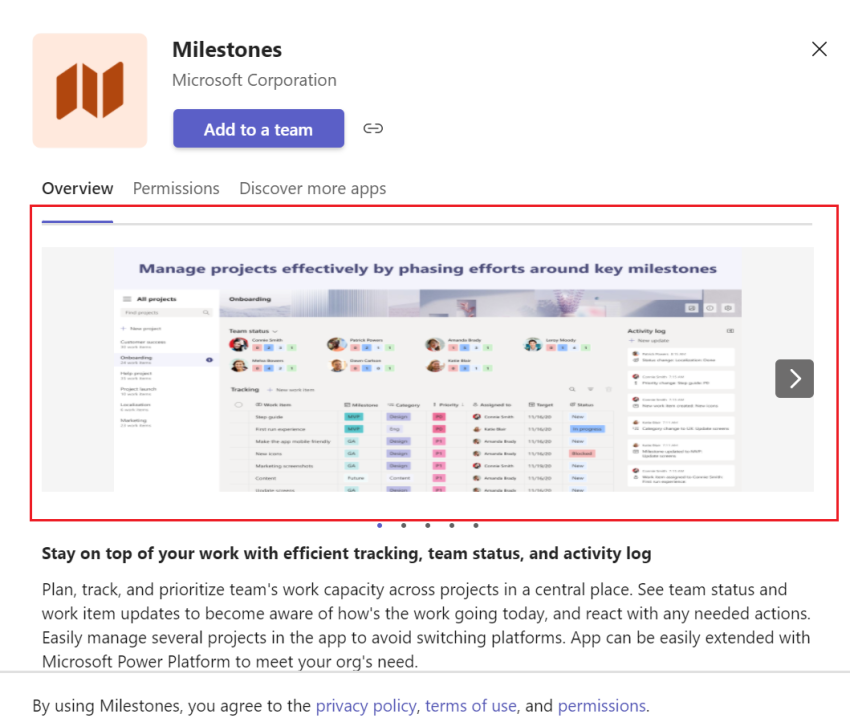
A video in your listing can be the most effective way to communicate with the users about your app. You can add the URL of videos in the format https://www.youtube.com/watch?v=:id or https://youtu.be/:id for YouTube and https://vimeo.com/:id for Vimeo.
For the benefit of the customers and admins who wants to install and use your app, we recommend that you add a video that addresses the value your app brings to the users. Also, as a best practice, we recommend that you add a demo or scenario walkthrough video that describes the end-to-end usage of your app to the users.
When providing a video that educates the users of the value your app provides, ensure to cover the following information in the video:
Who's the intended target audience and customer for your app?
What unique value does your app provide to the users?
Is there any measurable impact that your app guarantees to deliver for users?
What are the key problems that your app resolves for users?
Are there other key benefits of using your app?
What are the primary features of your app?
A demo or scenario walkthrough video is more like an educational video that provides the users or IT admins with a walkthrough of app configuration and usage experience. If you decide to add a demo or walkthrough video, provide the following details:
How can the users start with your app as first-time users and how do they set up your app?
How do they use the different capabilities or features in your app?
What are the major features of your app and how do they get to use them?
Provide an end-to-end demonstration of your app with all the key workflows and key scenarios that your app supports.
If there are any specific training videos on how users can learn to use the app, ensure that you provide the related information.
Use voice-over instructions wherever applicable to make it easier for the users to understand.
Ensure that the video intends to educate users and not to promote your app.
During submission, you're asked to categorize your app. App category helps improve your app discoverability in the Teams Store. You can categorize your app based on the following categories:
Categories
Microsoft
Education
Productivity
Images and video galleries
Project management
Utilities
Social
Communication
Content management
Files and documents
Workflow and business management
IT/Admin
Human resources and recruiting
Developer tools
Meetings and scheduling
Data visualization and BI
Training and tutorial
News and weather
Customer support
Reference
Sales and marketing
Look and feel
Customer and contact management (CRM)
Financial management
Maps and feeds
Other
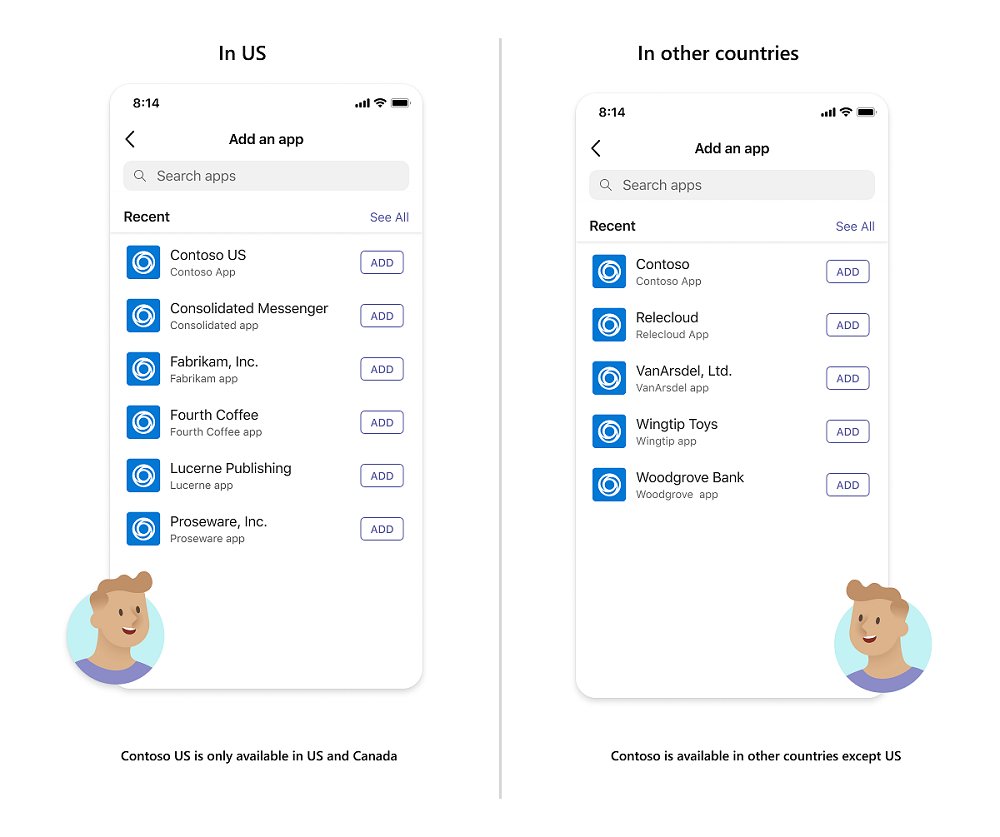
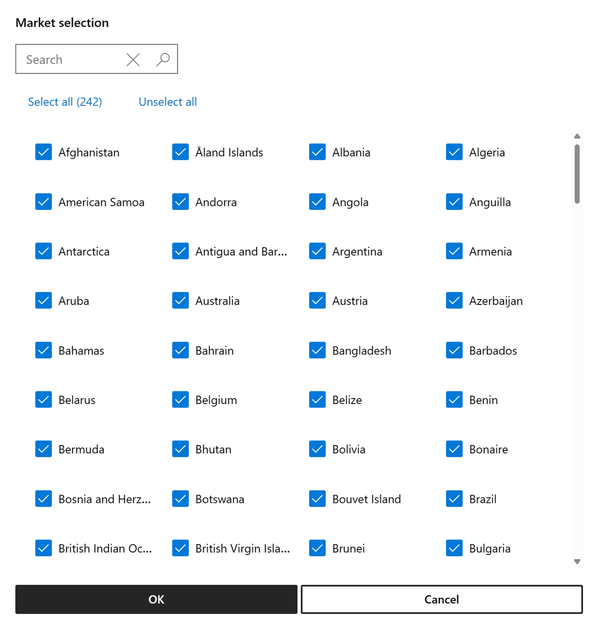
Distribute your app to specific countries or regions
If you want to cater your app to a specific audience, you can select from the available list of countries or regions and communicate what’s great about your app in ways that are relevant to users. This is known as Geo-filtering. Geo-filtering is applicable only for apps listed in the Teams Store. For example, a Contoso US app, which sells gift cards that are valid within the US and Canada is only visible in the Teams Store for the users in the US and Canada.
The following image shows the use of Geo-filtering for apps in the Teams desktop client:
The following image shows the use of Geo-filtering for apps in the Teams mobile client:
Note
Geo-filtering isn't supported in Government community cloud (GCC), GCC-High, and Department of Defence (DoD) tenants.
Geo-filtering helps you improve your app's visibility in the Teams Store. When you publish your app to the Teams Store, you can select from the available list of countries/regions in the Partner Center to target your app to users in specific countries or regions. For more information on supported geographic locations in Partner Center, see Geographic availability and currencies.
Determine user location
Teams uses the UsageLocation property from the user resource type API to determine the location of the user and displays the apps available in the user's country or region.
If a user wants to install an app available in another country or region, they can use the following methods:
Publisher Attestation is also required for Teams apps listed in the Store. The process includes completing a self-assessment of your app's security, data handling, and compliance practices. The process can help potential customers make informed decisions about using your app.
Note
If you're submitting a new app, you can't officially complete Publisher Attestation until your app is listed on the Teams Store. If you're updating a listed app, complete Publisher Attestation before you submit the latest version of the app for validation.
The source for this content can be found on GitHub, where you can also create and review issues and pull requests. For more information, see our contributor guide.
Platform Docs feedback
Platform Docs is an open source project. Select a link to provide feedback:
Demonstrate skills to plan, deploy, configure, and manage Microsoft Teams to focus on efficient and effective collaboration and communication in a Microsoft 365 environment.