Build API-based message extension
Note
API-based message extensions only support search commands.
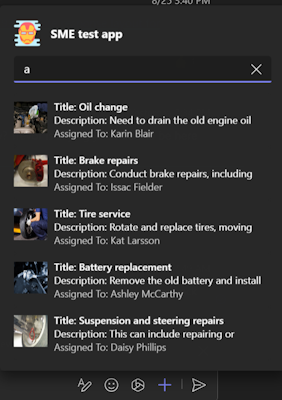
API-based message extensions are a Microsoft Teams app capability that integrates external APIs directly into Teams, enhancing your app's usability and offering a seamless user experience. API-based message extensions support search commands and can be used to fetch and display data from external services within Teams, streamlining workflows by reducing the need to switch between applications.
Before you get started, ensure that you meet the following requirements:
1. OpenAPI Description (OAD)
Ensure that you adhere to following guidelines for OpenAPI Description (OAD) document:
- OpenAPI versions 2.0 and 3.0.x are supported.
- JSON and YAML are the supported formats.
- The request body, if present, must be application/Json.
- Define an HTTPS protocol server URL for the
servers.urlproperty. - Only POST and GET HTTP methods are supported.
- The OpenAPI Description document must have an
operationId. - Only one required parameter without a default value is allowed.
- A required parameter with a default value is considered optional.
- Users must not enter a parameter for a header or cookie.
- The operation must not have a required header or cookie parameters without default values.
- Ensure that there are no remote references in the OpenAPI Description document.
- Constructing arrays for the request isn’t supported; however, nested objects within a JSON request body are supported.
- Teams doesn't support the
oneOf,anyOf,allOf, andnot(swagger.io) constructs.
The following code is an example of an OpenAPI Description document:
openapi: 3.0.1
info:
title: OpenTools Plugin
description: A plugin that allows the user to find the most appropriate AI tools for their use cases, with their pricing information.
version: 'v1'
servers:
- url: https://gptplugin.opentools.ai
paths:
/tools:
 get:
   operationId: searchTools
   summary: Search for AI Tools
   parameters:
     - in: query
       name: search
       required: true
       schema:
         type: string
       description: Used to search for AI tools by their category based on the keywords. For example, ?search="tool to create music" will give tools that can create music.
   responses:
     "200":
       description: OK
       content:
         application/json:
           schema:
             $ref: '#/components/schemas/searchToolsResponse'
     "400":
       description: Search Error
       content:
         application/json:
           schema:
             $ref: '#/components/schemas/searchToolsError'
components:
schemas:
 searchToolsResponse:
   required:
     - search
   type: object
   properties:
     tools:
       type: array
       items:
         type: object
         properties:
           name:
             type: string
             description: The name of the tool.
           opentools_url:
             type: string
             description: The URL to access the tool.
           main_summary:
             type: string
             description: A summary of what the tool is.
           pricing_summary:
             type: string
             description: A summary of the pricing of the tool.
           categories:
             type: array
             items:
               type: string
             description: The categories assigned to the tool.
           platforms:
             type: array
             items:
               type: string
             description: The platforms that this tool is available on.
       description: The list of AI tools.
 searchToolsError:
   type: object
   properties:
     message:
       type: string
       description: Message of the error.
For more information, see OpenAPI structure.
2. App manifest
Ensure that you adhere to following guidelines for app manifest:
Set the app manifest version to
1.17.Set
composeExtensions.composeExtensionTypetoapiBased.Define
composeExtensions.apiSpecificationFileas the relative path to the OpenAPI Description file within the folder. This links the app manifest to the API specification.Define
apiResponseRenderingTemplateFileas the relative path to the response rendering template. This specifies the location of the template used for rendering API responses.Each command must have a link to the response rendering template. This connects each command to its corresponding response format.
The
Commands.idproperty in the app manifest must match theoperationIdin the OpenAPI Description.If a required parameter is without a default value, the command
parameters.namein the app manifest must match theparameters.namein the OpenAPI Description document.If there’s no required parameter, the command
parameters.namein the app manifest must match the optionalparameters.namein the OpenAPI Description.Make sure that the parameters for each command match exactly with the names of the parameters defined for the operation in the OpenAPI spec.
A response rendering template must be defined per command, which is used to convert responses from an API.
Full description must not exceed 128 characters.
{
"$schema": "https://developer.microsoft.com/json-schemas/teams/v1.17/MicrosoftTeams.schema.json",
+  "manifestVersion": "1.17",
"version": "1.0.0",
"id": "04805b4b-xxxx-xxxx-xxxx-4dbc1cac8f89",
"packageName": "com.microsoft.teams.extension",
"developer": {
    "name": "Teams App, Inc.",
    "websiteUrl": "https://www.example.com",
    "privacyUrl": "https://www.example.com/termofuse",
    "termsOfUseUrl": "https://www.example.com/privacy"
},
"icons": {
    "color": "color.png",
    "outline": "outline.png"
},
"name": {
    "short": "AI tools",
    "full": "AI tools"
},
"description": {
    "short": "AI tools",
    "full": "AI tools"
},
"accentColor": "#FFFFFF",
"composeExtensions": [
    {
+      "composeExtensionType": "apiBased",
+      "authorization": {
+        "authType": "apiSecretServiceAuth ",
+        "apiSecretServiceAuthConfiguration": {
+            "apiSecretRegistrationId": "9xxxxxxx-7xxx-4xxx-bxxx-1xxxxxxxxxxx"
+        }
+      },
+      "apiSpecificationFile": "aitools-openapi.yml",
       "commands": [
       {
          "id": "searchTools",
          "type": "query",
          "context": [
             "compose",
             "commandBox"
          ],
          "title": "search for AI tools",
          "description": "search for AI tools",
          "parameters": [
             {
             "name": "search",
             "title": "search query",
             "description": "e.g. search='tool to create music'"
             }
          ],
+          "apiResponseRenderingTemplateFile": "response-template.json"
       }
       ]
    }
],
"validDomains": []
}
Parameters
| Name | Description |
|---|---|
composeExtensions.composeExtensionType |
Compose extension type. Update the value to apiBased. |
composeExtensions.authorization |
Authorization related information for the API-based message extension |
composeExtensions.authorization.authType |
Enum of possible authorization types. Supported values are none, apiSecretServiceAuth, and microsoftEntra. |
composeExtensions.authorization.apiSecretServiceAuthConfiguration |
Object capturing details needed to do service auth. Applicable only when auth type is apiSecretServiceAuth. |
composeExtensions.authorization.apiSecretServiceAuthConfiguration.apiSecretRegistrationId |
Registration ID returned when developer submits the API key through Developer Portal. |
composeExtensions.apiSpecificationFile |
References an OpenAPI Description file in the app package. Include when type is apiBased. |
composeExtensions.commands.id |
Unique ID that you assign to search command. The user request includes this ID. The ID must match the OperationId available in the OpenAPI Description. |
composeExtensions.commands.context |
Array where the entry points for message extension is defined. The default values are compose and commandBox. |
composeExtensions.commands.parameters |
Defines a static list of parameters for the command. The name must map to the parameters.name in the OpenAPI Description. If you're referencing a property in the request body schema, then the name must map to properties.name or query parameters. |
composeExtensions.commands.apiResponseRenderingTemplateFile |
Template used to format the JSON response from developer’s API to Adaptive Card response. [Mandatory] |
For more information, see composeExtensions.
3. Response rendering template
Note
Teams supports Adaptive Cards up to version 1.5 and the Adaptive Cards Designer supports up to version 1.6.
- Define the schema reference URL in the
$schemaproperty to establish the structure of your template. - The supported values for
responseLayoutarelistandgrid, which determine how the response is visually presented. - A
jsonPathis recommended for arrays or when the data for the Adaptive Card isn't the root object. For example, if your data is nested underproductDetails, your JSON path would beproductDetails. - Define
jsonPathas the path to the relevant data or array in the API response. If the path points to an array, then each entry in the array binds with the Adaptive Card template and returns as a separate result. [Optional] - Get a sample response for validating the response rendering template. This serves as a test to ensure your template works as expected.
- Use tools such as Fiddler or Postman to call the API and ensure that the request and the response are valid. This step is crucial for troubleshooting and confirming that your API is functioning correctly.
- You can use the Adaptive Card Designer to bind the API response to the response rendering template and preview the Adaptive Card. Insert the template in the CARD PAYLOAD EDITOR and insert the sample response entry in the SAMPLE DATA EDITOR.
The following code is an example of a Response rendering template:
Response rendering template example
{
"version": "1.0",
"jsonPath": "repairs",
"responseLayout": "grid",
"responseCardTemplate": {
  "$schema": "http://adaptivecards.io/schemas/adaptive-card.json",
  "type": "AdaptiveCard",
  "version": "1.4",
  "body": [
    {
      "type": "Container",
      "items": [
        {
          "type": "ColumnSet",
          "columns": [
            {
              "type": "Column",
              "width": "stretch",
              "items": [
                {
                  "type": "TextBlock",
                  "text": "Title: ${if(title, title, 'N/A')}",
                  "wrap": true
                },
                {
                  "type": "TextBlock",
                  "text": "Description: ${if(description, description, 'N/A')}",
                  "wrap": true
                },
                {
                  "type": "TextBlock",
                  "text": "Assigned To: ${if(assignedTo, assignedTo, 'N/A')}",
                  "wrap": true
                },
                {
                  "type": "Image",
                  "url": "${image}",
                  "size": "Medium",
                  "$when": "${image != null}"
                }
              ]
            },
            {
              "type": "Column",
              "width": "auto",
              "items": [
                {
                  "type": "Image",
                  "url": "${if(image, image, '')}",
                  "size": "Medium"
                }
              ]
            }
          ]
        },
        {
          "type": "FactSet",
          "facts": [
            {
              "title": "Repair ID:",
              "value": "${if(id, id, 'N/A')}"
            },
            {
              "title": "Date:",
              "value": "${if(date, date, 'N/A')}"
            }
          ]
        }
      ]
    }
  ]
  },
  "previewCardTemplate": {
  "title": "Title: ${if(title, title, 'N/A')}",
  "subtitle": "Description: ${if(description, description, 'N/A')}",
  "text": "Assigned To: ${if(assignedTo, assignedTo, 'N/A')}",
  "image": {
    "url": "${image}",
    "$when": "${image != null}"
    }
  }
 }
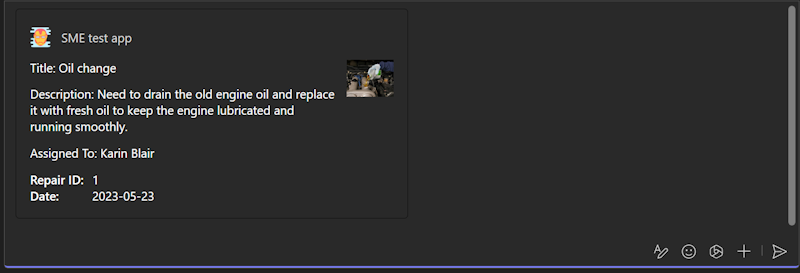
Preview Card
Expanded Adaptive Card
Parameters
| Property | Type | Description | Required |
|---|---|---|---|
version |
string |
The schema version of the current response rendering template. | Yes |
jsonPath |
string |
The path to the relevant section in the results to which the responseCardTemplate and previewCardTemplate should be applied. If not set, the root object is treated as the relevant section. If the relevant section is an array, each entry is mapped to the responseCardTemplate and the previewCardTemplate. | No |
responseLayout |
responseLayoutType |
Specifies the layout of the results in the message extension flyout. The supported types are list and grid. |
Yes |
responseCardTemplate |
adaptiveCardTemplate |
A template for creating an Adaptive Card from a result entry. | Yes |
previewCardTemplate |
previewCardTemplate |
A template for creating a preview card from a result entry. The resulting preview card is displayed in the message extension flyout menu. | Yes |
Json path
The JSON path is optional but should be used for arrays or where the object to be used as the data for the adaptive card isn't the root object. The JSON path should follow the format defined by Newtonsoft. If the JSON path points to an array, then each entry in that array is bound with the adaptive card template and returns as separate results.
Example Let's say you have the below JSON for a list of products and you want to create a card result for each entry.
{
   "version": "1.0",
   "title": "All Products",
   "warehouse": {
      "products": [
        ...
      ]
   }
}
As you can see, the array of results is under "products", which is nested under "warehouse", so the JSON path would be "warehouse.products".
Use https://adaptivecards.io/designer/ to preview the adaptive card by inserting the template into Card Payload Editor, and take a sample response entry from your array or for your object and insert it into the Same Data editor on the right. Make sure that the card renders properly and is to your liking. Note that Teams supports cards up to version 1.5 while the designer supports 1.6.
Schema mapping
The properties in OpenAPI Description document are mapped to the Adaptive Card template as follows:
string,number,integer,booleantypes are converted to a TextBlock.Example
Source Schema:
string,number,integer, andbooleanname: type: string example: doggieTarget Schema:
Textblock{ "type": "TextBlock", "text": "name: ${if(name, name, 'N/A')}", "wrap": true }
array: An array is converted to a container inside Adaptive Card.Example
Source schema:
arraytype: array items: required: - name type: object properties: id: type: integer category: type: object properties: name: type: stringTarget Schema:
Container{ "type": "Container", "$data": "${$root}", "items": [ { "type": "TextBlock", "text": "id: ${if(id, id, 'N/A')}", "wrap": true }, { "type": "TextBlock", "text": "category.name: ${if(category.name, category.name, 'N/A')}", "wrap": true } ] }
object: An object is converted to a nested property in Adaptive Card.Example
Source Schema:
objectcomponents: schemas: Pet: category: type: object properties: id: type: integer name: type: stringTarget Schema: Nested property in an Adaptive Card
{
  "type": "TextBlock",
  "text": "category.id: ${if(category.id, category.id, 'N/A')}",
  "wrap": true
},
{
  "type": "TextBlock",
  "text": "category.name: ${if(category.name, category.name, 'N/A')}",
  "wrap": true
}
image: If a property is an image URL, then it converts to an Image element in the Adaptive Card.Example
Source schema:
imageimage: type: string format: uri description: The URL of the image of the item to be repairedTarget Schema:
"Image"{ "type": "Image", "url": "${image}", "$when": "${image != null}" }
Authentication
You can implement authentication in API-based message extensions to provide secure and seamless access to applications. If your message extension requires authentication, add the authorization property under composeExtensions in app manifest and define the type of authentication for your application by setting the authType property under authorization. To enable authentication for your message extension, update your app manifest with any of the following authentication methods:
none
You can update none as a value for authorization in an API-based message extension when the message extension doesn't require any authentication for the user to access the API.
    "authorization": {
      "authType": "none"
      }
    },
Secret service auth
API secret service authentication is a secure method for your app to authenticate with API. You can register an API key through the Developer Portal for Teams, and generate an API key registration ID. Update the app manifest with the apiSecretServiceAuthConfiguration object with an apiSecretRegistrationId property. This property should contain the reference ID returned when you submitted the API key through the portal.
When an API request is initiated, the system retrieves the API key from a secure storage location and includes it in the authorization header using the bearer token scheme. The API endpoint, upon receiving the request, verifies the validity of the API key. If the verification is successful, the endpoint processes the request and returns the desired response, ensuring that only authenticated requests receive access to the API’s resources.
Register an API key
API key registration allows you to secure their APIs that are behind an auth and use in message extensions. You can register an API key and specify the domain, tenant, and app that can access the APIs, and provide the secrets that are needed to authenticate the API calls. You can then paste the API key ID in the simplified message extension and the API key ID enables the authentication for the API calls that are behind an auth.
To register an API Key, follow these steps:
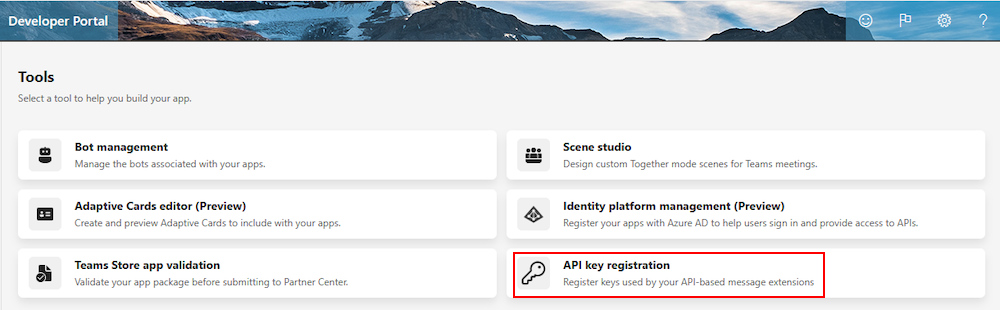
Go to Tools > API key registration.
Select + New API key.
In the API key registration page, under Register an API key, update the following:
Description: Description of the API Key.
Add domain: Update the base path for API endpoints. The path must be a secure HTTPS URL, include a fully qualified domain name, and can optionally include a specific path. For example,
https://api.yelp.com.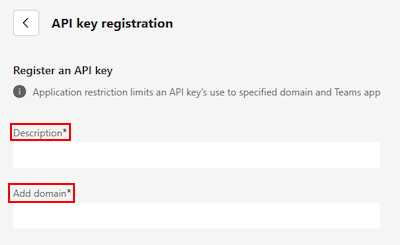
Under Set a target tenant, select any of the following:
- Home tenent
- Any tenant
Option When to use Description Home tenant When you develop your app in your tenant and test the app as a custom app or custom app built for your org. The API key is only usable within the tenant where the the API is registered. Any tenant After you've completed testing the app and want to enable the app across different tenants. Ensure that you update your target tenant to Any tenant before submitting your app package to the Partner Center. The API key can be used in other tenants after the app is available in the Teams Store. 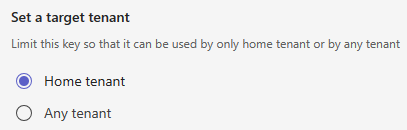
Under Set a Teams app, select any of the following:
- Any Teams app
- Existing Teams app ID
Option When to use Description Any Teams app When you develop your app in your tenant and test the app as a custom app or custom app built for your org. The API key can be used with any Teams app. It's useful when custom app or custom app built for your org have IDs generated after app upload. Existing Teams app ID After you've completed testing of your app within your tenant as a custom app or custom app built for your org. Update your API key registration and select Existing Teams app and input your app’s manifest ID. The Existing Teams app option binds the API secret registration to your specific Teams app. 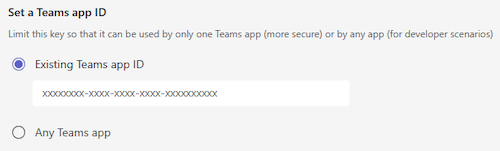
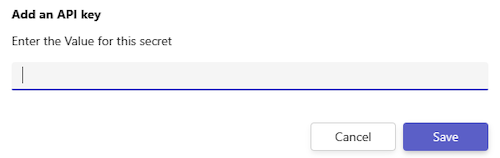
Select + Add Secret. A Add an API key dialog appears.
Enter a value for the secret and select Save.
Note
- You can maintain up to two secrets for each API key registration. If one key is compromised, it can be promptly removed and allows Teams to switch to the second key.
- The secret value must have at least 10 characters and at most 128 characters.
- If the first key results in a 401 error, Teams automatically attempts to use the second key. It helps with uninterrupted service for users and eliminates any potential downtime during the creation of a new secret.
An API key registration ID is generated.
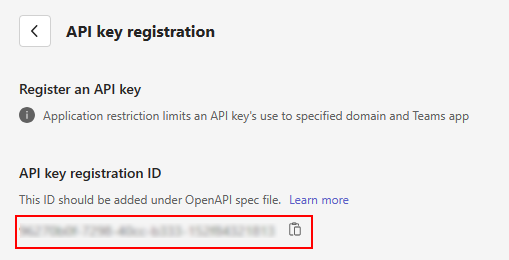
Copy and save the API key registration ID and update it as a value for the apiSecretRegistrationId property in the app manifest.
Update app manifest
You can authorize incoming requests to your service by configuring a static API key. The API key is stored securely and added to the API call. Add an apiSecretServiceAuthConfiguration object with an apiSecretRegistrationId property, which contains the reference ID when you submit the API key through the Developer portal for Teams. For more information, see composeExtensions.commands.
"composeExtensions": [
    {
      "composeExtensionType": "apiBased",
      "authorization": {
        "authType": "apiSecretServiceAuth",
        "apiSecretServiceAuthConfiguration": {
            "apiSecretRegistrationId": "9xxxxb0f-xxxx-40cc-xxxx-15xxxxxxxxx3"
        }
      },
Microsoft Entra
microsoftEntra authentication method uses an app user's Teams identity to provide them with access to your app. A user who has signed into Teams doesn't need to sign in again to your app within the Teams environment. With only a consent required from the app user, the Teams app retrieves access details for them from Microsoft Entra ID. After the app user has given consent, they can access the app even from other devices without having to be validated again.
Prerequisites
Before you start, ensure you have the following:
- An Azure account with an active subscription.
- Basic familiarity with Microsoft Entra ID and Teams app development.
The following image shows how SSO works when a Teams app user attempts to access API-bsed message extension app:

- The user invokes the API-based message extension app from a message extension in Teams and requests a command that requires authentication.
- The app sends a request to the Teams backend service with the app ID and the required scope (access_as_user).
- The Teams backend service checks if the user consented to the app and the scope. If not, it shows a consent screen to the user and asks for permission.
- If the user consents, the Teams backend service generates an access token for the user and the app, and sends it to the app in the authorization header of the request.
- The app validates the token. The user can extract the user information from the token, such as the name, email, and object ID.
- The app returns the response to the user in Teams.
To enable microsoftEntra authentication method for API-based message extension, follow these steps:
Register a new app in Microsoft Entra ID
Open the Azure portal on your web browser.
Select the App registrations icon.
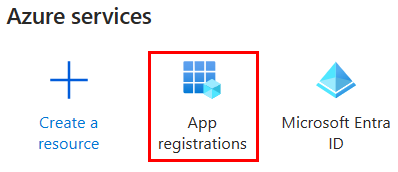
The App registrations page appears.
Select + New registration icon.
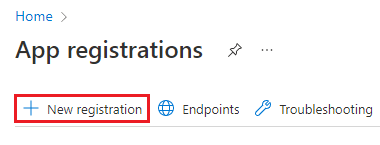
The Register an application page appears.
Enter the name of your app that you want to be displayed to the app user. You can change the name at a later stage if you want to.
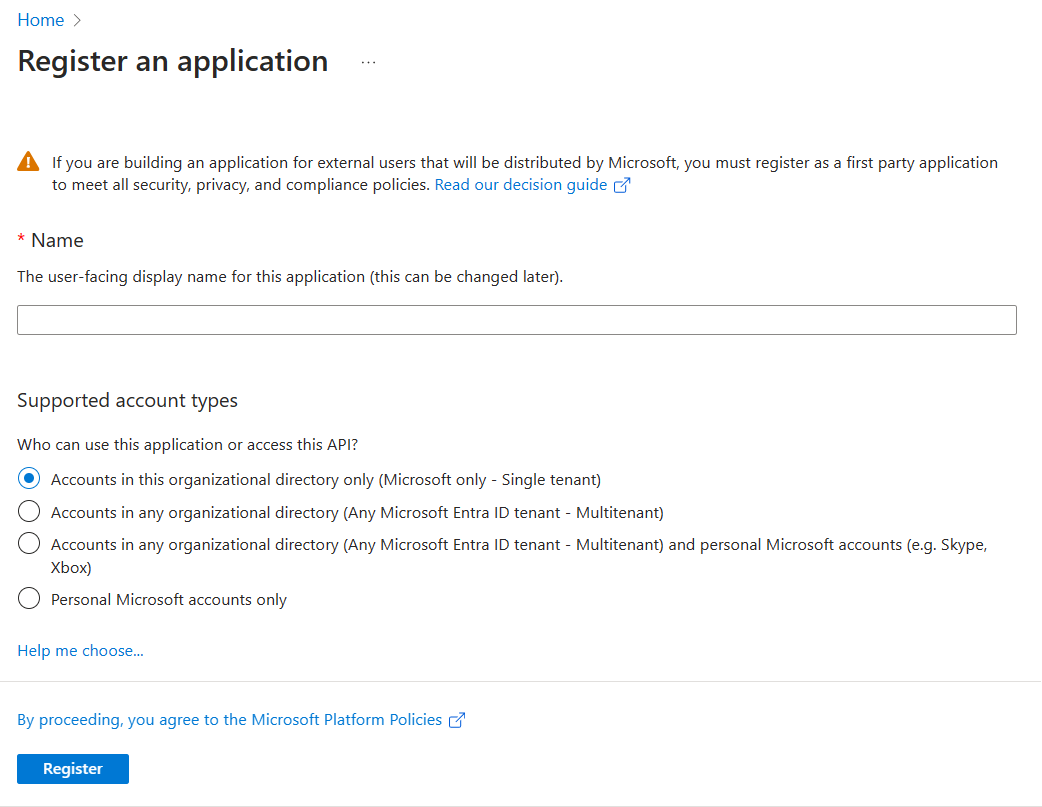
Select the type of user account that can access your app. You can select from single or multitenant options in organizational directories, or restrict the access to personal Microsoft accounts only.
Options for supported account types
Option Select this to... Accounts in this organizational directory only (Microsoft only - Single tenant) Build an application for use only by users (or guests) in your tenant.
Often called custom app built for your org (LOB app), this app is a single-tenant application in the Microsoft identity platform.Accounts in any organizational directory (Any Microsoft Entra ID tenant - Multitenant) Let users in any Microsoft Entra tenant use your application. This option is appropriate if, for example, you're building a SaaS application, and you intend to make it available to multiple organizations.
This type of app is known as a multitenant application in the Microsoft identity platform.Accounts in any organizational directory (Any Microsoft Entra ID tenant - Multitenant) and personal Microsoft accounts (for example, Skype, Xbox) Target the widest set of customers.
By selecting this option, you're registering a multitenant application that can support app users who have personal Microsoft accounts also.Personal Microsoft accounts only Build an application only for users who have personal Microsoft accounts. Note
You don't need to enter Redirect URI for enabling SSO for an API-based message extension app.
Select Register. A message pops up on the browser stating that the app was created.

The page with app ID and other configurations is displayed.
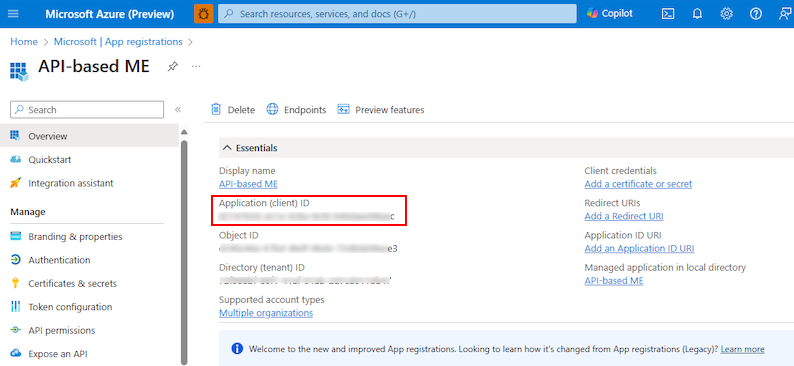
Note and save the app ID from Application (client) ID to update the app manifest later.
Your app is registered in Microsoft Entra ID. You now have the app ID for your API-based message extension app.
Configure scope for access token
After you've created a new app registration, configure scope (permission) options for sending access token to Teams client, and authorizing trusted client applications to enable SSO.
To configure scope and authorize trusted client applications, you need:
- Add Application ID URI: Configure scope (permission) options for your app. Expose a web API and configure the application ID URI.
- Configure API scope: Define scope for the API, and the users who can consent for a scope. You can only let admins provide consent for higher-privileged permissions.
- Configure authorized client application: Create authorized client IDs for applications that you want to preauthorize. It allows the app user to access the app scopes (permissions) you've configured, without requiring any further consent. Preauthorize only those client applications you trust as your app users don't have the opportunity to decline consent.
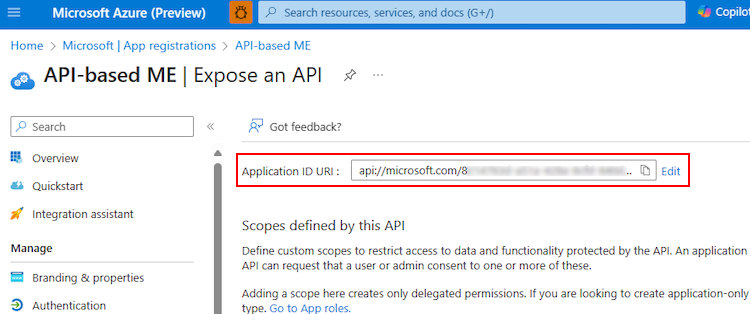
Application ID URI
Select Manage > Expose an API from the left pane.
The Expose an API page appears.
Select Add to generate application ID URI in the form of
api://{AppID}.
The section for setting application ID URI appears.
Enter the Application ID URI in the format explained here.
- The Application ID URI is prefilled with app ID (GUID) in the format
api://{AppID}. - The application ID URI format must be:
api://fully-qualified-domain-name.com/{AppID}. - Insert the
fully-qualified-domain-name.combetweenapi://and{AppID}(which is, GUID). For example, api://example.com/{AppID}.
Important
Sensitive information: The application ID URI is logged as part of the authentication process and mustn't contain sensitive information.
Application ID URI for app with multiple capabilities: If you're building an API-based message extension, enter the application ID URI as
api://fully-qualified-domain-name.com/{YourClientId}, where {YourClientId} is your Microsoft Entra app ID.Format for domain name: Use lower case letters for domain name. Don't use upper case.
For example, to create an app service or web app with resource name,
demoapplication:If base resource name used is URL will be... Format is supported on... demoapplication https://demoapplication.example.netAll platforms. DemoApplication https://DemoApplication.example.netDesktop, web, and iOS only. It isn't supported on Android. Use the lower-case option demoapplication as base resource name.
- The Application ID URI is prefilled with app ID (GUID) in the format
Select Save.
A message pops up on the browser stating that the application ID URI was updated.

The application ID URI displays on the page.
Note and save the Application ID URI to update the app manifest later.
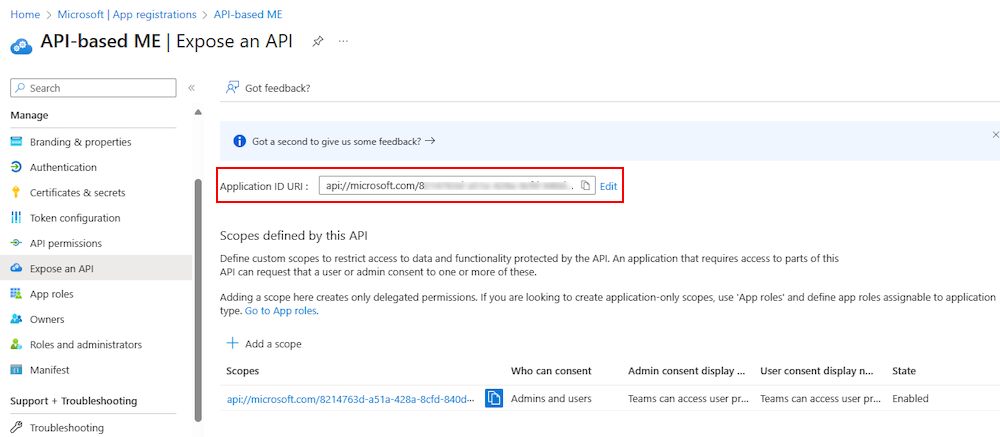
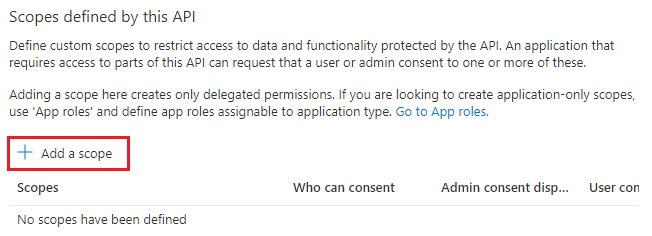
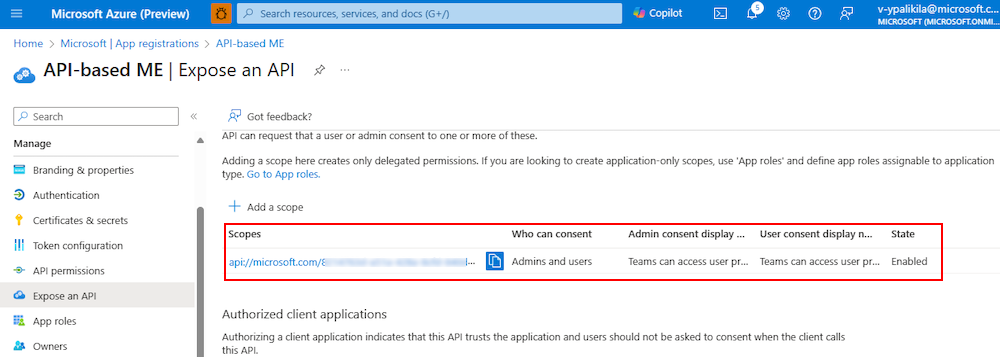
Configure API scope
Note
API-based message extension support access_as_user scope only.
Select + Add a scope in the Scopes defined by this API section.
The Add a scope page appears.
Enter the details for configuring scope.
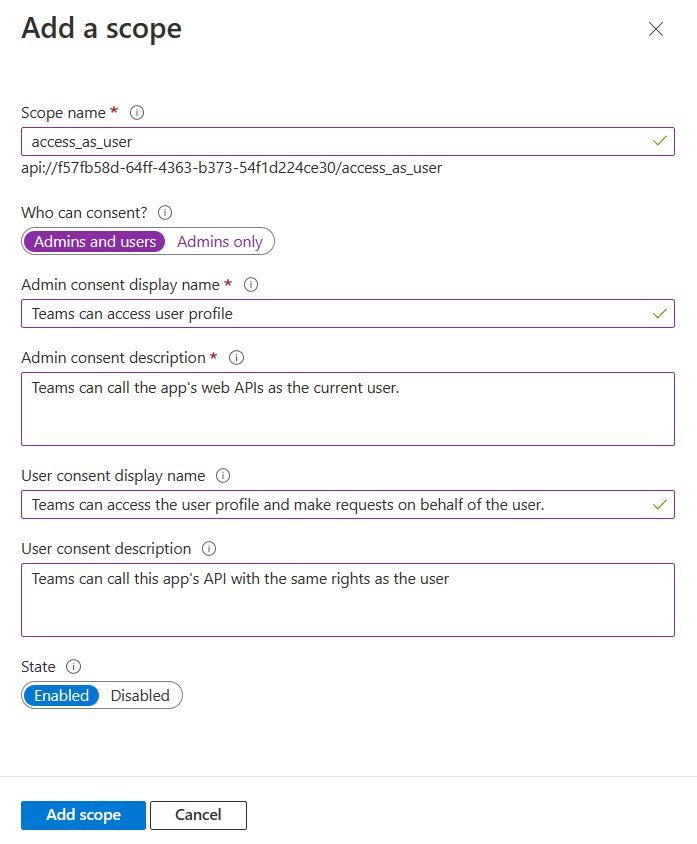
- Enter the scope name. This field is mandatory.
- Select the user who can give consent for this scope. The default option is Admins only.
- Enter the Admin consent display name. This field is mandatory.
- Enter the description for admin consent. This field is mandatory.
- Enter the User consent display name.
- Enter the description for user consent description.
- Select the Enabled option for state.
- Select Add scope.
A message pops up on the browser stating that the scope was added.

The new scope you defined displays on the page.
Configure authorized client application
Move through the Expose an API page to the Authorized client application section, and select + Add a client application.
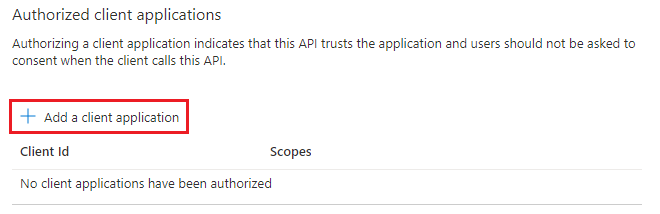
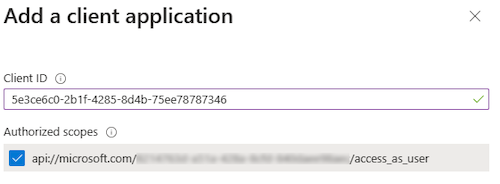
The Add a client application page appears.
Enter the appropriate Microsoft 365 client ID for the applications that you want to authorize for your app’s web application.
Note
- The Microsoft 365 client IDs for mobile, desktop, and web applications for Teams are the actual IDs that you must add.
- For a Teams API-based message extension app, you need either Web or SPA, as you can't have a mobile or desktop client application in Teams.
Select one of the following client IDs:
Use client ID For authorizing... 1fec8e78-bce4-4aaf-ab1b-5451cc387264 Teams mobile or desktop application 5e3ce6c0-2b1f-4285-8d4b-75ee78787346 Teams web application Select the application ID URI you created for your app in Authorized scopes to add the scope to the web API you exposed.
Select Add application.
A message pops up on the browser stating that the authorized client app was added.

The authorized app's client ID displays on the page.
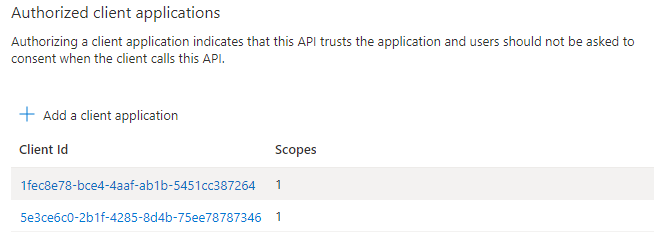
Note
You can authorize more than one client application. Repeat the steps of this procedure for configuring another authorized client application.
You've successfully configured app scope, permissions, and client applications. Ensure that you note and save the application ID URI. Next, you configure the access token version.
Update app manifest
Note
webApplicationInfo is supported in the app manifest version 1.5 or later.
Update the following properties in the app manifest file:
webApplicationInfo: Enables SSO for your app to help app users access your API-based message extension app seamlessly. section, which contains crucial details about your app. The application ID URI that you registered in Microsoft Entra ID is configured with the scope of the API you exposed. Configure your app's subdomain URI inresourceto ensure that the authentication request usinggetAuthToken()is from the domain given in the app manifest. For more information, see webApplicationInfo.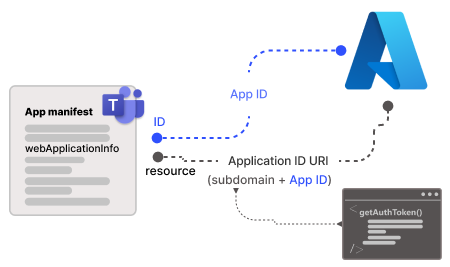
authorization.microsoftEntraConfiguration: Enables single sign-on (SSO) authentication for your message extension. Configure thesupportsSingleSignOnproperty totrueto support SSO and reduce the need for multiple authentications. For more information, see composeExtensions.
To configure app manifest:
Open the API-based message extension app project.
Open the app manifest folder.
Note
- The app manifest folder should be at the root of your project. For more information, see Create a Microsoft Teams app package.
- For more information on learning how to create a manifest.json, see the app manifest schema.
Open the
manifest.jsonfileAdd the following code snippet to the app manifest file:
webApplicationInfo
"webApplicationInfo":
{
"id": "{Microsoft Entra AppId}",
"resource": "api://subdomain.example.com/{Microsoft Entra AppId}"
}
where,
{Microsoft Entra AppId}is the app ID you created when you registered your app in Microsoft Entra ID. It's the GUID.subdomain.example.comis the application ID URI that you registered when creating scope in Microsoft Entra ID.
MicrosoftEntraConfiguration
"authorization": {
  "authType": "microsoftEntra",
  “microsoftEntraConfiguration”: {
    “supportsSingleSignOn”: true
  }
},
Save the app manifest file.
For more information, see composeExtensions.commands.
Authenticate token
When the message extension calls the API during authentication, it receives a request with the user’s authentication token (AED token). The message extension then adds the token in the authorization header of the outgoing HTTP request. The header format is Authorization: Bearer <token_value>. For example, when a message extension makes an API call to a service that requires authentication. The extension constructs an HTTP request as follows:
GET /api/resource HTTP/1.1
Host: api.example.com
Authorization: Bearer eyJhbGciOiJIUzI1NiIsInR5cCI6IkpXVCJ9.eyJzdWIiOiIxMjM0NTY3ODkwIiwibmFtZSI6IkpvaG4gRG9lIiwiaWF0IjoxNTE2MjM5MDIyfQ.SflKxwRJSMeKKF2QT4fwpMeJf36POk6yJV_adQssw5c
After the API-based message extension gets a request header with token, perform the following steps:
Authenticate: Verify the token for the audience, scope, issuer, and signature claims to check if the token is for your app.
The following is an example of a JSON Web Token (JWT) with a header and response:
{
"typ": "JWT",
"rh": "0.AhoAv4j5cvGGr0GRqy180BHbR6Rnn7s7iddIqxdA7UZsDxYaABY.",
"alg": "RS256",
"kid": "q-23falevZhhD3hm9CQbkP5MQyU"
}.{
  "aud": "00000002-0000-0000-c000-000000000000",
  "iss": "https://login.microsoftonline.com/72f988bf-86f1-41af-91ab-2d7cd011db47/v2.0",
  "iat": 1712509315,
  "nbf": 1712509315,
  "exp": 1712513961,
  "aio": "Y2NgYEjJqF0stqv73u41a6ZmxPEvBgA=",
  "azp": "1fec8e78-bce4-4aaf-ab1b-5451cc387264",
  "azpacr": "0",
  "name": "John Doe",
  "oid": "00000000-0000-0000-0000-000000000000",
  "preferred_username": "john.doe@contoso.com",
  "rh": "I",
  "scp": "access_as_user",
  "sub": "e4uM7JgAEm08GBuasSltQjvPuMX1fR5TqxopJpqZJB8",
  "tid": "12345678-aaaa-bbbb-cccc-9876543210ab",
  "uti": "h7DMQwSPAEeiEe62JJUGAA",
  "ver": "2.0"
  }
Troubleshooting
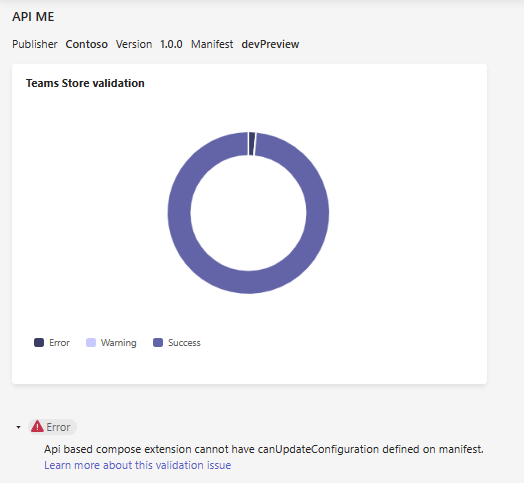
If you get a Manifest parsing has failed error message when uploading the app to teams, use Teams app validator to validate the app package, including the app manifest and OpenAPI spec file. Review the app manifest and the OpenAPI Description document requirements to resolve errors or warnings and try uploading your app.
If you encounter any issues while running your app in Teams, use the following troubleshooting steps to identify and resolve your issue:
Network: Select the Network tab in Developer tools to inspect network activity
Open Teams web client.
Sign in with your Microsoft 365 credentials.
Go to a chat, and run your message extension app.
At the top-right, select Settings and more (...). Go to More tools > Developer tools.
Select Network. Select the filter option and enter invoke in the search field.
Select an error from the list.
In the right pane, select the Response tab.
A JSON object representing an error response from a service or API is displayed. It contains a
standardizedErrorobject witherrorCode,errorSubCode, anderrorDescription, which have more details about the error.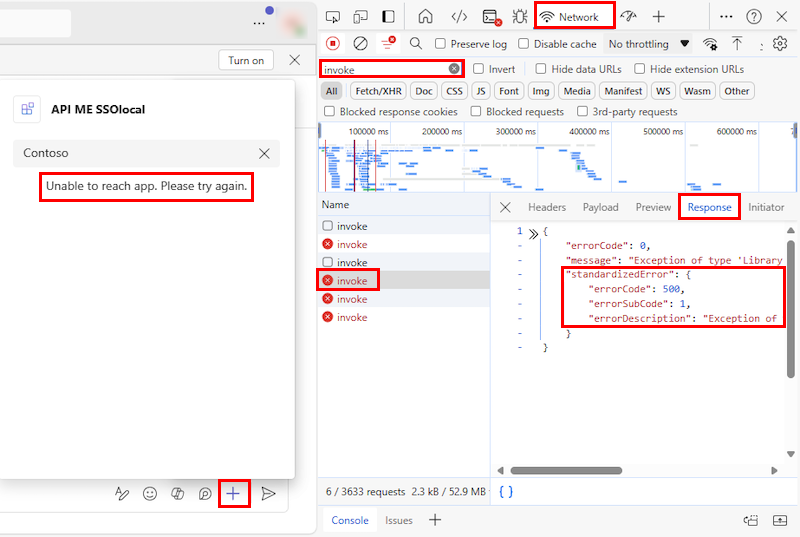
Common HTTP Error Responses:
- A 400 Bad Request error might occur if a request parameter is missing or incorrectly formatted.
- A 401 Unauthorized or 403 Forbidden error suggests issues with the API key, such as it being missing or unauthorized.
- A 500 Internal Server Error indicates that the service doesn't know how to respond, due to a server-side issue.
Troubleshooting with Tools: If the information from the network trace is insufficient, you can construct a request following the OpenAPI description document and use tools like Swagger Editor or Postman to test the request, including the authorization header for the API key if necessary.
If you’re unable to resolve the errors, we recommend contacting Microsoft Teams product support for further assistance.
Platform Docs