Unfurl links in Teams using bot
Microsoft Bot Framework extends the cards specification by adding a set of predefined cards that bots can use as a part of bot messaging. Link unfurling using bot in Teams helps you to register your app and helps to receive an invoke activity, when the URL with domain is pasted into the compose message area. The invoke activity contains the full URL and you can respond with a card. Users can unfurl the link using bot with additional information to get an enhanced experience.
Note
Link unfurling isn't supported on mobile clients.
Key features of link unfurling
- Allows user to paste URLs and respond with a card.
- Allows user to register the app and receives invoke activity.
This step-by-step guide helps you to create a bot to perform link unfurling in Microsoft Teams for https://www.BotFramework.com. You'll see the following output:
Prerequisites
Ensure you install the following tools and set up your development environment:
| Install | For using... | |
|---|---|---|
| Microsoft Teams | Microsoft Teams to collaborate with everyone you work with through apps for chat, meetings, and call all in one place. | |
| Visual Studio 2022 |
You can install the enterprise version in Visual Studio 2022, and install the ASP.NET and web development workloads. Use the latest version. | |
| .NET Core SDK | Customized bindings for local debugging and Azure Functions app deployments. Use the latest version or install the portable version. | |
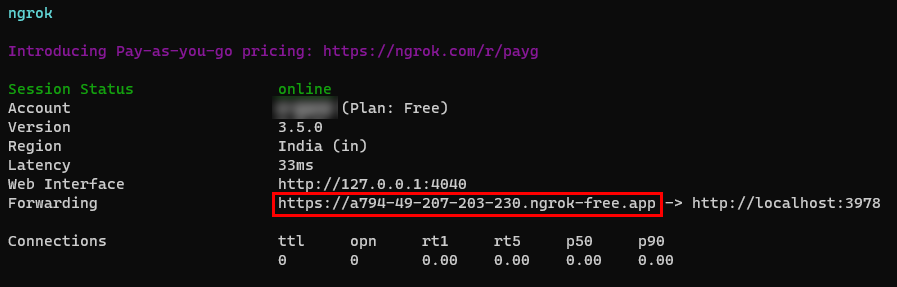
| Dev tunnel | Teams app features (conversational bots, message extensions, and incoming webhooks) need inbound connections. A tunnel connects your development system to Teams. Dev tunnel is a powerful tool to securely open your localhost to the internet and control who has access. Dev tunnel is available in Visual Studio 2022 version 17.7.0 or later. or You can also use ngrok as a tunnel to connect your development system to Teams. It isn't required for apps that only include tabs. This package is installed within the project directory (using npm devDependencies). |
Note
After downloading ngrok, sign up and install authtoken.
Set up local environment
Open Microsoft-Teams-Samples.
Select Code.
From the dropdown menu, select Open with GitHub Desktop.

Select Clone.
Register Microsoft Entra app
The following steps help you to create and register your bot in Azure portal:
- Create and register your Azure app.
- Create client secret to enable SSO authentication of the bot.
- Add Teams channel to deploy the bot to Teams channel.
- Use ngrok to create a tunnel to your web server's endpoints.
- Add messaging endpoint to the ngrok tunnel you created.
Add App registration
Go to Azure portal.
Select App registrations.
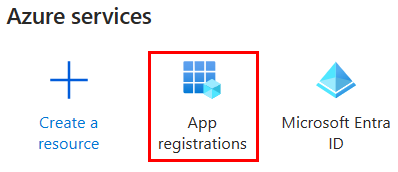
Select + New registration.

Enter the name of your app.
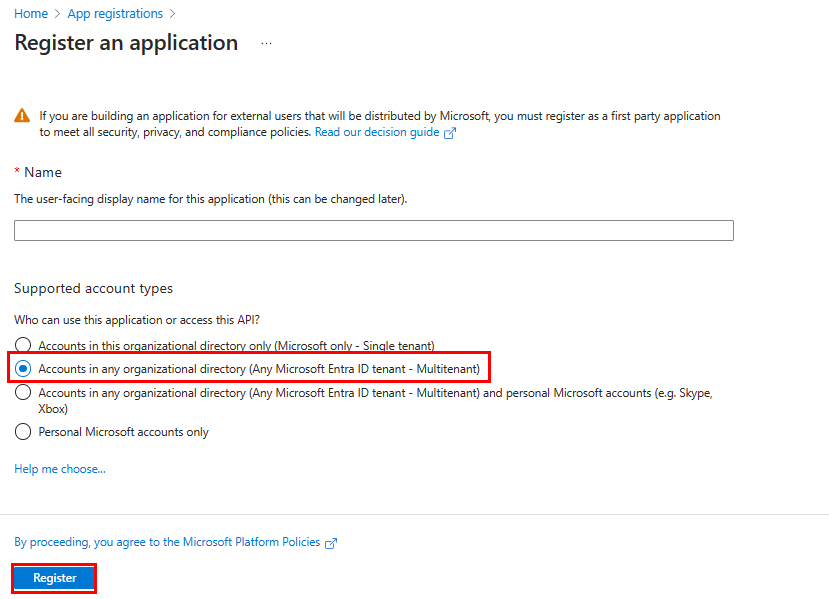
Select Accounts in any organizational directory (Any Microsoft Entra ID tenant - Multitenant).
Select Register.
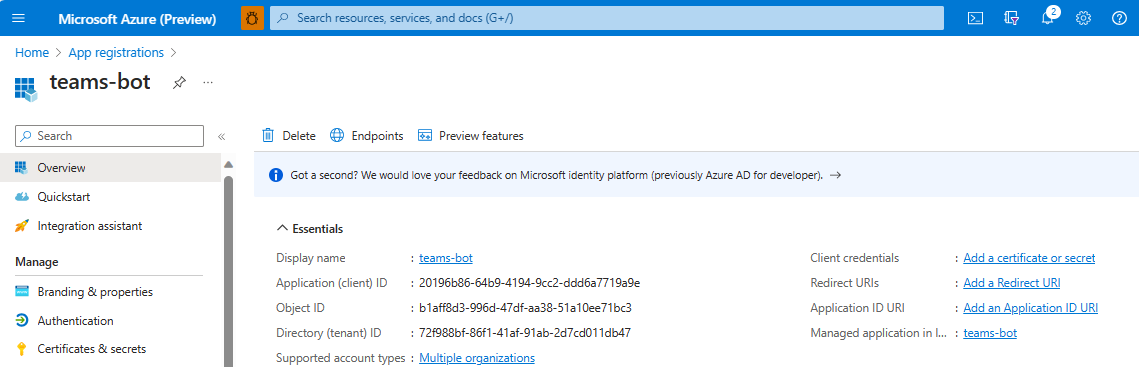
Your app is registered in Microsoft Entra ID. The app overview page appears.
Note
Save the app ID from Application (client) ID and Directory (tenant) ID for further use.
Create a tunnel
Open Visual Studio.
Select Create a new project.

In the search box, enter ASP.NET. From the search results, select ASP.NET Core Web App.
Select Next.

Enter Project name and select Next.
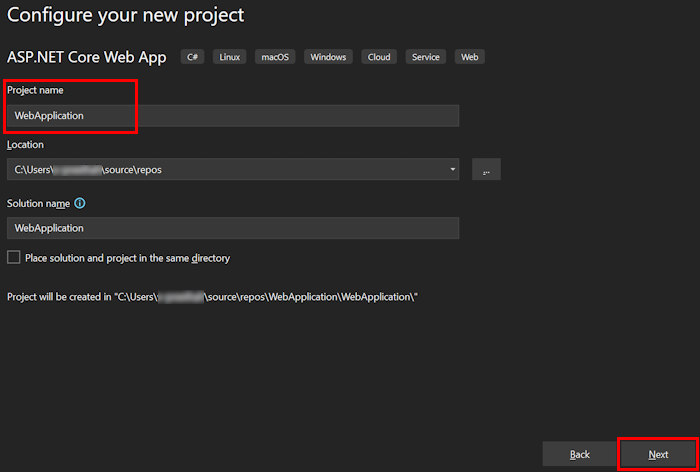
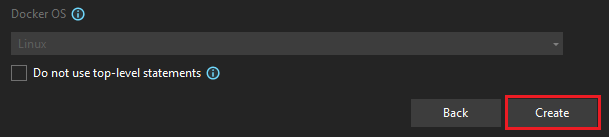
Select Create.
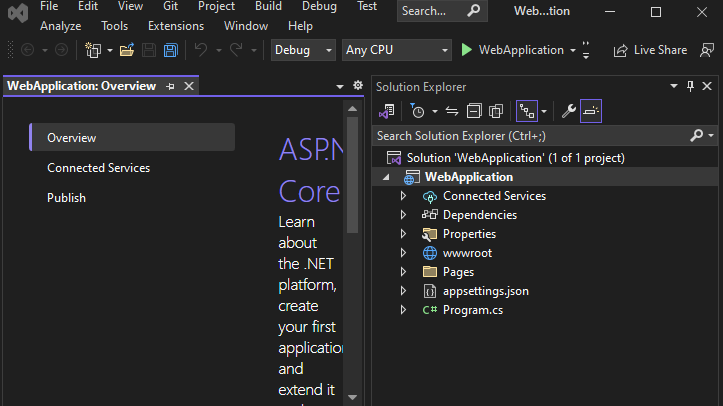
An overview window appears.
In the debug dropdown list, select Dev Tunnels (no active tunnel) > Create a Tunnel....
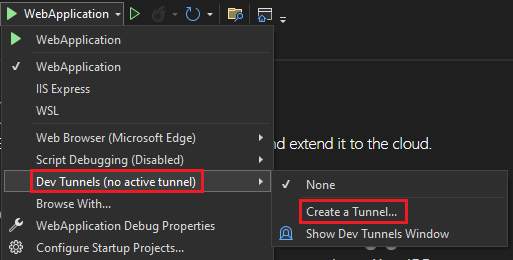
A pop-up window appears.
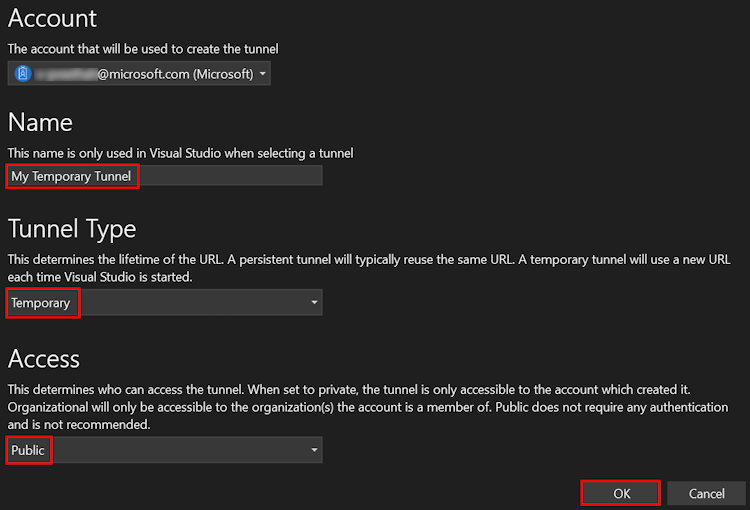
Update the following details in the pop-up window:
- Account: Enter a Microsoft or GitHub account.
- Name: Enter a name for your tunnel.
- Tunnel Type: From the dropdown list, select Temporary.
- Access: From the dropdown list, select Public.
Select OK.
A pop-up window appears showing that dev tunnel is successfully created.
Select OK.

You can find the tunnel you've created in the debug dropdown list as follows:
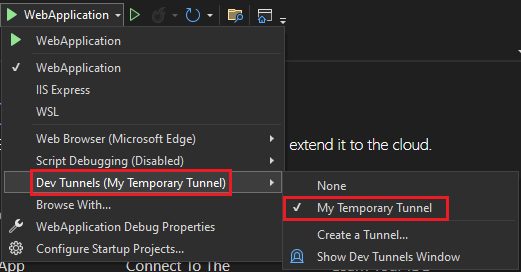
Select F5 to run the application in the debug mode.
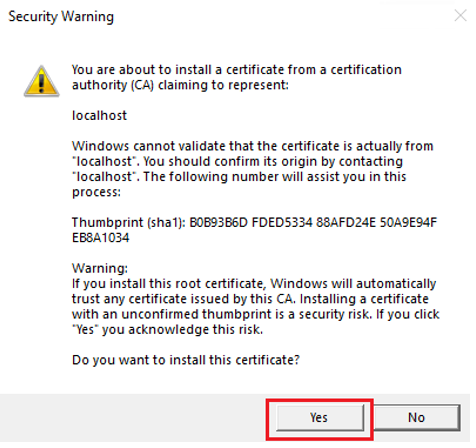
If a Security Warning dialog appears, select Yes.
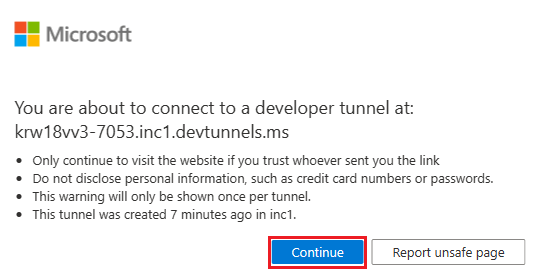
A pop-up window appears.
Select Continue.
The dev tunnel home page opens in a new browser window and the dev tunnel is now active.
Go to Visual Studio, select View > Output.
From the Output console dropdown menu, select Dev Tunnels.
The Output console shows the dev tunnel URL.

Add a web authentication
In the left pane, under Manage, select Authentication.
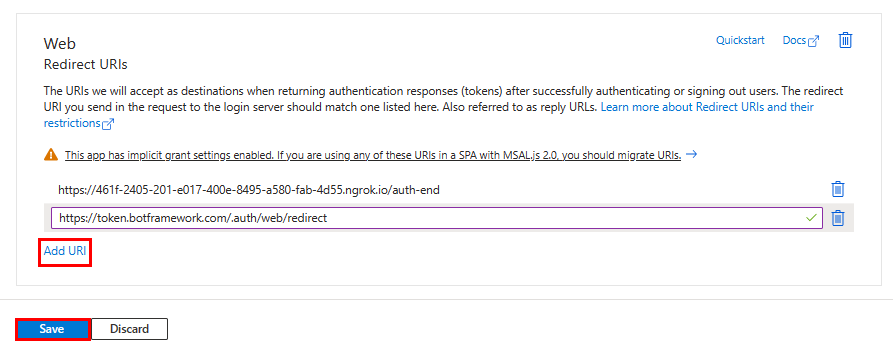
Select Add a platform > Web.

Enter the redirect URI for your app by appending
auth-endto the fully qualified domain name. For example,https://your-devtunnel-domain/auth-endorhttps://your-ngrok-domain/auth-end.Under Implicit grant and hybrid flows, select the Access tokens and ID tokens checkboxes.
Select Configure.

Under Web, select Add URI.
Enter
https://token.botframework.com/.auth/web/redirect.Select Save.
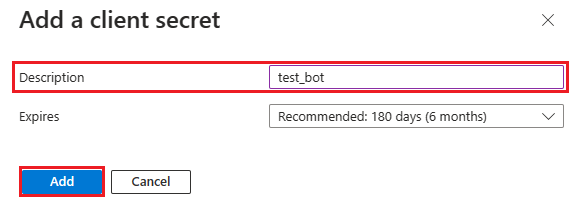
Create a client secret
In the left pane, under Manage, select Certificates & secrets.
Under Client secrets, select + New client secret.
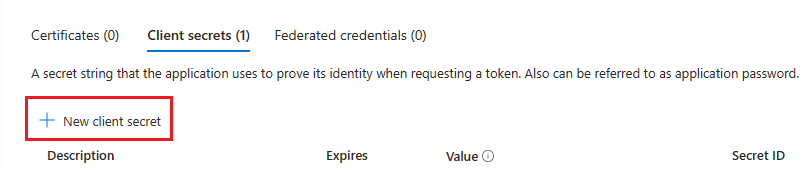
The Add a client secret window appears.
Enter Description.
Select Add.
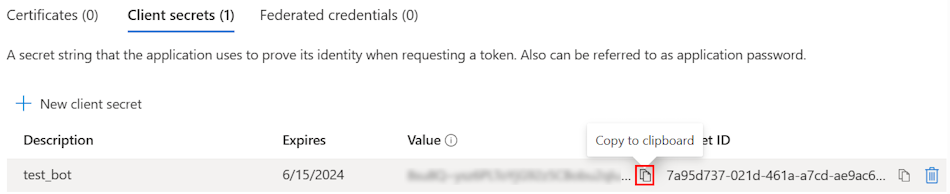
Under Value, select Copy to clipboard to save the client secret value for further use.
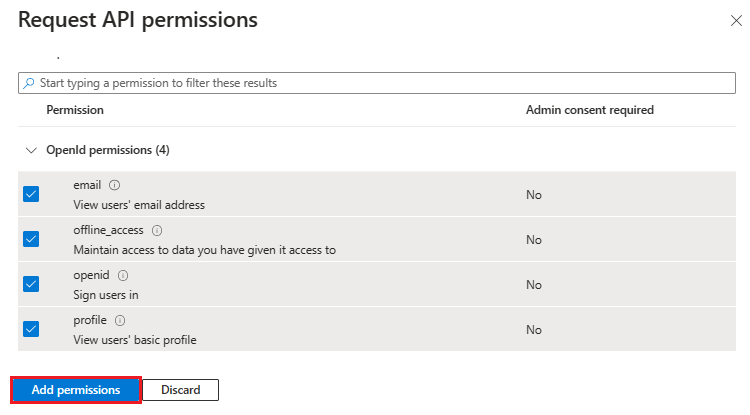
Add API permission
In the left pane, under Manage, select API permissions.
Select + Add a permission.

Select Microsoft Graph.
Select Delegated permissions.
Select the following permissions:
- OpenId permissions > email, offline_access, openid, profile.
- User > User.Read.
Select Add permissions.
Note
- If an app isn't granted IT admin consent, users must provide consent the first time they use an app.
- Users need to consent to the API permissions only if the Microsoft Entra app is registered in a different tenant.
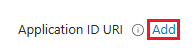
Add Application ID URI
In the left pane, under Manage, select Expose an API.
Next to Application ID URI, select Add.
Update the Application ID URI in the
api://your-devtunnel-domain/botid-{AppID}orapi://your-ngrok-domain/botid-{AppID}format and select Save.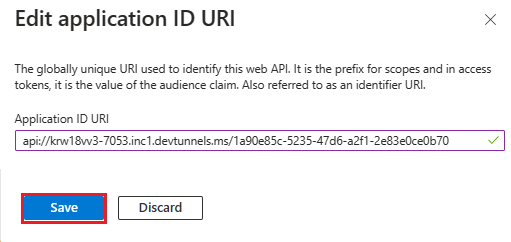
The following image shows the domain name:

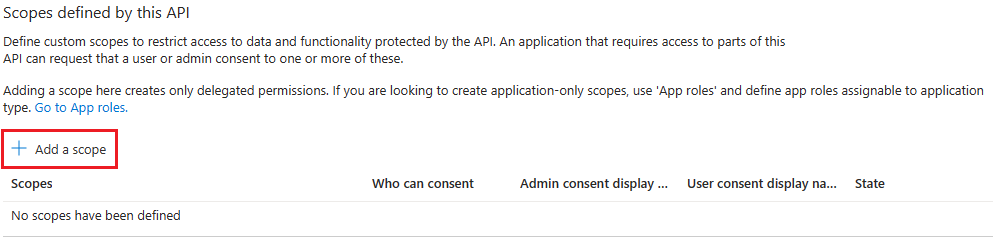
Add a scope
In the left pane, under Manage, select Expose an API.
Select + Add a scope.
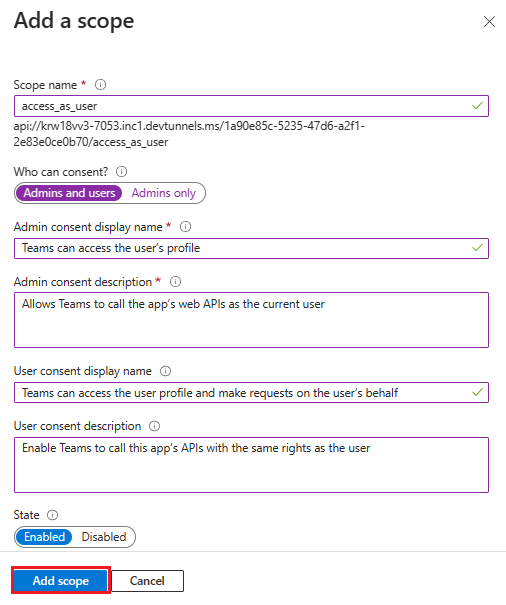
Enter access_as_user as the Scope name.
Under Who can consent?, select Admins and users.
Update the values for the rest of the fields as follows:
Enter Teams can access the user’s profile as Admin consent display name.
Enter Allows Teams to call the app’s web APIs as the current user as Admin consent description.
Enter Teams can access the user profile and make requests on the user’s behalf as User consent display name.
Enter Enable Teams to call this app’s APIs with the same rights as the user as User consent description.
Ensure that State is set to Enabled.
Select Add scope.
The following image shows the fields and the values:
Note
The Scope name must match with the Application ID URI with
/access_as_userappended at the end.
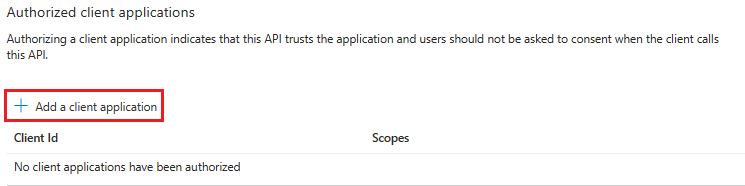
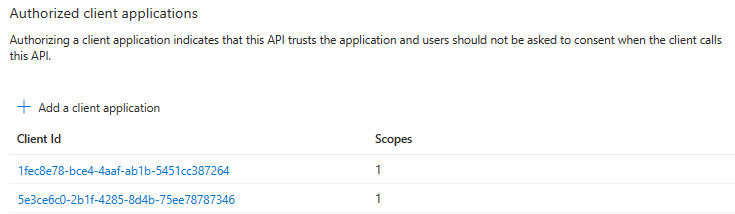
Add client application
In the left pane, under Manage, select Expose an API.
Under Authorized client applications, identify the applications that you want to authorize for your app’s web application.
Select + Add a client application.
Add Teams mobile or desktop and Teams web application.
For Teams mobile or desktop: Enter the Client ID as
1fec8e78-bce4-4aaf-ab1b-5451cc387264.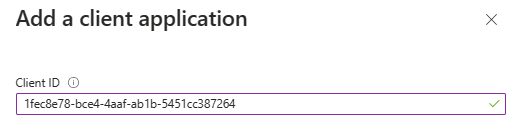
For Teams web: Enter the Client ID as
5e3ce6c0-2b1f-4285-8d4b-75ee78787346.
Select the Authorized scopes checkbox.
Select Add application.

The following image displays the Client Id:
Create your bot
Create an Azure bot resource
Note
If you're already testing your bot in Teams, sign out of this app and Teams. To see this change, sign in again.
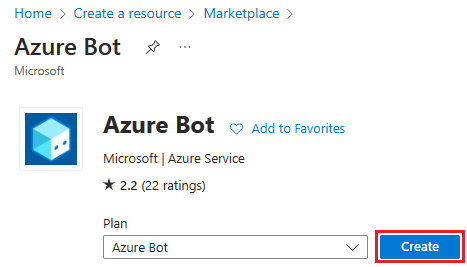
Go to Home.
Select + Create a resource.
In the search box, enter Azure Bot.
Select Enter.
Select Azure Bot.
Select Create.
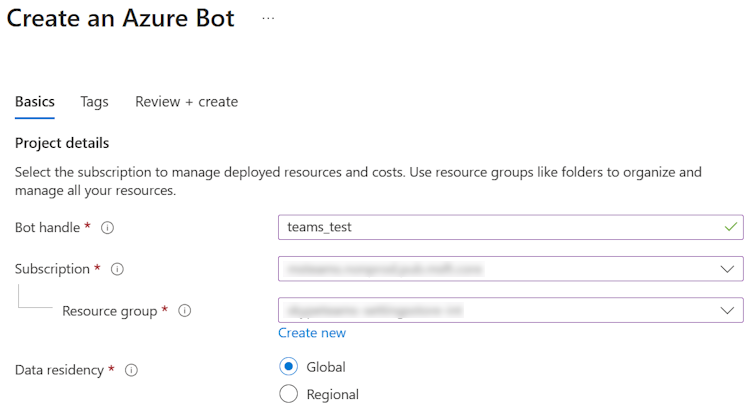
Enter the bot name in Bot handle.
Select your Subscription from the dropdown list.
Select your Resource group from the dropdown list.
If you don't have an existing resource group, you can create a new resource group. To create a new resource group, follow these steps:
- Select Create new.
- Enter the resource name and select OK.
- Select a location from New resource group location dropdown list.

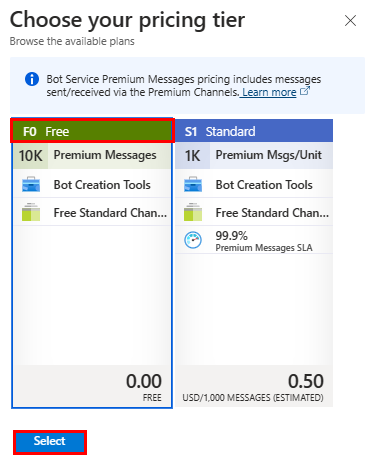
Under Pricing, select Change plan.

Select FO Free > Select.
Under Microsoft App ID, select Type of App as Multi Tenant.
In the Creation type, select Use existing app registration.
Enter the App ID.
Note
You can't create more than one bot with the same Microsoft App ID.
Select Review + create.

After the validation passes, select Create.
The bot takes a few minutes to provision.
Select Go to resource.
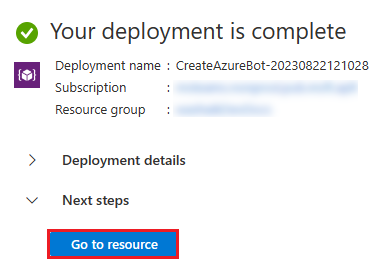
You've successfully created your Azure bot.
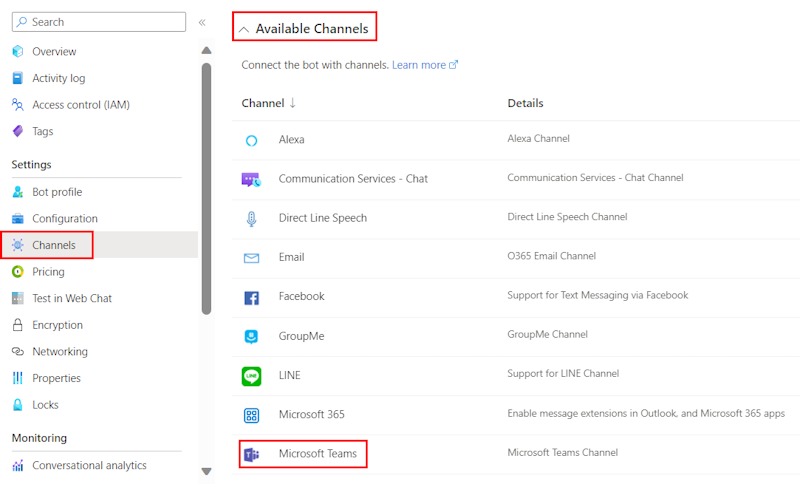
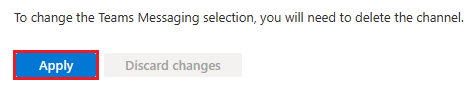
Add a Teams channel
In the left pane, select Channels.
Under Available Channels, select Microsoft Teams.
Select the checkbox to accept the Terms of Service.
Select Agree.

Select Apply.
To add a messaging endpoint
Use the dev tunnel URL in the Output console as the messaging endpoint.
In the left pane, under Settings, select Configuration.
Update the Messaging endpoint in the format
https://your-devtunnel-domain/api/messages.
Select Apply.
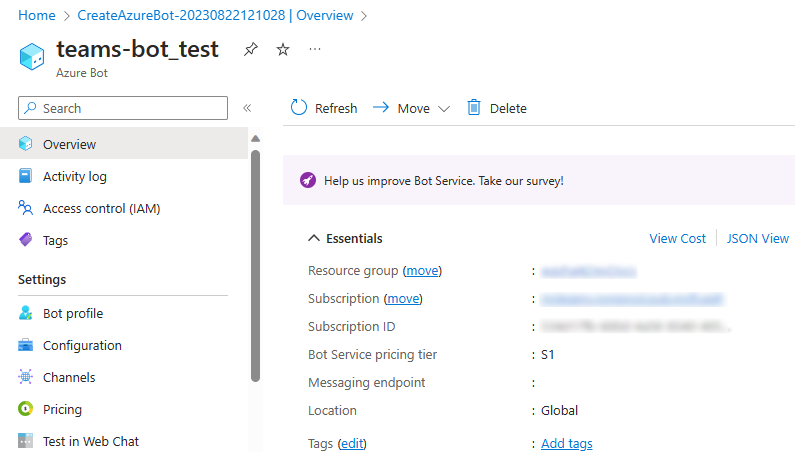
You've successfully set up a bot in Azure Bot service.
Note
If the Application Insights Instrumentation key shows an error, update with App ID.

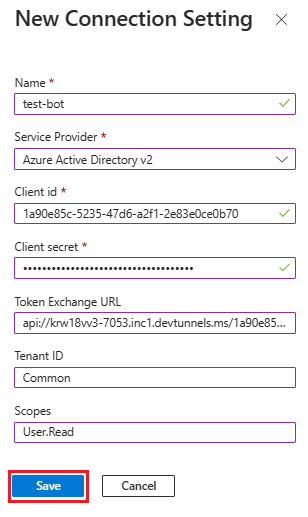
Add an OAuth connection settings
In the left pane, select Configuration.
Select Add OAuth Connection Settings.
Under New Connection Setting, update the following details:
- Name: Enter a name for your new connection setting. You can use the name in the settings of your bot service code.
- Service Provider: From the dropdown list, select Azure Active Directory v2.
- Client id: Update your Microsoft App ID.
- Client secret: Update the client secrets Value.
- Token Exchange URL: Update the Application ID URI.
- Tenant ID: Enter Common.
- Scopes: Enter User.Read.
Select Save.
Set up app settings and manifest files
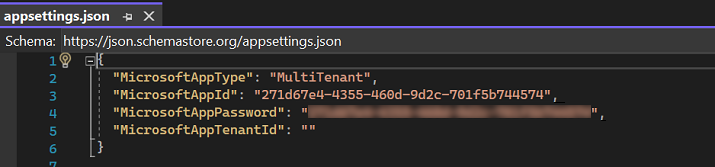
Go to the appsettings.json file in cloned repository.
Open the appsettings.json file and update the following information:
- Set
"MicrosoftAppType"to MultiTenant. - Set
"MicrosoftAppId"to your bot's Microsoft App ID. - Set
"MicrosoftAppPassword"to your bot's client secrets Value. - Set
"MicrosoftAppTenantId"as blank for MultiTenant bot.
- Set
Go to the manifest.json file in cloned repository.
Open the manifest.json file.
Add the following code snippet to your manifest file, if not already present:
"bots": [
 {
   "botId": "<<YOUR-MICROSOFT-APP-ID>>",
   "scopes": [
     "personal",
     "team",
     "groupchat"
   ],
   "supportsFiles": false,
   "isNotificationOnly": false
 }
Replace all occurrences of
<<YOUR-MICROSOFT-APP-ID>>with your bot's Microsoft App ID.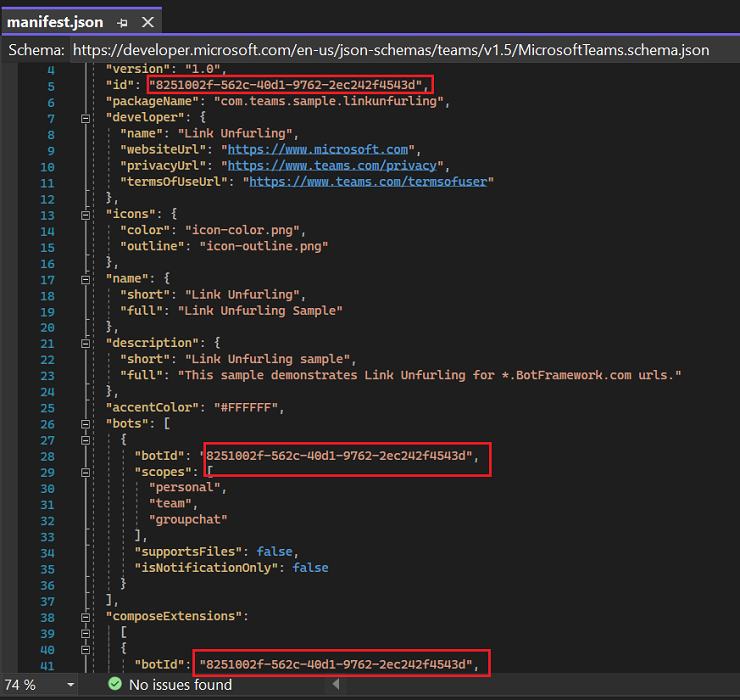
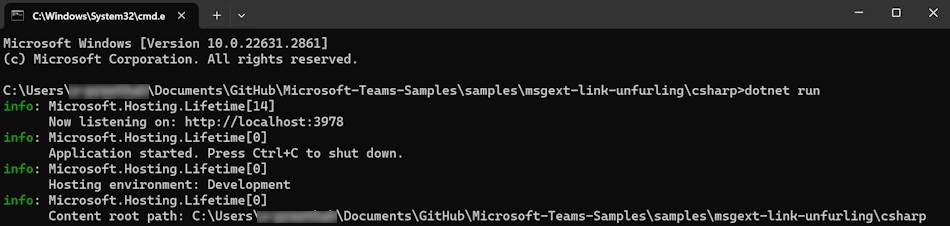
Build and run the service
To build and run the service, use the latest version of Visual Studio or Command line.
Open Visual Studio.
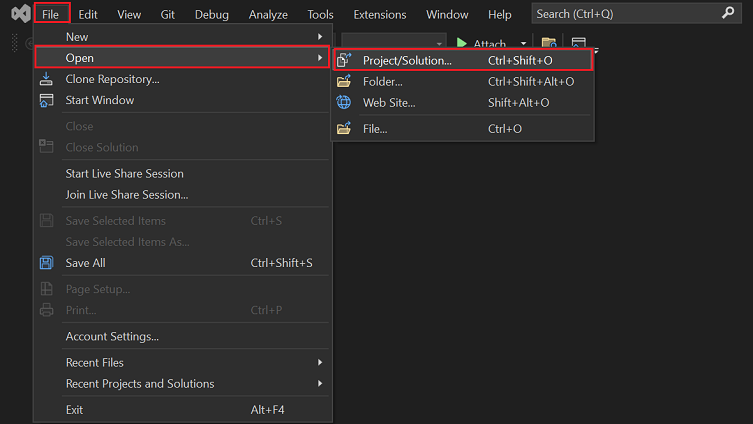
Go to File > Open > Project/Solution....
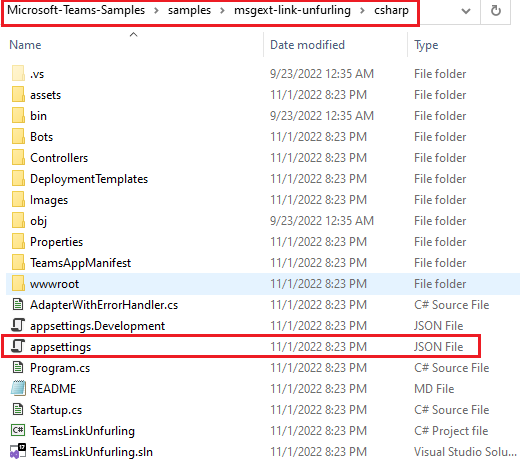
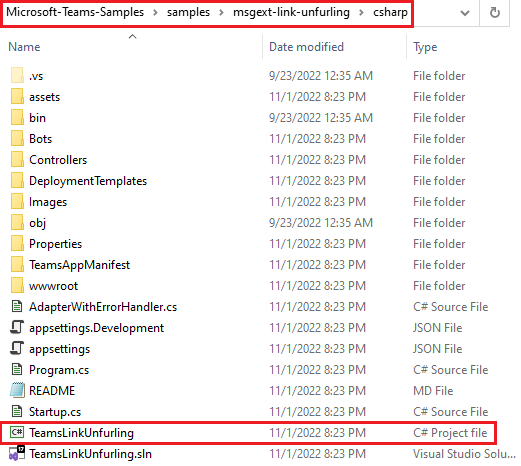
Select TeamsLinkUnfurling.csproj file from samples > msgext-link-unfurling > csharp folder.
From View, open Solution Explorer.
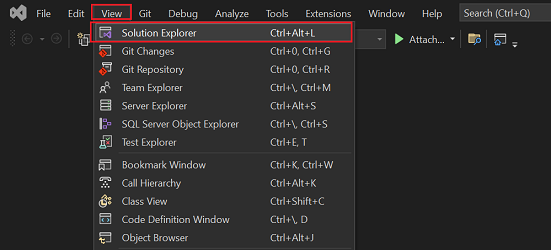
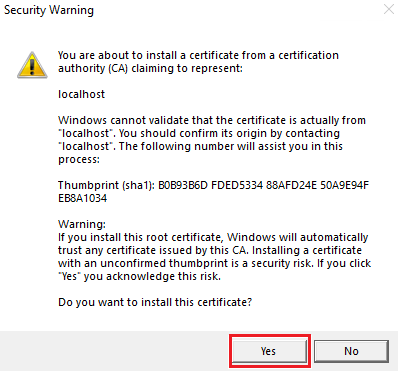
Press F5 to run the project.
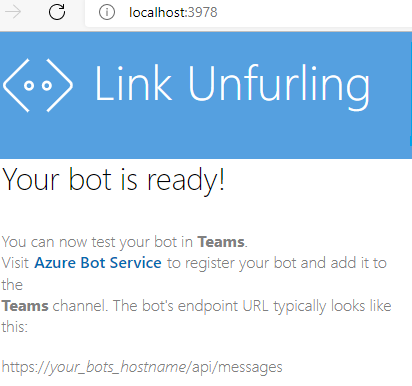
Select Yes if the following dialog appears:
A webpage opens with a message Your bot is ready!
Upload Link Unfurling app
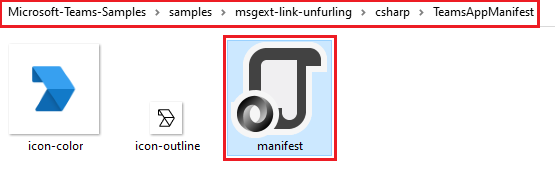
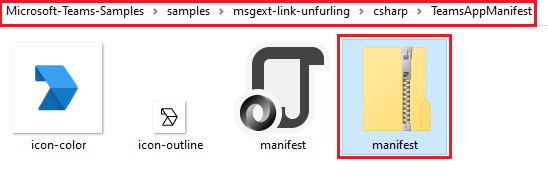
In your cloned repository, go to samples > msgext-link-unfurling > csharp > TeamsAppManifest.
Create a .zip file with the following files that are present in the Manifest folder:
manifest.json
icon-outline.png
icon-color.png
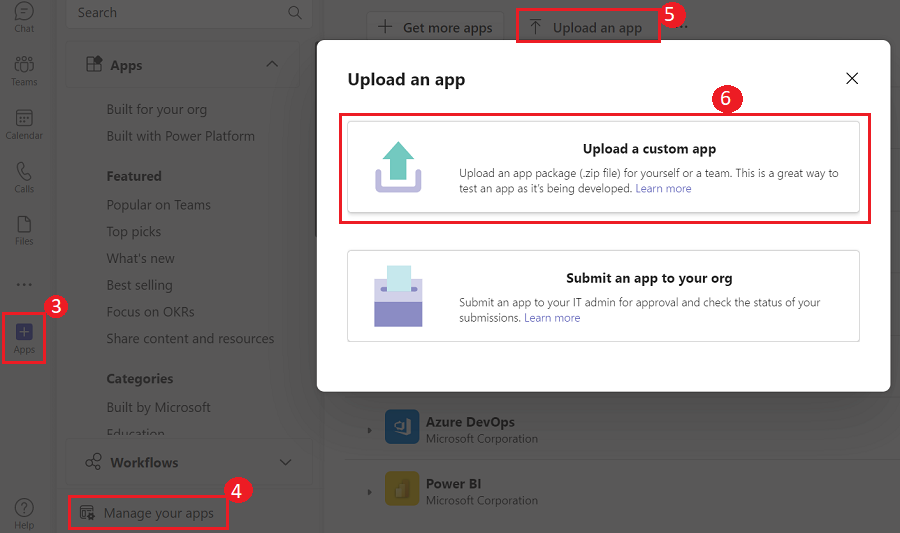
In the Teams client, select the Apps icon.
Select Manage your apps.
Select Upload an app
Look for the option to Upload a custom app. If you see the option, custom app upload is enabled.
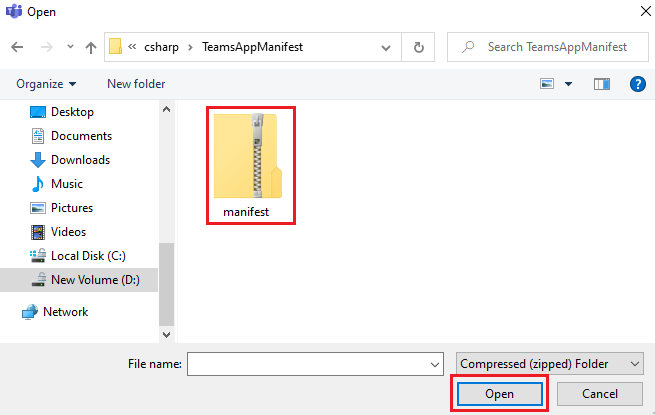
Select the .zip file you've created in the TeamsAppManifest folder and select Open.
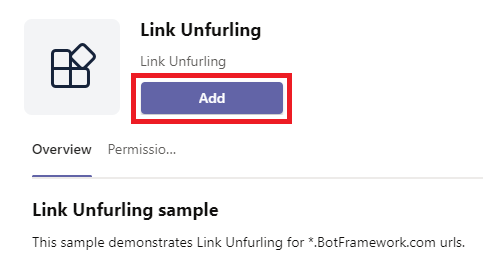
Select Add.
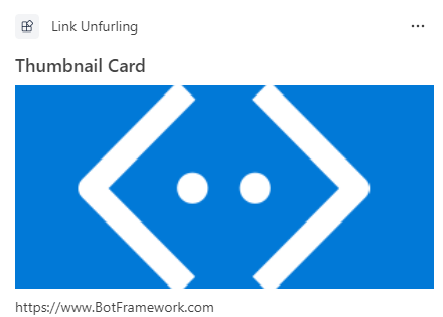
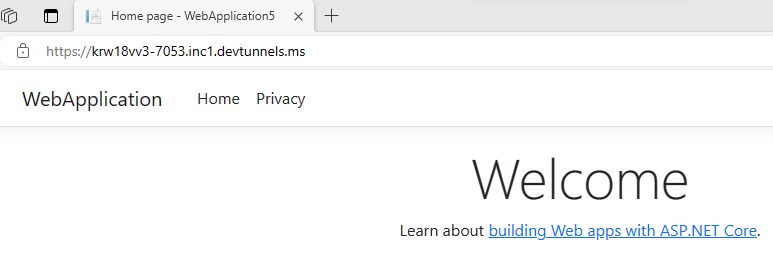
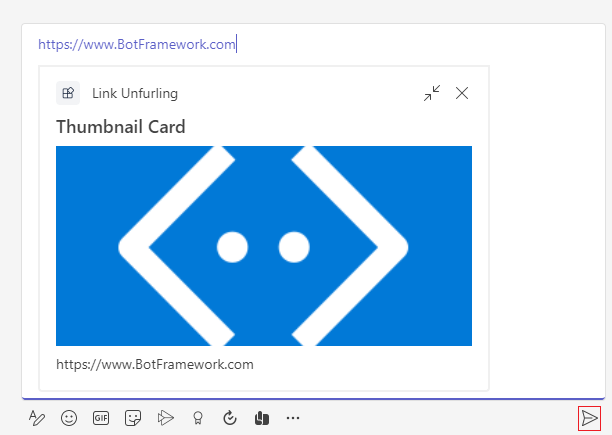
In the compose message area, enter
https://www.BotFramework.com.The link unfurls as shown in the following image:

Select Send.
Complete challenge
Did you come up with something like this?
Congratulations!
You've completed the tutorial to get started with Teams link unfurling app!
Have an issue with this section? If so, please give us some feedback so we can improve this section.
Platform Docs
Feedback
Coming soon: Throughout 2024 we will be phasing out GitHub Issues as the feedback mechanism for content and replacing it with a new feedback system. For more information see: https://aka.ms/ContentUserFeedback.
Submit and view feedback for