Microsoft Entra ID provides access to your tab app based on the app user's Teams identity. Register your tab app with Microsoft Entra ID so that the app user who has signed into Teams can be given access to your tab app.
Enable SSO in Microsoft Entra ID
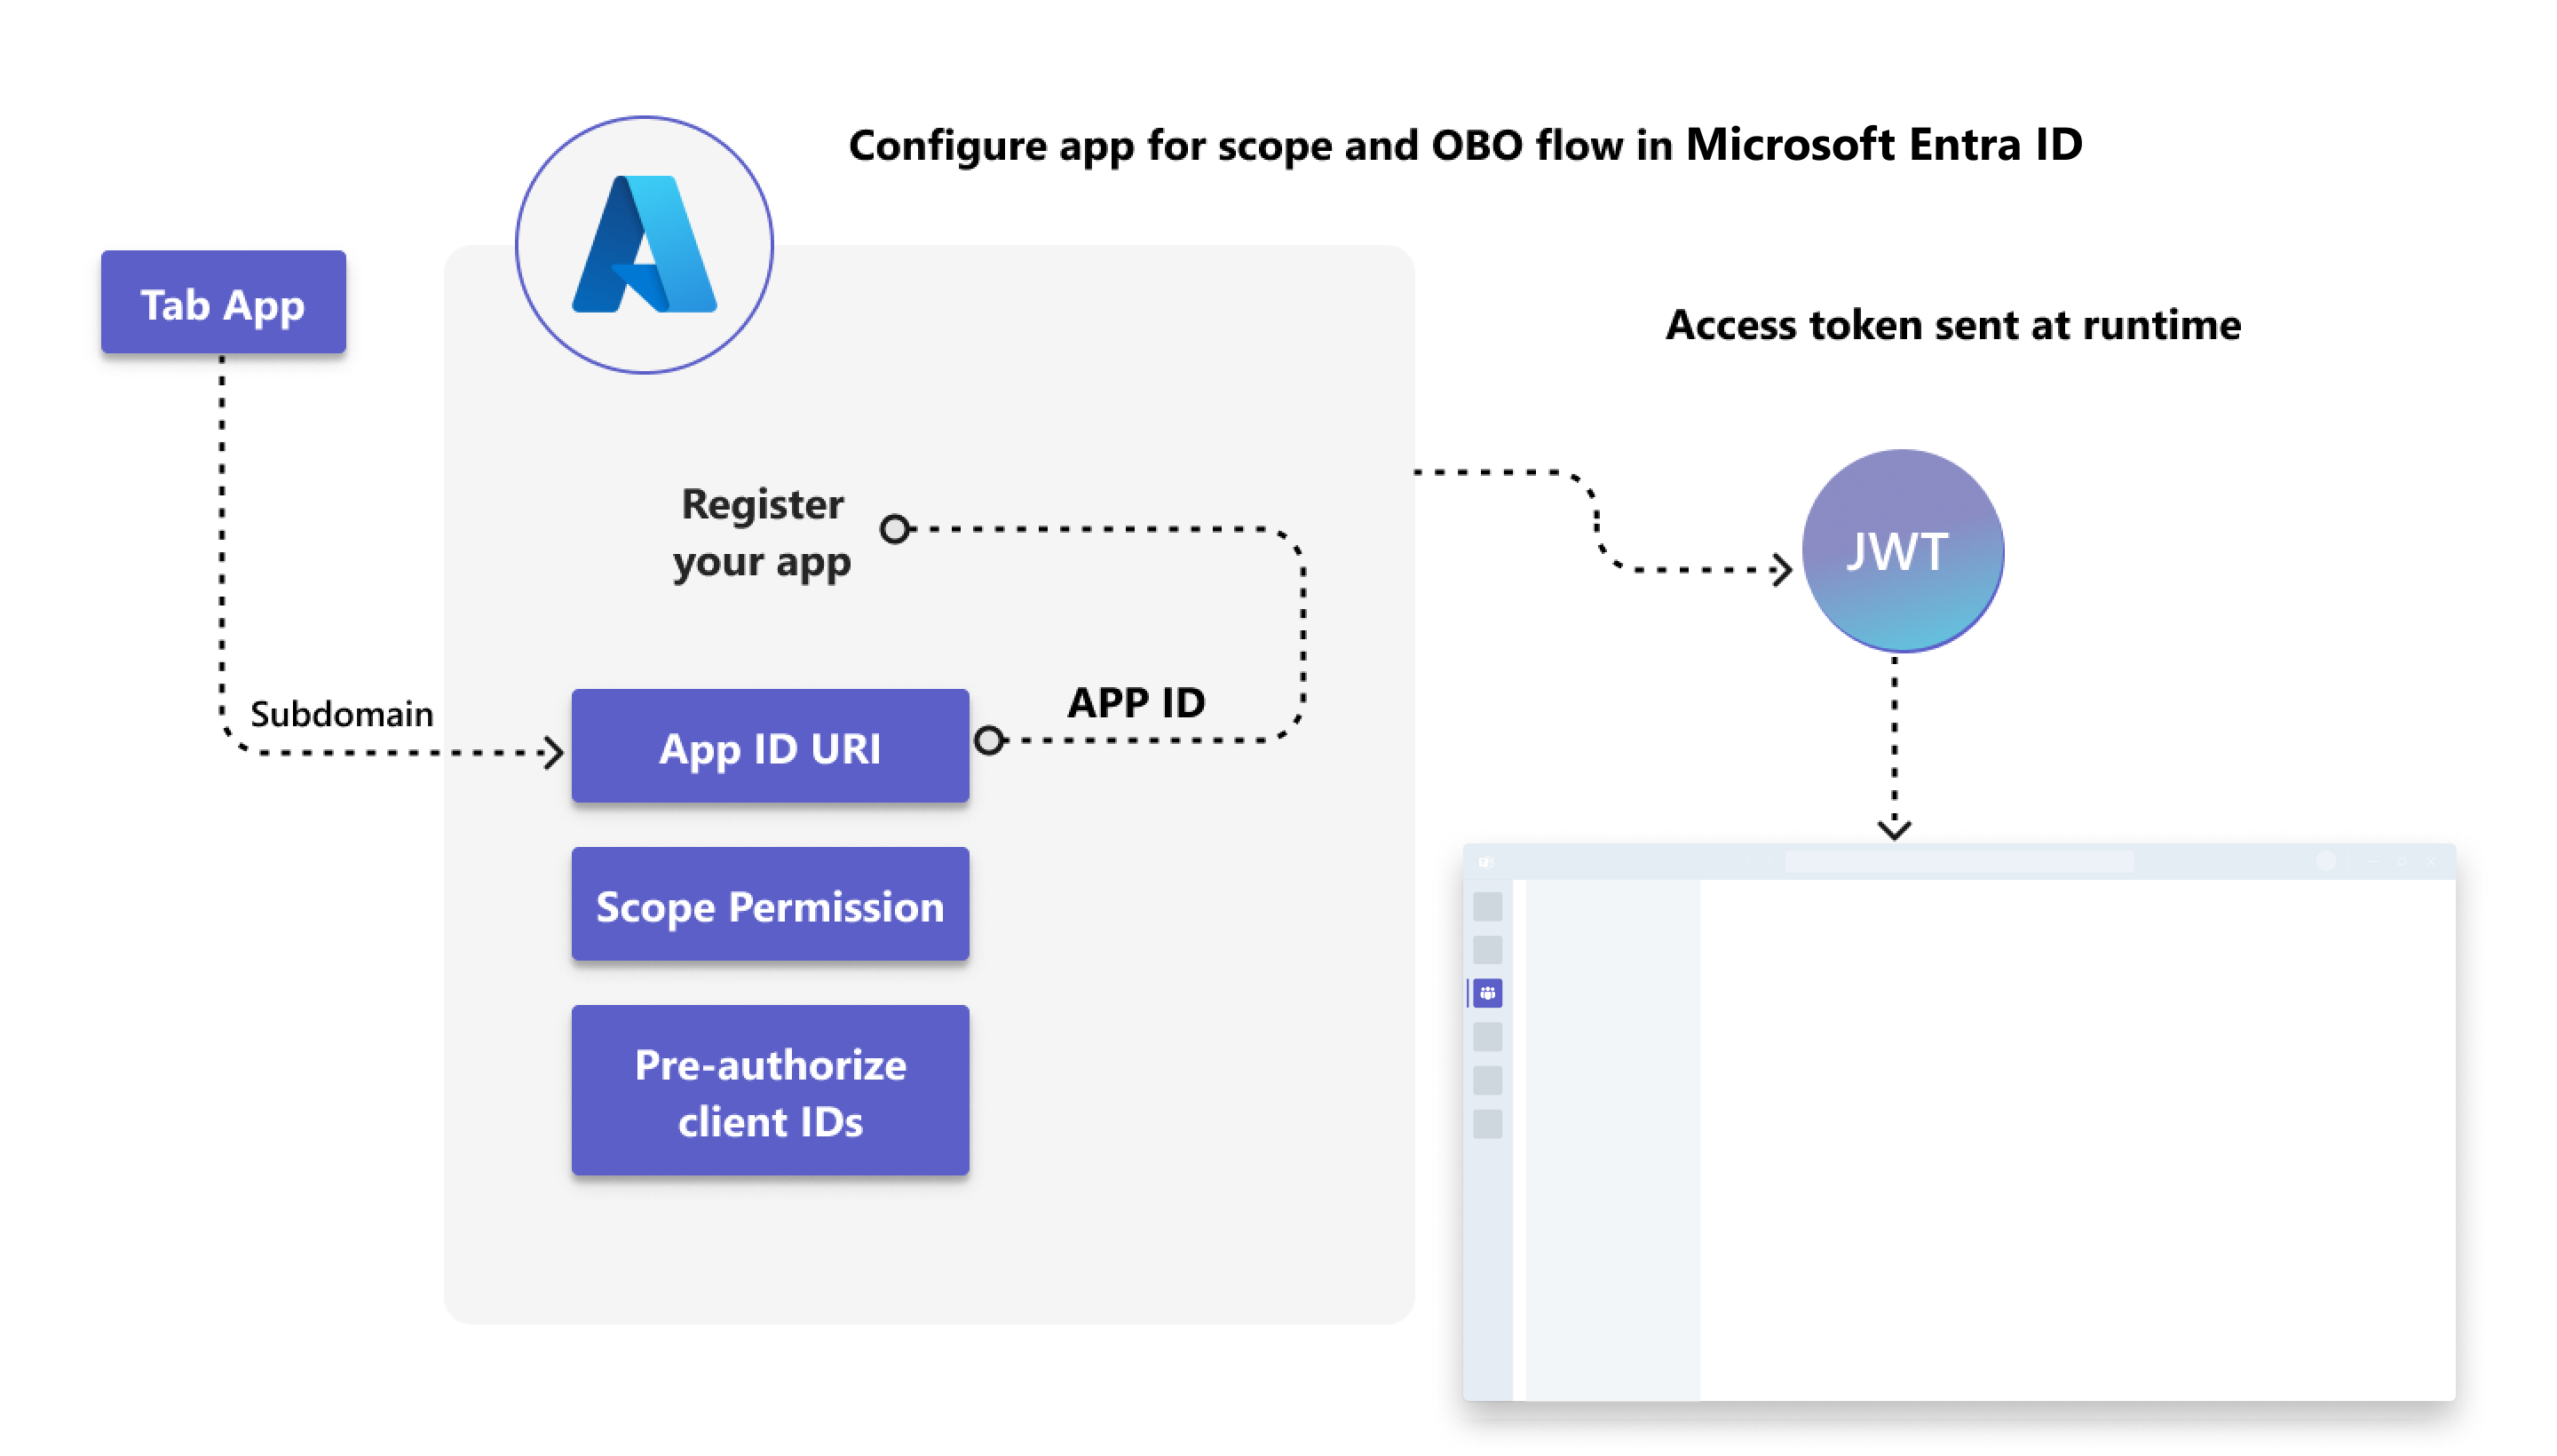
Registering your tab app in Microsoft Entra ID and enabling it for SSO requires making app configurations, such as generating app ID, defining API scope, and preauthorize client IDs for trusted applications.
Create a new app registration in Microsoft Entra ID, and expose its (web) API using scopes (permissions). Configure a trust relationship between the exposed API on Microsoft Entra ID and your app. It allows Teams Client to obtain an access token on behalf of your application and the logged-in user. You can add client IDs for the trusted mobile, desktop, and web applications that you want to preauthorize.
You might also need to configure other details, such as authenticating app users on the platform or device where you want to target your tab app.
User-level Graph API permissions are supported, that is, email, profile, offline_access, and OpenId. If you require access to other Graph scopes, such as User.Read or Mail.Read, see get an access token with Graph permissions.
Microsoft Entra configuration enables SSO for your tab app in Teams. It responds with an access token for validating the app user.
Before you configure your app
It's helpful if you learn about the configuration for registering your app on Microsoft Entra ID beforehand. Ensure that you've prepared to configure the following details prior to registering your app:
Single or multitenant options: Will your application be used in only the Microsoft 365 tenant where it's registered, or will many Microsoft 365 tenants use it? Applications written for one enterprise are typically single-tenant. Applications written by an independent software vendor and used by many customers need to be multitenant so each customer's tenant can access the application.
Application ID URI: It's a globally unique URI that identifies the web API you expose for your app's access through scopes. It's also referred to as an identifier URI. The application ID URI includes the app ID and the subdomain where your app is hosted. Your application's domain name and the domain name you register for your Microsoft Entra application must be the same. The multiple domains per app aren't supported.
Scope: It's the permission that an authorized app user or your app can be granted for accessing a resource exposed by the API.
Note
Custom apps built for your org (LOB apps): Custom apps built for your org (LOB apps) are internal or specific within your organization or business. Your organization can make these apps available through Microsoft Store.
Customer-owned apps: SSO is also supported for customer-owned apps within the Azure AD B2C tenants.
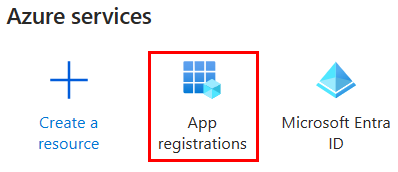
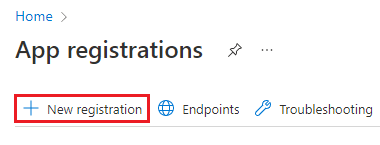
To create and configure your app in Microsoft Entra ID for enabling SSO:
You can configure your tab app in Microsoft Entra ID to configure the scope and permissions for access tokens.
Register your app in Microsoft Entra ID and configure the tenancy and app's platform, before you can enable it for SSO. Microsoft Entra ID generates a new app ID that you must note. You need to update it later in the app manifest (previously called Teams app manifest) file.
Note
Microsoft Teams Toolkit registers the Microsoft Entra application in an SSO project. You can skip this section if you've used Teams Toolkit to create your app. However, you would need to configure permissions and scope, and trust client applications.
Learn how to register your app in Microsoft Entra ID
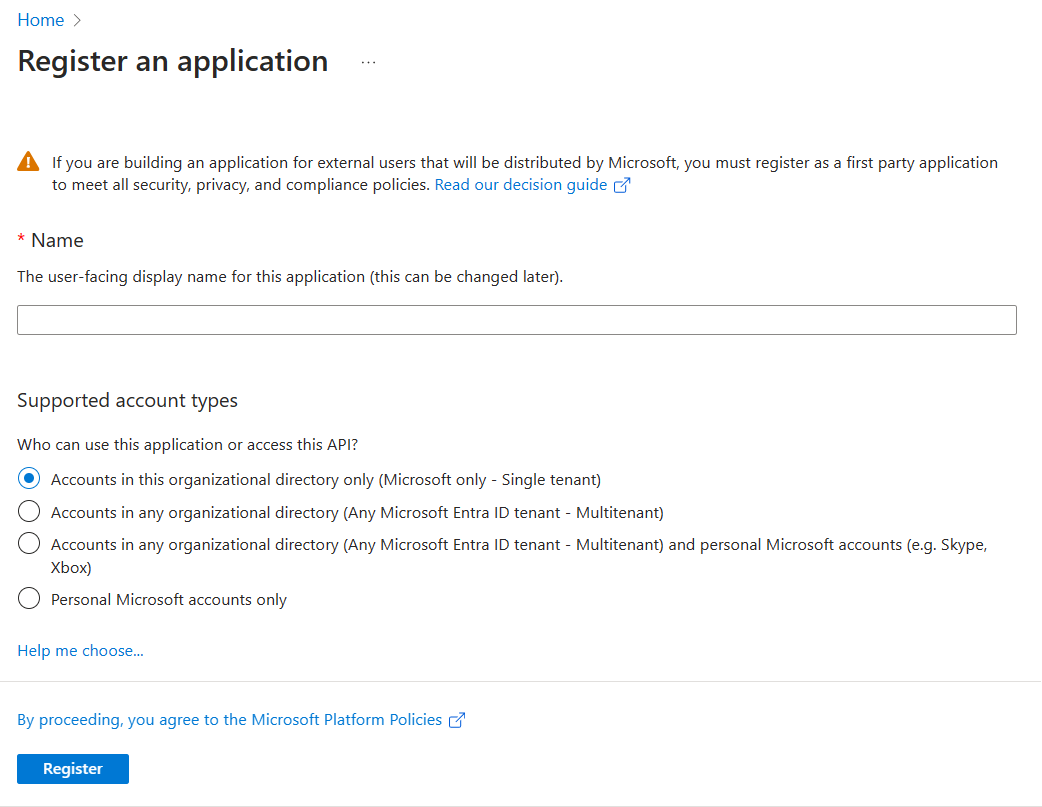
Enter the name of your app that you want to be displayed to the app user. You can change the name at a later stage, if you want to.
Select the type of user account that can access your app. You can select from single or multitenant options in organizational directories, or restrict the access to personal Microsoft accounts only.
Options for supported account types
Option
Select this to...
Accounts in this organizational directory only (Microsoft only - Single tenant)
Build an application for use only by users (or guests) in your tenant. Often called custom app built for your org (LOB app), this app is a single-tenant application in the Microsoft identity platform.
Accounts in any organizational directory (Any Microsoft Entra ID tenant - Multitenant)
Let users in any Microsoft Entra tenant use your application. This option is appropriate if, for example, you're building a SaaS application, and you intend to make it available to multiple organizations. This type of app is known as a multitenant application in the Microsoft identity platform.
Accounts in any organizational directory (Any Microsoft Entra ID tenant - Multitenant) and personal Microsoft accounts (e.g. Skype, Xbox)
Target the widest set of customers. By selecting this option, you're registering a multitenant application that can support app users who have personal Microsoft accounts also.
Personal Microsoft accounts only
Build an application only for users who have personal Microsoft accounts.
Note
You don't need to enter Redirect URI for enabling SSO for a tab app.
Select Register.
A message pops up on the browser stating that the app was created.
The page with app ID and other configurations is displayed.
Note and save the app ID from Application (client) ID to update the app manifest later.
Your app is registered in Microsoft Entra ID. You now have app ID for your tab app.
Configure scope for access token
After you've created a new app registration, configure scope (permission) options for sending access token to Teams Client, and authorizing trusted client applications to enable SSO.
To configure scope and authorize trusted client applications, you need:
To expose an API: Configure scope (permission) options for your app. Expose a web API and configure the application ID URI.
To configure API scope: Define scope for the API, and the users who can consent for a scope. You can let only admins provide consent for higher-privileged permissions.
To configure authorized client application: Create authorized client IDs for applications that you want to preauthorize. It allows the app user to access the app scopes (permissions) you've configured, without requiring any further consent. Preauthorize only those client applications you trust as your app users won't have the opportunity to decline consent.
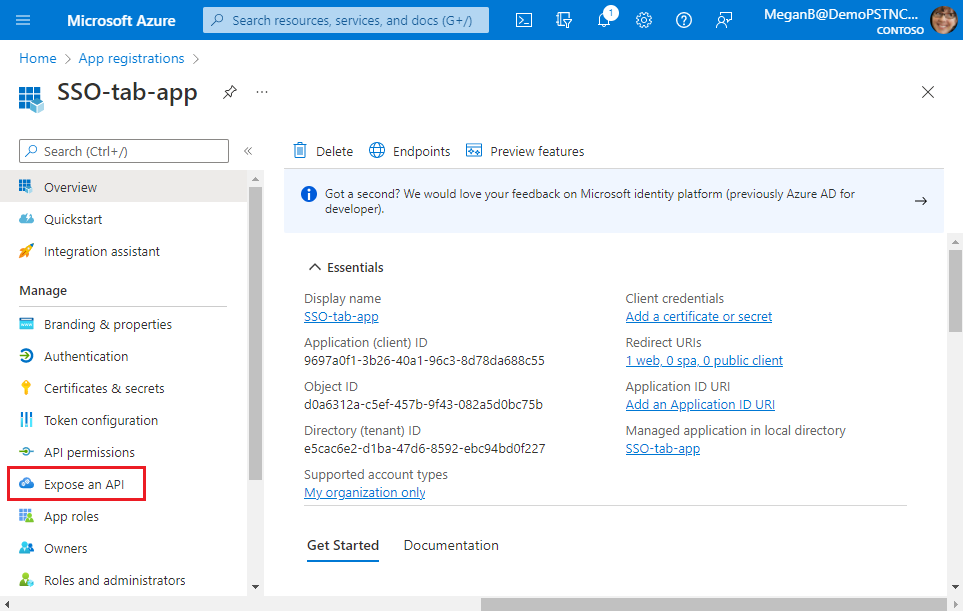
To expose an API
Select Manage > Expose an API from the left pane.
The Expose an API page appears.
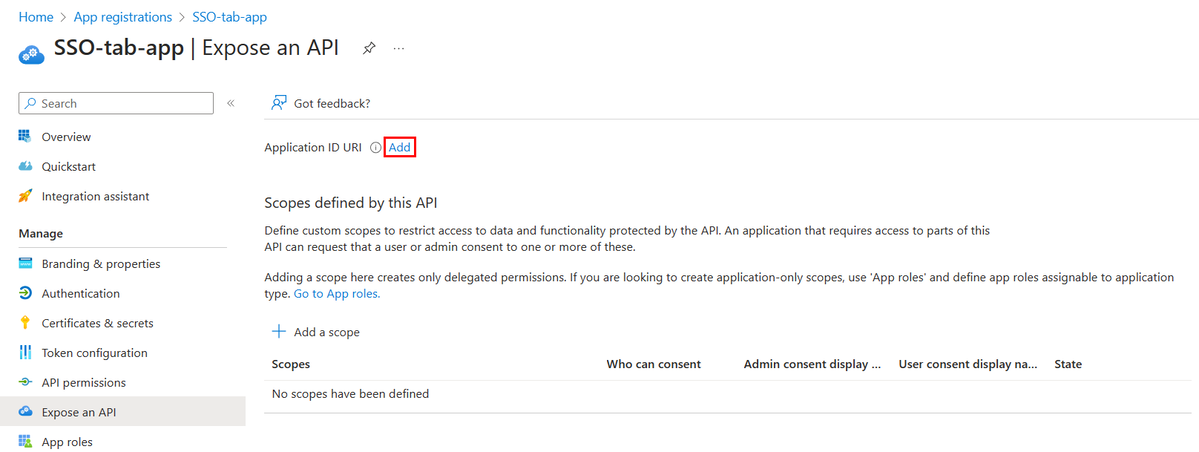
Select Add to generate application ID URI in the form of api://{AppID}.
The section for setting application ID URI appears.
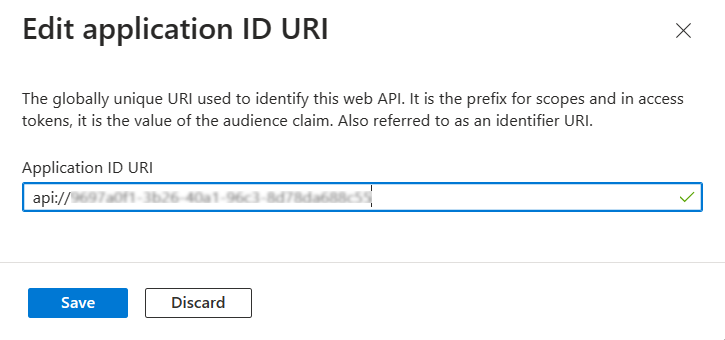
Enter the application ID URI in the format explained here.
The Application ID URI is prefilled with app ID (GUID) in the format api://{AppID}.
The application ID URI format must be: api://fully-qualified-domain-name.com/{AppID}.
Insert the fully-qualified-domain-name.com between api:// and {AppID} (which is, GUID). For example, api://example.com/{AppID}.
where,
fully-qualified-domain-name.com is the human-readable domain name from which your tab app is served. Your application's domain name and the domain name you register for your Microsoft Entra application must be the same.
If you're using a tunneling service, such as ngrok, you must update this value whenever your ngrok subdomain changes.
AppID is the app ID (GUID) that was generated when you registered your app. You can view it in the Overview section.
Important
Sensitive information: The application ID URI is logged as part of the authentication process and mustn't contain sensitive information.
Application ID URI for app with multiple capabilities: If you're building an app with a bot, a messaging extension, and a tab, enter the application ID URI as api://fully-qualified-domain-name.com/botid-{YourClientId}, where {YourClientId} is your bot app ID.
Format for domain name: Use lower case letters for domain name. Don't use upper case.
For example, to create an app service or web app with resource name, demoapplication:
If base resource name used is
URL will be...
Format is supported on...
demoapplication
https://demoapplication.example.net
All platforms.
DemoApplication
https://DemoApplication.example.net
Desktop, web, and iOS only. It isn't supported in Android.
Use the lower case option demoapplication as base resource name.
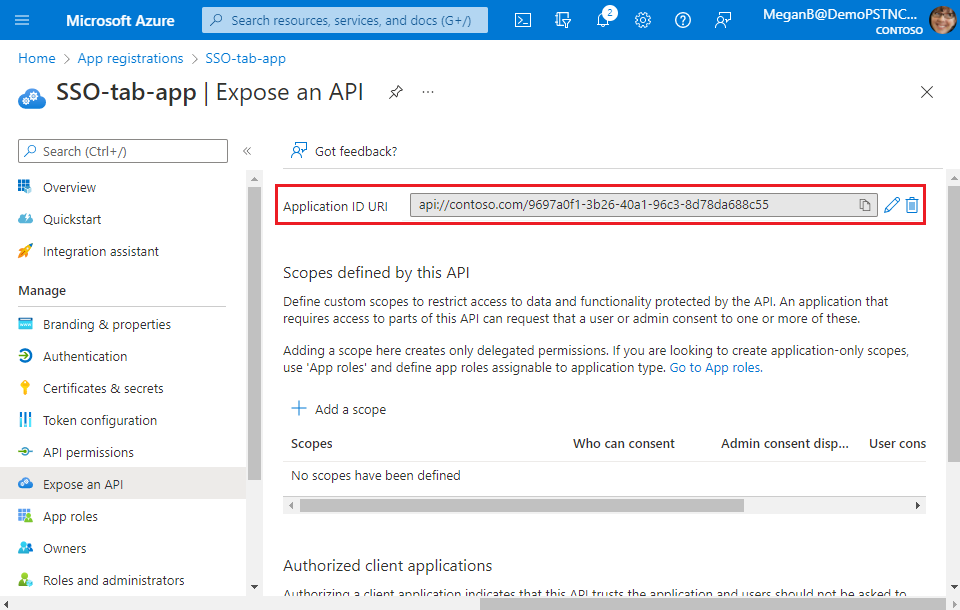
Select Save.
A message pops up on the browser stating that the application ID URI was updated.
The application ID URI displays on the page.
Note and save the Application ID URI to update the app manifest later.
To configure API scope
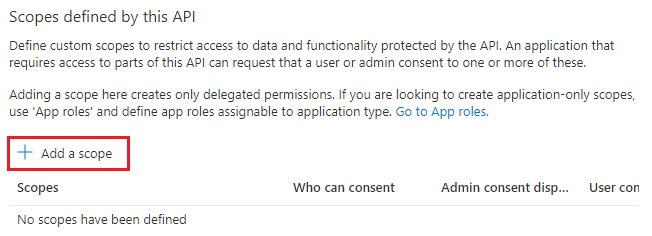
Select + Add a scope in the Scopes defined by this API section.
The Add a scope page appears.
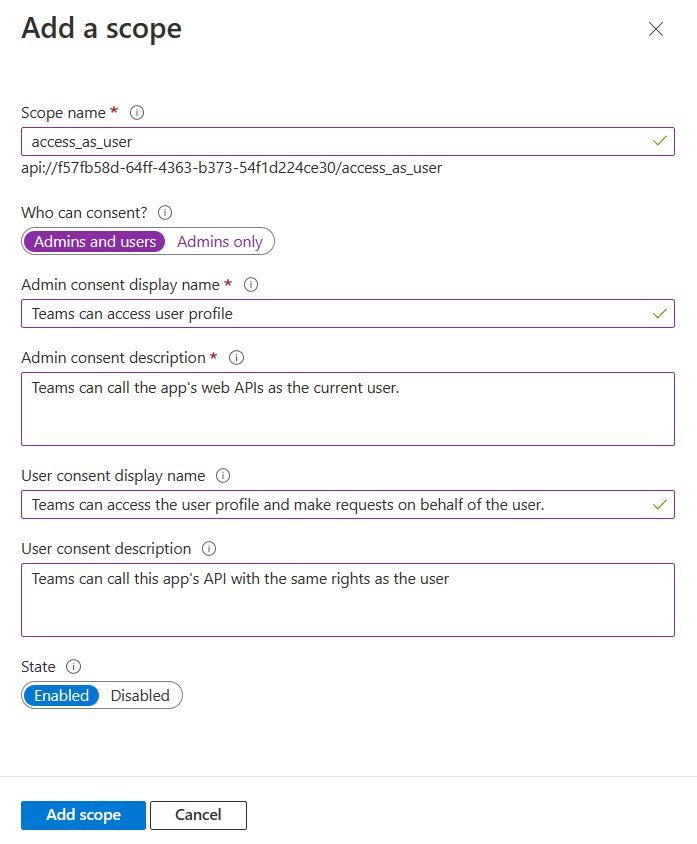
Enter the details for configuring scope.
Enter the scope name. This field is mandatory.
Select the user who can give consent for this scope. The default option is Admins only.
Enter the Admin consent display name. This field is mandatory.
Enter the description for admin consent. This field is mandatory.
Enter the User consent display name.
Enter the description for user consent description.
Select the Enabled option for state.
Select Add scope.
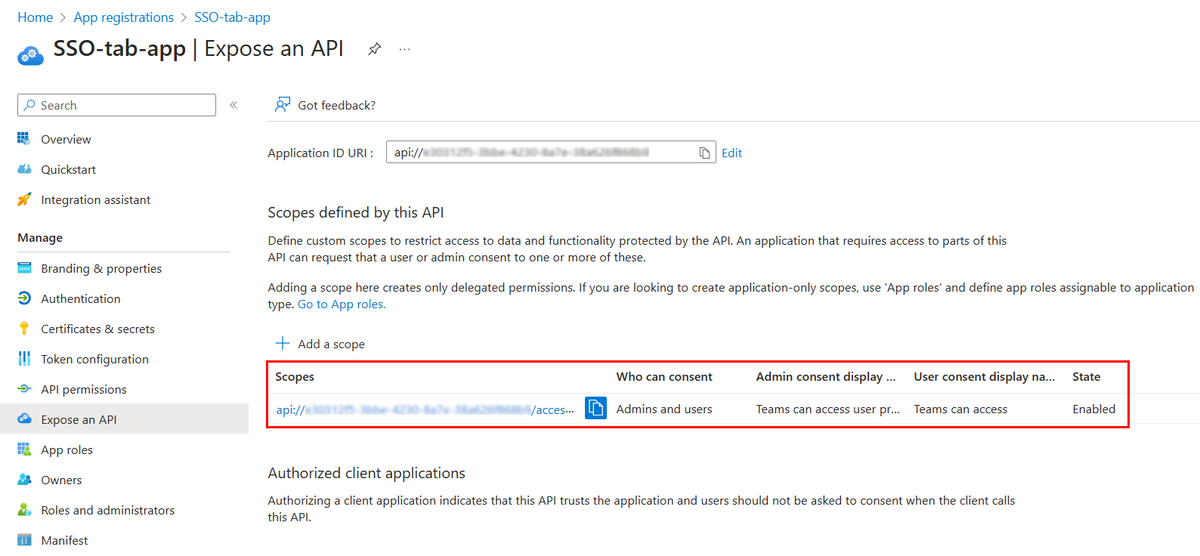
A message pops up on the browser stating that the scope was added.
The new scope you defined displays on the page.
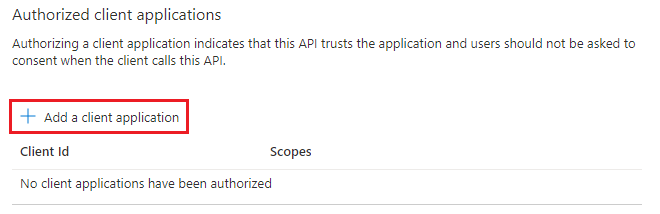
To configure authorized client application
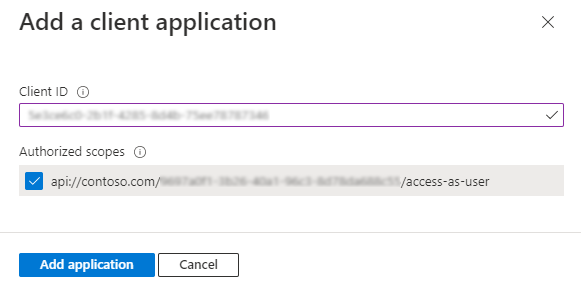
Move through the Expose an API page to the Authorized client application section, and select + Add a client application.
The Add a client application page appears.
Enter the appropriate Microsoft 365 client ID for the applications that you want to authorize for your app’s web application.
Note
The Microsoft 365 client IDs for mobile, desktop, and web applications for Teams, Microsoft 365 app, and Outlook are the actual IDs that you must add.
For a Teams tab app, you need either Web or SPA, as you can't have a mobile or desktop client application in Teams.
Select one of the following client IDs:
Microsoft 365 client application
Client ID
Teams desktop, mobile
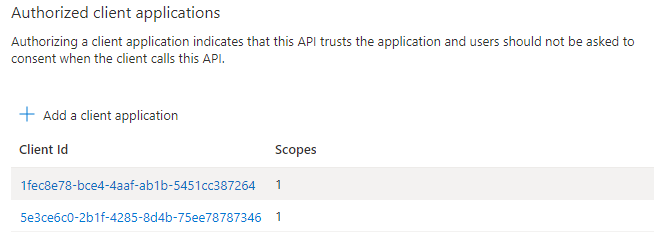
1fec8e78-bce4-4aaf-ab1b-5451cc387264
Teams web
5e3ce6c0-2b1f-4285-8d4b-75ee78787346
Microsoft 365 web
4765445b-32c6-49b0-83e6-1d93765276ca
Microsoft 365 desktop
0ec893e0-5785-4de6-99da-4ed124e5296c
Microsoft 365 mobile
d3590ed6-52b3-4102-aeff-aad2292ab01c
Outlook desktop
d3590ed6-52b3-4102-aeff-aad2292ab01c
Outlook web
bc59ab01-8403-45c6-8796-ac3ef710b3e3
Outlook mobile
27922004-5251-4030-b22d-91ecd9a37ea4
Note
Some Microsoft 365 client applications share Client IDs.
Select the application ID URI you created for your app in Authorized scopes to add the scope to the web API you exposed.
Select Add application.
A message pops up on the browser stating that the authorized client app was added.
The authorized app's client ID displays on the page.
Note
You can authorize more than one client application. Repeat the steps of this procedure for configuring another authorized client application.
You've successfully configured app scope, permissions, and client applications. Ensure that you note and save the application ID URI. Next, you configure the access token version.
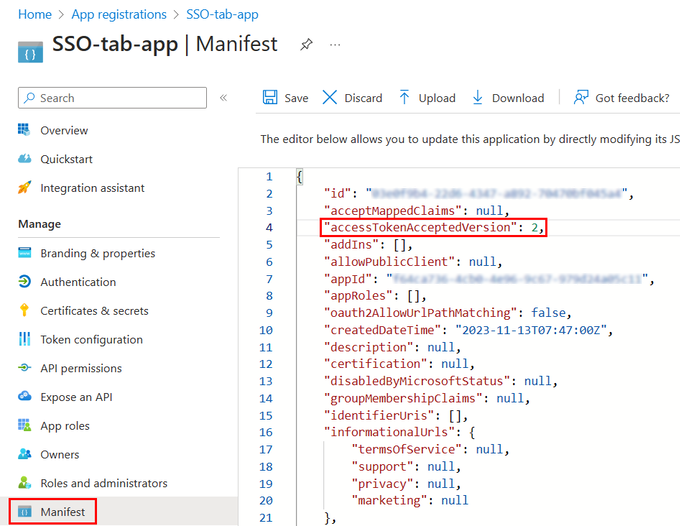
Configure access token version
You must define the access token version for your app. This configuration is made in the Microsoft Entra application app manifest.
To define the access token version
Select Manage > Manifest from the left pane.
The Microsoft Entra application app manifest appears.
Enter 2 as the value for the accessTokenAcceptedVersion property.
Note
If you've selected Personal Microsoft accounts only or Accounts in any organizational directory (Any Microsoft Entra directory - Multitenant) and personal Microsoft accounts (for example, Skype and Xbox) during app registration, update the value for the accessTokenAcceptedVersion property as 2.
Select Save
A message pops up on the browser stating that the app manifest was updated successfully.
Congratulations! You've completed the app configuration in Microsoft Entra ID required to enable SSO for your tab app.
The source for this content can be found on GitHub, where you can also create and review issues and pull requests. For more information, see our contributor guide.
Platform Docs feedback
Platform Docs is an open source project. Select a link to provide feedback:
This module focuses on effectively managing identities and enhancing security in Microsoft Enterprise Identity, ensuring that users, groups, and external identities are protected against security threats and unauthorized access.