Note
Access to this page requires authorization. You can try signing in or changing directories.
Access to this page requires authorization. You can try changing directories.
[This article is prerelease documentation and is subject to change.]
You can add a settings page that allows users to configure settings for your app.
The user can access the settings by right-clicking the app item in the compose box
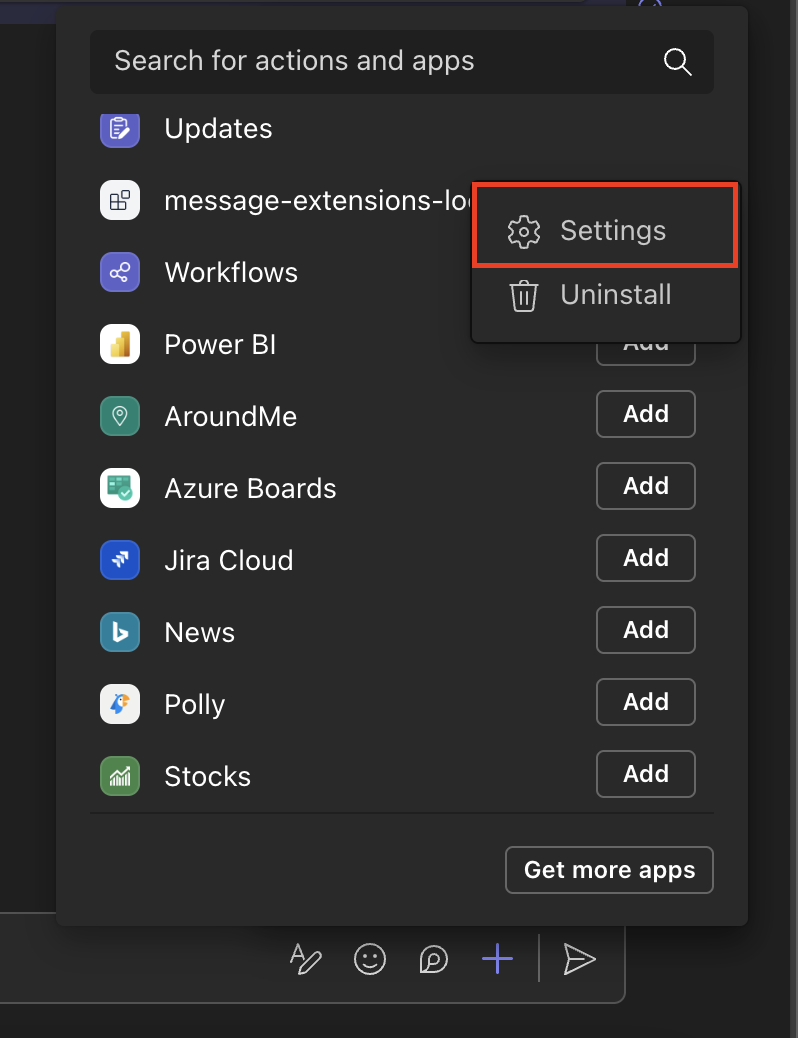
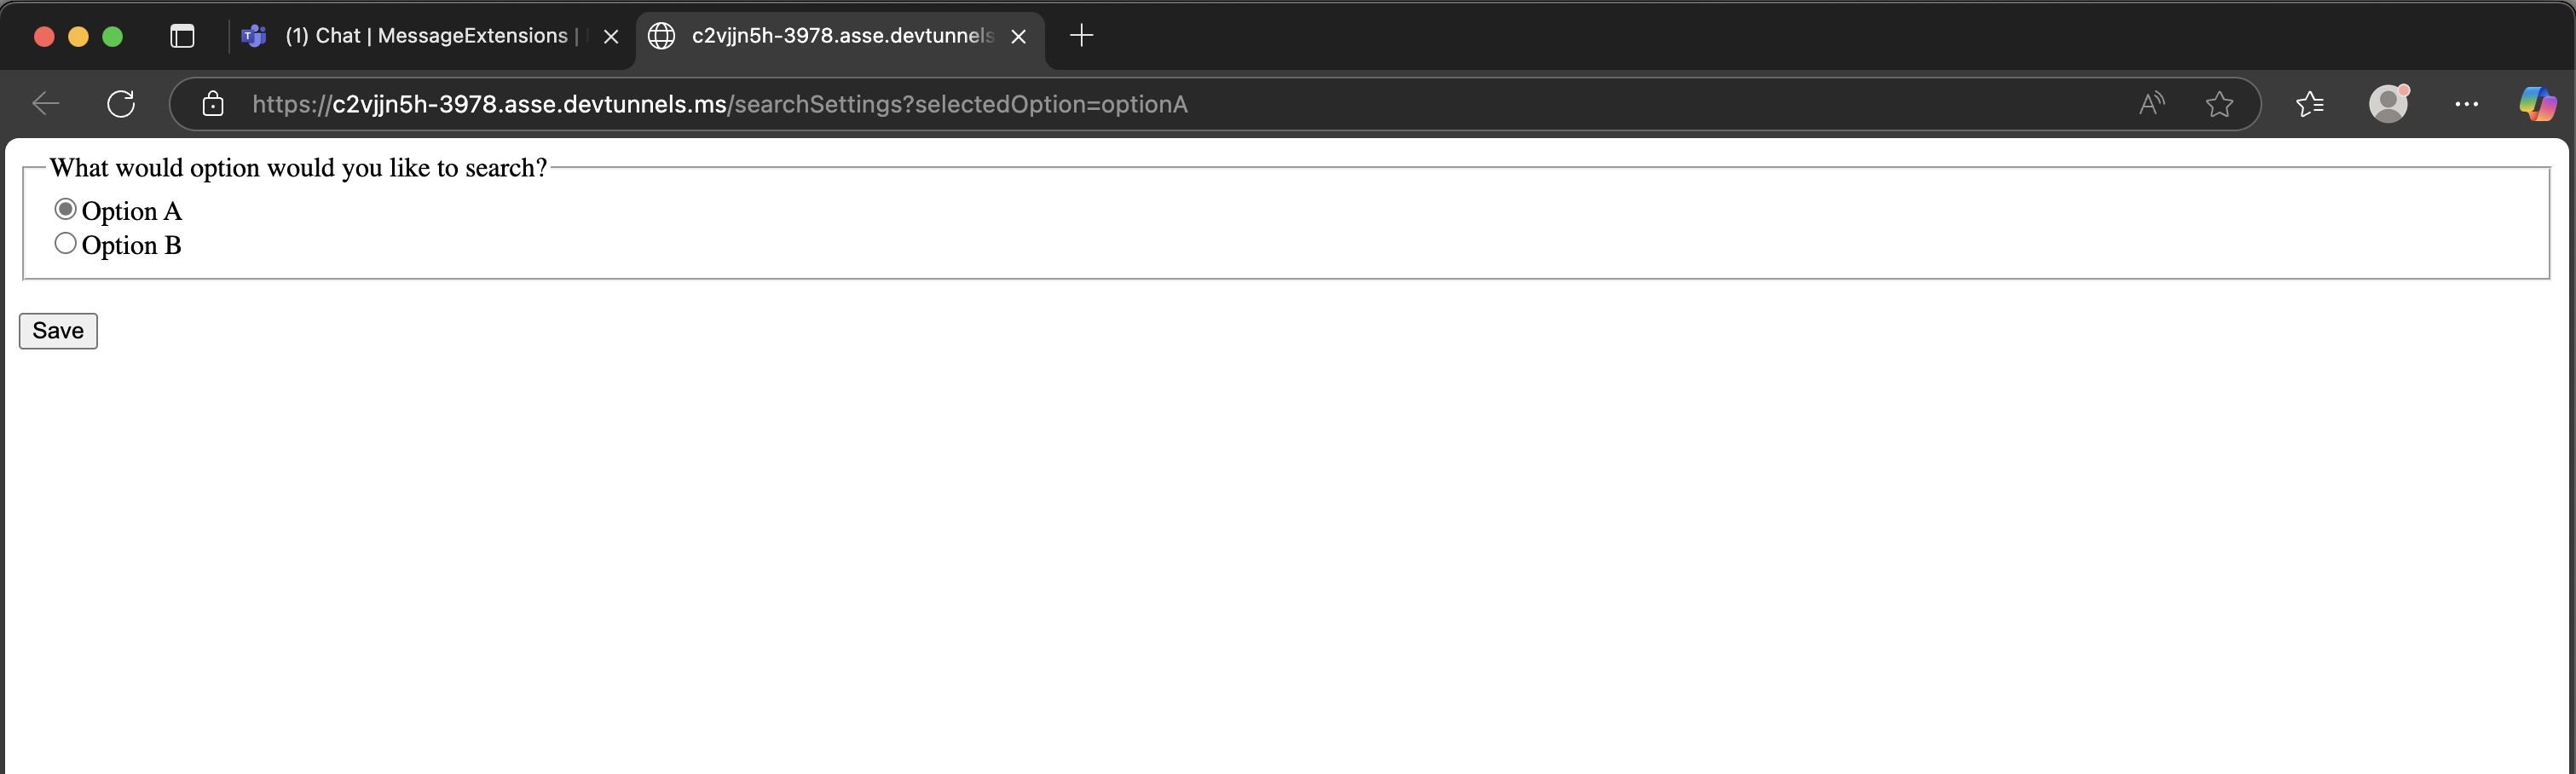
This guide will show how to enable user access to settings, as well as setting up a page that looks like this:
1. Update the Teams Manifest
Set the canUpdateConfiguration field to true in the desired message extension under composeExtensions.
"composeExtensions": [
    {
        "botId": "${{BOT_ID}}",
        "canUpdateConfiguration": true,
        ...
    }
]
2. Serve the settings html page
This is the code snippet for the settings html page:
<html>
<body>
    <form>
        <fieldset>
            <legend>What programming language do you prefer?</legend>
            <input type="radio" name="selectedOption" value="typescript">Typescript<br>
            <input type="radio" name="selectedOption" value="csharp">C#<br>
        </fieldset>

        <br />
        <input type="button" onclick="onSubmit()" value="Save"> <br />
    </form>

    <script src="https://res.cdn.office.net/teams-js/2.34.0/js/MicrosoftTeams.min.js"
            integrity="sha384-brW9AazbKR2dYw2DucGgWCCcmrm2oBFV4HQidyuyZRI/TnAkmOOnTARSTdps3Hwt"
            crossorigin="anonymous"></script>

    <script type="text/javascript">
        document.addEventListener("DOMContentLoaded", function () {
            // Get the selected option from the URL
            var urlParams = new URLSearchParams(window.location.search);
            var selectedOption = urlParams.get('selectedOption');
            if (selectedOption) {
                var checkboxes = document.getElementsByName("selectedOption");
                for (var i = 0; i < checkboxes.length; i++) {
                    var thisCheckbox = checkboxes[i];
                    if (selectedOption.includes(thisCheckbox.value)) {
                        checkboxes[i].checked = true;
                    }
                }
            }
        });
    </script>

    <script type="text/javascript">
        // initialize the Teams JS SDK
        microsoftTeams.app.initialize();

        // Run when the user clicks the submit button
        function onSubmit() {
            var newSettings = '';

            var checkboxes = document.getElementsByName("selectedOption");

            for (var i = 0; i < checkboxes.length; i++) {
                if (checkboxes[i].checked) {
                    newSettings = checkboxes[i].value;
                }
            }

            // Closes the settings page and returns the selected option to the bot
            microsoftTeams.authentication.notifySuccess(newSettings);
        }
    </script>
</body>
</html>
Save it in the index.html file in the same folder as where your app is initialized.
You can serve it by adding the following code to your app:
app.tab(`settings`, path.resolve(__dirname));
Note
This will serve the HTML page to the ${BOT_ENDPOINT}/tabs/settings endpoint as a tab. See Tabs Guide to learn more.
3. Specify the URL to the settings page
To enable the settings page, your app needs to handle the message.ext.query-settings-url activity that Teams sends when a user right-clicks the app in the compose box. Your app must respond with the URL to your settings page. Here's how to implement this:
app.on("message.ext.query-settings-url", async ({ activity }) => {
  // Get user settings from storage if available
  const userSettings = await app.storage.get(activity.from.id) || { selectedOption: '' }
  const escapedSelectedOption = encodeURIComponent(userSettings.selectedOption);

  return {
    composeExtension: {
      type: "config",
      suggestedActions: {
        actions: [
          {
            type: "openUrl",
            title: "Settings",
            // ensure the bot endpoint is set in the environment variables
            // process.env.BOT_ENDPOINT is not populated by default in the Teams Toolkit setup.
            value: `${process.env.BOT_ENDPOINT}/tabs/settings?selectedOption=${escapedSelectedOption}`
          }
        ]
      }
    }
  };
});
4. Handle Form Submission
When a user submits the settings form, Teams sends a message.ext.setting activity with the selected option in the activity.value.state property. Handle it to save the user's selection:
app.on("message.ext.setting", async ({ activity, send }) => {
  const { state } = activity.value
  if (state == "CancelledByUser") {
    return {
      status: 400
    }
  }
  const selectedOption = state;

  // Save the selected option to storage
  await app.storage.set(activity.from.id, { selectedOption })

  await send(`Selected option: ${selectedOption}`)

  return {
    status: 200
  }
});