Note
Access to this page requires authorization. You can try signing in or changing directories.
Access to this page requires authorization. You can try changing directories.
Microsoft 365 Agents Toolkit (previously known as Teams Toolkit) helps to deploy or upload the front-end and back-end code in your app to your provisioned cloud resources in Azure.
You can deploy to the following types of cloud resources:
- Azure App Services
- Azure Functions
- Azure Storage (as static website)
- SharePoint
Note
Before you deploy app code to Azure cloud, you need to successfully complete the provisioning of cloud resources.
Deploy Teams apps using Agents Toolkit
The Get started guide helps to deploy using Agents Toolkit. You can use the following to deploy your Teams app:
Sign in to your Azure account
Use this account to access the Microsoft Azure portal and to provision new cloud resources to support your app. Before deploying your app to Azure App Service, Azure Functions, or Azure Storage, you must sign in to your Azure account.
Open Visual Studio Code.
Open the project folder in which you created app.
Select the Microsoft 365 Agents Toolkit icon in the sidebar.
Select Sign in to Azure.
Tip
If you have the Azure Account extension installed and are using the same account, you can skip this step. Use the same account as you're using in other extensions.
Your default web browser opens to let you sign in to the account.
Sign in to your Azure account using your credentials.
Close the browser when prompted and return to Visual Studio Code.
The ACCOUNTS section of the sidebar shows the two accounts separately. It also lists the number of usable Azure subscriptions available to you. Ensure you have at least one usable Azure subscription available. If not, sign out and use a different account.
Now you're ready to deploy your app to Azure!
Congratulations, you've created a Teams app! Now let's go ahead and learn how to deploy one of the apps to Azure using Agents Toolkit.
Deploy to Azure
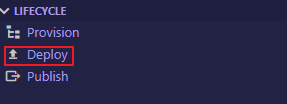
Select Deploy from the LIFECYCLE section in the left pane.
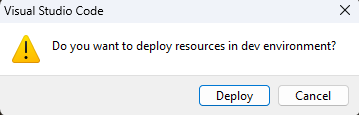
Select an environment. (If there's only one environment, this step is skipped.)
Select Deploy.
Select the Microsoft 365 Agents Toolkit icon in the sidebar.
Customize deploy lifecycle in Teams
To customize the deployment process, you can edit the deploy sections in 'm365agents.yml'.
cli/runNpmCommand
This action executes npm commands under specified directory with parameters.
Sample
  - uses: cli/runNpmCommand
    with:
      workingDirectory: ./src
      args: install
Parameters
| Parameter | Description | Required | Default value |
|---|---|---|---|
| workingDirectory | Represents the folder where you want to run the command. If your input value is a relative path, it's relative to the workingDirectory. | No | Project root |
| args | Command arguments | Yes |
cli/runDotnetCommand
This action executes dotnet commands under specified directory with parameters.
Sample
  - uses: cli/runDotnetCommand
    with:
      workingDirectory: ./src
      execPath: /YOU_DOTNET_INSTALL_PATH
      args: publish --configuration Release --runtime win-x86 --self-contained
Parameters
| Parameter | Description | Required | Default value |
|---|---|---|---|
| workingDirectory | Represents the folder where you want to run the command. If your input value is a relative path, it's relative to the workingDirectory. | No | Project root |
| args | npm Command arguments | Yes | |
| execPath | Executor path | No | System PATH |
cli/runNpxCommand
Sample
  - uses: cli/runNpxCommand
    with:
      workingDirectory: ./src
      args: gulp package-solution --ship --no-color
Parameters
| Parameter | Description | Required | Default value |
|---|---|---|---|
| workingDirectory | Represents the folder where you want to run the command. If your input value is a relative path, it's relative to the workingDirectory. | No | Project root |
| args | Command arguments | Yes |
azureAppService/zipDeploy
Sample
  - uses: azureAppService/zipDeploy
    with:
      workingDirectory: ./src
      artifactFolder: .
      ignoreFile: ./.webappignore
      resourceId: ${{BOT_AZURE_APP_SERVICE_RESOURCE_ID}}
      dryRun: false
      outputZipFile: ./.deployment/deployment.zip
Parameters
| Parameter | Description | Required | Default value |
|---|---|---|---|
| workingDirectory | Represents the folder where you want to upload the artifact. If your input value is a relative path, it's relative to the project root. | No | Project root |
| artifactFolder | Represents the folder where you want to upload the artifact. If your input value is a relative path, it's relative to the workingDirectory. | Yes | |
| ignoreFile | Specifies the file path of ignoreFile used during upload. This file can be utilized to exclude certain files or folders from the artifactFolder. Its syntax is similar to the Git's ignore. | No | null |
| resourceId | Indicates the resource ID of an Azure App Service. It's generated automatically after running the provision command. If you already have an Azure App Service, you can find its resource ID | Yes | |
| dryRun | You can set the dryRun parameter to true if you only want to test the preparation of the upload and don't intend to deploy it. This helps you verify that the packaging zip file is correct. | No | false |
| outputZipFile | Indicates the path of the zip file for the packaged artifact folder. It's relative to the workingDirectory. This file is reconstructed during deployment, reflecting all folders and files in your artifactFolder, and removing any nonexistent files or folders. | No | ./.deployment/deployment.zip |
azureFunctions/zipDeploy
This action upload and deploy the project to Azure Functions using the zip deploy feature.
Sample
  - uses: azureFunctions/zipDeploy
    with:
      workingDirectory: ./src
      artifactFolder: .
      ignoreFile: ./.webappignore
      resourceId: ${{BOT_AZURE_APP_SERVICE_RESOURCE_ID}}
      dryRun: false
      outputZipFile: ./.deployment/deployment.zip
Parameters
| Parameter | Description | Required | Default value |
|---|---|---|---|
| workingDirectory | Represents the folder where you want to upload the artifact. If your input value is a relative path, it's relative to the project root. | No | Project root |
| artifactFolder | Represents the folder where you want to upload the artifact. If your input value is a relative path, it's relative to the workingDirectory. | Yes | |
| ignoreFile | Specifies the file path of ignoreFile used during upload. This file can be utilized to exclude certain files or folders from the artifactFolder. Its syntax is similar to the Git's ignore. | No | null |
| resourceId | Indicates the resource ID of an Azure Functions. It's generated automatically after running the provision command. If you already have an Azure Functions, you can find its resource ID in the Azure portal. | Yes | |
| dryRun | You can set the dryRun parameter to true if you only want to test the preparation of the upload and don't intend to deploy it. This helps you verify that the packaging zip file is correct. | No | false |
| outputZipFile | Indicates the path of the zip file for the packaged artifact folder. It's relative to the workingDirectory. This file is reconstructed during deployment, reflecting all folders and files in your artifactFolder, and removing any nonexistent files or folders. | No | ./.deployment/deployment.zip |
azureStorage/deploy
This action uploads and deploys the project to Azure Storage.
Sample
  - uses: azureStorage/deploy
    with:
      workingDirectory: ./src
      artifactFolder: .
      ignoreFile: ./.webappignore
      resourceId: ${{BOT_AZURE_APP_SERVICE_RESOURCE_ID}}
Parameters
| Parameter | Description | Required | Default value |
|---|---|---|---|
| workingDirectory | Represents the folder where you want to upload the artifact. If your input value is a relative path, it's relative to the project root. | No | Project root |
| artifactFolder | Represents the folder where you want to upload the artifact. If your input value is a relative path, it's relative to the workingDirectory. | Yes | |
| ignoreFile | Specifies the file path of ignoreFile used during upload. This file can be utilized to exclude certain files or folders from the artifactFolder. Its syntax is similar to the Git's ignore. | No | null |
| resourceId | Indicates the resource ID of an Azure Functions. It's generated automatically after running the provision command. If you already have an Azure Functions, you can find its resource ID in the Azure portal. | Yes |
spfx/deploy
This action upload and deploys generated sppkg to SharePoint app catalog. You can create tenant app catalog manually or by setting createAppCatalogIfNotExist to true if you don't have one in current M365 tenant.
Sample
- uses: spfx/deploy
    with:
      createAppCatalogIfNotExist: false
      packageSolutionPath: ./src/config/package-solution.json
Parameters
| Parameter | Description | Required | Default value |
|---|---|---|---|
| createAppCatalogIfNotExist | If the value is true, this action creates tenant app catalog first if not exist. | No | False |
| packageSolutionPath | Path to package-solution.json in SPFx project. This action honors the configuration to get target sppkg. | Yes |
See also
Collaborate with us on GitHub
The source for this content can be found on GitHub, where you can also create and review issues and pull requests. For more information, see our contributor guide.
Platform Docs