Prerequisites for creating your Teams app using Visual Studio
Before you create your Microsoft Teams app project, ensure that the prerequisites are in place. You must:
- Install required tools to build your Teams app
- Prepare Accounts to build your Teams app
- Verify custom app upload permission
Install required tools to build your Teams app
Ensure that the following tools are installed on the device where you’ll create your app project before you start building your Teams app:
| Tools | Purpose | For environment type | |
|---|---|---|---|
| Required | |||
| Teams Toolkit | A Microsoft Visual Studio extension that creates a project scaffolding for your app. Use the latest version. | C# and Blazor | |
| Microsoft Teams | Collaborate with everyone you work with through apps for chat, meetings, and call - all in one place. | C# and Blazor | |
| Microsoft Edge (recommended) or Google Chrome | A browser with developer tools. | C# and Blazor | |
| Optional | |||
| Azure development workload for Visual Studio and Azure CLI | Access stored data or deploy a cloud-based back-end for your Teams app in Azure. | C# and Blazor | |
| Microsoft Graph Explorer | A browser-based tool that lets you run a query from Microsoft Graph data. | C# and Blazor | |
| Developer Portal for Teams | A web-based portal to configure, manage, and distribute your Teams app including to your organization or the Microsoft Teams Store. | C# and Blazor |
It's recommended that you bookmark the Microsoft Graph Explorer to learn about Microsoft Graph services. This browser-based tool allows you to run a query and access the Microsoft Graph API.
Accounts to build your Teams app
Ensure that you have the following accounts before you start building your Teams app:
| Accounts | For using | For environment type |
|---|---|---|
| Microsoft 365 account with a valid subscription | Teams developer account while developing an app. | JavaScript, TypeScript, SPFx, and C# or Blazor. |
| Azure account | Back-end resources on Azure. | JavaScript, TypeScript, SPFx, and C# or Blazor. |
Microsoft 365 developer program
Note
To build Teams apps, you must have a work or school Microsoft 365 account. Microsoft 365 personal account can't be used.
If you have a Visual Studio Enterprise or Professional subscription, both programs include a free Microsoft 365 developer subscription. It's active as long as your Visual Studio subscription is active. For more information, see Microsoft 365 developer subscription.
If you don't have any Microsoft 365 tenant, you might qualify for a Microsoft 365 E5 developer subscription through the Microsoft 365 Developer Program; for details, see the FAQ. Alternatively, you can sign up for a 1-month free trial or purchase a Microsoft 365 plan.
You can sign up for the developer program using one of the following account types:
Microsoft account for personal use
The Microsoft account provides access to the Microsoft products and cloud services, such as Outlook, Messenger, OneDrive, MSN, Xbox Live, or Microsoft 365.
Sign up for an Outlook.com mailbox to create a Microsoft 365 account. Use it to access consumer-related Microsoft cloud services or Azure.

Microsoft work account for business
This account provides access to all small, medium, and enterprise business-level Microsoft cloud services. The services include Azure, Microsoft Intune, and Microsoft 365.
When you sign up to one of these services as an organization, a cloud-based directory is automatically provisioned in Microsoft Entra ID to represent your organization.
 :::
:::
Create a free Microsoft 365 developer account
To create a free Microsoft 365 developer account:
Go to the Microsoft 365 developer program.
Select Join Now.
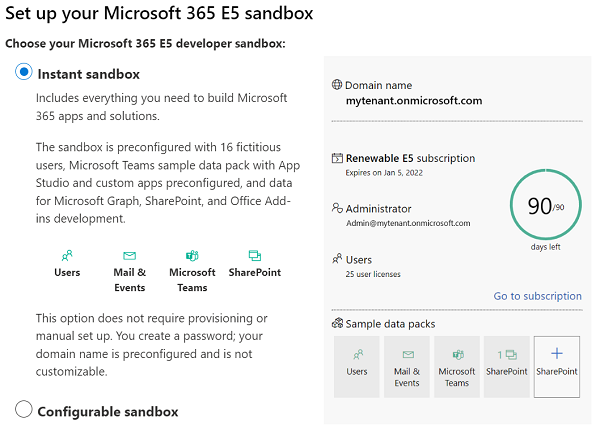
Set up your administrator account subscription.
After the completion of the subscription, the following information appears:
Azure account
An Azure account allows you to host a Teams app or the back-end resources for your Teams app to Azure. You can do this using Teams Toolkit in Visual Studio. You must have an Azure subscription in the following scenarios:
- If you already have an existing app on a different cloud provider other than Azure, and you want to integrate the app on Teams platform.
- If you want to host the back-end resources for your app using another cloud provider, or on your own servers if they're available in the public domain.
Note
You can use Azure account to provision Azure resource to host your Teams app. You can create a free account in case you don't have any. If you don't use Teams Toolkit to provision and deploy, Azure account isn't required.
Verify custom app upload permission
After creating the app, you must load your app in Teams without distributing it. This process is known as custom app upload. Sign in to your Microsoft 365 account to view this option.
You can verify if the custom app upload permission is enabled using Teams client.
Verify custom app upload permission using Teams client
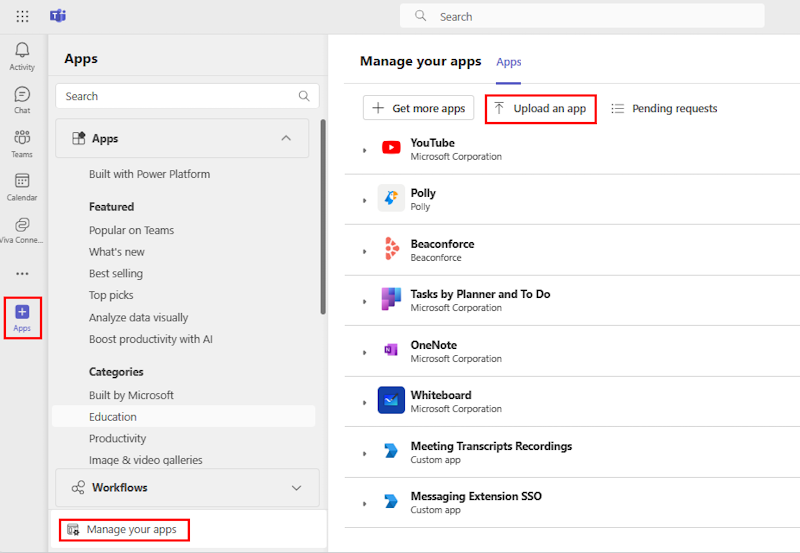
In the Teams client, select Apps > Manage your apps > Upload an app.
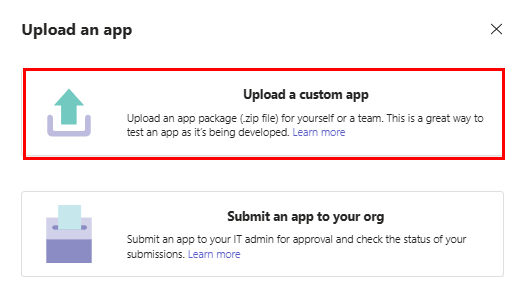
Check if you can see the option Upload a custom app as you can see in the following image:
Enable custom app upload using admin center
If custom app upload option isn’t visible in Teams Toolkit extension in Visual Studio Code or if the option to upload a custom app isn’t available in Teams, it indicates that you don't have the required permission for custom app upload.
You must enable custom app upload for your app in Teams:
- If you're a tenant admin, enable the custom app upload setting for your tenant or organization in the Teams admin center.
- If you aren't a tenant admin, contact your tenant admin to enable custom app upload.
If you have admin rights, you can enable custom app upload:
Sign in to Microsoft 365 admin center with your admin credentials.
Select the
 icon > Teams.
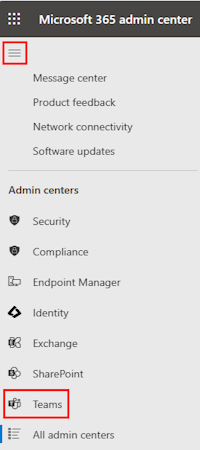
Note
It can take up to 24 hours for the Teams option to appear. You can upload your custom app to a Teams environment for testing and validation.
Sign in to Microsoft Teams admin center with your admin credentials.
Select the
icon > Teams apps > Setup policies.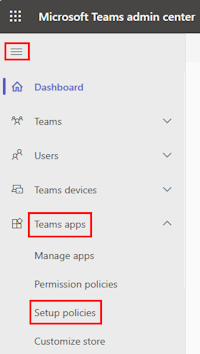
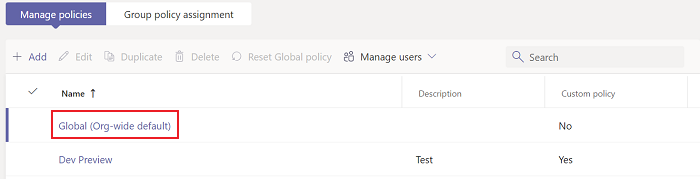
Select Global (Org-wide default).
Turn on the Upload custom apps toggle.
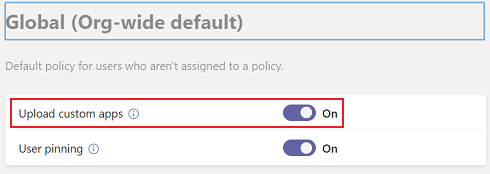
Select Save.
Note
It can take up to 24 hours for custom app upload to become active. In the meantime, you can use upload for your tenant to test your app. To upload the .zip package file of the app, see upload custom apps.
Ensure that you have the custom app upload permission using the steps mentioned in verify custom app upload permission using Visual Studio Code or Teams client.
See also
Platform Docs