Note
Access to this page requires authorization. You can try signing in or changing directories.
Access to this page requires authorization. You can try changing directories.
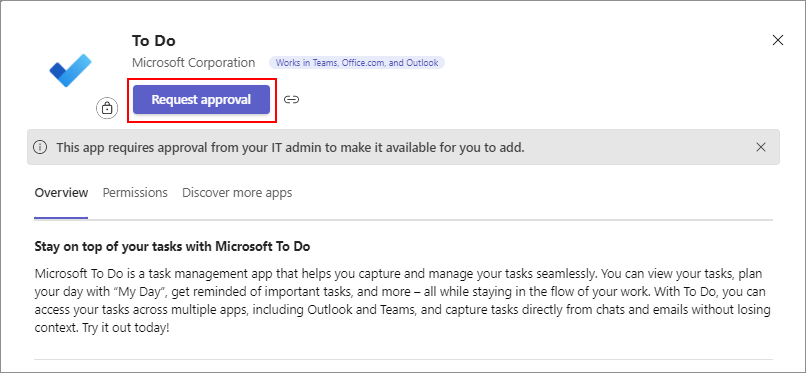
The apps that are blocked in your organization may affect user productivity and collaboration. Users can't use blocked apps but can view such apps and app information in the Teams store. Teams lets users request an approval from admins to allow the usage of blocked apps. After you evaluate an app, you can either allow it or dismiss the requests.
This functionality provides you with a signal about the demand for an app within your organization. You can easily view the aggregate number of requests for each requested app. It helps you make an informed decision about which apps to evaluate for allowing.
You can't hide blocked apps, but you retain complete control of the apps that users can or can't use. If you choose to allow an app, the controls and user interface to manage apps remain the same.
The default option sends the user requests to Teams admin center. You can view user requests and allow the requested apps.
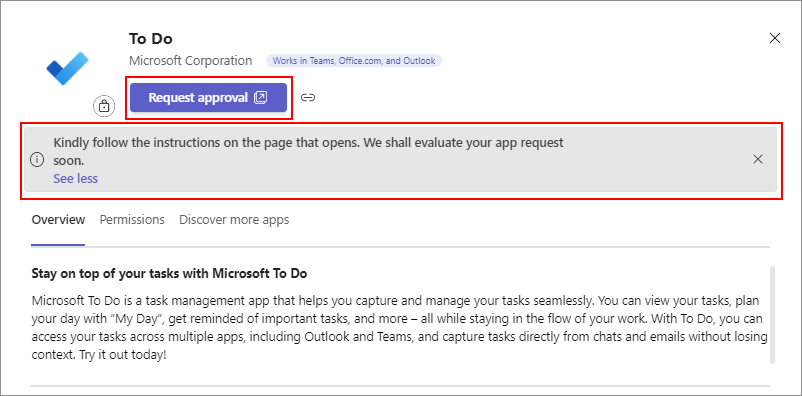
Admin center lets you configure the user request experience that is best suited for your organization. You can provide an instruction or a custom message that displays for each blocked app and user requests are made on an org-specific URL.
Note
The feature isn't supported in Government Community Cloud (GCC), GCC-High, and Department of Defense (DoD) tenants. It isn't supported for custom apps.
View user requests in Teams admin center
You can view the user requests at the following UIs:
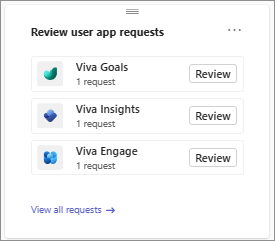
To quickly see a list of up to three most requested apps, see the notification in the Teams admin center dashboard.
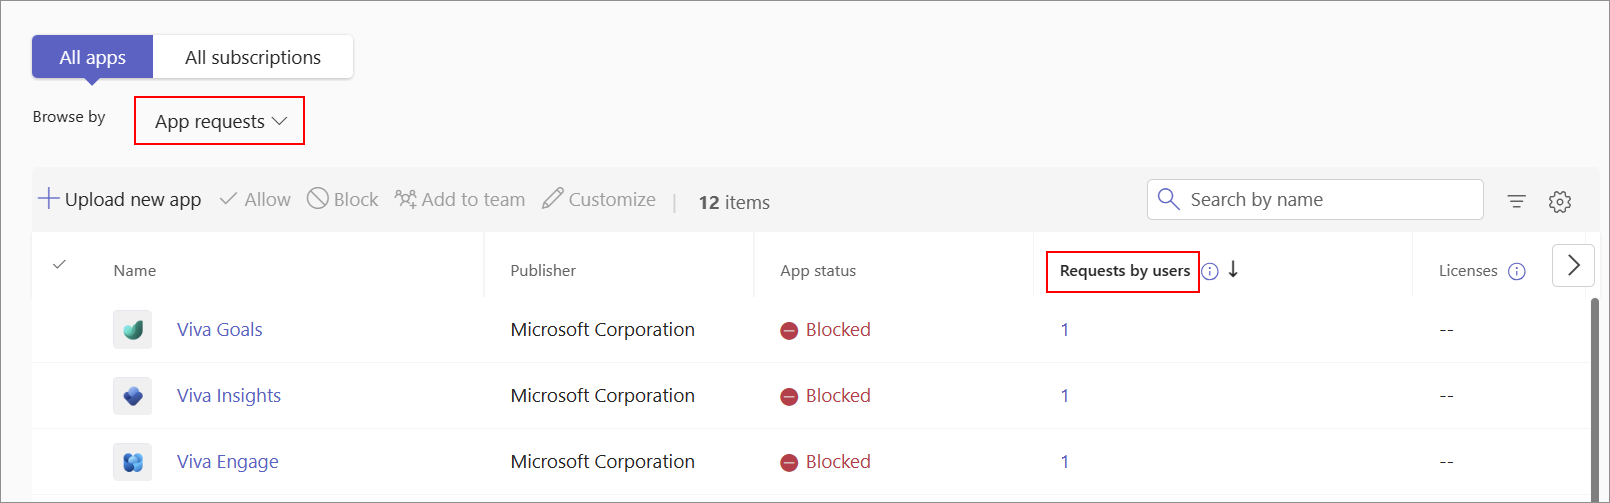
To know the number of requests received for each app, see the Manage apps page. You can sort the Requests by users column or use the App requests category filter.
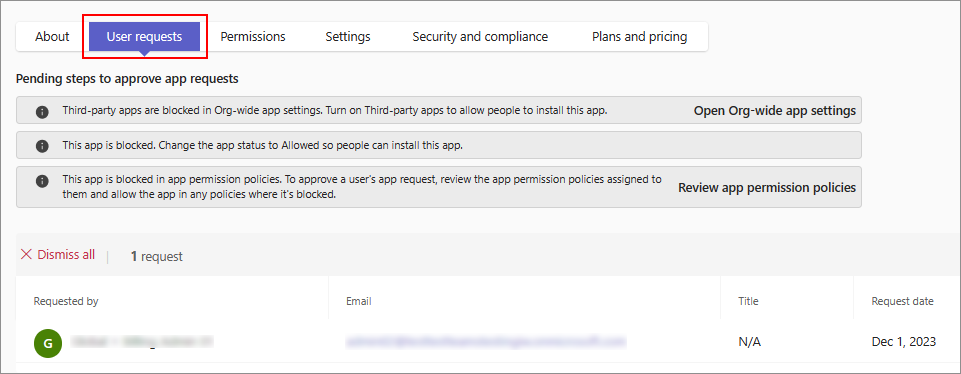
To view email contact of each requester of an app, see the User requests tab in the app details page.


We recommend a regular triage to check for user requests. To view and manage the requests and to allow a requested app, follow these steps:
Sign into the Teams admin center and go to Teams apps > Manage apps.
Choose to display the Requests by users column if the Manage apps page doesn't display it. You can sort the column.
To view details of the requests of a specific app, use any one of the following methods:
- On the admin center dashboard, select Review in the widget.
- On the Manage apps page, click the number of requests in Requests by users column.
- On the app details page, select the User requests tab.
Act on the user requests to allow apps
After you evaluate an app, you can either allow it or ignore the requests. To allow an app, follow these steps:
Sign into the Teams admin center and go to Teams apps > Manage apps.
Open the app details page for the requested app.
Select Manage requests or select the User requests tab.
Follow the options that are displayed to allow the app. These options vary based on the method you used to block it as admin center displays only the relevant options. Follow one or more of the following steps to allow the app:
- If the app is blocked using permission policies, modify the permission policies.
- If the app is blocked for all users, allow the app.
- If third-party apps are blocked for the entire organization, modify Org-wide app settings.
After you allow an app, the following happens:
- Users can see the Add option for the allowed app in the Teams app store.
- Teams doesn't inform requesters when admins act on their requests. We recommend manually letting the requesters know of your decision and action, especially if you approve an app for use. Use the requesters' contact email before you dismiss the requests.
- The request counter doesn't reset after you approve an app. To reset it and remove all requests, you can dismiss the requests.
Receive user requests on your custom webpage
Teams provides a default message for users to request approval to an app. You can modify the default setting to add a custom message with instructions, org-specific URL, or both. The modifications are displayed for each app in Teams store.
To configure a custom message and redirect users to an org-specific URL, follow the steps:
Sign into the Teams admin center and go to Teams apps > Manage apps.
At the upper-right corner, select Org-wide app settings.
To display a custom message or instruction in Teams store, enter a text message in text field under User requests configuration. The field has a limit of 300 characters.
To provide an org-specific URL to collect user requests, follow the steps:
Turn on the Redirect requests to external link toggle.
Provide your org-specific URL.
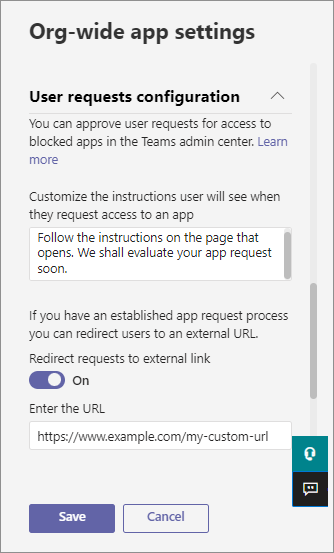
Select Save.
If you choose to use this custom method to receive requests, the methods to evaluate apps and govern the requested apps remain the same.
Dismiss user requests
To dismiss the requests, select the Dismiss all option available in the User requests tab in the app details page.
When you dismiss requests for an app, the following happens:
- You can't view the name and email or the requesters.
- Teams doesn't inform the requesters that their request is acted upon.
- Requests count in the admin center resets to zero.
- Users can again request the same app to be allowed, after a few hours of you dismissing requests.