Note
Access to this page requires authorization. You can try signing in or changing directories.
Access to this page requires authorization. You can try changing directories.
Create an Add-On with Custom Components
Custom blocks and items use various components, declared in their definitions, to augment the behavior of the block or item.
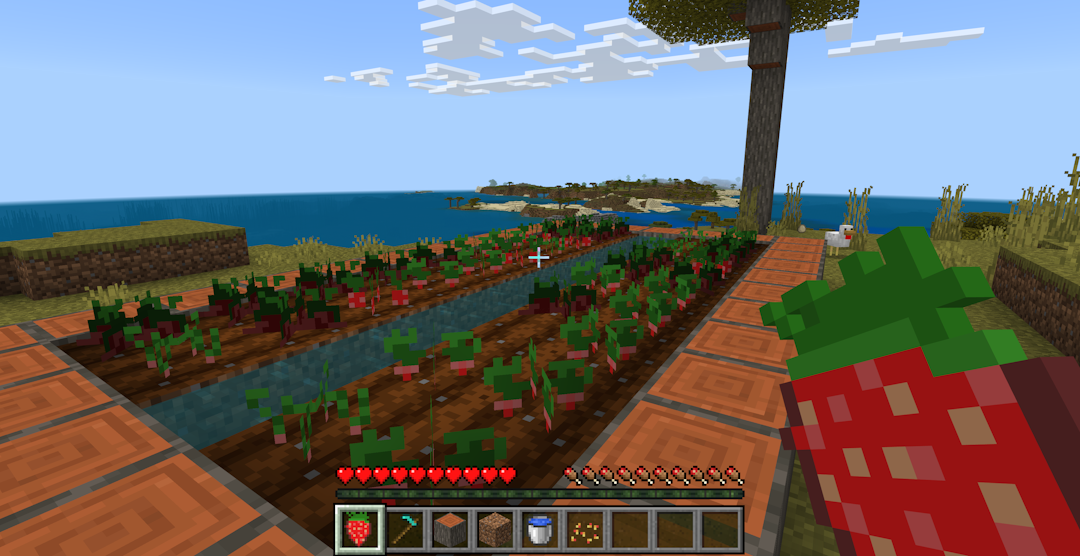
Until now, all components have been built-in to Minecraft, with various parameters used to control the component's behavior. With custom components, you can define your own behavior for blocks and items when combined with scripting! In this tutorial we will make a small block and item example using custom components and scripting by adding a new strawberry crop and strawberry item. The strawberry plants will have the behavior that, if they are not picked when they are ripe, can go bad. You'll have to time it just right to get fresh strawberries, and in this sample, you'll see the block components that manage crop growth rates in addition to custom item effects.
You can find the source of this example on the github.com/microsoft/minecraft-scripting-samples.
Prerequisites
Before you begin, you should have gone through the Getting Started with Add-Ons tutorial, the Introduction to Behavior Packs tutorial, and the Introduction to Scripting tutorial.
You'll want to be comfortable with how add-on folders are structured, what required files the behavior pack should contain, and how to use scripting with your behavior pack.
Some other good resources to know are how to make blocks and items in your add-on:
Item Custom Components
The strawberry item will utilize custom components to give the player that eats it night vision. First lets make the strawberry item itself.
{
  "format_version": "1.21.10",
  "minecraft:item": {
    "description": {
      "menu_category": {
        "group": "itemGroup.name.crop",
        "category": "nature"
      },
      "identifier": "example:strawberry"
    },
    "components": {
      "minecraft:icon": "strawberry",
      "minecraft:max_stack_size": 64,
      "minecraft:use_modifiers": {
        "use_duration": 1.6,
        "movement_modifier": 0.35
      },
      "minecraft:food": {
        "can_always_eat": true,
        "nutrition": 1,
        "saturation_modifier": 0.5
      },
      "minecraft:use_animation": "eat",
    }
  }
}
Adding Custom Components to Items
To add custom components to an item, add a minecraft:custom_components component to the item which has an array of strings.
Within this array, the strings are the name of the component that you are adding. When an event occurs, the components will run some script, and this will run in the order defined in your JSON. This means that one item can run the same components in a different order than another item. For our strawberry, we will need only 1 component, but for your own items you can add more custom components to the array.
"minecraft:custom_components": [
    "example:add_night_vision_on_consume"
]
The name you choose for your custom component requires a namespace before it. In the code above, the namespace is example and the component name is add_night_vision_on_consume.
Registering Item Custom Components in Script
Now that our item has been configured to have a custom component, we need to register the behavior for the component in script. The behavior we want is that when you eat the strawberry, the player receives night vision for some time. First, we register our component using the same name we defined in the JSON component to the ItemComponentRegistry and provide a list of events that this component is listening for. In this case we are going to listen to the onConsume event for item custom components which will run our code when the item is consumed by a player. We can then add the night vision effect to the player and our custom component is now ready to be used.
import { ItemComponentConsumeEvent, world } from "@minecraft/server";

world.beforeEvents.worldInitialize.subscribe(initEvent => {
  initEvent.itemComponentRegistry.registerCustomComponent('example:add_night_vision_on_consume', {
    onConsume(arg: ItemComponentConsumeEvent) {
      arg.source.addEffect('minecraft:night_vision', 600);
    }
  });
});
Notice that the component code and name do not reference the strawberry item itself. You can reuse components on multiple items that have similar behavior.
Block Custom Components
Block custom components work very similarly to item custom components. First we need our block definition:
{
  "format_version": "1.21.10",
  "minecraft:block": {
    "description": {
      "identifier": "example:strawberry_crop",
      "states": {
        "starter:crop_age": [ 0, 1, 2, 3, 4 ]
      }
    },
    "permutations": [
      {
        "condition": "query.block_state('starter:crop_age') == 4",
        "components": {
          "minecraft:loot": "loot_tables/strawberry_grown_crop.json"
        }
      }
    ],
    "components": {
      "minecraft:geometry": "geometry.starter_crop_geo",
      "minecraft:loot": "loot_tables/strawberry_seed.json",
      "minecraft:collision_box": false,
      "minecraft:placement_filter": {
        "conditions": [
          {
            "allowed_faces": ["up"],
            "block_filter": ["minecraft:farmland"]
          }
        ]
      },
      "tag:minecraft:crop": {}
    }
  }
}
Adding Custom Components to Blocks
Similar to item custom components, we use the minecraft:custom_components component in the block JSON to define what custom components this block has. In this case we are going to add 2 different components definitions: one in the base of the block and one within the permutation. When both a block permutation and base block use the minecraft:custom_components component, only the components listed in the permutation will have their script code run. This allows you to reorder, remove, or add new custom components to specific permutations of a block. Since the first 4 permutations (age 0-3) of the strawberry crop all use the same custom components, we can just put this in the base block's component list. The last permutation (age 4) will have some additional functionality so we can harvest the fully grown strawberries, so it will need its own minecraft:custom_components to override the one in the base block.
{
  "format_version": "1.21.10",
  "minecraft:block": {
    "description": {
      "identifier": "example:strawberry_crop",
      "states": {
        "starter:crop_age": [ 0, 1, 2, 3, 4 ]
      }
    },
    "permutations": [
      {
        "condition": "query.block_state('example:crop_age') == 4",
        "components": {
          "minecraft:loot": "loot_tables/strawberry_grown_crop.json"
        },
        "minecraft:custom_components": [
          "example:crop_harvest"
        ]
      }
    ],
    "components": {
      "minecraft:geometry": "geometry.example_crop_geo",
      "minecraft:loot": "loot_tables/strawberry_seed.json",
      "minecraft:collision_box": false,
      "minecraft:placement_filter": {
        "conditions": [
          {
            "allowed_faces": ["up"],
            "block_filter": ["minecraft:farmland"]
          }
        ]
      },
      "tag:minecraft:crop": {},
      "minecraft:custom_components": [
        "example:crop_grow"
      ]
    }
  }
}
Registering Block Custom Components in Script
Similar to items, we register the component in script with a list of events that the component is listening to and the behavior that should be run when the event is raised. For items we used the ItemComponentRegistry to do this; for blocks we use the BlockComponentRegistry. In this case, we have two components to fill out. The item example above showed how to do this by placing your behavior in the registration statement. These two components will look at two alternate ways you can organize your code.
"example:crop_grow" Component
This component is designed to grow crops, which we can do by listening to the onRandomTick event for block custom components, and changing the block's permutation to the next age. This component is registered by giving the event a function to run where the previous item custom component example had its code.
import {
  BlockComponentRandomTickEvent,
  world
} from "@minecraft/server";

function cropGrowRandomTick(event : BlockComponentRandomTickEvent) {
  const age = event.block.permutation.getState('example:crop_age');
  if (age === undefined || typeof age !== 'number') {
    return;
  }
  else if (age === 4) {
    return; // fully grown
  }

  event.block.setPermutation(event.block.permutation.withState('example:crop_age', age + 1));
}

world.beforeEvents.worldInitialize.subscribe(initEvent => {
  initEvent.blockComponentRegistry.registerCustomComponent('example:crop_grow', {
    onRandomTick: cropGrowRandomTick,
  });
});
"example:crop_harvest" Component
The crop grown component exists on only the finished crop when it is ready to be harvested. This component will allow the player to interact with the block to harvest the strawberries without having to break the block. It then "replants" the strawberries by changing the block permutation back to the first growth stage. This component is registered by making a new class that implements the BlockCustomComponent object, giving you a third way to register components. The same can be done with items and the ItemCustomComponent object.
import {
  BlockCustomComponent,
  BlockComponentPlayerInteractEvent,
  world
} from "@minecraft/server";

class BlockCropHarvestComponent implements BlockCustomComponent {
  onPlayerInteract(event : BlockComponentPlayerInteractEvent) {
    if (event.player === undefined) {
      return;
    }

    const blockPos = event.block.location;
    event.dimension.runCommand('loot spawn ' +
      blockPos.x + ' ' +
      blockPos.y + ' ' +
      blockPos.z + ' loot strawberry_grown_crop'
    );
    event.block.setPermutation(event.block.permutation.withState('example:crop_age', 0));
  }
};

world.beforeEvents.worldInitialize.subscribe(initEvent => {
  initEvent.blockComponentRegistry.registerCustomComponent('example:crop_harvest', new BlockCropHarvestComponent());
});
Congratulations! You now have a block and an item using custom components. Check out our custom components sample at the Minecraft Scripting Samples repository.