Note
Access to this page requires authorization. You can try signing in or changing directories.
Access to this page requires authorization. You can try changing directories.
If you're new to Minecraft Add-On development, creating your first working behavior pack and custom entity can take a lot of time and research. The Minecraft Entity Wizard for Blockbench aims to make it as easy as possible to create a custom entity and to add it to your world. From there, you can build on your entity, change the model, or add your own behavior.
Building a grizzly bear with the Minecraft Entity Wizard
Blockbench is a 3D modeling program with native support for many Minecraft 3D model formats. Once you've created your basic entity in the Entity Wizard, you can continue to use Blockbench to modify the model, and you can edit the behavior in an external program (more on that later).
As a starting point, the Entity Wizard offers most of Minecraft's vanilla mobs as presets. For example, if you want to create a shark, you can choose the dolphin preset. There are also stripped down "basic" presets that you can use if you're a more experienced creator and want to create entity behavior from scratch.
In this tutorial, you'll learn the following:
- How to add the Minecraft Entity Wizard plugin to Blockbench.
- The steps to create a custom entity with the Wizard.
- How to export the entity to use within Minecraft: Bedrock Edition.
Requirements
It's recommended that the following be completed before beginning this tutorial.
You'll also need to either have Blockbench installed or have access to the Blockbench web app.
Important
Blockbench is provided by external, third-party contributors and is not a Mojang/Microsoft offering.
Getting started
Once you've downloaded and installed Blockbench, you can directly install the Entity Wizard from within the program.
Tip
If you do not want to install the app, or you are using a mobile device like a tablet, you can also use the plugin in the Blockbench web app. Most parts of the program work the same in the web app, but saving files requires a few extra steps.
Adding the Minecraft Entity Wizard
- In Blockbench, go to File > Plugins..., switch to the Available tab, and enter "Minecraft Entity Wizard" into the search bar (or scroll until you find it in the list).
- Find the Entity Wizard plugin and click Install.
- After it's installed, close the Plugins dialog.
The Wizard
You'll find the Minecraft Entity Wizard in the left sidebar of the start screen, under Loaders. Now that the plugin is installed, you can use the Minecraft Entity Wizard to start creating your entity.
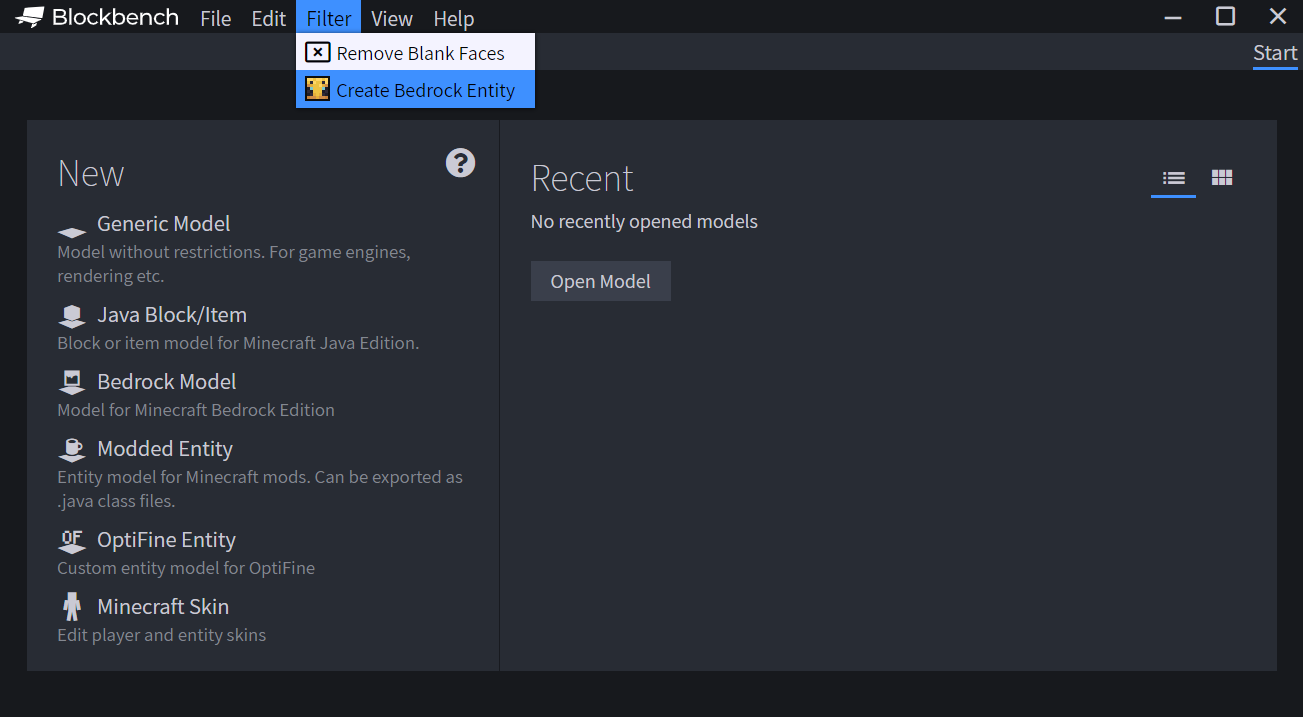
- Click the yellow banner on the start screen to open the wizard, or navigate to Filter and select Create Bedrock Entity.
- Click the Let's Go-button.
The wizard will guide you through the steps required to create your custom entity. To navigate the wizard, use the Back and Next buttons at the bottom of the screen.
Caution
You can also close the dialog and select Keep to keep your current state and inputs. However, closing Blockbench entirely will discard your input.
Name
The Display Name is the name that the entity will later be called in Minecraft. It will appear in the spawn egg name, in chat, and in other places in the interface. This name also supports translations into different languages.
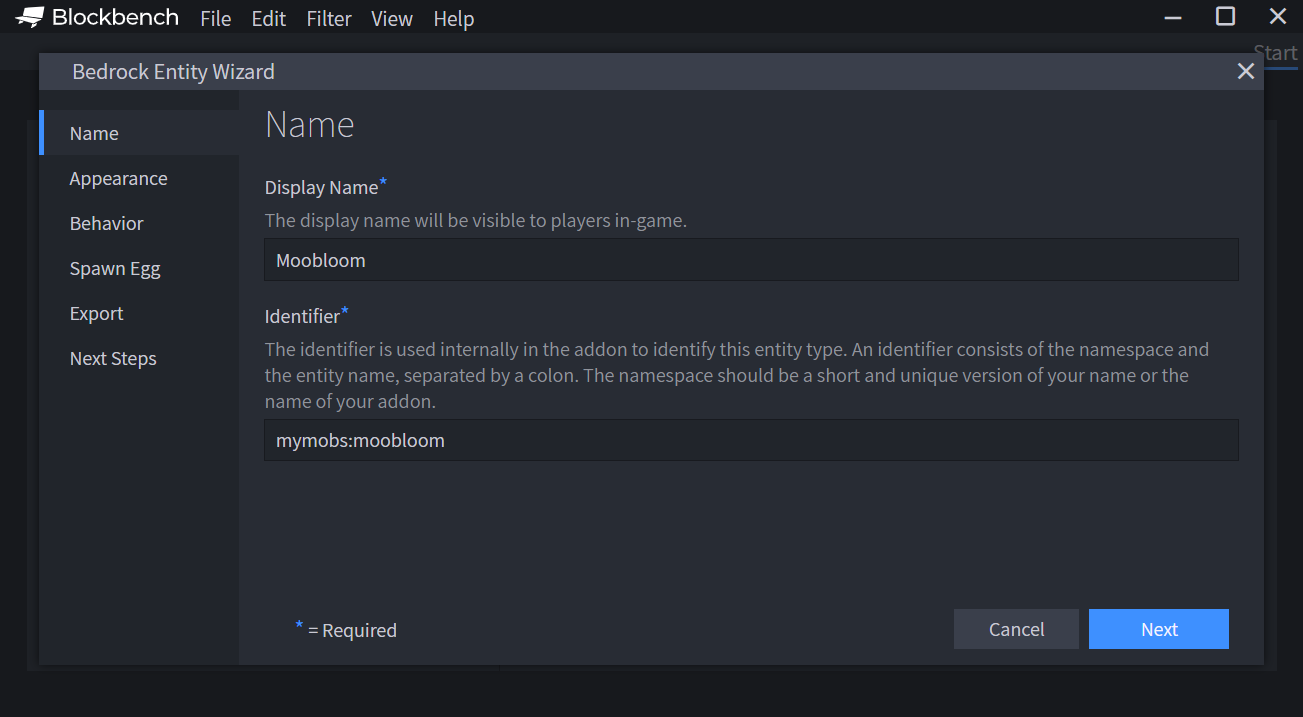
Note
The Identifier is the internal name used within Minecraft that is commonly used in commands and other places to identify this type of entity.
Appearance
Select the appearance of your entity from a list of presets. The appearance includes model, texture, animations, and sounds. At a later step, you will be able to edit and modify this model in Blockbench.
Note
If you currently have a model opened inside Blockbench, you may also pick this model as your starting point.
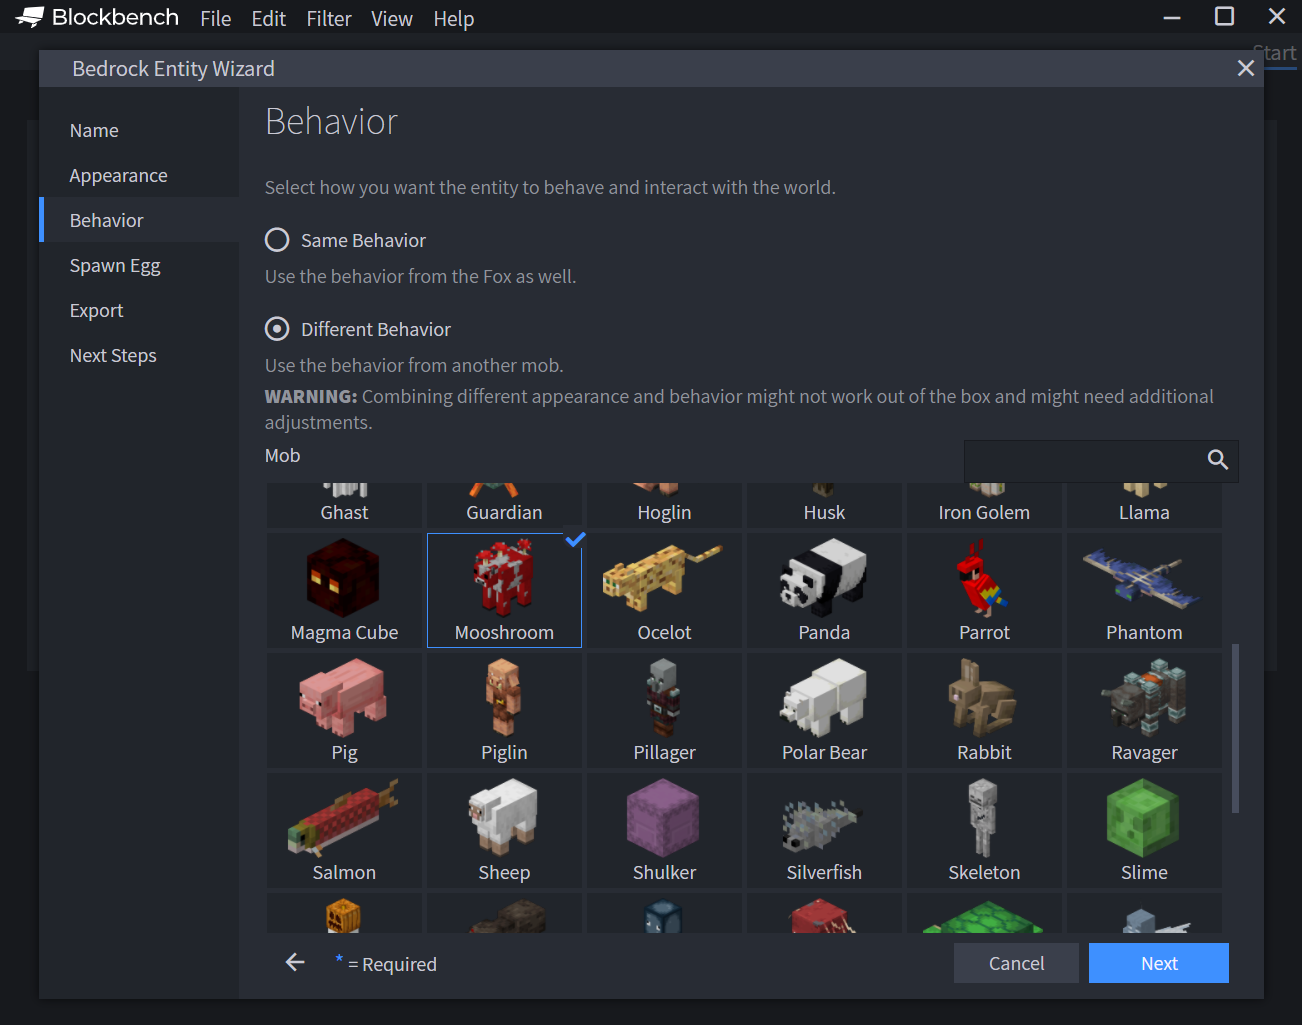
Behavior
The behavior tab determines how your custom entity behaves and interacts with the world.
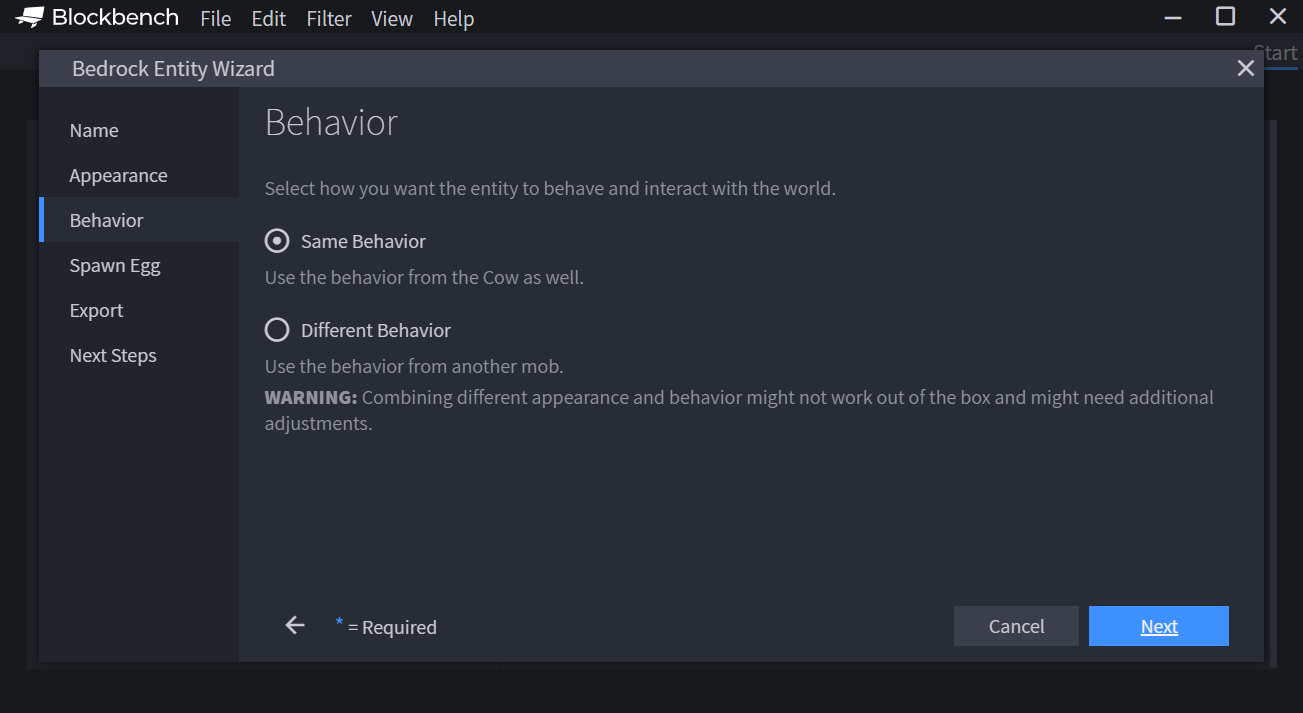
Warning
It is recommended for beginners to use the behavior from the same mob as the appearance, to avoid conflicts.
Appearance and behavior often work hand in hand. As an example, if you mix the appearance of a wolf with the behavior of a sheep (a sheep in wolf's clothing), you will quickly notice that the wolf in Minecraft does not come with a grazing animation, so it will look like the grass below them just pops off.
Spawn egg
The spawn egg tab allows you to set the spawn egg that is the item used to spawn the custom entity.
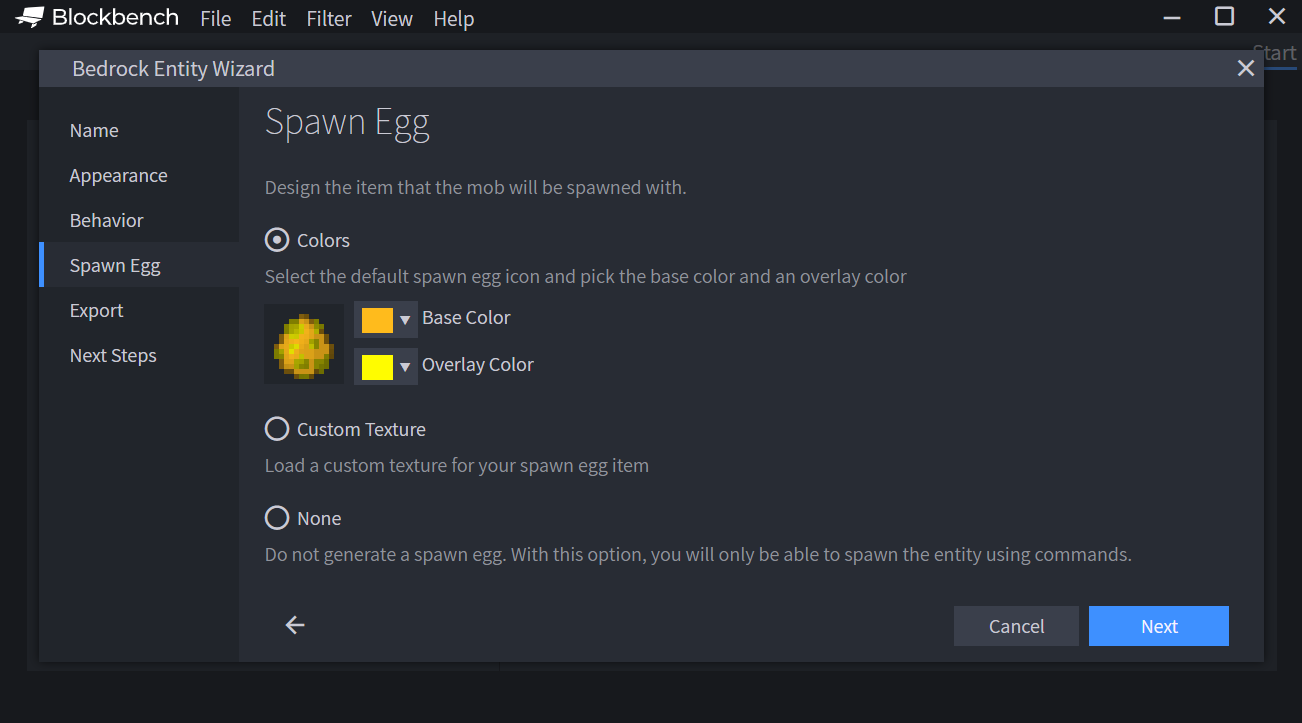
There are three ways to define the spawn egg:
- Colors: Use the two-color pickers to select the background and foreground colors on the default spawn egg icon.
- Custom Texture: Select a custom texture for your spawn egg icon. You can create the texture in a regular image editor, such as Paint.NET or Photoshop. The image should be a PNG file, ideally with a resolution of 16 by 16 pixels and a transparent background.
- None: Do not generate a spawn egg at all. If you select this option, you will not find a spawn egg in the creative inventory, instead you can summon the entity using commands.
Exporting
You have now entered all the information that is necessary to create the entity. The Next Steps tab allows you to select an export method to create a resource and behavior pack to load the entity into your world.
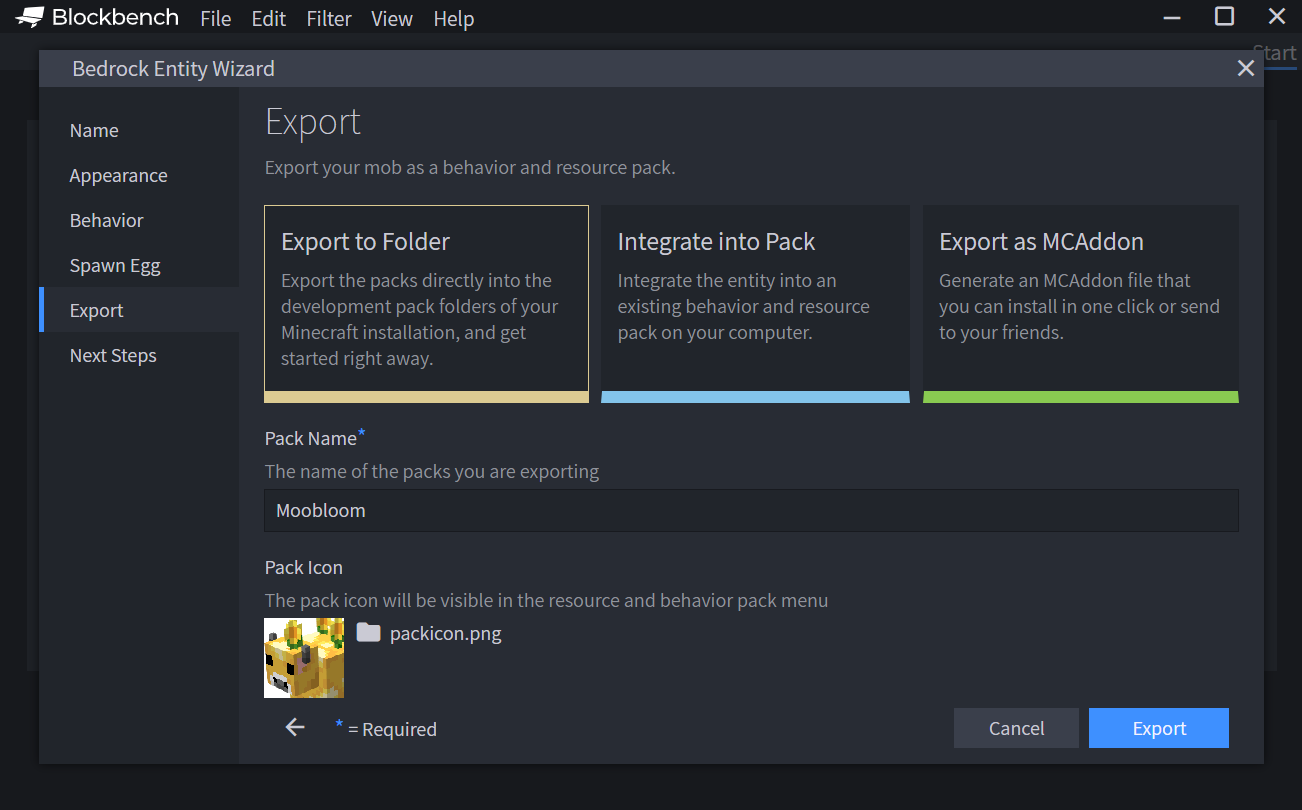
In the Blockbench desktop app, there are three ways to save your pack:
- Export Packs: Create a new pack with your custom entity.
- Integrate into Pack: Integrate your new custom entity into an existing Add-On.
- Export as MCAddon: Generate a
.mcaddonfile and save it to your computer. You can open this file to load your Add-On into Minecraft, or share this file with friends. If you select this option, you will not be able to directly edit your model in Blockbench after exporting the Add-On.
Tip
In the web app, the only option available to export your pack is MCAddon.
Important
The Integrate into Pack option is only available if you have a behavior pack and a resource pack already imported in Minecraft. Upon launching Blockbench for the first time, you may not see all available export options. To quickly enable this, you can use the following steps.
- Create an entity.
- Export to .mcaddon.
- double-click the .mcaddon to import it.
- If Minecraft is open when import has started you will need to relaunch it.
- If it was closed it will launch as part of the export process.
- Minecraft recognizes the pack exists.
- create another entity. After this, the third option will be accessible.
Depending on the export option you have selected, you may need to enter some information about the Add-On that the wizard is about to create.
Depending on the export option you selected, you may need to enter some information about the Add-On you're creating.
Pack Name: This name will be used both for the generated file, as well as for the name in the pack menu in Minecraft.
Pack Icon: You can upload an image as an icon to represent your pack in the pack menu. The image should be a PNG file; the recommended resolution is 64 by 64 pixels. The icon is optional.
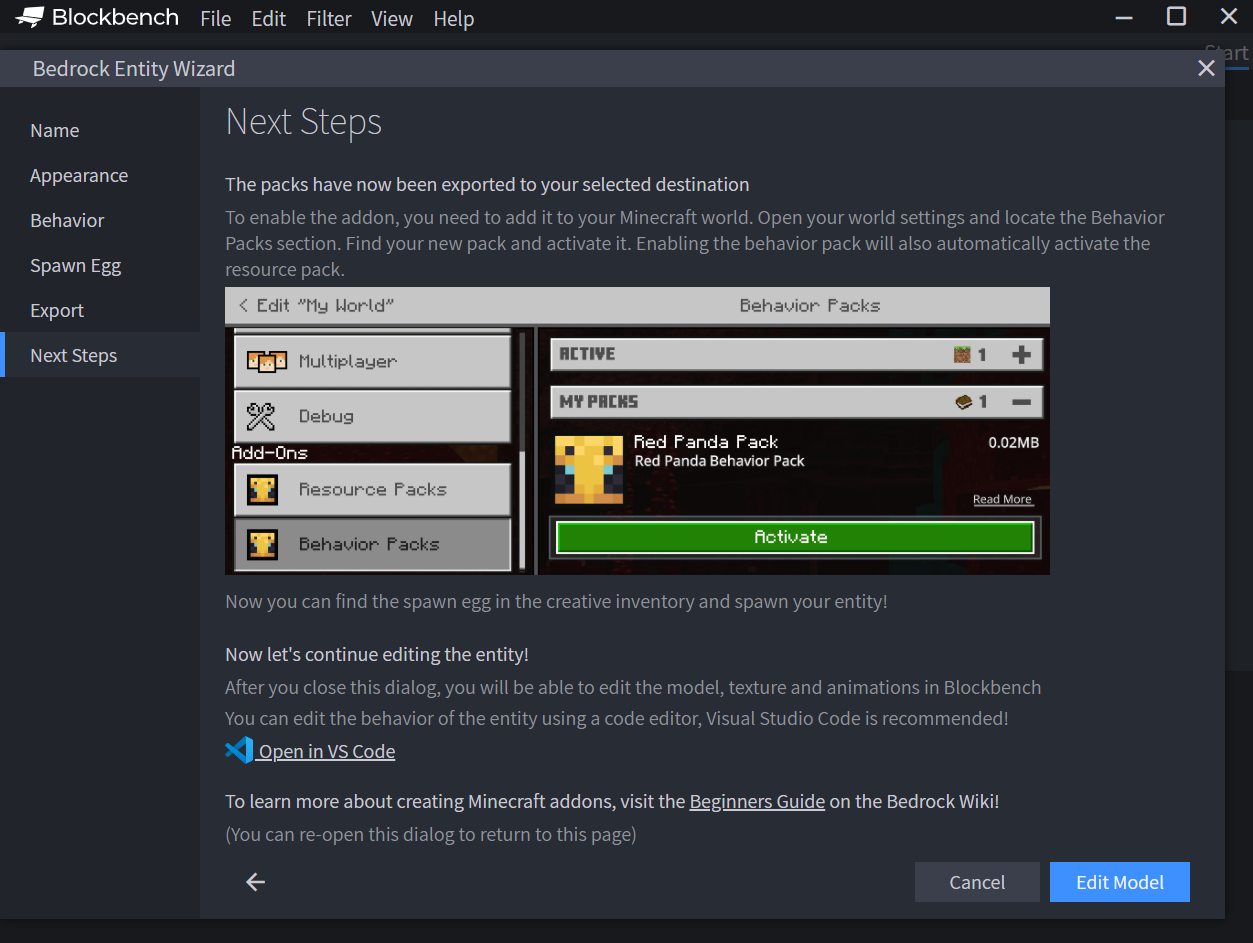
Installing the pack
To enable your packs for the first time, you need to add the behavior pack to your Minecraft world. Open the world settings and locate the Behavior Packs section. Find your new pack and activate it. Activating the behavior pack automatically activates the connected resource pack. This means that you now have the full Add-On installed into your world.
Tip
You can view a detailed step-by-step walkthrough on how to enable tutorial in the Behavior Pack tutorial.
Enter the world and follow the instructions in the wizard to spawn your custom entity. Usually, you can do this by getting a spawn egg from the creative inventory and using it.
Note
Alternatively, if you have exported your Add-On as a .mcaddon file, you can open this file in order to automatically add the packs into Minecraft.
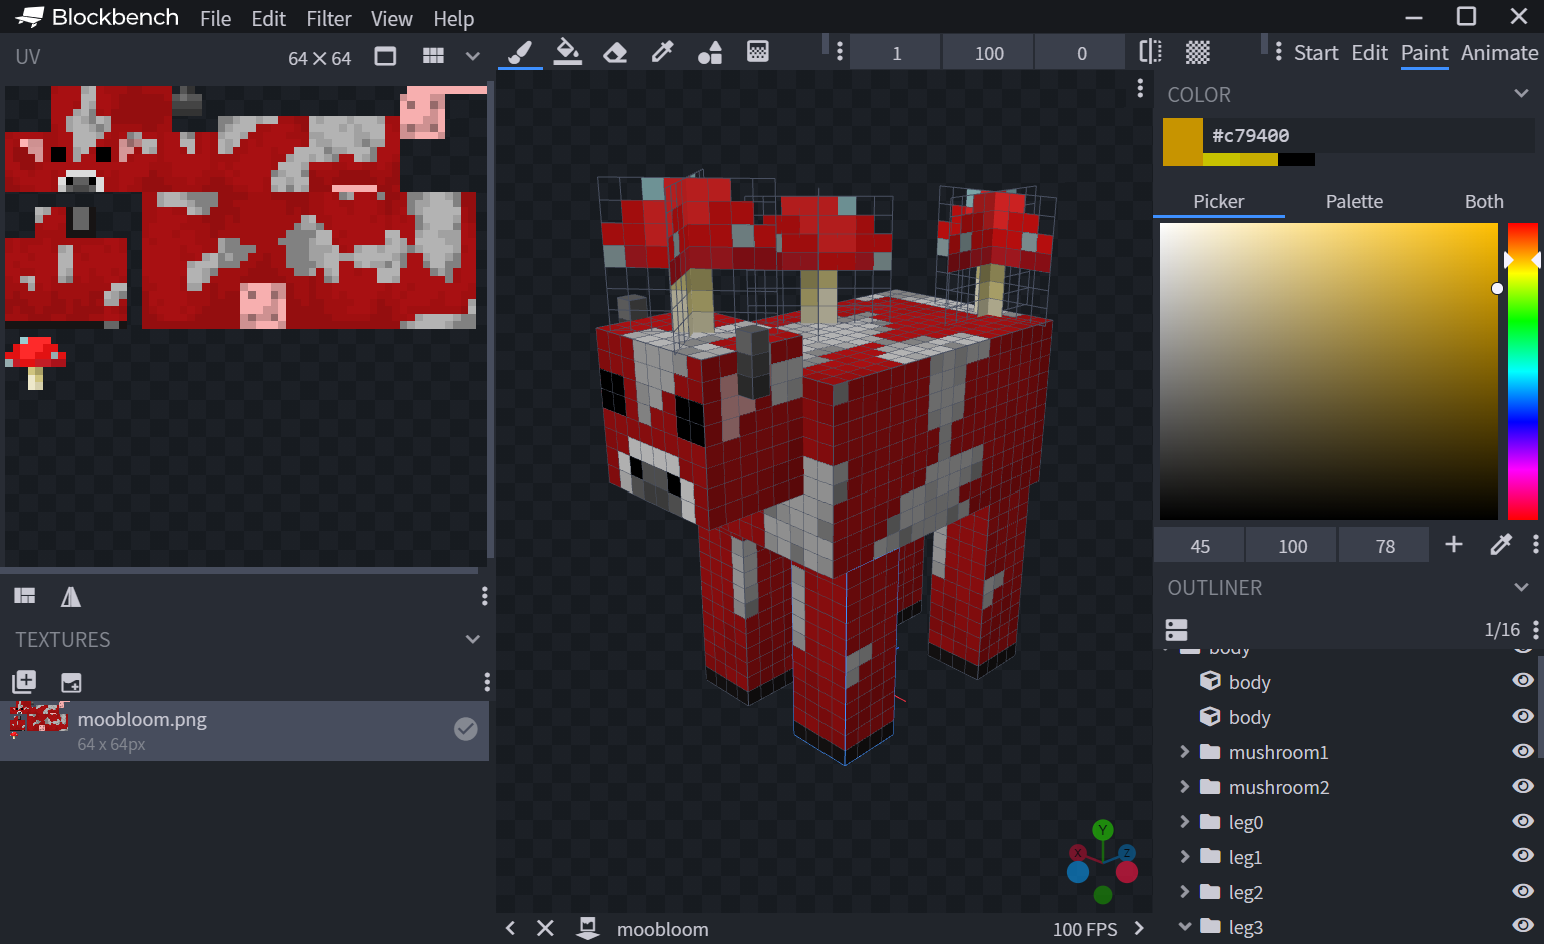
Modifying your entity
Model and animations
Since you are already in Blockbench, you can continue to use the program to edit the model, textures and animations. To do that, press the blue button in the bottom right called Edit Model.
Caution
This option is not available if you have exported your Add-On as an .mcaddon file.
You can learn how to model and animate in this tutorial playlist: ArtsByKev Blockbench Tutorials
More information on Blockbench can be found on the Blockbench Wiki.
Editing behavior
If you want to edit the behavior and other aspects of your entity, you need to use a code editor. The wizard will present you with an option to open the packs in Visual Studio Code, a code editor that is popular for Add-On development for Minecraft: Bedrock Edition. You can learn how to set up Visual Studio Code for Add-On development under this link.
Custom entity behavior is a huge topic, and this article won't attempt to touch on it. Instead, here are some helpful resources to help you get started:
To view all of the available behaviors and AI Goal Components that an entity can use, you can go to the Entity JSON Reference Documentation.
What's next?
If you'd like to see another tutorial on using Blockbench with the Minecraft Entity Wizard, you can watch it on the Minecraft Creator Channel.
Want to learn more about building with Blockbench? The Blockbench Wiki has step by step guides and reference documentation for modeling, texturing, and animating any custom creation you can imagine.
The Blockbench Quick Start guide can help lead you to the specific document that you're looking for and is a great way to discover relevant external guides and videos.