Note
Access to this page requires authorization. You can try signing in or changing directories.
Access to this page requires authorization. You can try changing directories.
If you created a really neat Minecraft world and you wanted to share that world with other players, you have some options.
You could export the world and send out copies of it, or you could create a template of the world.
Worlds in the Minecraft Marketplace, like survival spawns, are typically world templates. When a player creates a world from the template, they get their own fresh copy of the world.
So where do world templates come from? Well, they are made from a zipped Minecraft world has been given the file extension .mctemplate and has the proper manifest.json file and a texts folder with some files inside it.
If your exported world has custom stuff added to it, like Add-On packs, those get included, too.
When you import a world file (.mcworld), it gets added to your list of worlds where you can open it and start mining and crafting.
When you import a world template (.mctemplate), it goes into the list of world templates where you can select it and Minecraft will use it to create a world that will then be added to your list of worlds.
Let's start with the simplest possible Minecraft world and learn some cool renaming tricks.
Unpacking, Examining, and Re-Packing a Minecraft World File
In this first part, we are going to create a world, export it, change the file extension on the name, unzip it, look at the contents, zip the contents back up, and open it again in Minecraft.
This is just to get you used to tinkering around in Minecraft files so things make more sense when you start making changes.
Ready? Here we go!
Launch Minecraft, create a world, give it a memorable name like New_World, and play in it to test it out. (I love it when instructions tell me to play Minecraft!)
Save and quit the world to go back to the Minecraft Play screen that shows all of your worlds.
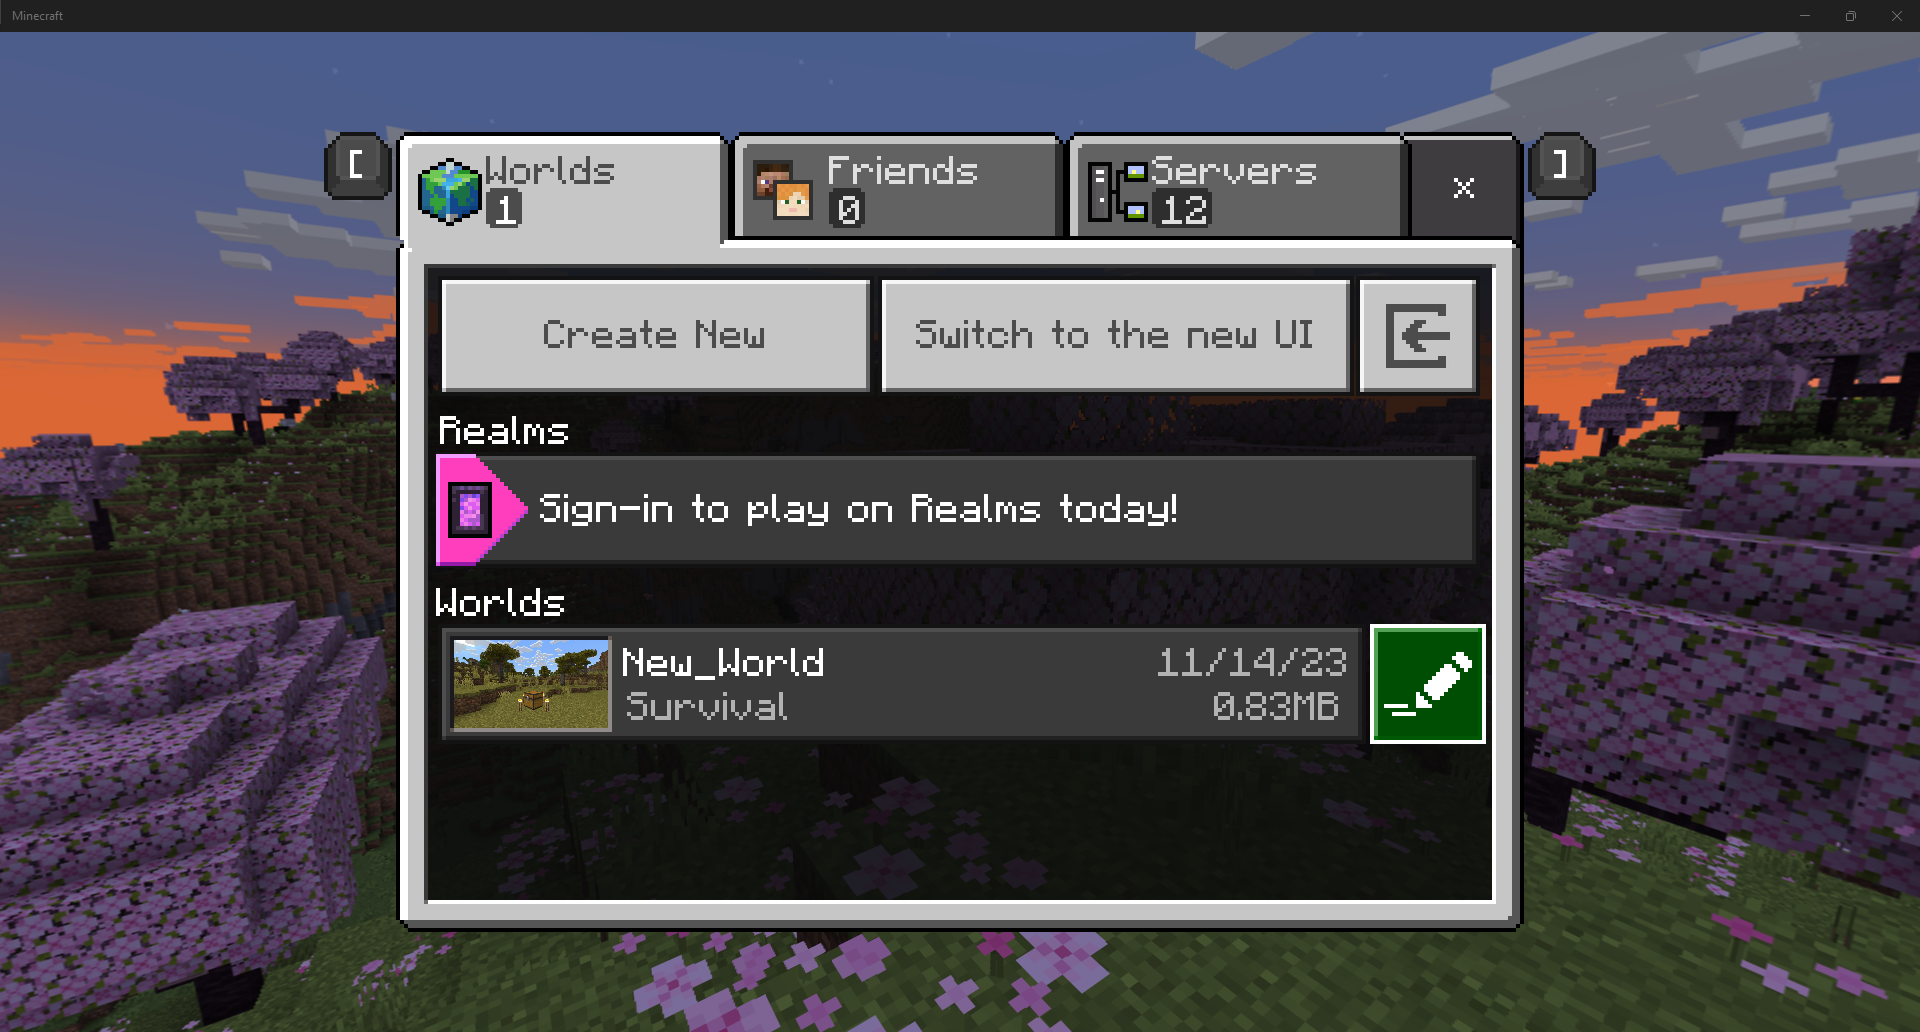
- Click the Edit button for that world to go to the Edit World screen.
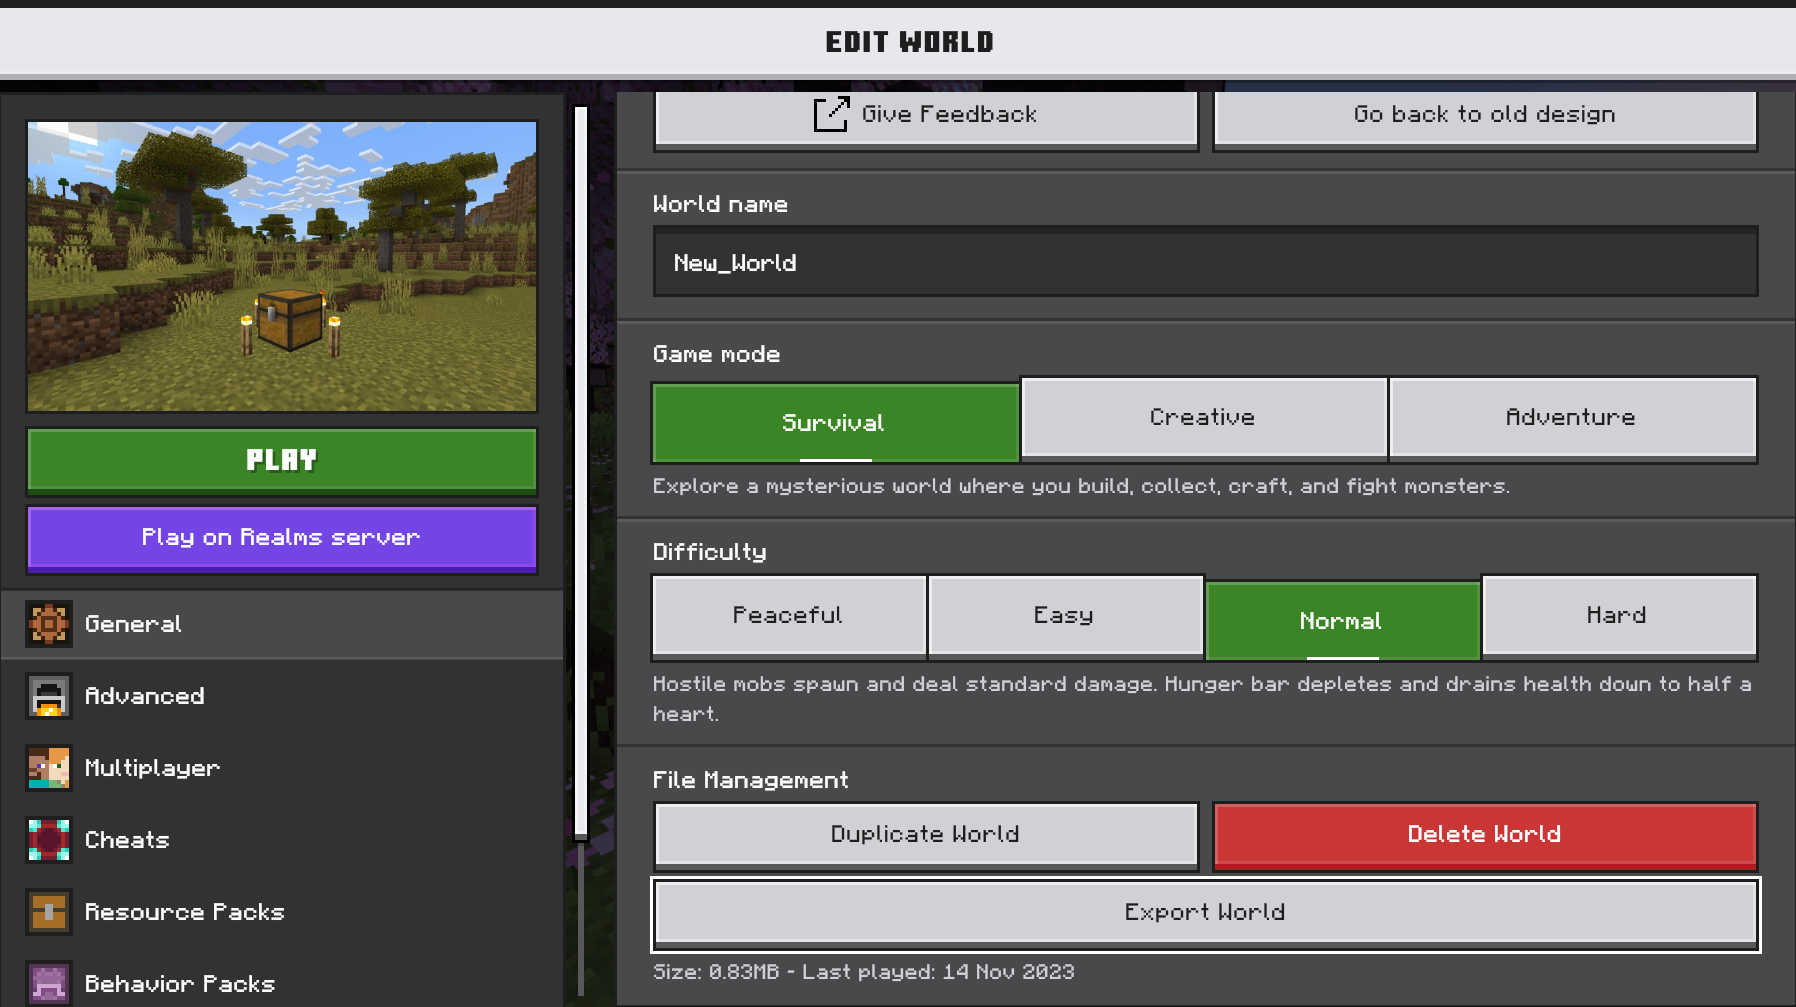
- On the General tab, in the File Management section, find the Export World button and click it. The Save As window will be displayed.
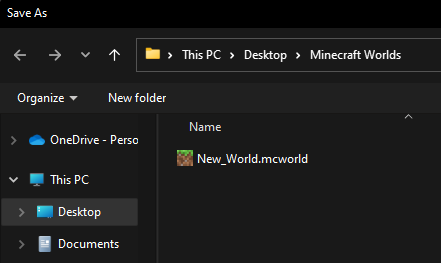
Choose a location that is easy for you to find, like in a folder on your computer's Desktop, and click the Export button.
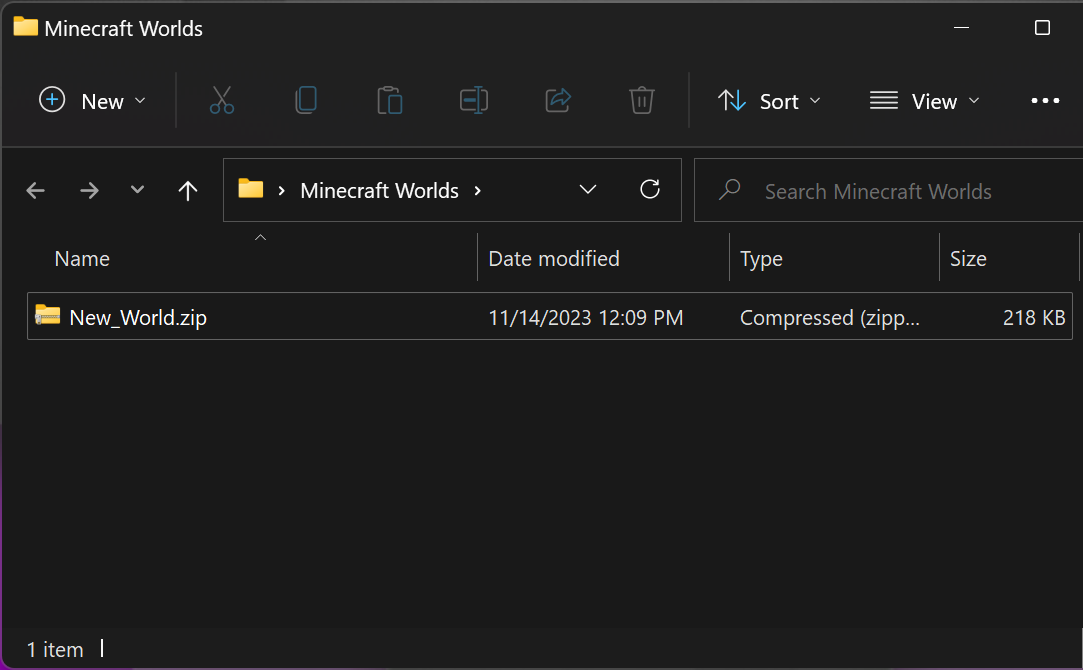
Minimize Minecraft and go find the exported world file. It will have a Minecraft icon and the .mcworld file extension.
Change the file extension from .mcworld to .zip.
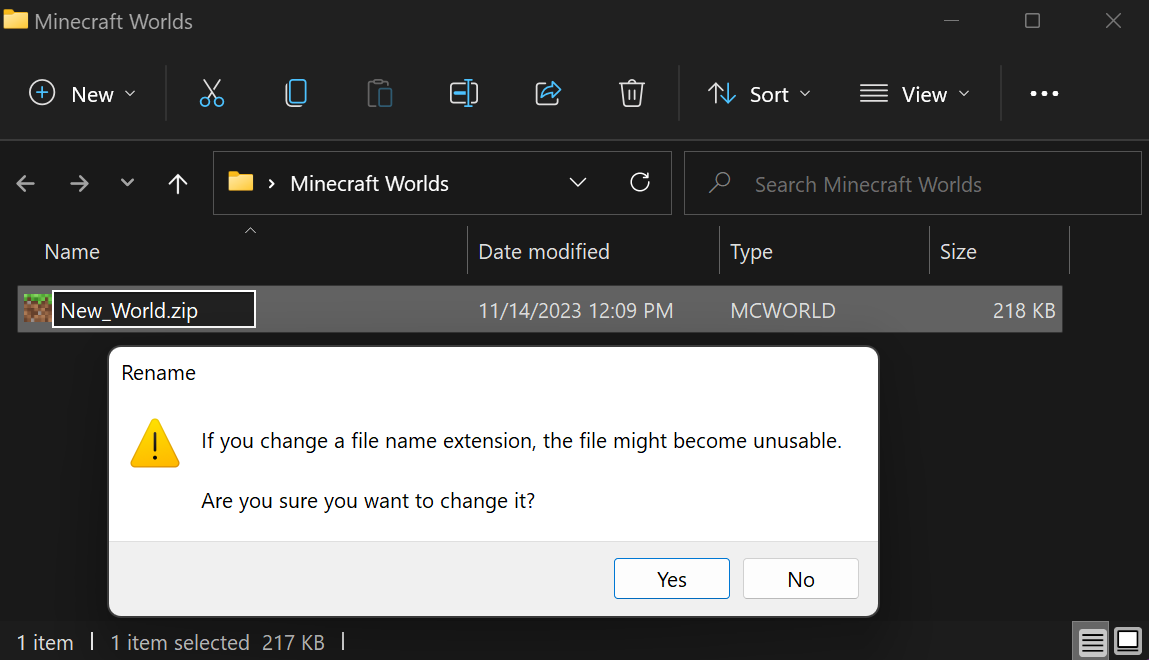
- Your computer will warn you that the file might become unusable and ask "Are you sure you want to change it?" We're sure. Click Yes. The file's icon will look different.
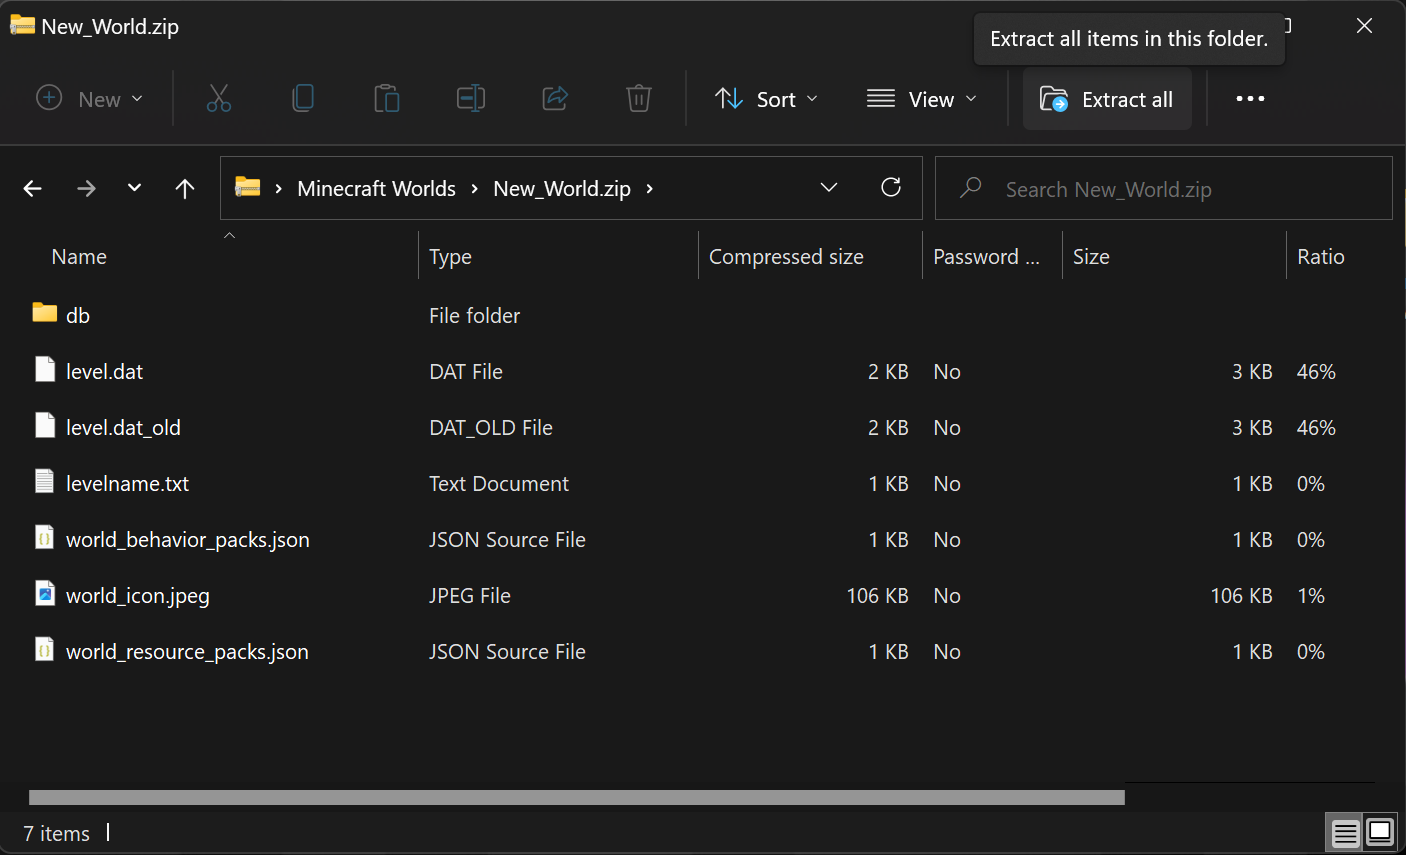
- Double-click the .zip file to open it and choose Extract All. The structure should look something like this:
- Open the files and check them out in Visual Studio Code, but don't move them or change the names of anything.
Structure of a Minecraft World package (without Add-On packs)
This is the baseline for our project.
- db folder that contains files similar to this:
000005.ldb - Microsoft Access Record-Locking Information
000006.log - Text Document
- 000005.ldb - Binary file, not editable
- 000006.log - Binary file, not editable
- CURRENT - File that says something like "MANIFEST-000004"
- MANIFEST-000004 - Binary file that cannot be opened
- level.dat - DAT file that contains important data about your Minecraft world
- level.dat_old - DAT_OLD File that can be used as a backup for the other DAT file
- levelname.txt - Text document that holds the name of the world: "New_World"
- world_icon.jpeg - JPEG File that contains the first image Minecraft displays for the world
.ldb and .log files are part of the database implementation for how your map is stored. They are binary and not friendly for editing by hand, so don't touch these!
- Edit the world_icon.jpeg file in an app like Paint.
![]()
Don't get too attached to your edited world icon, though. Whenever you play the world and then save and exit, Minecraft makes a new icon to replace it to reflect your gameplay. We want to make changes to this first one to distinguish it from the original world.
Re-Packaging a Minecraft World
Now, we're going to zip everything back up, rename the .zip extension to .mcworld, and open it again in Minecraft.
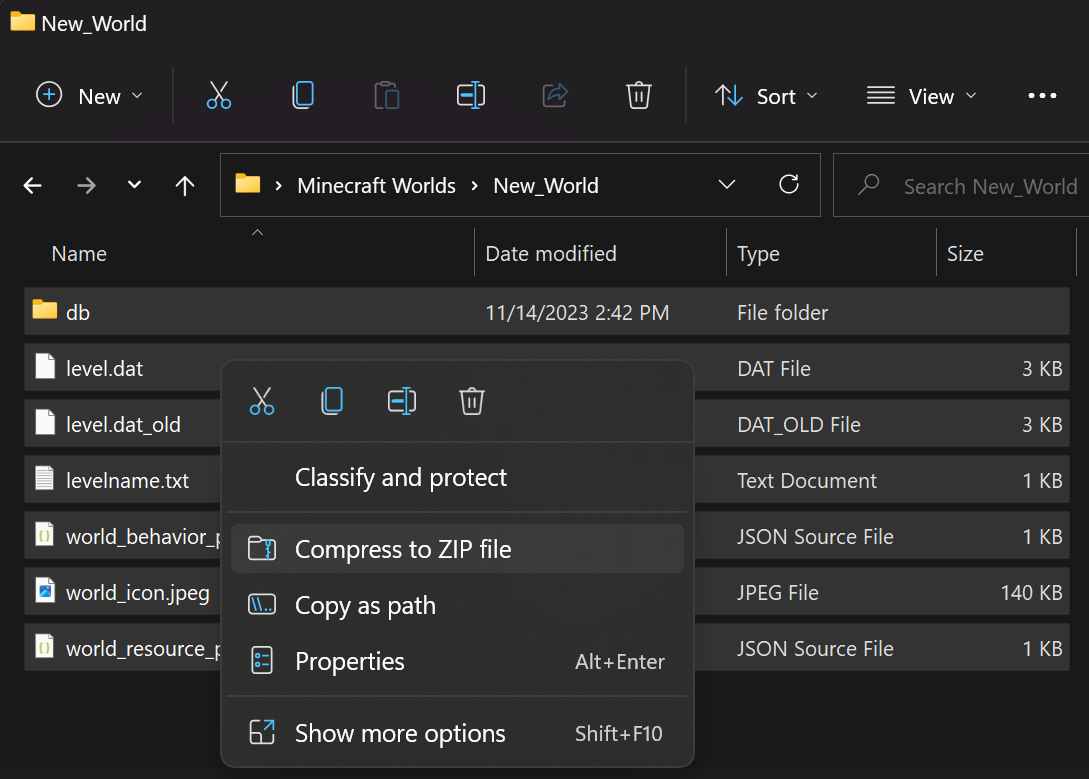
Inside the world folder, select all of the individual files.
With all of the files selected, right-click any one of the selected files and choose Compress to ZIP file.
- The zip file will be created among the other files and the computer will automatically give it the same name as the file you right-clicked. That's okay. You can rename the zip file to something distinctive like New_World_EDITED.zip.
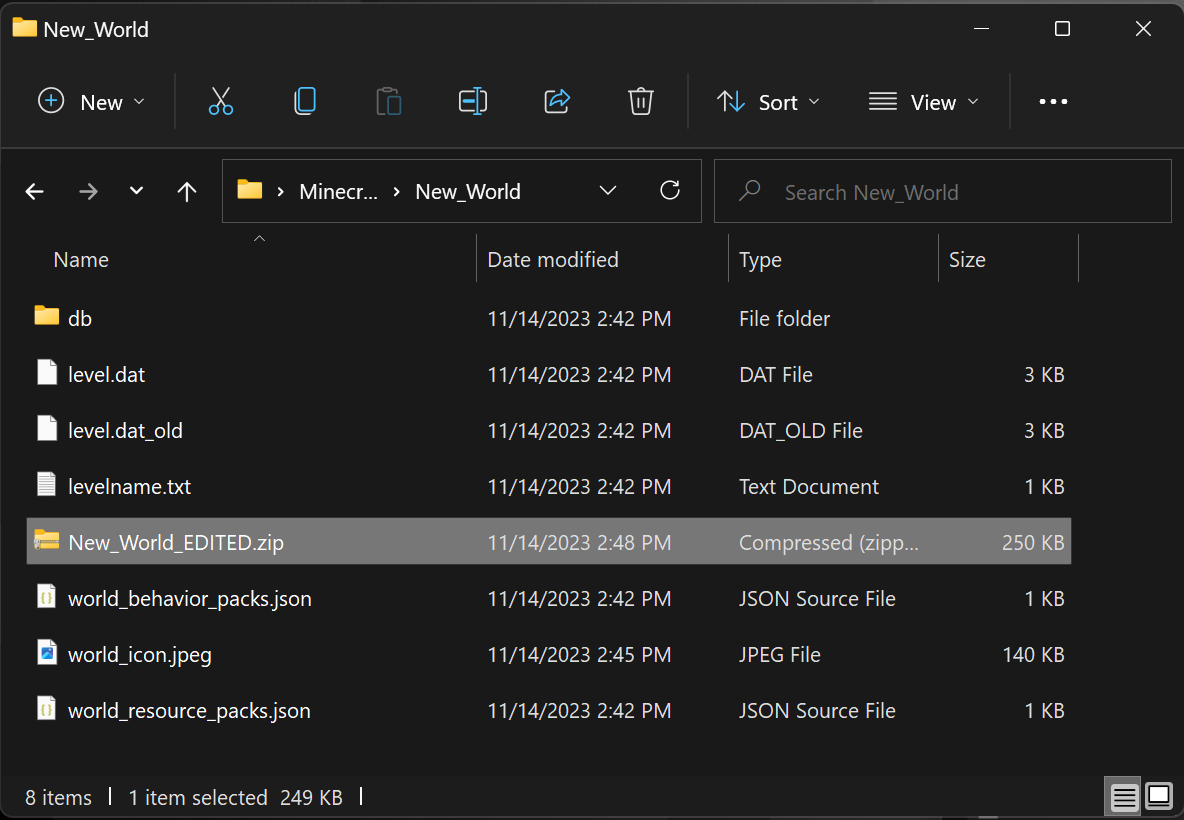
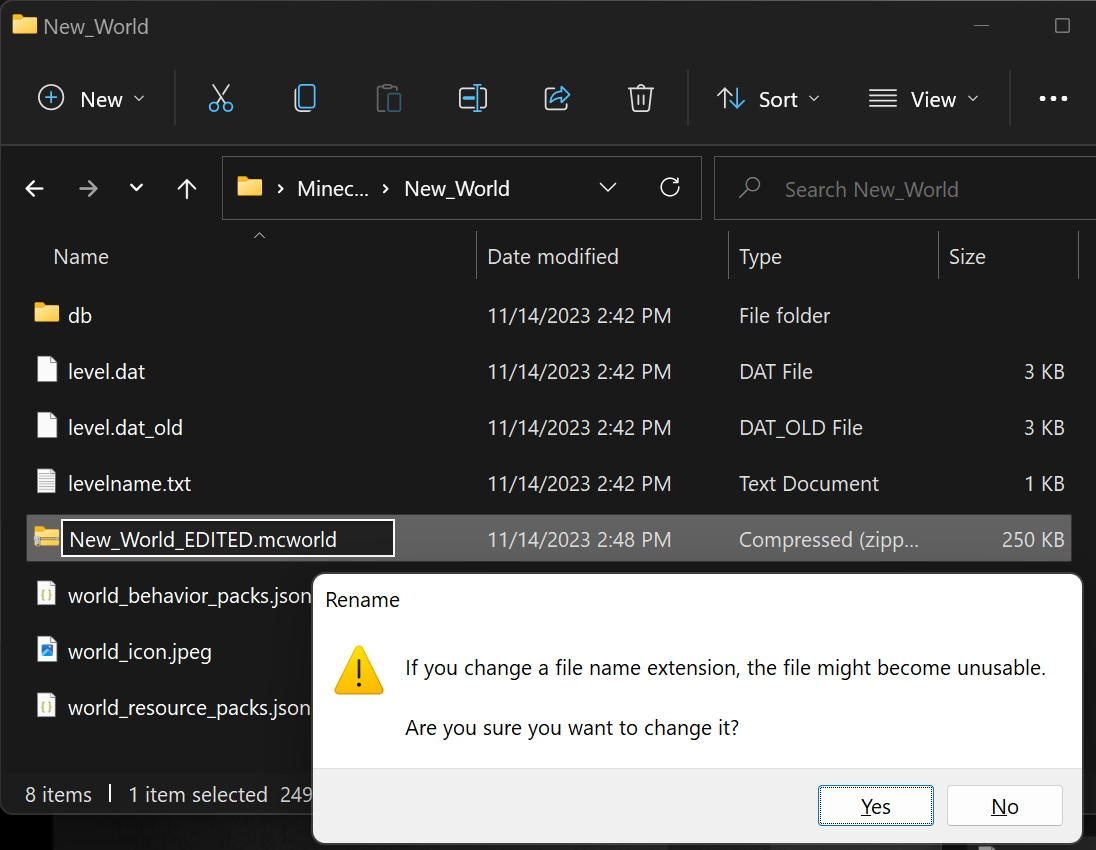
- After the zip file is created, use the rename option to change the .zip extension to .mcworld.
Note
You can give the new zip file the name New_World.mcworld as it's being created, but we want to show you that the final .mcworld file is simply a renamed .zip file.
Important
Do not try to zip the whole folder and rename it from .zip to .mcworld. When the computer zips a file, it creates a folder for the things you want zipped, so the world folder goes inside another folder and Minecraft will not be able to import the world.
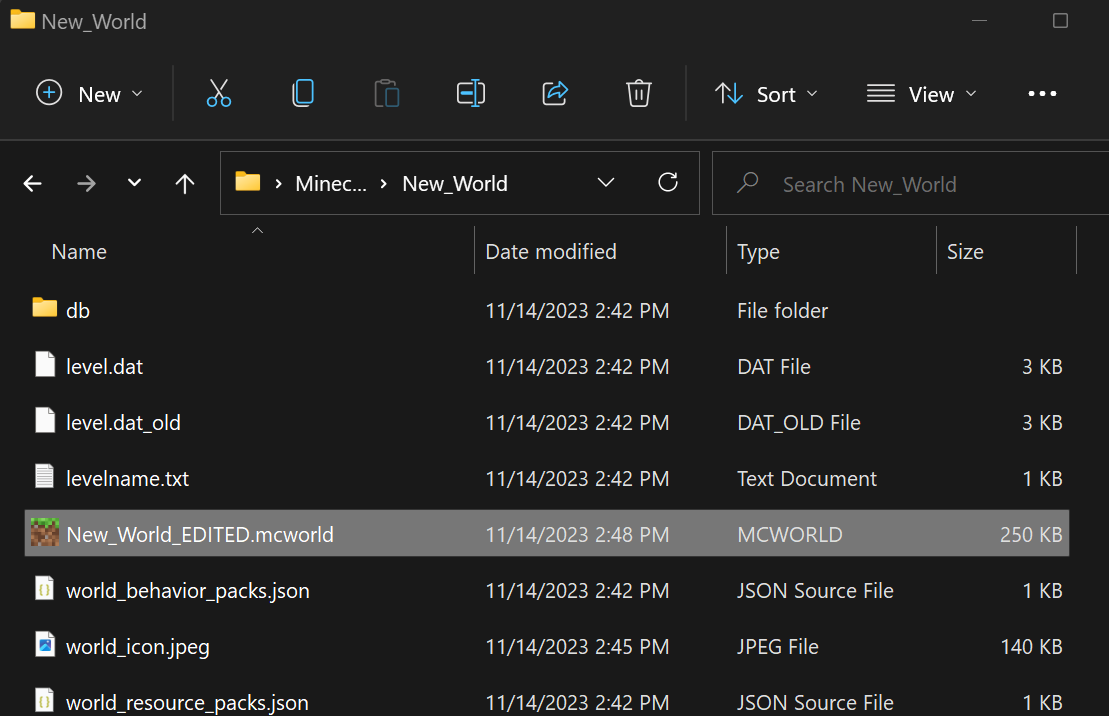
After you change the file extension to .mcworld, the file will have the Minecraft logo on it.
Double-click the New_World.mcworld to launch Minecraft and import the world. You should see messages that confirm the world has started and finished being imported successfully.
Click Play to go to the Play screen, where the world will be displayed along with any others.
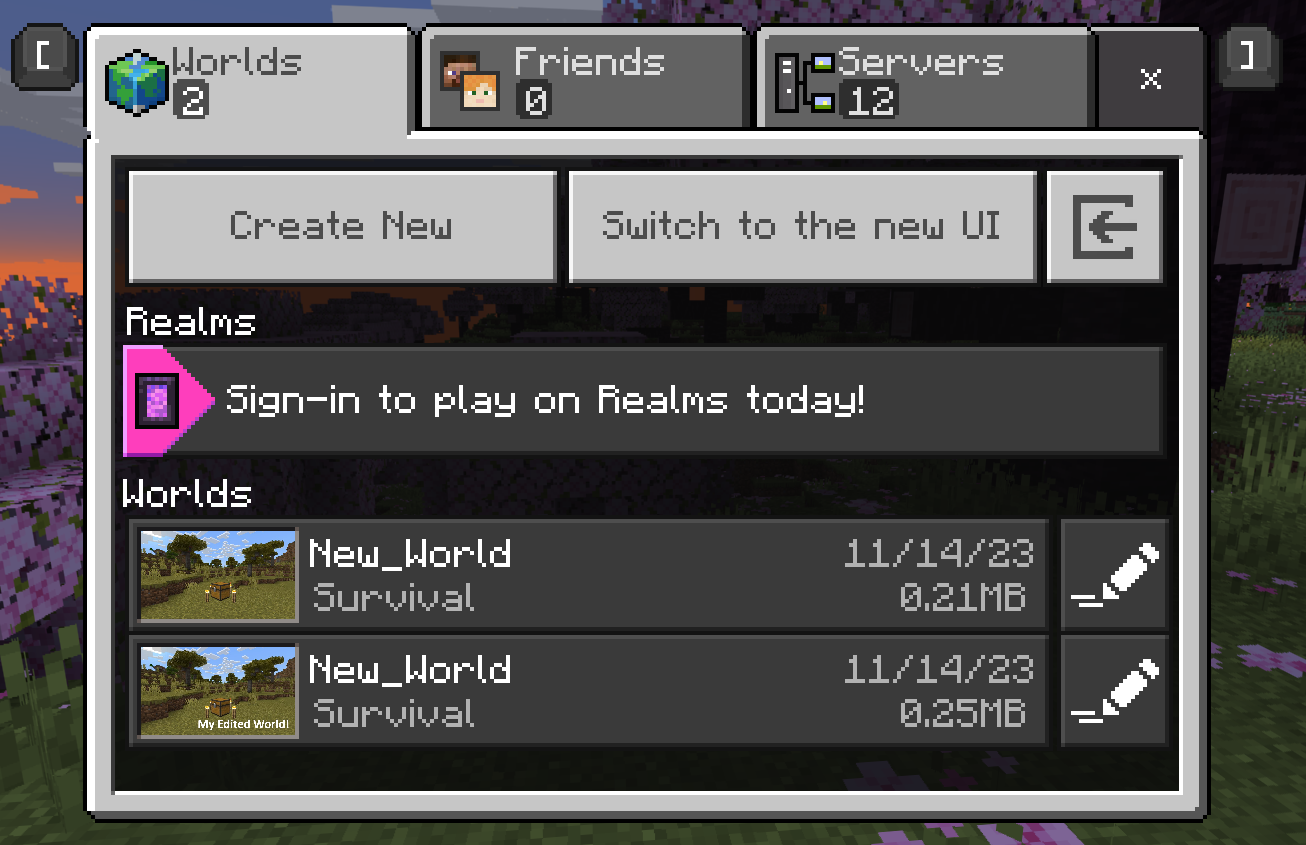
- When you go into the edited world, it will look just like the original one.
Okay. Now that we know what a world file has in it, and how to zip and rename the contents, let's learn about the structure of a world template.
Creating a World Template
All you need to do to turn a Minecraft world into a world template is:
Create a working exported world with any configurations and Add-On packs activated.
Add the proper manifest.json file.
Optional: Create a folder named texts with 2 text files inside: en_US.lang and languages.json.
After you zip everything up, rename the file to have a .mctemplate extension.
That's it!
manifest.json
The manifest.json for a world template should have these contents:
name: This field is alwayspack.name. This is the name that will be in the imported template file in the world_templates folder.description: This field is alwayspack.descriptionversion: This tells the game what version of the pack this is. Always create new content with[1, 0 ,0].uuid: Generate two different UUIDs from this site: https://www.uuidgenerator.net/version4.type: This tells the game to treat this pack as a world template
Template world template manifest.json:
{
  "header": {
    "name": "pack.name",
    "description": "pack.description",
    "version": [1, 0, 0],
    "uuid": "<FIRST GENERATED UUID>"
  },
  "modules": [
    {
      "version": [1, 0, 0],
      "type": "world_template",
      "uuid": "<SECOND GENERATED UUID>"
    }
  ],
  "format_version": 2
}
Texts folder
The texts folder is where the name and description of your world is defined in the en_US.lang file.
If you do not have this folder and its contents, then the name of your world template will be "pack.name" as specified in the manifest.
en_US.lang
This is where the name and description of your world are defined. You are required to have these two lines in your .lang file:
- Pack name:
pack.name=[name of pack] - Pack description:
pack.description=[description of pack]
Template en_US.lang:
The names after the = are what will show up in the UI of the game.
pack.name=Western World
pack.description=Howdy partner
languages.json (optional)
This file tells the game what languages your skin pack supports. The only language currently required is English. If you would like to support other languages, you can create additional xx_YY.lang files and edit them to tell the game to support those languages.
Template languages.json:
[
    "en_US"
]
world_icon.jpeg
This is the image that shows up when your world is created from the template. Non-marketplace templates do not need a world icon, but if a template is made from an existing world, the world icon will already be available to use.
- Dimensions: 800x450px
- File format: JPEG
Using a World Template
The easiest way to import a world template into Minecraft is to double-click it and let Minecraft do the rest.
You should see Import started... and Successfully imported ... messages.
After Minecraft launches, click Play.
Because we are working with a template instead of a world, it will not be shown in your list of worlds. Instead, click Create New.
On the Create... page, scroll down to the Imported Templates collection. Your template should be listed there. Click it to create a world from the template.
Troubleshooting
While you learn how to create and modify worlds and templates, you are probably going to import and re-import your files. You will get "Failed to import" errors if you already have content with the same UUIDs loaded into your com.mojang folder.
Instead of creating new UUIDs for each manifest.json file, you can clean out the contents of the MinecraftWorlds and Minecraft Templates folders in your com.mojang folder.
You might not want to throw anything away until you're sure you don't need it, so rather than deleting the contents of these folders, we suggest dragging the contents to a backup folder.
If you accidentally drag the entire folder out of your com.mojang folder, it should be okay. Minecraft will just make a new one.
Go to your com.mojang folder, as explained in the Getting Started tutorial.
All of your existing worlds are in the MinecraftWorlds folder. You can remove the ones you don't need. Names of worlds are not terribly descriptive (like "XqZXZZQdBQQ"), so if you're not sure which world you're about to pull out of the folder, take a look inside the texts folder. The .lang file (like en_US.lang) will have the name of the world in the
pack.name=line.All of your imported templates are in the world_templates folder. Minecraft puts them in there during the import process.
Variation: Add-On Packs
If you activate Add-On packs in a world and then export that world, Minecraft creates a few more folders and files to handle it all:
- behavior_packs
- All the behavior packs you activated in the world will be copied into here
- db
- resource_packs
- 0.All the resource packs you activated in the world will be copied into here
- level.dat
- level.dat_old
- levelname.txt
- world_behavior_pack_history.json - Contains information about the behavior packs, such as UUIDs
- world_behavior_packs.json - Contains behavior pack ID and version
- world_icon.jpeg
- world_resource_pack_history.json - Contains information about the resource packs, such as UUIDs
- world_resource_packs.json - Contains resource pack ID and version
Important
Resource pack and behavior pack folder names in world templates must be 10 characters or shorter. This is due to an issue on Xbox where long paths may cause resource or behavior packs to not load properly. We suggest using an acronym of the contents title for folder names.
Variation: Random Seed
Your template does not have to be used on only one world. You can enable random seed generation and have your changes applied to any random world.
Starting with any unzipped, exported world, delete the db folder.
Add
"allow_random_seed" : trueto the manifest.json.
Sample random seed world template manifest.json file
{
  "header": {
    "name": "pack.name",
    "description": "pack.description",
    "version": [1, 0, 0],
    "uuid": "<FIRST GENERATED UUID>",
    "allow_random_seed" : true

  },
  "modules": [
    {
      "version": [1, 0, 0],
      "type": "world_template",
      "uuid": "<SECOND GENERATED UUID>"
    }
  ],
  "format_version": 2
}
After the world is created, the world seed is locked and no longer editable.
What's Next?
Now that you know more about world templates, you can learn even more interesting things you can do with them.
To see examples of unchanged resource and behavior files, check out the Minecraft Vanilla resource pack and Vanilla behavior Pack.