Deploy the Movere Console
This article describes how to download and install the Movere Console.
Before you start
Review the tasks summarized in the table.
| Task | Details |
|---|---|
| Check install permissions | Review the permissions you need. |
| Check Console requirements | Review the installation requirements for the Console. |
| Check URL access | Verify the URLs and IP addresses to which the Console needs access. When connecting to the Movere portal in Azure, the installer attempts to resolve the Movere URLs in the customer tenant region. |
| Verify ports | Verify the ports needed on the Console device. During installation, Movere tries to connect over the internet on port 443 outbound, using a TLS 1.2 connection. TLS 1.2 must be supported on the device, and port 443 must be open and available. If TLS isn't supported, or port 443 is blocked, restricted, or used by another app, installation fails. |
| Allows Movere apps | Make sure that any anti-virus or security software running on the Console machine doesn't block the installer files. |
| Test connectivity | To test connectivity from the device before you begin, open a browser and navigate to https://geo.movere.io/ip. If successful, the browser displays the IP address of the machine. |
Download the Console installer
Sign in to the device on which you want to install the Movere Console, using the account with which you want to run the Console.
Sign in to the Movere portal.
Open the Stats tab, and click your tenant name.
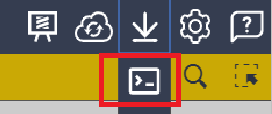
Click the download icon, to download the Movere installer (Movere.Installer.exe, 2.056 MB).
Right-click on the Movere.Installer file > Run as administrator.
In Notice and Acceptance, review the terms, and click I Accept > OK, to accept the conditions and continue.
In Welcome, click Next.
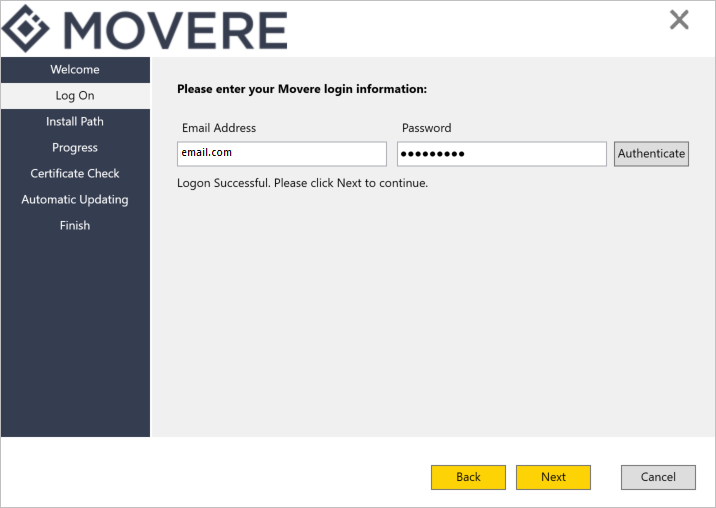
In Log On, enter your email address, and the password for your Movere user account. Then click Authenticate. After successful authentication, click Next. Your account needs Write access for authentication.
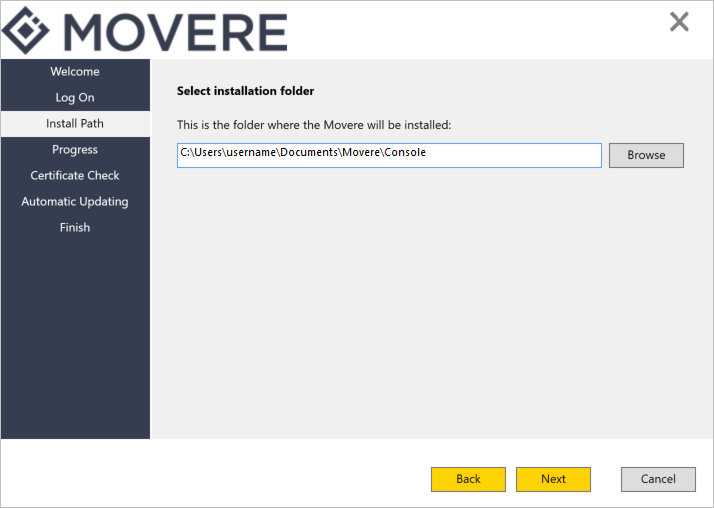
In Install Path, specify where you want to install Movere, then click Next. We recommend using the default location (C:\Movere), to ensure that the account you're using has full access to the Movere folder. Then, click Next.
In Progress, wait while the installer downloads, installs the Console files, and binds a certificate to port 443. Then click Next.
- Certificates are unique and bound to the specific device on which the Console is installed.
- The certificate includes the FQDN of the Windows device on which you install the Console, and all active IP addresses on the device. IP addresses must be IPv4. IPv6 isn't supported.
- IP addresses are listed in the Subject Name Alternative field of the certificate.
In Certificate Check, check that the certificate is successfully installed, then click Next.
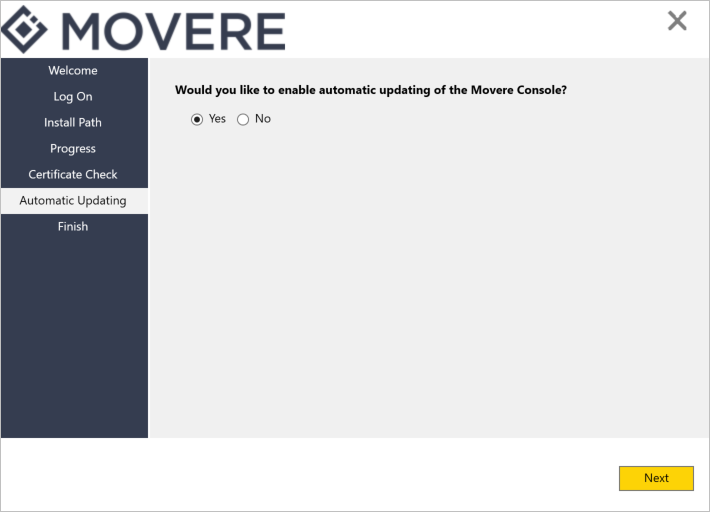
In Automatic Updating, click Yes to automatically update the Console.
In Finish, complete the installation, and optionally select to create a desktop icon.
Review installed files
The install process installs files in the Console folder (C:\Movere).
| File/folder | Details |
|---|---|
| Arc2 | Contains the actual resource consumption bot (Movere.Arc2) and the bot configuration file (Movere.Arc2.exe.config) used when the target computer runs .NET 3.5. |
| Arc4 | Contains the actual resource consumption bot (Movere.Arc2) and the bot configuration file (Movere.Arc2.exe.config) used when the target computer runs .NET 4.0 or higher. |
| Bot2 | Contains the inventory bot (Movere.Bot2.Local) and the bot configuration file (Movere.Bot2.Local.exe.config) used when the target computer runs .NET 2.0. |
| Bot4 | Contains the inventory bot (Movere.Bot2.Local) and the bot configuration file (Movere.Bot2.Local.exe.config) used when the target computer runs .NET 4.0 or higher. |
| LinuxBot | Contains bots and scanning files for Linux devices. Bots for inventory/resource consumption scanning: - 32-bit: Movere.ARC.Linux.Bot.x86 - 64-bit: Movere.ARC.Linux.Bot.x64) systems. Linux configuration file (Movere.ARC.Linux.Bot.xml) Bootstrap files to support third-party and manual Linux scanning on 32-bit (Movere.Arc.Linux.Bootstrap.x86) and 64-bit (Movere.Arc.Linux.Bootstrap.x64) systems. Supporting files for scanning SQL Server on 64-bit Linux systems (Movere.tsql.x64), and for leveraging the gpg command on 32-bit (Movere.gpg.x86) and 64-bit (Movere.gpg.x64) systems. |
| Uninstall | Executable file to uninstall the Movere Console. |
| FrameworkVerifier | Verifies which .NET version is running on a target device, and triggers the corresponding inventory bot, to start scanning. |
| Movere.Console.WPF | Movere Console app. |
| Movere.Console.WPF.exe | Configuration file for Movere Console app. |
| dll files | The dll files used by Movere. Some of the dll files installed on the console machine are: - Movere.Inventory.Core.dll - Movere.Models.Serializable.dll - Movere.Service.Authentication.dll - System.ValueTuple.dll - Microsoft.Security.RegularExpressions.dll |
| Movere.Service | Scanning orchestrator. |
| Movere.Service.exe | Configuration file for Movere.Service app. |
| Token.txt | The token.txt file contains the users encrypted Movere user ID. It's an authorization from the Movere IdentityServer, added as a header to every uploaded payload. It allows the payload to pass through the Movere File Transfer API. The token.txt file doesn't contain the user's Movere password, and can't be decrypted. The token.txt file can only be downloaded by a Movere user with Write permissions. Partner accounts, and Microsoft users can't generate token.txt files. The token file has a 90 day lifespan. After it expires, the Movere File Transfer API rejects any payloads uploaded using the expired token.txt file. The token file also authenticates the download of a rescan file via the Console, by a customer account with Write permissions. |
Run the Console for the first time
Open the Movere Console.
When you open the Console for the first time, you're prompted to specify a magic word.
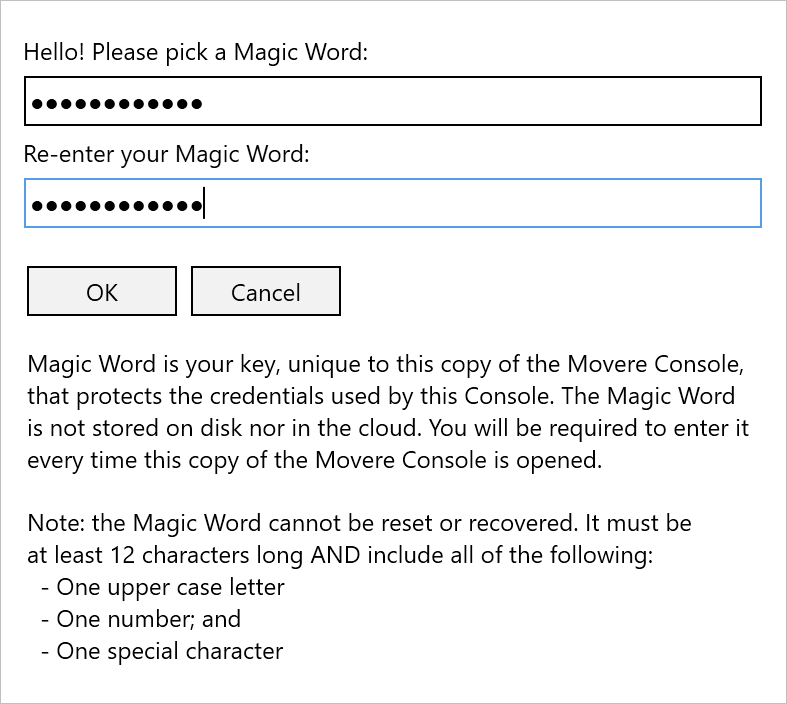
- The magic word must be at least 12 characters long, and include an upper case letter, a number, and a special character.
- Keep the magic word safe. It isn't stored on disk or in the cloud, and can't be reset or recovered. If you forget it, you need to uninstall and reinstall the Console to reset the magic word, and regain access to the Console.
- The magic word isn't stored in clear text in the Log Service file.
After adding the magic word, the Console opens, and you can begin scanning.
Update the Console automatically
If you opted in for automatic updates when you installed the Movere Console, then the Console is automatically updated to the latest version as it's available.
- The Console is updated using the Movere.UpdateService.exe service.
- It's a Windows service that performs a daily call to the Movere Tool API, to check for the latest Console version.
- The service compares the local version to the latest and installs the latest version as needed.
During automatic updating of the Console:
- Movere saves all Console settings in memory, including credentials, and credential mappings.
- Automatic updates don't impact the magic word.
- If a scan is in progress when the Console updates, the Update Service waits for the scan to complete before updating. The Update Service doesn't stop existing scans.
- The Update Service doesn't update any bots that are actively running on target devices. The service downloads updated bot versions to the Console machine. You need to start a new scan after updating, to ensure that target devices have the latest bots.
Uninstall the Console
There are a few ways to uninstall the Movere Console. We recommend that on Windows devices, you remove the Console using the uninstall option the Control Panel. Don't just delete Movere folders and files, since this won't result in a complete uninstall.
- In the Control Panel > Programs and Features, locate the Movere Console entry, and uninstall it.
- Run the Movere Console Unistall Wizard. The wizard removes all Movere folder, files, and certificates from the device.
Next steps
- Learn about scanning.
- Review the scanning requirements for Windows and Linux devices.