Note
Access to this page requires authorization. You can try signing in or changing directories.
Access to this page requires authorization. You can try changing directories.
Applies To: # OData client v7 supported OData Client V7
OData provides three tools to generate client proxy file for an OData Service.
OData Client Code Generator support generating client proxy file for OData V4 Service. It supports following Visual Studio:
- Visual Studio 2010 (The last version of this tool for VS 2010 is 2.3.0, You can download it from ODataItemTemplate.2.3.0.vsix.)
- Visual Studio 2012
- Visual Studio 2013
- Visual Studio 2015
- Visual Studio 2017
For full documentation, please refere to "How to use OData client generator to generate client proxy file".
OData Connected Service lets app developers connect their applications to OData Services (both V3 & V4) and generate the client proxy files for the services. It supports following Visual Studio:
- Visual Studio 2017
- Visual Studio 2019
Unchase OData Connected Service is a Visual Studio extension to generate C# or VB client proxy files for the OData web services (both V3 & V4) with some customization and more options. Simply put, it is like Add Service Reference for WCF or Add Web Reference for WSDL, but for OData. It supports following Visual Studio:
- Visual Studio 2017
- Visual Studio 2019
The following part will mainly focus on how to use the OData Connected Service by Microsoft to generate client proxy file. Similar steps are used in the Unchase OData Connected Service. See How To.
Install OData Connected Service Extension
You can install this extension by this link from vs gallery. Or, you can install it in Visual Studio 2015.
In Visual Studio, Click Tools > Extensions and Updates.
Expand Online > Visual Studio Gallery > Tools > Connected Service, and select the OData Connected Service extension.
Click Download.
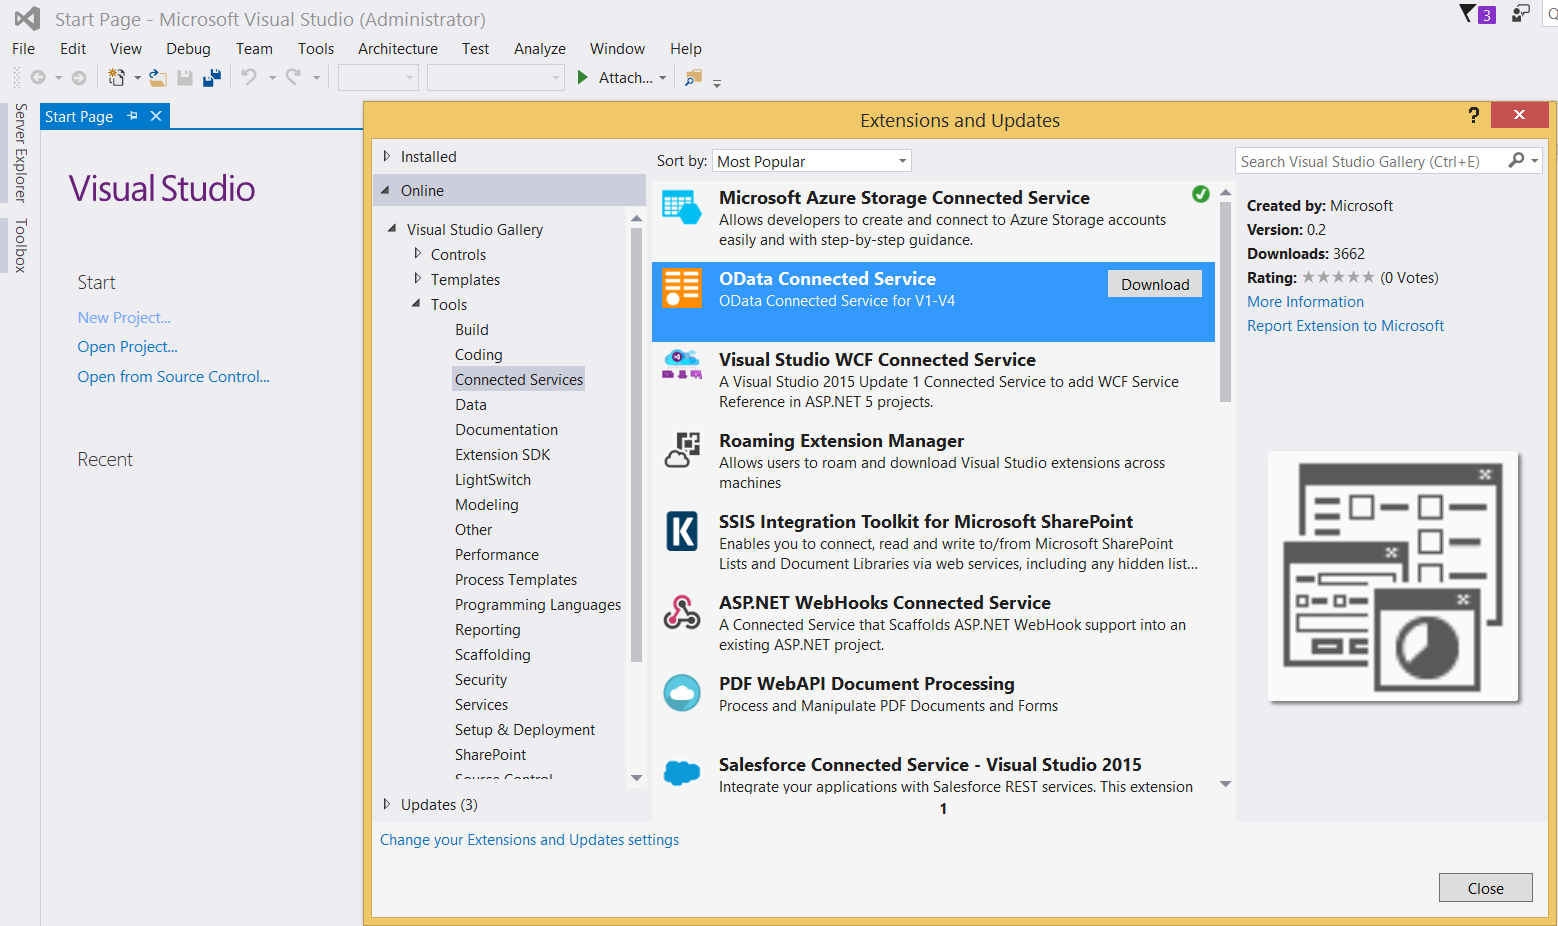
Then it will pop up a VSIX Installer window, Click Install.
Click Close once the installation finishes.
You need to restart the visual studio in order for the installation to take effect.
Generate Client Proxy
Create a new project
Create your project. Here, we take "Console Application" project as an example.
Start Visual Studio and from the File menu, select New and then Project.
In the Templates pane, select Installed > Templates, expand the Visual C# > Windows > Classic Desktop and select Console Application. Name the Project "TrippinApp" and click OK.
Generate client proxy for an OData service
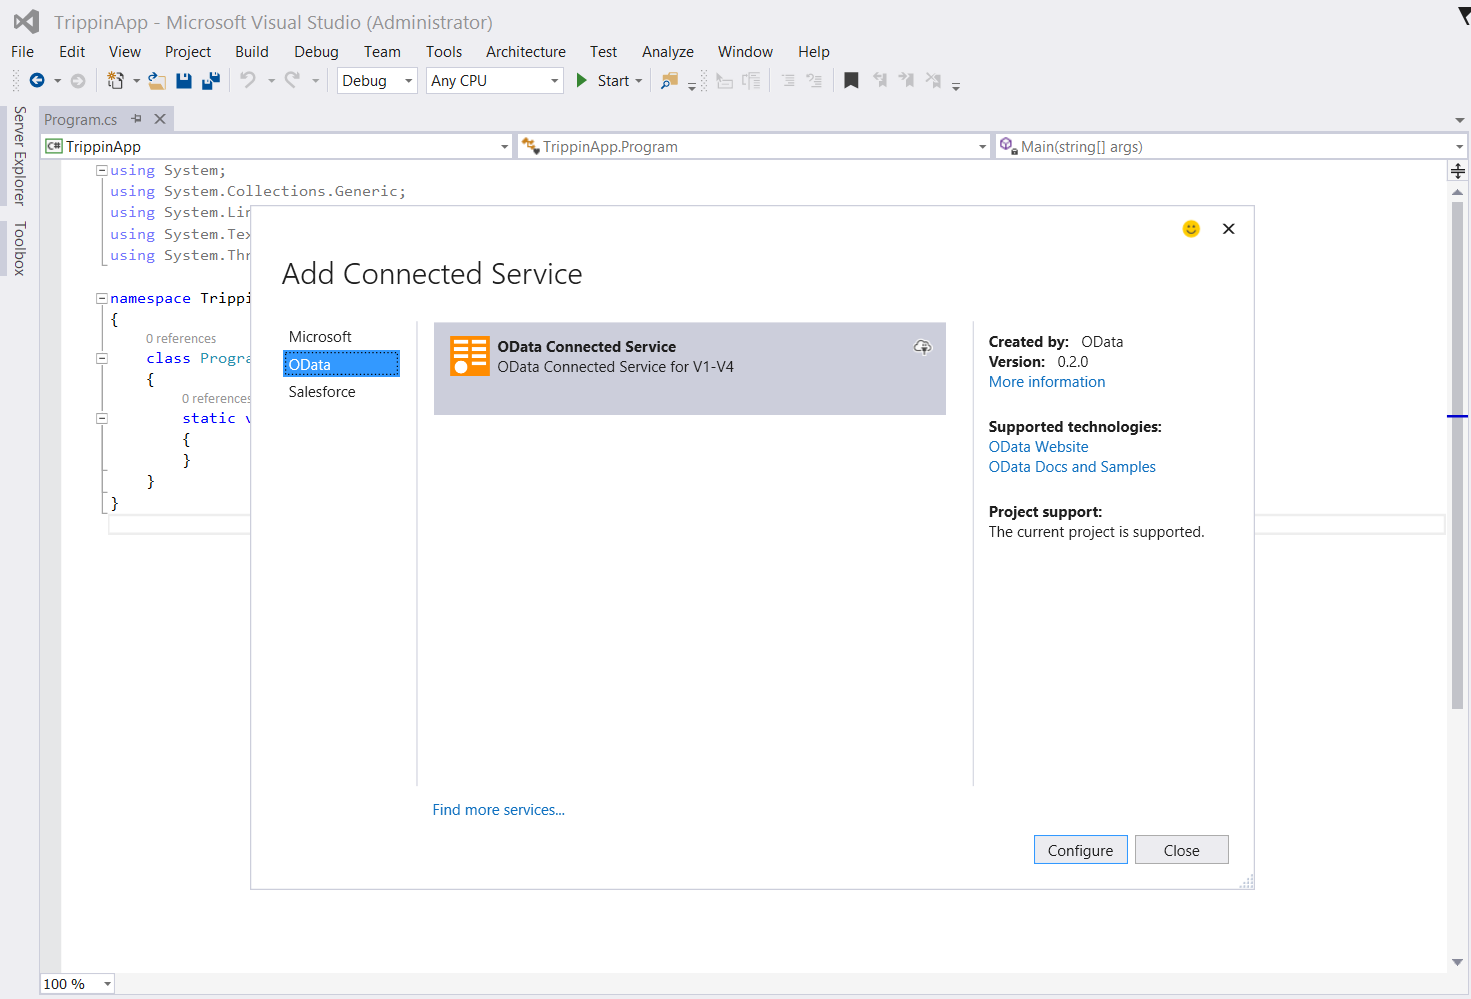
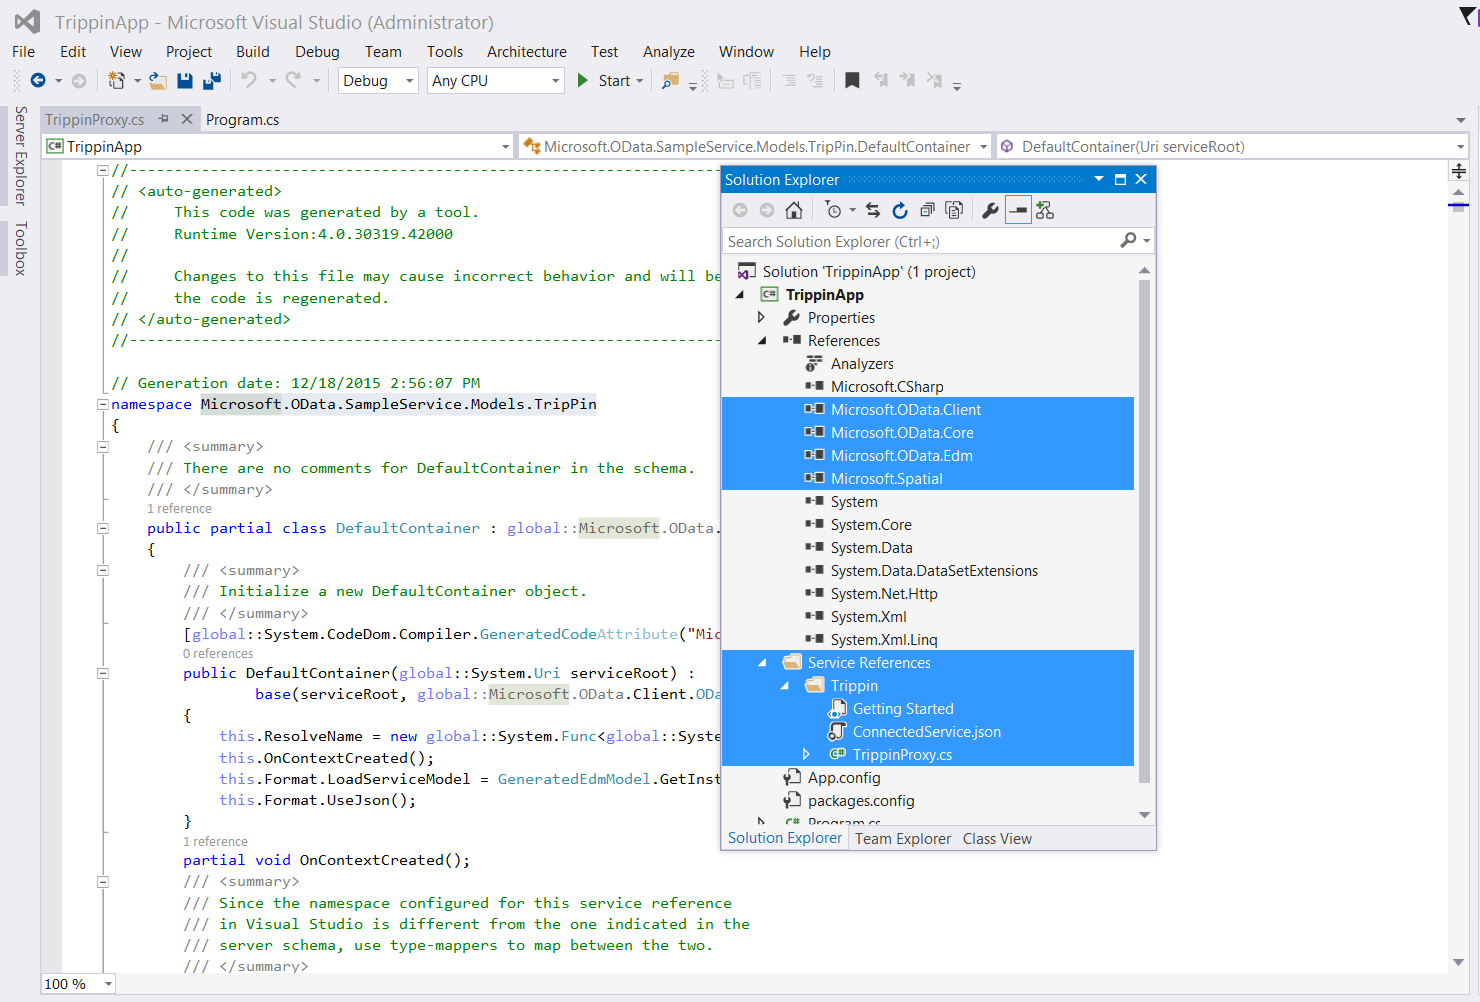
In the Solution Explorer pane, right click the "TrippinApp" project and select Add and then Connected Service.
In the Add Connected Service dialog, select OData and then click Configure.
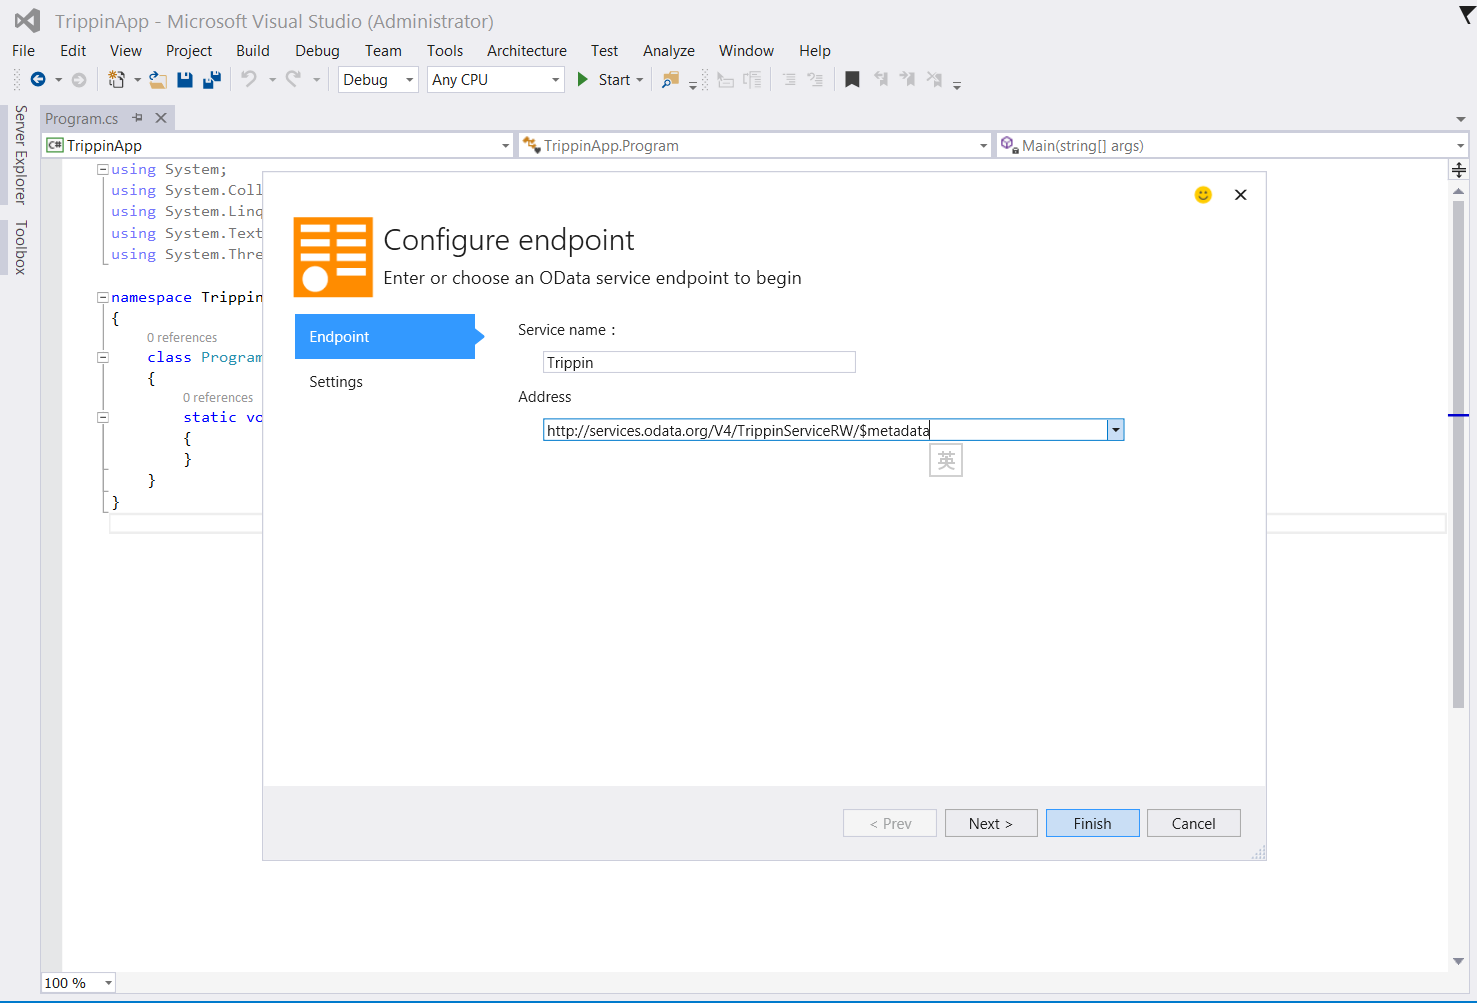
In the Configure endpoint dialog, input the service name and the OData service endpoint, then click Next button.
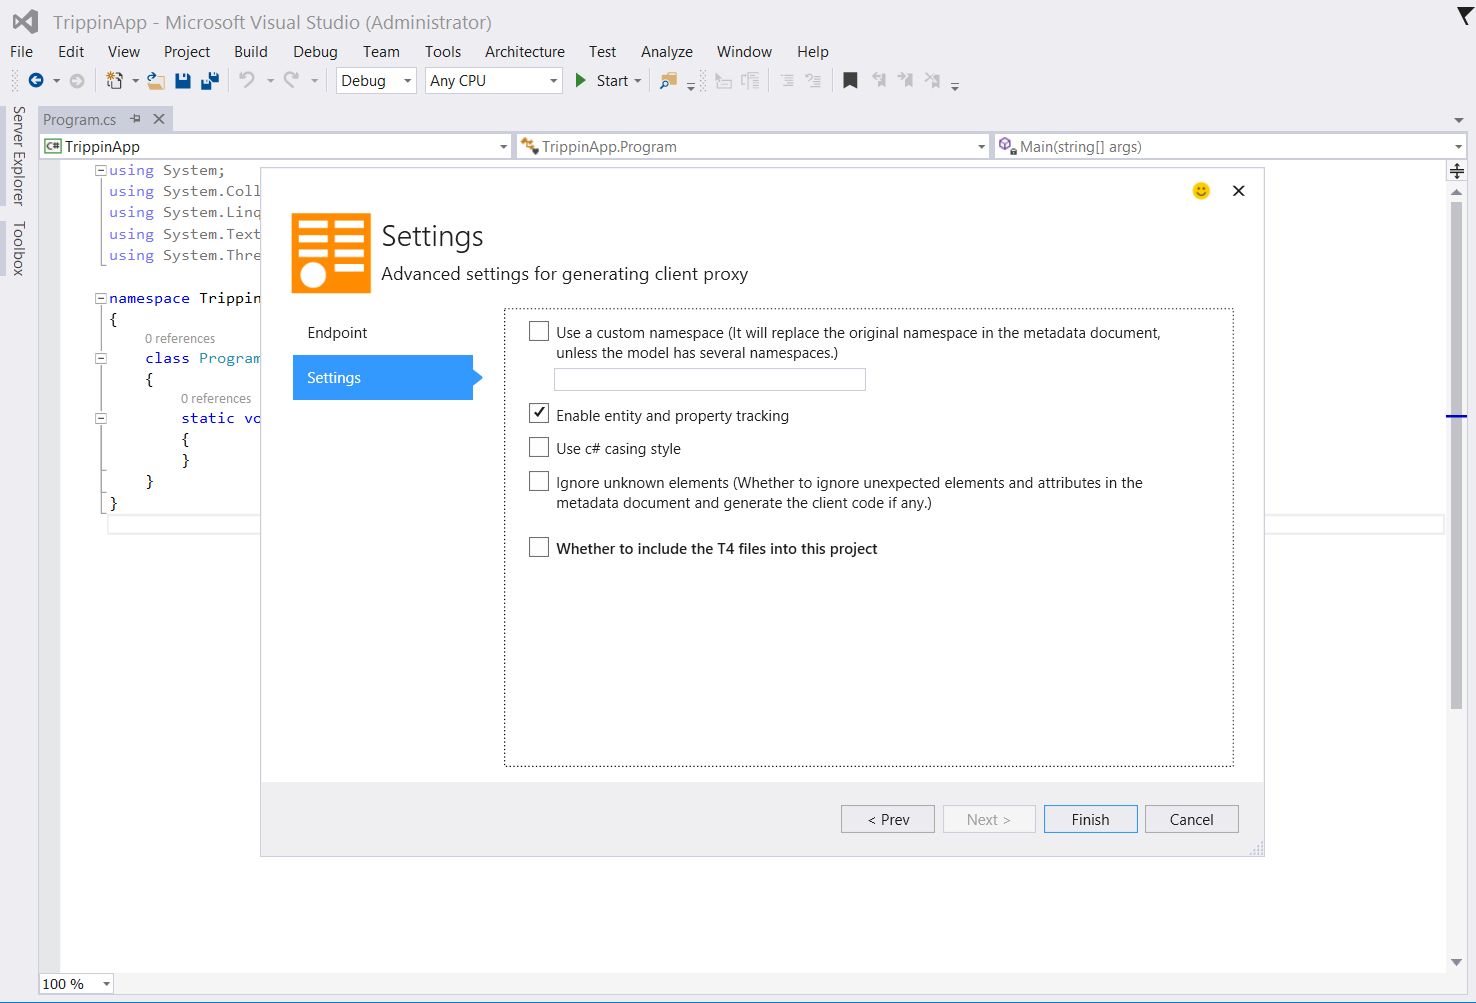
In the Settings dialog, enter the file name(without extension) of the proxy file and click Finish.

In the Settings dialog, You also can configure some other settings by click AdvancedSettings link. Then you can set the related code generation settings.
Once you finished all those settings, click Finish. This tool will begin to install the related NuGet packages and generate the client proxy file into your project.
Consume the OData service
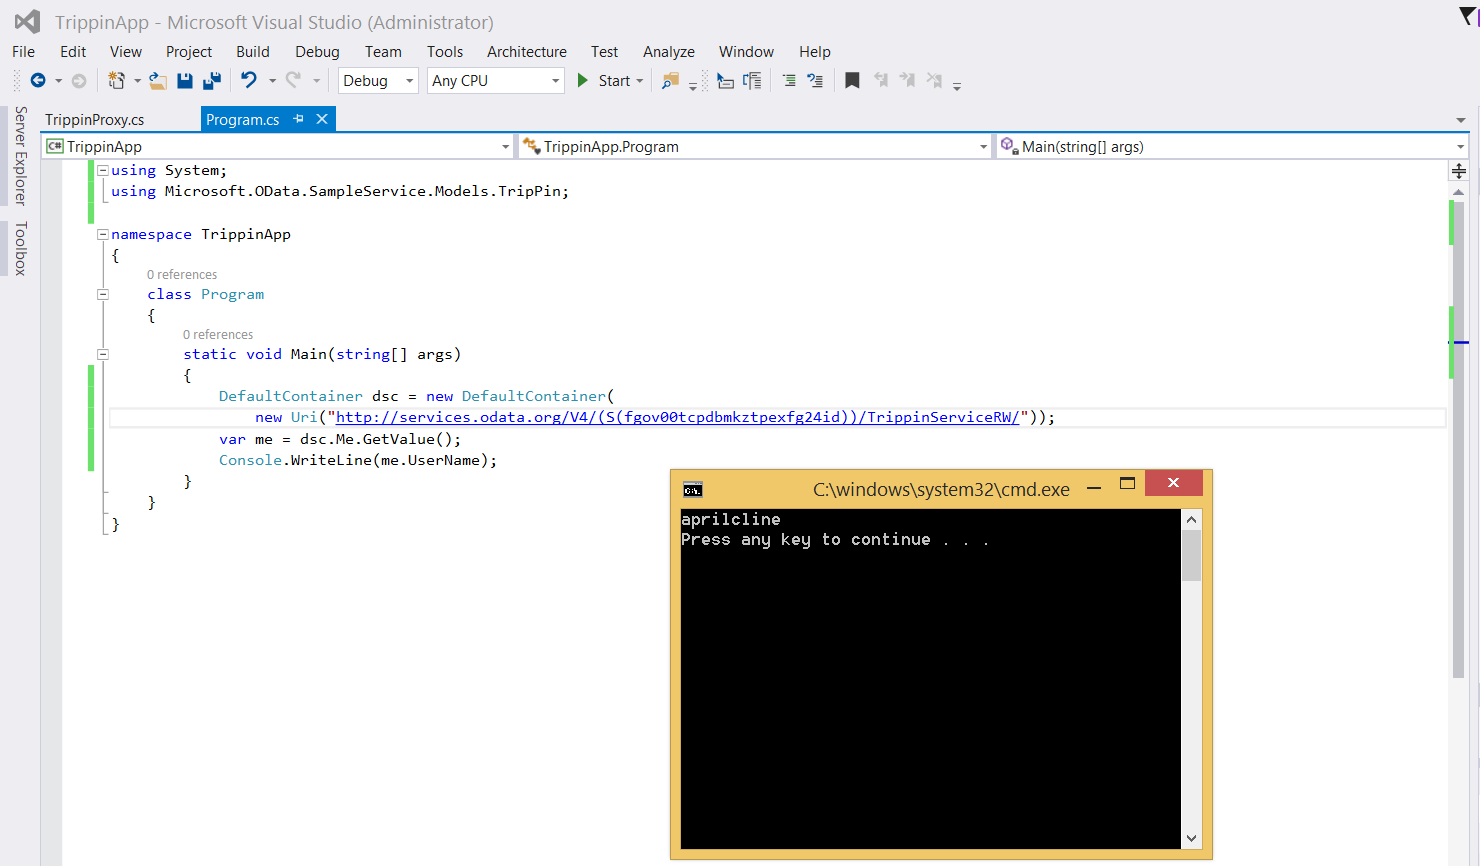
Now, the developer can write client code to consume the OData Service.
    using System;
	using Microsoft.OData.SampleService.Models.TripPin;

	namespace TrippinApp
	{
	    class Program
	    {
	        static void Main(string[] args)
	        {
	            DefaultContainer dsc = new DefaultContainer(
	                new Uri("https://services.odata.org/V4/(S(fgov00tcpdbmkztpexfg24id))/TrippinServiceRW/"));
	            var me = dsc.Me.GetValue();
	            Console.WriteLine(me.UserName);
	        }
	    }
	}
Summary
Now you have the OData Connected Service at your disposal to generate your client proxy for any OData service. To leave us feedback, please open github issues at OData Connected Service GitHub.