Note
Access to this page requires authorization. You can try signing in or changing directories.
Access to this page requires authorization. You can try changing directories.
This article covers debugging only for custom functions that don't use a shared runtime. For shared runtime scenarios, see Overview of debugging Office Add-ins.
Note
We recommend using custom functions with a shared runtime, unless you have a specific reason not to use a shared runtime. For more information about runtimes, see Runtimes in Office Add-ins.
Tip
The debugging techniques that are described in this article don't work with projects that are created with the Office Add-in project containing the manifest only option in the Yeoman generator. The scripts that are referred to later in this article aren't installed with that option. To debug an add-in that is created with this option, see the instructions in one of the following articles, as appropriate.
The process of debugging a custom function for add-ins that don't use a shared runtime varies depending on the target platform (Windows, Mac, or web) and on whether you are using Visual Studio Code or a different IDE. Use the links in the following table to visit sections of this article that are relevant to your debugging scenario. In this table, "CF-NSR" refers to custom functions in a non-shared runtime.
| Target platform | Visual Studio Code | Other IDE |
|---|---|---|
| Excel on the web | Use VS Code and the browser development tools | Use the command line tools |
| Excel on Windows | Use VS Code and the browser development tools | Debugging CF-NSR that are running in Excel on Windows outside VS Code isn't supported. Debug against Excel on the web. |
| Excel on Mac | VS Code debugging of CF-NSR that are running in Excel on Mac isn't supported. Debug against Excel on the web. | Use the command line tools |
Use the browser developer tools to debug custom functions in Excel on the web
Use the browser developer tools to debug custom functions that don't use a shared runtime in Excel on the web. The following steps apply to custom functions add-ins with the add-in only manifest (manifest.xml). Use these steps on Windows or macOS.
Run your add-in from Visual Studio Code
- Open your custom functions root project folder in Visual Studio Code (VS Code).
- Choose Terminal > Run Task and run Watch. This will monitor and rebuild for any file changes.
- Choose Terminal > Run Task and run Dev Server.
Sideload your add-in
Open Office on the web.
Open a new Excel workbook.
Select Home > Add-ins, then select Advanced....
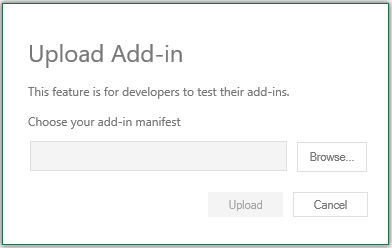
On the Office Add-ins dialog, select Upload My Add-in.
Browse to the add-in manifest.xml file, and then select Upload.
Note
Once you've sideloaded to the document, it will remain sideloaded each time you open the document.
Start debugging
- Open your browser's developer tools. In Chrome and most browsers, use F12 to open the developer tools.
- In developer tools, open your source code script file using Cmd+P or Ctrl+P (functions.js or functions.ts).
- Set a breakpoint in the custom function source code.
If you need to make changes, edit the code in VS Code, save your work, then refresh the workbook page to apply the update.
Use the command line tools to debug
If you don't use VS Code, run your add-in from the command line using tools such as Bash or PowerShell. To debug your code in Excel on the web, use your browser's developer tools.
From the command line run
npm run watchto watch for and rebuild when code changes occur.Open a second command line window (the first one is busy while running the watch.)
If you want to start your add-in in the desktop version of Excel and the "scripts" section of the project's package.json file has a "start:desktop" script, then run
npm run start:desktop; otherwise, runnpm run start.Or if you prefer to start your add-in in Excel on the web run the following command.
npm run start -- web --document {url}(where{url}is the URL of an Excel file on OneDrive or SharePoint)Note
If you are developing on a Mac, enclose the
{url}in single quotation marks. Do not do this on Windows.If your add-in doesn't sideload in the document, follow the steps in Sideload your add-in. Then continue to the next section to start debugging.
Open your browser's developer tools. In Chrome and most browsers, use F12 to open the developer tools.
In developer tools, open your source code script file (functions.js or functions.ts). Your custom functions code may be located near the end of the file.
In the custom function source code, apply a breakpoint by selecting a line of code.
If you need to change the code, you can make edits in VS Code and save the changes. Refresh the browser to see the changes loaded.
Commands for building and running your add-in
Available build tasks:
npm run watch: builds for development and automatically rebuilds when a source file is savednpm run build-dev: builds for development oncenpm run build: builds for productionnpm run dev-server: runs the web server used for development
Use these tasks to start debugging:
npm run start:desktop: Starts Excel on desktop and sideloads your add-in. If the "start:desktop" script isn't present in the "scripts" section of the project's package.json file, then runnpm run startinstead.npm run start -- web --document {url}(where{url}is the URL of an Excel file on OneDrive or SharePoint): Starts Excel on the web and sideloads your add-in.Note
If you are developing on a Mac, enclose the
{url}in single quotation marks. Do not do this on Windows.npm run stop: Stops Excel and debugging.
Next steps
Learn about Authentication for custom functions without a shared runtime.
See also
Collaborate with us on GitHub
The source for this content can be found on GitHub, where you can also create and review issues and pull requests. For more information, see our contributor guide.
Office Add-ins