Note
Access to this page requires authorization. You can try signing in or changing directories.
Access to this page requires authorization. You can try changing directories.
The prepend-on-send and append-on-send features enable your Outlook add-in to insert content to the body of a message or appointment when the mail item is sent. These features further boost your users' productivity and security by enabling them to:
- Add sensitivity and classification labels to their messages and appointments for easier item identification and organization.
- Insert disclaimers for legal purposes.
- Add standardized headers for marketing and communication purposes.
In this walkthrough, you'll develop an add-in that prepends a header and appends a disclaimer when a message is sent.
Note
Support for the append-on-send feature was introduced in requirement set 1.9, while support for the prepend-on-send feature was introduced in requirement set 1.13. See clients and platforms that support these requirement sets.
Set up your environment
Complete the Outlook quick start which creates an add-in project with the Yeoman generator for Office Add-ins.
Configure the manifest
To configure the manifest, select the tab for the type of manifest you'll use.
The following shows how to configure your unified manifest to enable the prepend-on-send and append-on-send features.
Open the manifest.json file.
Add the following object to the
"extensions.runtimes"array. Note the following about this code.- The
"minVersion"of the Mailbox requirement set is set to"1.13", so the add-in can't be installed on platforms and Office versions where this feature isn't supported. - The
"id"of the runtime is set to the descriptive name,"function_command_runtime". - The
"code.page"property is set to the URL of the UI-less HTML file that will load the function command. - The
"lifetime"property is set to"short", which means that the runtime starts up when the function command button is selected and shuts down when the function completes. (In certain rare cases, the runtime shuts down before the handler completes. See Runtimes in Office Add-ins.) - There are actions specified to run the
"prependHeaderOnSend"and"appendDisclaimerOnSend"functions. You'll create these functions in a later step.
{ "requirements": { "capabilities": [ { "name": "Mailbox", "minVersion": "1.13" } ], "formFactors": [ "desktop" ] }, "id": "function_command_runtime", "type": "general", "code": { "page": "https://localhost:3000/commands.html" }, "lifetime": "short", "actions": [ { "id": "prependHeaderOnSend", "type": "executeFunction", "displayName": "prependHeaderOnSend" }, { "id": "appendDisclaimerOnSend", "type": "executeFunction", "displayName": "appendDisclaimerOnSend" } ] }- The
Add the following object to the
"extensions.ribbons"array. Note the following about this code.- The
"mailCompose"value is added to the"contexts"array to surface the prepend-on-send and append-on-send buttons in a compose window. - The
"controls"objects create and configure the buttons for the prepend-on-send and append-on-send functions. The"actionId"property of each object must reflect the same value specified in the applicable"actions.id"property of the"extensions.runtimes"object.
{ "contexts": [ "mailCompose" ], "tabs": [ { "builtInTabId": "TabDefault", "groups": [ { "id": "msgComposeGroup", "label": "Contoso Add-in", "icons": [ { "size": 16, "url" "https://localhost:3000/assets/icon-16.png" }, { "size": 32, "url" "https://localhost:3000/assets/icon-32.png" }, { "size": 80, "url" "https://localhost:3000/assets/icon-80.png" } ], "controls": [ { "id": "PrependButton", "type": "button", "label": "Prepend header", "icons": [ { "size": 16, "url" "https://localhost:3000/assets/icon-16.png" }, { "size": 32, "url" "https://localhost:3000/assets/icon-32.png" }, { "size": 80, "url" "https://localhost:3000/assets/icon-80.png" } ], "supertip": { "title": "Prepend header on send", "description": "Prepend the Contoso header on send." }, "actionId": "prependHeaderOnSend" }, { "id": "AppendButton", "type": "button", "label": "Add disclaimer", "icons": [ { "size": 16, "url" "https://localhost:3000/assets/icon-16.png" }, { "size": 32, "url" "https://localhost:3000/assets/icon-32.png" }, { "size": 80, "url" "https://localhost:3000/assets/icon-80.png" } ], "supertip": { "title": "Append disclaimer on send", "description": "Append the Contoso disclaimer on send." }, "actionId": "appendDisclaimerOnSend" } ] } ] } ] }- The
In the
"authorization.permissions.resourceSpecific"array, add the following object. Be sure it's separated from other objects in the array with a comma.{ "name": "Mailbox.AppendOnSend.User", "type": "Delegated" }Save your changes.
Tip
- The prepend-on-send and append-on-send features must be activated by the user through a task pane or function command button. If you want content to be prepended or appended on send without additional action from the user, you can implement these features in an event-based activation add-in.
- To learn more about manifests for Outlook add-ins, see Office Add-in manifests.
Implement the prepend-on-send handler
In this section, you'll implement the JavaScript code to prepend a sample company header to a mail item when it's sent.
Navigate to the ./src/commands folder of your project and open the commands.js file.
Insert the following function at the end of the file.
function prependHeaderOnSend(event) {
  // It's recommended to call the getTypeAsync method and pass its returned value to the options.coercionType parameter of the prependOnSendAsync call.
  Office.context.mailbox.item.body.getTypeAsync(
    {
      asyncContext: event
    },
    (asyncResult) => {
      if (asyncResult.status === Office.AsyncResultStatus.Failed) {
        console.log(asyncResult.error.message);
        return;
      }

      // Sets the header to be prepended to the body of the message on send.
      const bodyFormat = asyncResult.value;
      // Because of the various ways in which HTML text can be formatted, the content may render differently when it's prepended to the mail item body.
      // In this scenario, a <br> tag is added to the end of the HTML string to preserve its format.
      const header = '<div style="border:3px solid #000;padding:15px;"><h1 style="text-align:center;">Contoso Limited</h1></div><br>';

      Office.context.mailbox.item.body.prependOnSendAsync(
        header,
        {
          asyncContext: asyncResult.asyncContext,
          coercionType: bodyFormat
        },
        (asyncResult) => {
          if (asyncResult.status === Office.AsyncResultStatus.Failed) {
            console.log(asyncResult.error.message);
            return;
          }

          console.log("The header will be prepended when the mail item is sent.");
          asyncResult.asyncContext.completed();
        }
      );
  });
}
Save your changes.
Implement the append-on-send handler
In this section, you'll implement the JavaScript code to append a sample company disclaimer to a mail item when it's sent.
In the same commands.js file, insert the following function after the
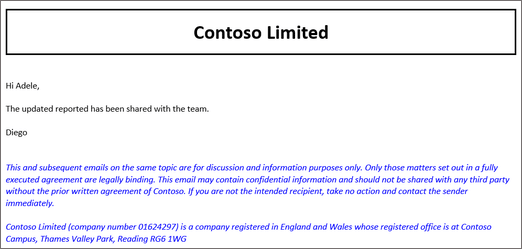
prependHeaderOnSendfunction.function appendDisclaimerOnSend(event) { // Calls the getTypeAsync method and passes its returned value to the options.coercionType parameter of the appendOnSendAsync call. Office.context.mailbox.item.body.getTypeAsync( { asyncContext: event }, (asyncResult) => { if (asyncResult.status === Office.AsyncResultStatus.Failed) { console.log(asyncResult.error.message); return; } // Sets the disclaimer to be appended to the body of the message on send. const bodyFormat = asyncResult.value; const disclaimer = '<p style = "color:blue"> <i>This and subsequent emails on the same topic are for discussion and information purposes only. Only those matters set out in a fully executed agreement are legally binding. This email may contain confidential information and should not be shared with any third party without the prior written agreement of Contoso. If you are not the intended recipient, take no action and contact the sender immediately.<br><br>Contoso Limited (company number 01624297) is a company registered in England and Wales whose registered office is at Contoso Campus, Thames Valley Park, Reading RG6 1WG</i></p>'; Office.context.mailbox.item.body.appendOnSendAsync( disclaimer, { asyncContext: asyncResult.asyncContext, coercionType: bodyFormat }, (asyncResult) => { if (asyncResult.status === Office.AsyncResultStatus.Failed) { console.log(asyncResult.error.message); return; } console.log("The disclaimer will be appended when the mail item is sent."); asyncResult.asyncContext.completed(); } ); }); }Save your changes.
Register the JavaScript functions
- In the same commands.js file, insert the following after the
appendDisclaimerOnSendfunction. These calls map the function name specified in the manifest to its JavaScript counterpart. The location of the function name in the manifest varies depending on the type of manifest your add-in uses.
Add-in only manifest: The function name specified in the <FunctionName> element.
Unified manifest for Microsoft 365: The function name specified in the
"id"property of the objects in the"extensions.runtimes.actions"array.Office.actions.associate("prependHeaderOnSend", prependHeaderOnSend); Office.actions.associate("appendDisclaimerOnSend", appendDisclaimerOnSend);
- Save your changes.
Try it out
Run the following command in the root directory of your project. When you run this command, the local web server will start if it's not already running and your add-in will be sideloaded.
npm startNote
- When you first use Yeoman generator to develop an Office Add-in, your default browser opens a window where you'll be prompted to sign in to your Microsoft 365 account. If a sign-in window doesn't appear and you encounter a sideloading or login timeout error, run
atk auth login m365before runningnpm startagain.
If your add-in wasn't automatically sideloaded, follow the instructions in Sideload Outlook add-ins for testing to manually sideload the add-in in Outlook.
- When you first use Yeoman generator to develop an Office Add-in, your default browser opens a window where you'll be prompted to sign in to your Microsoft 365 account. If a sign-in window doesn't appear and you encounter a sideloading or login timeout error, run
Create a new message, and add yourself to the To line.
(Optional) Enter text in the body of the message.
From the ribbon or overflow menu, select Prepend header.
From the ribbon or overflow menu, select Add disclaimer.
Send the message, then open it from your Inbox or Sent Items folder to view the inserted content.
Tip
Because content is only prepended or appended once the message is sent, the sender will only be able to view the added content from their Inbox or Sent Items folder. If you require the sender to view the added content before the message is sent, see Insert data in the body when composing an appointment or message in Outlook.
When you want to stop the local web server and uninstall the add-in, follow the applicable instructions:
To stop the server, run the following command. If you used
npm start, the following command should also uninstall the add-in.npm stopIf you manually sideloaded the add-in, see Remove a sideloaded add-in.
Review feature behavior and limitations
As you implement prepend-on-send and append-on-send in your add-in, keep the following in mind.
Prepend-on-send and append-on-send are only supported in compose mode.
The string to be prepended or appended must not exceed 5,000 characters.
HTML can't be prepended or appended to a plain text body of a message or appointment. However, plain text can be added to an HTML-formatted body of a message or appointment.
Any formatting applied to prepended or appended content doesn't affect the style of the rest of the mail item's body.
Prepend-on-send and append-on-send can't be implemented in the same add-in that implements the on-send feature. As an alternative, consider implementing Smart Alerts instead.
When implementing Smart Alerts in the same add-in, the prepend-on-send and append-on-send operations occur before the
OnMessageSendandOnAppointmentSendevent handler operations.If multiple active add-ins use prepend-on-send or append-on-send, the order of the content to be inserted depends on the order in which the add-in ran. For prepend-on-send, the content of the add-in that runs last appears at the top of the mail item body before the previously prepended content. For append-on-send, the content of the add-in that runs last appears at the bottom of the mail item body after the previously appended content.
Delegate and shared mailbox scenarios are supported as long as the add-in that implements prepend-on-send or append-on-send is enabled on the shared mailbox or owner's account.
Troubleshoot your add-in
If you encounter an error while implementing the prepend-on-send and append-on-send features, refer to the following table for guidance.
| Error | Description | Resolution |
|---|---|---|
DataExceedsMaximumSize |
The content to be appended or prepended is longer than 5,000 characters. | Shorten the string you pass to the data parameter of your prependOnSendAsync or appendOnSendAsync call. |
InvalidFormatError |
The message or appointment body is in plain text format, but the coercionType passed to the prependOnSendAsync or appendOnSendAsync method is set to Office.CoercionType.Html. |
Only plain text can be inserted into a plain text body of a message or appointment. To verify the format of the mail item being composed, call Office.context.mailbox.item.body.getTypeAsync, then pass its returned value to your prependOnSendAsync or appendOnSendAsync call. |
See also
Collaborate with us on GitHub
The source for this content can be found on GitHub, where you can also create and review issues and pull requests. For more information, see our contributor guide.
Office Add-ins