Automatically set the subject of a new message or appointment
Need to add a required disclaimer to all your messages? With an event-based add-in, content is automatically added to new messages or appointments. Your users can focus on writing, instead of compliance.
The following sections teach you how to develop an add-in that handles the OnNewMessageCompose and OnNewAppointmentOrganizer events. By the end of this walkthrough, you'll have an add-in that automatically sets the subject of new messages and appointments being created.
Note
The OnNewMessageCompose and OnNewAppointmentOrganizer events were introduced in requirement set 1.10. To verify that your Outlook client supports these events, see Requirement sets supported by Exchange servers and Outlook clients.
Set up your environment
Complete the Outlook quick start which creates an add-in project with the Yeoman generator for Office Add-ins.
Configure the manifest
To configure the manifest, select the tab for the type of manifest you're using.
Open the manifest.json file.
Navigate to the "authorization.permissions.resourceSpecific" array. In the array object, replace the value of the "name" property with "MailboxItem.ReadWrite.User". This is needed by the add-in to be able to set the subject of the mail item.
...
"authorization": {
    "permissions": {
        "resourceSpecific": [
            {
                "name": "MailboxItem.ReadWrite.User",
                "type": "Delegated"
            }
        ]
    }
},
...
Add the following object to the "extensions.runtimes" array. Note the following about this markup:
The "minVersion" of the Mailbox requirement set is configured to "1.10" as this is the lowest version of the requirement set that supports the
OnNewMessageComposeandOnNewAppointmentOrganizerevents.The "id" of the runtime is set to the descriptive name "autorun_runtime".
The "code" property has a child "page" property that is set to an HTML file and a child "script" property that is set to a JavaScript file. You'll create or edit these files in later steps. Office uses one of these values depending on the platform.
- Office on Windows executes the event handlers in a JavaScript-only runtime, which loads a JavaScript file directly.
- Office on Mac and on the web, and new Outlook on Windows execute the handlers in a browser runtime, which loads an HTML file. That file, in turn, contains a
<script>tag that loads the JavaScript file.
For more information, see Runtimes in Office Add-ins.
The "lifetime" property is set to "short", which means that the runtime starts up when one of the events is triggered and shuts down when the handler completes. (In certain rare cases, the runtime shuts down before the handler completes. See Runtimes in Office Add-ins.)
There are two types of "actions" that can run in the runtime. You'll create functions to correspond to these actions in a later step.
 {
    "requirements": {
        "capabilities": [
            {
                "name": "Mailbox",
                "minVersion": "1.10"
            }
        ]
    },
    "id": "autorun_runtime",
    "type": "general",
    "code": {
        "page": "https://localhost:3000/commands.html",
        "script": "https://localhost:3000/launchevent.js"
    },
    "lifetime": "short",
    "actions": [
        {
            "id": "onNewMessageComposeHandler",
            "type": "executeFunction",
            "displayName": "onNewMessageComposeHandler"
        },
        {
            "id": "onNewAppointmentComposeHandler",
            "type": "executeFunction",
            "displayName": "onNewAppointmentComposeHandler"
        }
    ]
}
Add the following "autoRunEvents" array as a property of the object in the "extensions" array.
"autoRunEvents": [

]
Add the following object to the "autoRunEvents" array. The "events" property maps handlers to events as described in the table earlier in this article. The handler names must match those used in the "id" properties of the objects in the "actions" array in an earlier step.
  {
      "requirements": {
          "capabilities": [
              {
                  "name": "Mailbox",
                  "minVersion": "1.10"
              }
          ],
          "scopes": [
              "mail"
          ]
      },
      "events": [
          {
              "type": "newMessageComposeCreated",
              "actionId": "onNewMessageComposeHandler"
          },
          {
              "type": "newAppointmentOrganizerCreated",
              "actionId": "onNewAppointmentComposeHandler"
          }
      ]
  }
Tip
- To learn about runtimes in add-ins, see Runtimes in Office Add-ins.
- To learn more about manifests for Outlook add-ins, see Office Add-in manifests.
Implement event handling
From the same quick start project, create a new folder named launchevent under the ./src directory.
In the ./src/launchevent folder, create a new file named launchevent.js.
Open the file ./src/launchevent/launchevent.js in your code editor and add the following JavaScript code.
/*
* Copyright (c) Microsoft Corporation. All rights reserved. Licensed under the MIT license.
* See LICENSE in the project root for license information.
*/

function onNewMessageComposeHandler(event) {
  setSubject(event);
}
function onNewAppointmentComposeHandler(event) {
  setSubject(event);
}
function setSubject(event) {
  Office.context.mailbox.item.subject.setAsync(
    "Set by an event-based add-in!",
    {
      "asyncContext": event
    },
    function (asyncResult) {
      // Handle success or error.
      if (asyncResult.status !== Office.AsyncResultStatus.Succeeded) {
        console.error("Failed to set subject: " + JSON.stringify(asyncResult.error));
      }

      // Call event.completed() to signal to the Outlook client that the add-in has completed processing the event.
      asyncResult.asyncContext.completed();
    });
}

// IMPORTANT: To ensure your add-in is supported in Outlook, remember to map the event handler name specified in the manifest to its JavaScript counterpart.
Office.actions.associate("onNewMessageComposeHandler", onNewMessageComposeHandler);
Office.actions.associate("onNewAppointmentComposeHandler", onNewAppointmentComposeHandler);
Save your changes.
Note
There are some limitations you must be aware of when developing an event-based add-in for classic Outlook on Windows. To learn more, see Event-based activation behavior and limitations.
Update the commands HTML file
In the ./src/commands folder, open commands.html.
Immediately before the closing head tag (
</head>), add a script entry to include the event-handling JavaScript code.<script type="text/javascript" src="../launchevent/launchevent.js"></script>Save your changes.
Update webpack config settings
Open the webpack.config.js file found in the root directory of the project and complete the following steps.
Locate the
pluginsarray within theconfigobject and add this new object at the beginning of the array.new CopyWebpackPlugin({ patterns: [ { from: "./src/launchevent/launchevent.js", to: "launchevent.js", }, ], }),Save your changes.
Try it out
Run the following commands in the root directory of your project. When you run
npm start, the local web server will start (if it's not already running) and your add-in will be sideloaded.npm run buildnpm startNote
If your add-in wasn't automatically sideloaded, follow the instructions in Sideload Outlook add-ins for testing to manually sideload the add-in in Outlook.
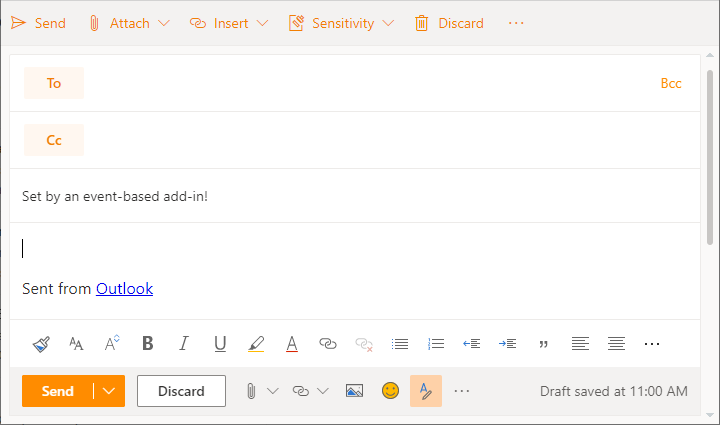
In Outlook on the web or in new Outlook on Windows, create a new message.
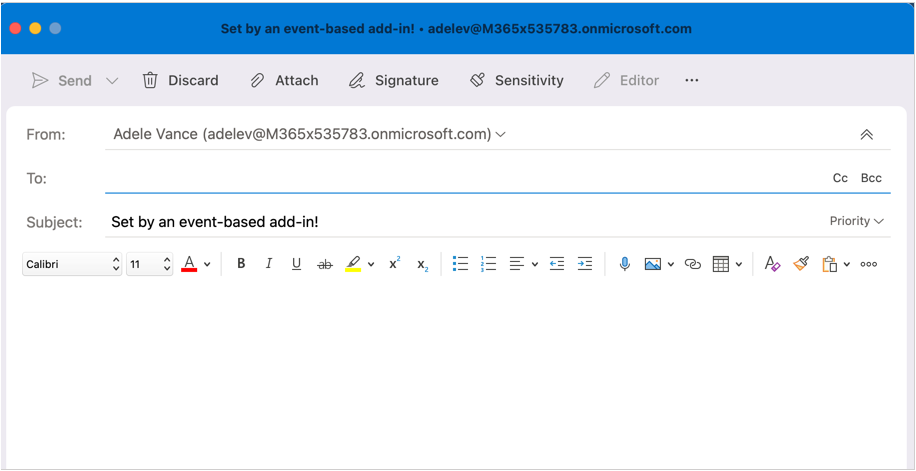
In Outlook on the new Mac UI, create a new message.
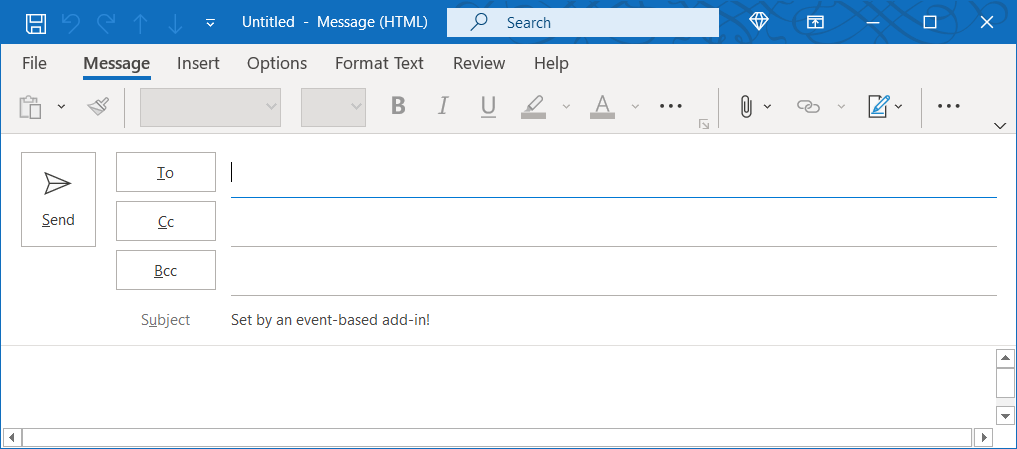
In classic Outlook on Windows, create a new message.
When you want to stop the local web server and uninstall the add-in, follow the applicable instructions:
To stop the server, run the following command. If you used
npm start, the following command should also uninstall the add-in.npm stopIf you manually sideloaded the add-in, see Remove a sideloaded add-in.
Next steps
To learn more about event-based activation and other events that you can implement in your add-in, see Configure your Outlook add-in for event-based activation.
See also
Office Add-ins