Note
Access to this page requires authorization. You can try signing in or changing directories.
Access to this page requires authorization. You can try changing directories.
There are two manual options when installing Microsoft 365 Learning Pathways. The first is the manual installation. This installs the web part and sets it up for use in your tenant. This won't create any pages other than the admin page and viewer page. The second installation option is to install the Learning Pathways site template previously hosted from the SharePoint Lookbook. To install the site template, follow these instructions. This tutorial walks you through the process of creating a site collection, downloading, and installing the site template. You'll then need to run M365lpConfiguration.ps1 in the Execute PowerShell Configuration Script to set the tenant app property.
Important
If you already have learning pathways provisioned in your tenant, it's recommended that you update learning pathways. If you install a new instance of learning pathways, you'll need to manually transfer any customizations from the existing site to the new site.
Prerequisites for multilingual support
- You need to be a SharePoint Administrator to be able to deploy this solution to the target tenant and have Site Collection.
- You must set up and configure the tenant-wide App Catalog. See Set up your Office 365 tenant and follow the Create app catalog site section. If your tenant-wide App Catalog is provisioned, you need access to an account that has rights to upload a package to it to complete this setup process. Generally, this is an account with the SharePoint administrator role. If an account with that role doesn't work, go to the SharePoint admin center and find the Site Collection Administrators for the app catalog site collection. Then, either sign in as one of the Site Collection Administrators, or add the SharePoint administrator account that failed, to the Site Collection Administrators. You'll also need access to an account that is a SharePoint Administrator.
- Provisioning with the PnP Lookbook template provisions all 10 languages. If you need multilingual support, ensure that your default language is set on the site collection BEFORE installing the Lookbook template. For more information on multilingual support, see Overview of multilingual support for learning pathways.
Ensure the Tenant Admin account doesn't have a language selected
Before you provision learning pathways, ensure that the Admin Account for the tenant doesn't have a language selected. Here's how to verify if the Admin account doesn't have a language selected.
- With your Edge Admin profile, go to office.com.
- Enter the user credentials (if necessary).
- In Microsoft 365, select All Apps > Delve.
- Select Me > Update Profile.
- Scroll down the page and select How can I change language and regional settings.
- Click here, and then select the ellipses ....
- Under My Display Languages, you should see No languages selected. If a language is selected, unselect it.
To provision learning pathways
There are two manual options when installing Microsoft 365 Learning Pathways. The first is the manual install. This installs the web part and set it up for use in your tenant. This won't create any pages other than the admin page and viewer page. The second installation option is to install the Learning Pathways site template previously hosted from the SharePoint Lookbook. Follow these installation instructions to provision learning pathways to your tenant using either option: Manually installing and configuring Microsoft 365 learning pathways .
Add Owners to Site
As the Tenant Admin, it's unlikely you are the person customizing the site, so you need to assign a few owners to the site. Owners have administrative privileges on the site so they can modify site pages and rebrand the site. They also have the ability to hide and show content and build custom playlist and subcategories.
- From the SharePoint Settings menu, select Site permissions.
- Select Advanced permission settings.
- Select Microsoft 365 learning pathways Owners.
- Select New > Add users to this group, and then add the people you want to be Owners.
- Add a link to Explore the Site in the Share message, and then select Share.
Add translators to the site
If you'll be using translators for the site, you can assign them permissions. Translators require Member permissions or higher.
Choose options for using multiple languages on the site
The SharePoint look book service creates the Learning Pathways site in nine languages. The following recommendations apply:
- Turn off the languages you don't want to support
- If you aren't supporting a multilingual site, turn off the multi-lingual feature. See the "Turn off multilingual support" section later in this article.
Remove languages you don't want to support
For organizations that choose to support only one language, in addition to the default English language, we recommend removing languages that aren't supported.
From the Learning Pathways site, select Settings from the top-right of the page, and then select Site information.
At the bottom of the site information pane, select View all site settings.
Under Site Administration, select Language settings.
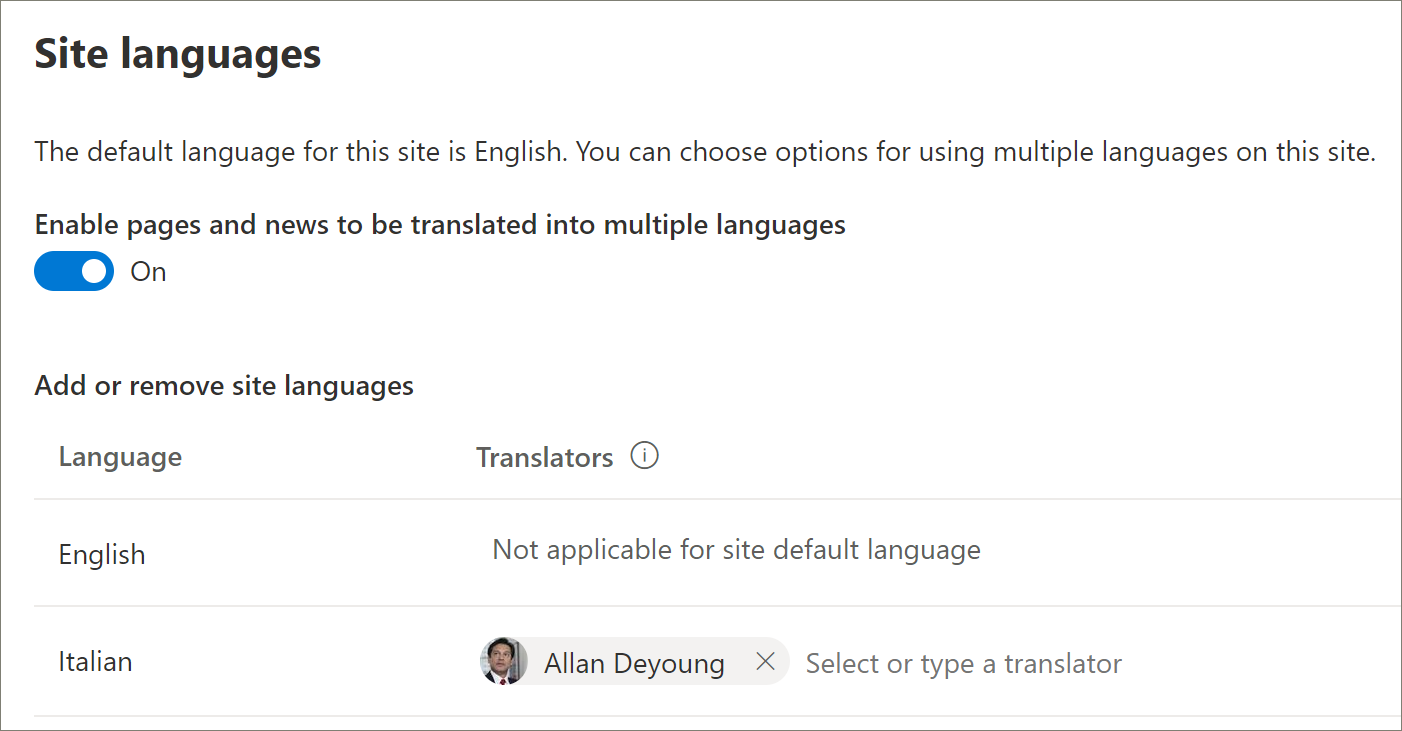
Under Enable pages and news to be translated into multiple languages, slide the toggle to On. It should be On by default.
Under Add or remove site languages, select Remove to remove the languages you don't need for the site. The following shows an example of the Language Settings page to show Italian supported for the site, in addition to the default English language.
Note
When removing languages, you can't remove the default English language.
Assign translators
If you're going to translate pages, optionally assign one or more translators for each language (except the site default language).
- In the Translator column, start typing the name of a person you want to be a translator, and then select the name from the list.
Note
Anyone in your organization's Active Directory can be assigned as a translator. People assigned as translators won't automatically be given appropriate permissions. When someone without edit permissions to a site tries to access the site, they'll be directed to a web page where they can request access.
Turn off multilingual support
If you don't want a multilingual site, for example, you want an English-only site, it's recommended that you turn off the multilingual feature.
- From the Learning Pathways site, select Settings from the top-right of the page, and then select Site information.
- At the bottom of the site information pane, select View all site settings.
- Under Site Administration, select Language settings.
- Under Enable pages and news to be translated into multiple languages, slide the toggle to On. It should be On by default.
- Under Enable pages and news to be translated, select Off.
Add languages
Learning pathways supports nine languages, but it's recommended that you add only the languages you need to support for the learning pathways site. You can add langauges at any time.
- Under Add or remove site languages, start typing a language name in Select or type a language, or choose a language from the dropdown. You can repeat this step to add multiple languages. You can add or remove languages from your site at any time by going back to this page.